

Turn Your Childs Handwritten Name Into A Vinyl Design
Hello! I'm so thrilled to be taking over the Expressions Vinyl blog today! My name is Melissa Viscount I'm the author of The Ultimate Silhouette Guide series and the blogger behind Silhouette School. That's where you can usually find me sharing tutorials on pretty much everything Silhouette related - including lots and lots of vinyl!
Since I always seem to have the 'school' thing going on, I am excited to be here at Expressions Vinyl just in time for their Back to School sale! And...what perfect timing because it's put your kid's name on everything back to school season!
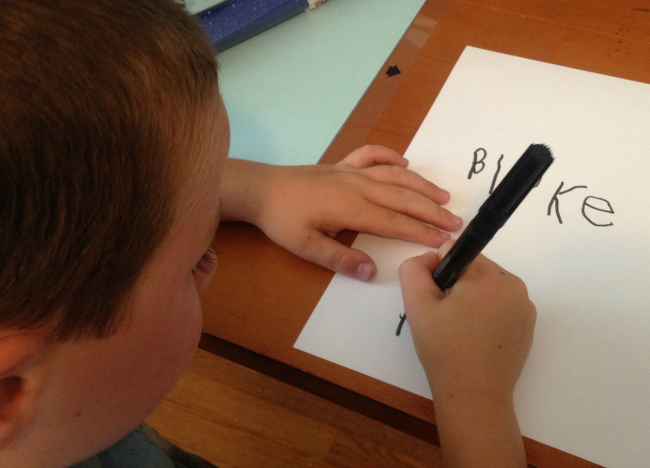
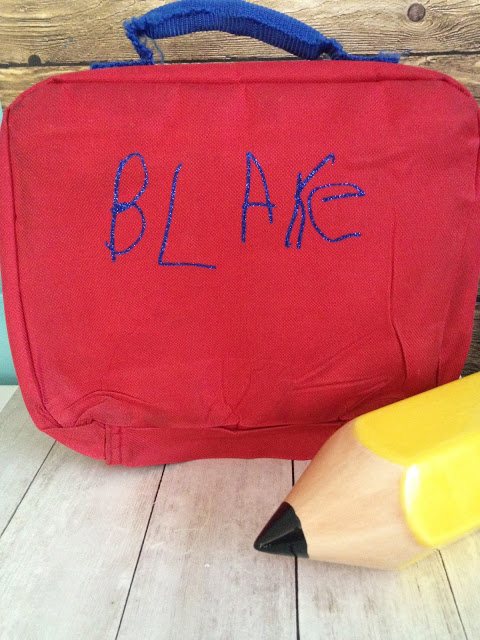
This year my son is going into kindergarten, so I've been labeling everything...with vinyl and heat transfer vinyl. His lunch box is no exception. While I could simply type out his name in Silhouette Studio and cut it on HTV and slap it on there, I thought it would be even more fun to have his name in his sweet five year old handwriting.
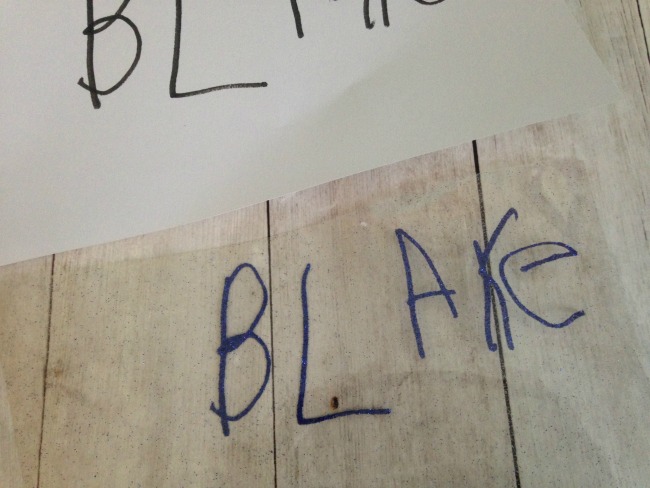
The first thing you want to do is have your child write out their name in a dark colored marker. Because a marker is thicker, it just makes for an easier trace once you move the image into Silhouette Studio.
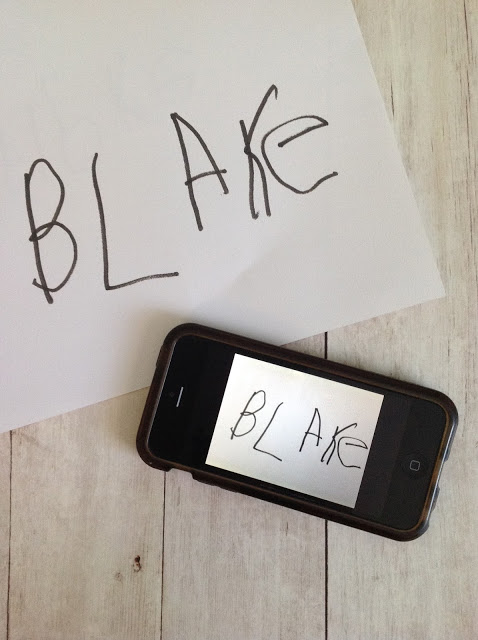
Next, use your cell phone to take a picture of the handwritten name. Then email it to yourself and download the .jpeg photo onto your computer. You could also use a scanner if you prefer that method over taking a picture.
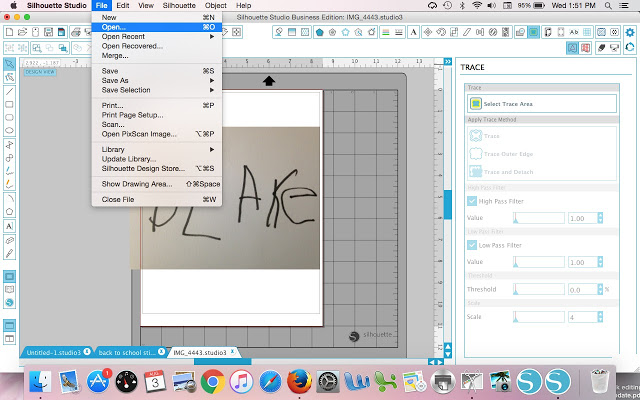
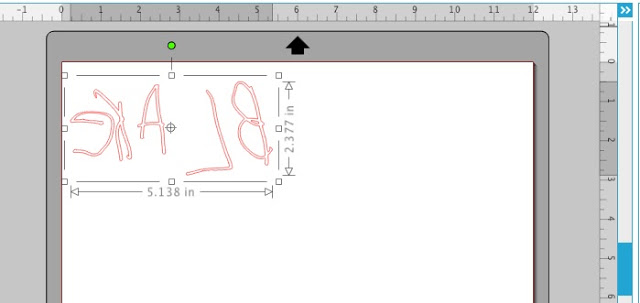
Open up Silhouette Studio and from the File menu click "Open". Navigate to the .jpeg image file and click "Open." The picture of your child's handwriting will open in Silhouette Studio. It will likely be very large so you may wish to re-size it before you trace.
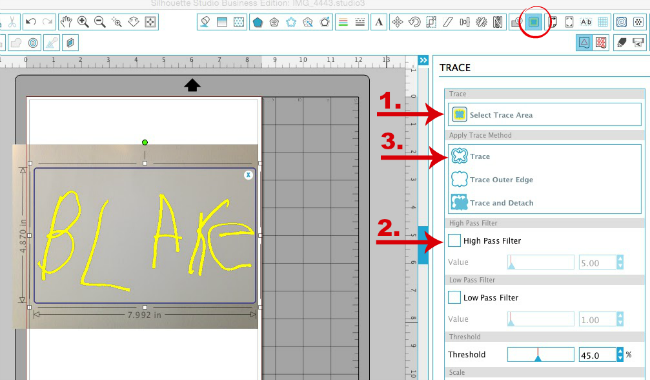
Now you're ready to trace your child's handwriting using the Trace tool along the top tool bar. Once the Trace window opens click "Select Trace Area" and draw a box around the handwriting. The areas with marker will turn yellow.
Uncheck the High Pass Filter box and you should get an even better trace.
Click "Trace" to produce the red cut lines.
You can now safely delete the jpeg image. Depending on the size of surface where you are going to place the name, you may need to further resize the name.
If you are cutting on heat transfer vinyl, as I did, you need to mirror the image before cutting.
Load up your mat with the material - my son picked blue glitter heat transfer vinyl for the name on his lunchbox. In Silhouette Studio, prepare to cut by picking the correct material type and adjusting the blade depth and settings if necessary.
Click "Send to Cut" and your Silhouette CAMEO or Portrait will cut out your child's handwriting.
Once you weed the design, you're ready to place it!
I used my heat press to press Blake's name cut in heat transfer vinyl onto his lunch box!
I used my smaller 9x12 swing away heat press for this job because I was able to kind of stretch the lunch box over the edge of the press which made it easier to press. Sometimes lunch boxes and backpacks have so many zippers and seams the press can't get good pressure - but this was no problem!
![]()
I mean how cute is this lunchbox with my son's name in his own handwriting on it?! I just love the way it came out and it's such a fun and quick project!
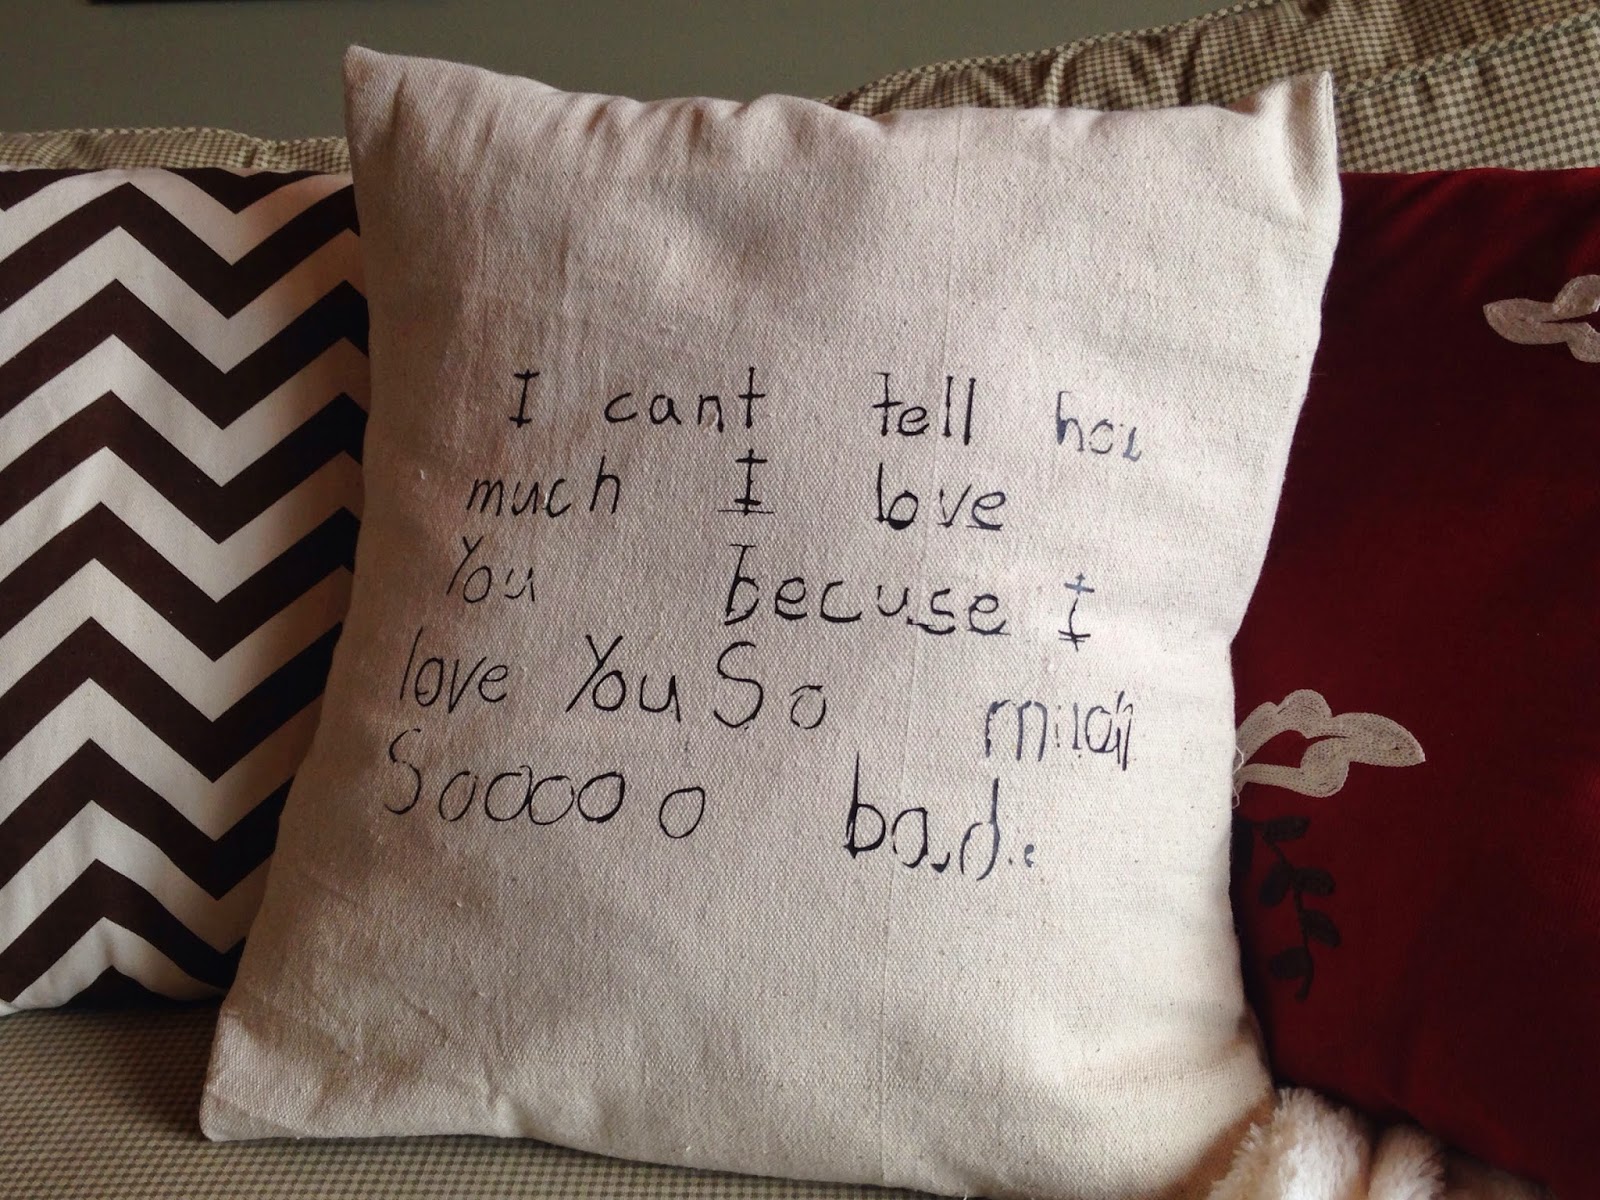
You can use this handwriting and tracing method for all kids of fun projects! One of my all time favorite Silhouette CAMEO projects was tracing a note my daughter wrote, cutting it on vinyl and putting it on a throw pillow!
I really hope you enjoyed this Silhouette tutorial on cutting your own handwriting. Come on over to Silhouette School and check out my library of more than 700 Silhouette CAMEO tutorials! And if you're looking for extra help - don't miss my Ultimate Silhouette Guide series of books!
Recent Posts
-
Hop into Spring with Cute Easter Vinyl Crafts
Do you love our Vinyl? Sign up for Vinyl Club today to get FREE vinyl and save big! …Mar 28th 2024 -

Fixing Wrinkles and Bubbles in Vinyl
How do you get air bubbles out of vinyl? There are a few different ways to ensure a flawless …Mar 26th 2024 -

20 Creative Craft Quotes You Will Love
March 12, 2024 20 Creative Craft Quotes You Will Love You can never have too many craft …Mar 12th 2024