
Airplane Dog Fights In Flight
After decorating June's door, I got into trouble by not doing something for Drake's bedroom door. I would so rather put something creative and cute on the door than have them hang their own signs that end up getting ripped off and leaving tape marks and paint chips all over. I love their creativity, so it is critical that they are involved when deciding what's on in "their" space. Since we had already done Parachutes and Airplanes in his room, it only seemed right to follow the same theme.
To start things off I needed a great design and the materials. I started browsing online for airplanes and I thought the biplane was a great idea. I love the movie "The Red Baron" and this instantly caught my attention. The biplane also created a great option to incorporate his name. Instead of trying to squeeze the A on one side or the other we decided to take out the A out and use the prop in it's place. This balanced it out real nice.
Supplies for Vinyl Airplane Dog Fight Project
Here is what I used and my Silhouette design file:
- Silhouette Machine and Studio
- Transfer Tape
- These Vinyl Colors
Getting Started
Now that you have your vinyl and the design, it's time to get cutting. Due to the color vinyl overlapping to create depth we have to adjust the settings in the Silhouette studio. Now I have already done this with this design so you don't need to, but I will still share with you how I did it.
Creating The Offset For Color Background
This is rather simple once you understand the tool to use. Simple select the layer that you want to create a background color for. Once you have the areas selected select the "Offset" icon to create a duplicate background.
This image already shows what I offset. The items in blue have been offset. As you can see in the image above, the airplane wings were offset and given a yellow behind them and the name has a black offset.
Now to cut these out, we have to do these one at a time of course. So lets start with the YELLOW. I created a duplicate of the entire image so the original stayed true. With the duplicate, I deleted all the colors except for the yellow as indicated here. I moved the original off the cutting mat so machine would not cut it at all. I wanted to reference the original for both the blue and black layers.
Once all the other colors are removed I cut this out. Next I repeated the process for both the blue and the black color vinyls.
Now that they are all cut and the vinyl is weeded out, I will start putting them on the door. The first color I will start with is the yellow. This lays the base for the prop and the wing and will help keep it all lined up.
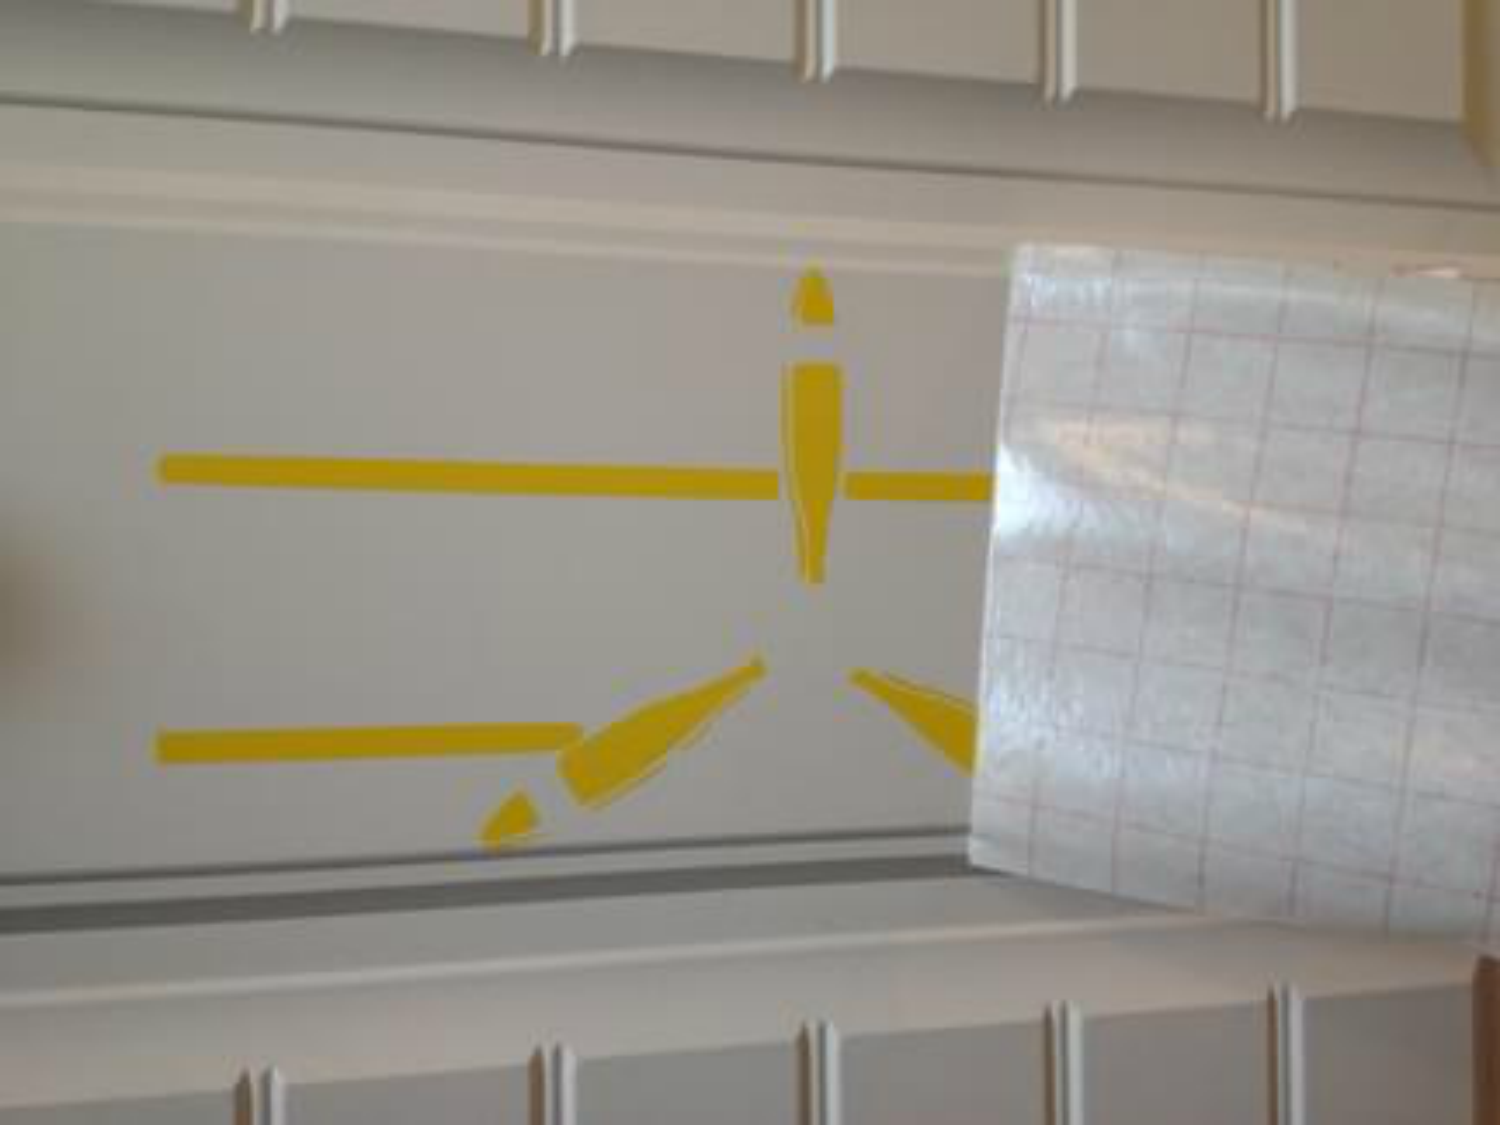
Once those are in place, I cut out the blue pieces to make it easier to apply.
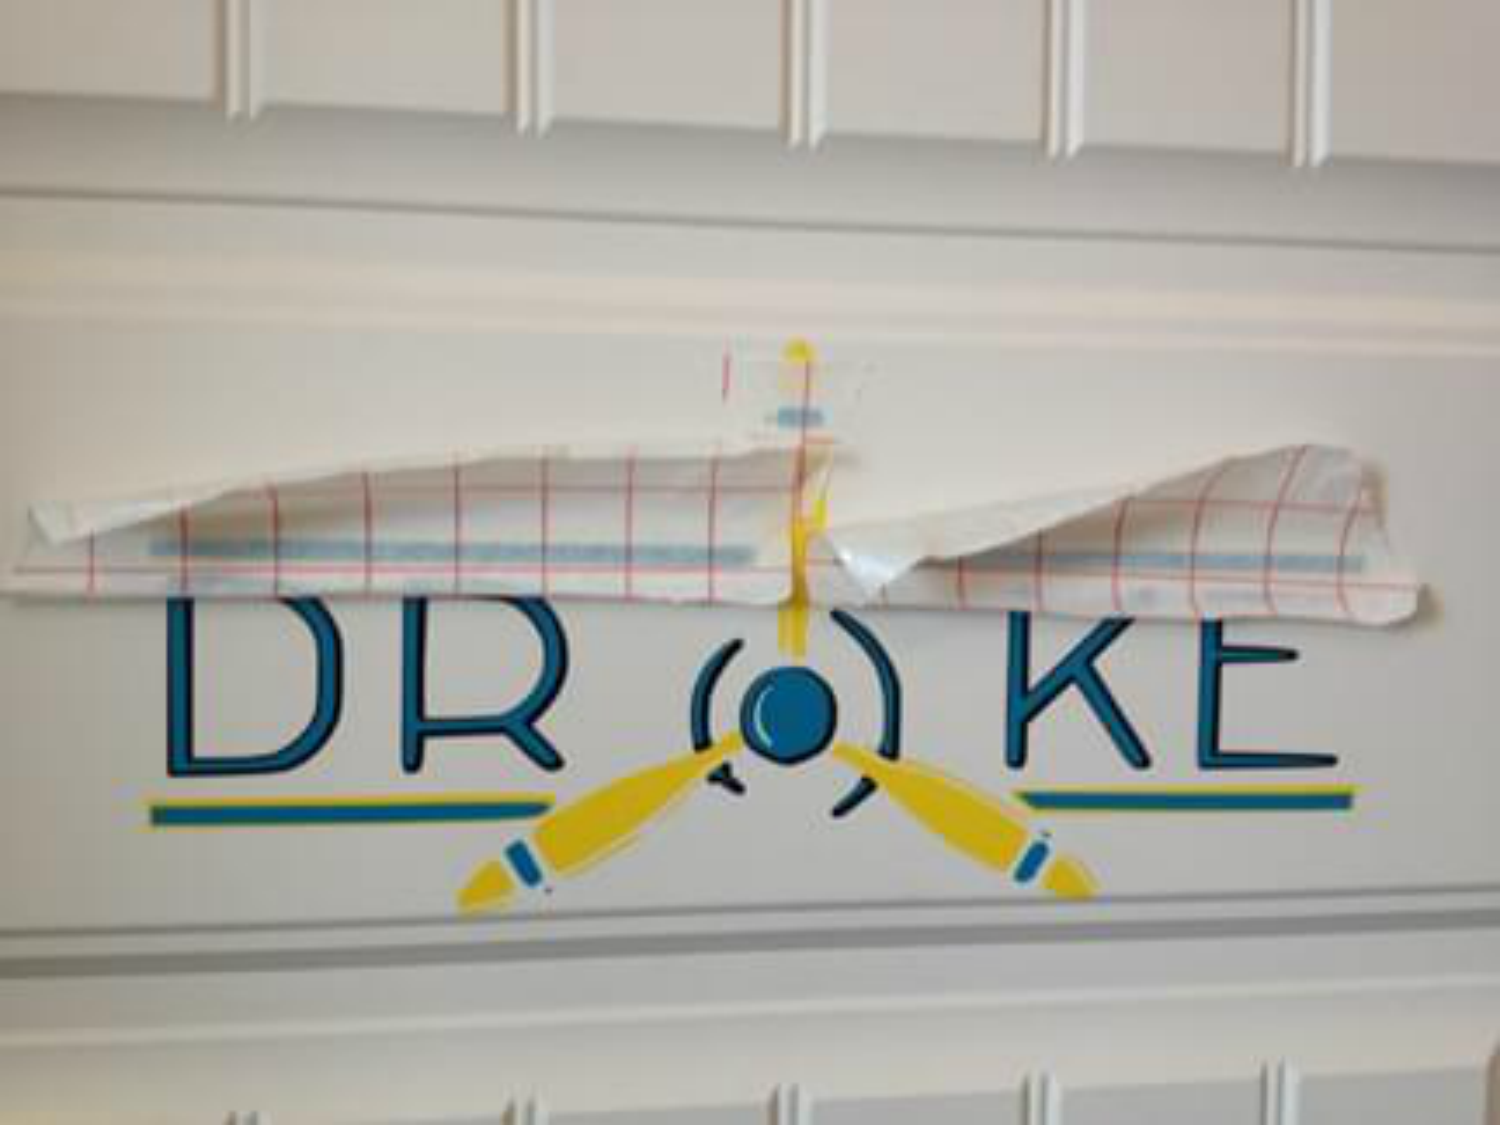
Now we are all done!
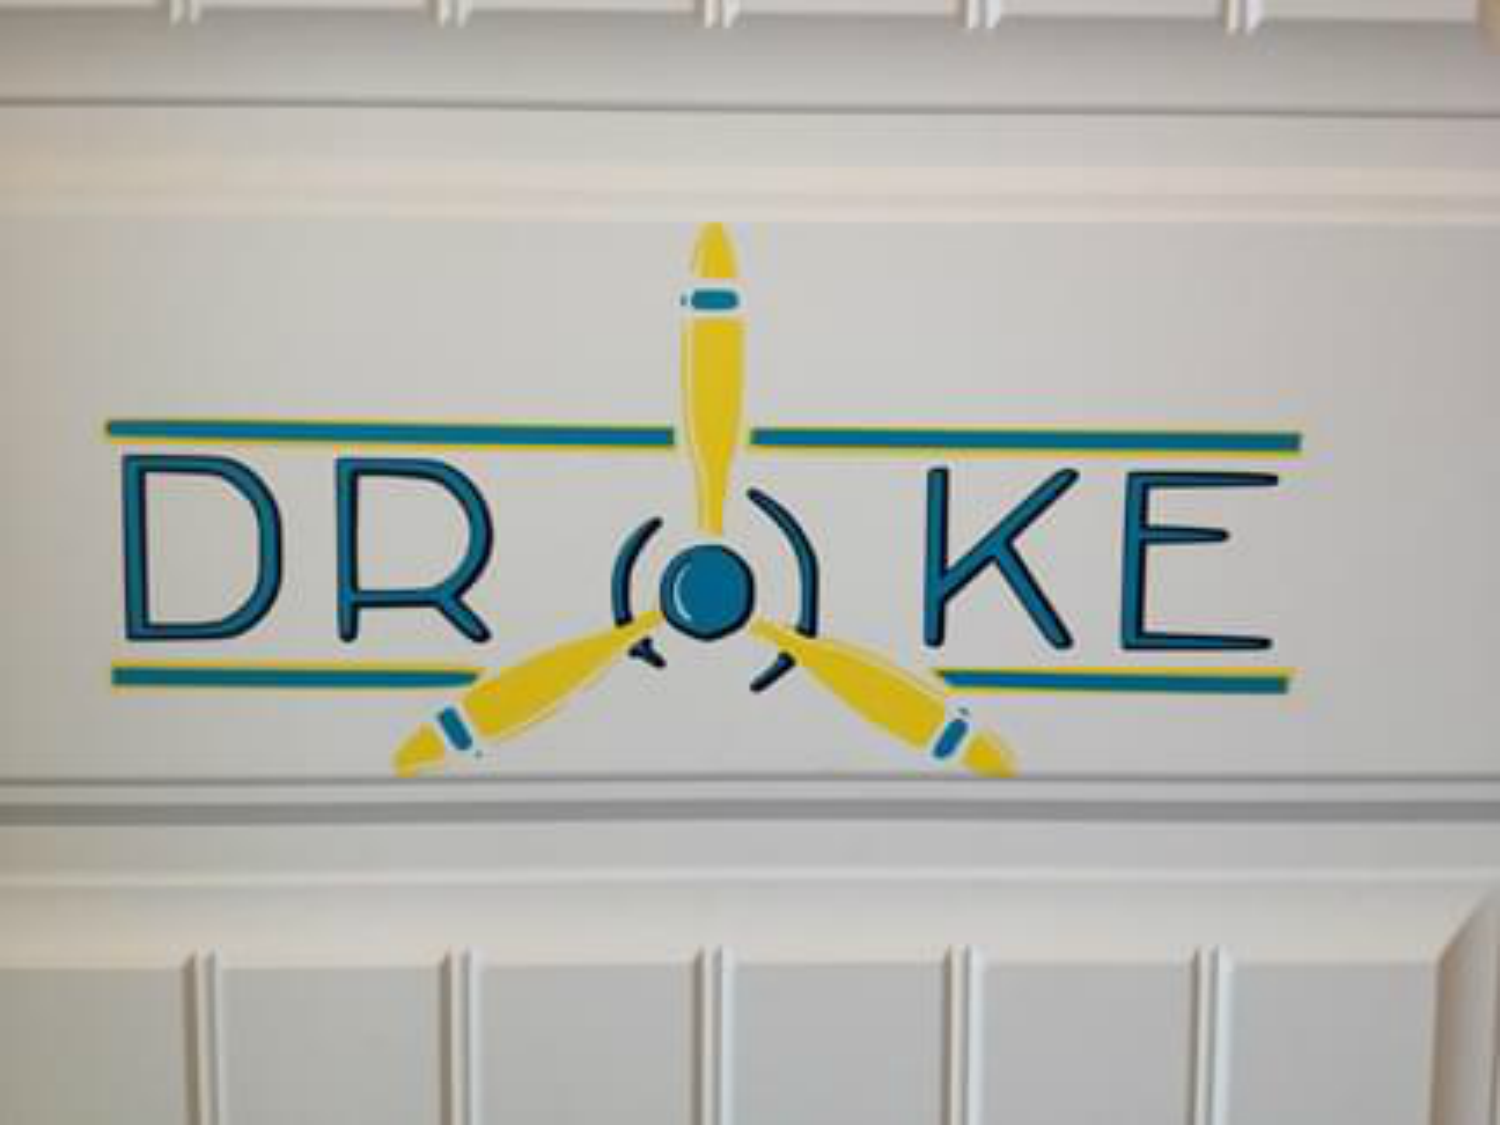
Then I added a couple of smaller planes in black just for fun.
Recent Posts
-
NEW Holographic Eclipse Heat Transfer Vinyl
April 15th, 2024 3 Ways to Use the New Holographic Eclipse Heat Transfer Vinyl from Siser …Apr 29th 2024 -
Hop into Spring with Cute Easter Vinyl Crafts
Do you love our Vinyl? Sign up for Vinyl Club today to get FREE vinyl and save big! …Mar 28th 2024 -

Fixing Wrinkles and Bubbles in Vinyl
How do you get air bubbles out of vinyl? There are a few different ways to ensure a flawless …Mar 26th 2024