DIY Valentine's Day Wooden Heart Decorations: A Step-by-Step Tutorial
Valentine's Day is approaching, and what better way to express your love than with handmade decorations? In this tutorial, we'll guide you through the process of creating charming wooden heart decorations using a kit from Target, craft paint, and adhesive vinyl. Follow along as we transform simple materials into beautiful Valentine's Day décor.
Materials Needed:
- Wooden heart kit (available at Target or craft stores)
- Craft paint in Valentine's Day colors (such as red, pink, and white)
- Adhesive vinyl in various colors and patterns
- Paintbrushes
- Box cutter or precision cutting tool
Step 1: Prepare Your Workspace
Set up a clean and well-lit workspace where you can comfortably work on your project. Lay out all the materials you'll need within easy reach.
Step 2: Paint the Edges of the Wooden Hearts
Using your craft paint and paintbrushes, carefully paint around the edges of each wooden heart. Choose colors that reflect the Valentine's Day theme, such as shades of red, pink, and white. Allow the paint to dry completely before moving on to the next step.
Step 3: Design Your Vinyl Decorations
Select adhesive vinyl in colors and patterns that complement your painted wooden hearts. You can create intricate designs, write messages, or simply cut out shapes – let your creativity be your guide! Use scissors or a cutting machine to cut the vinyl into the desired shapes and sizes. We chose to just cover the design with permanent patterned adhesive vinyl.
Step 4: Apply the Vinyl to the Wooden Hearts
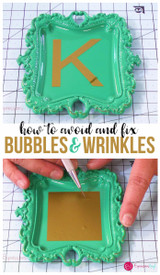
Once the paint is dry, carefully apply the adhesive vinyl to the front face of each wooden heart. Smooth out any air bubbles or wrinkles to ensure a clean and seamless application. Take your time to position the vinyl precisely for the best results.
Step 5: Trim the Excess Vinyl
Using a box cutter or precision cutting tool, carefully trim around the edges of the vinyl to remove any excess material. Take care to follow the outline of the heart shape for a neat and polished finish. This step requires patience and precision, so take your time to achieve the desired result.
Step 6 (optional): Add Hanging Strings
To turn your decorated wooden hearts into hanging decorations, attach a piece of string or ribbon to each heart. You can either glue the string to the back of the heart or drill small holes for a more secure attachment. Make sure the strings are long enough to hang the decorations wherever you please.
Step 7: Display and Enjoy!
Once you've completed all the steps, step back and admire your handiwork! Your DIY Valentine's Day wooden heart decorations are now ready to be displayed and enjoyed. Hang them on door handles, wall hooks, or anywhere else that could use a touch of love and creativity.
Crafting your own Valentine's Day decorations is a fun and rewarding way to celebrate the season of love. With just a few simple materials and a little creativity, you can create beautiful wooden heart decorations that will add charm and warmth to any space. Give it a try and spread the love this Valentine's Day!
Recent Posts
-
NEW Holographic Eclipse Heat Transfer Vinyl
April 15th, 2024 3 Ways to Use the New Holographic Eclipse Heat Transfer Vinyl from Siser …Apr 29th 2024 -
Hop into Spring with Cute Easter Vinyl Crafts
Do you love our Vinyl? Sign up for Vinyl Club today to get FREE vinyl and save big! …Mar 28th 2024 -
Fixing Wrinkles and Bubbles in Vinyl
How do you get air bubbles out of vinyl? There are a few different ways to ensure a flawless …Mar 26th 2024


