
Outlining Text - A Quick How-To
Hi Everyone - - it's Mandy again from Sugar Bee Crafts (it's awesome over there - go ahead and check it out!)
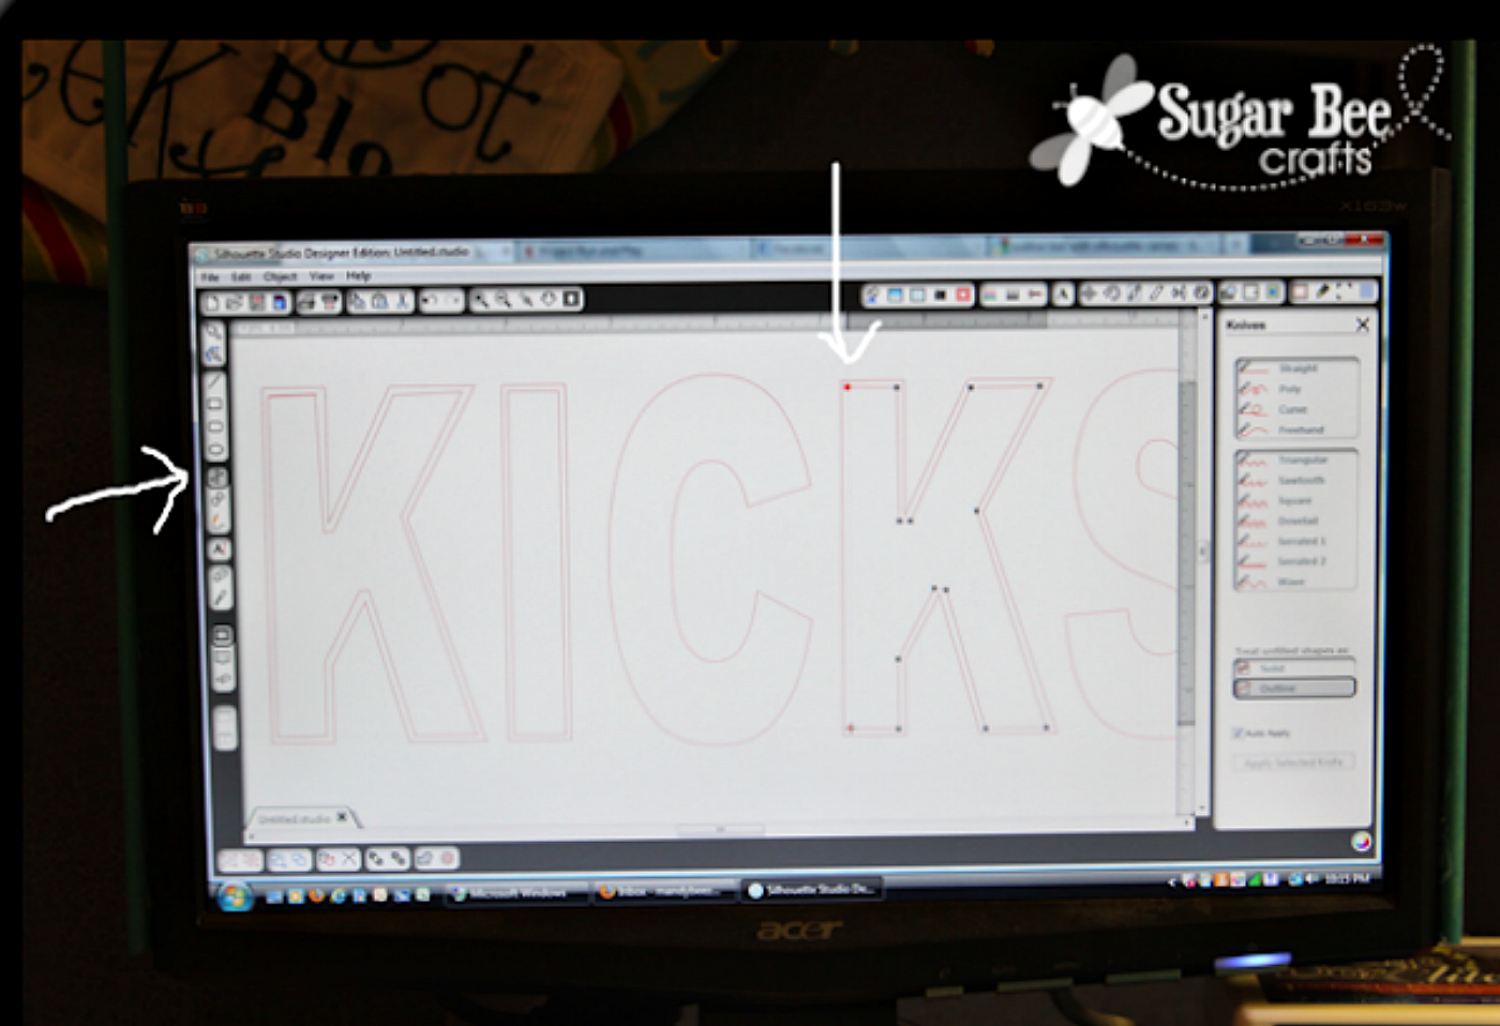
I want to show you a quick solution to a problem I was having..... I was making a shirt with iron-on vinyl (which we all LOVE!) with my Silhouette Cameo and I wanted to use the center of the letters as a place for fabric. So what I needed was an outline of the letters, if that makes sense. I tried making a smaller version of the letter, but doing that doesn't line up well because of all the angles (unless it's the letter "o"). And I played around and came up with a solution...
I have never really used the drawing features, but there's one that looks like a figure 8 with sharp angles (I pointed to it in the picture below) - you click on it and it will let you draw lines, all around, until you double click back on your starting point. So I clicked a start point, then clicked in a corner of the letter, then clicked in another corner of the letter, etc, working my way around as it played connect the dots. And so I made my own outline inside of the letter:
And then, a friendly reminder - - ALWAYS FLIP YOUR HEAT TRANSFER VINYL before cutting!! Thank me later for that one :)

Here's how it turned out after being cut and weeded - see how the middle of the letters on "KICKS" is open:
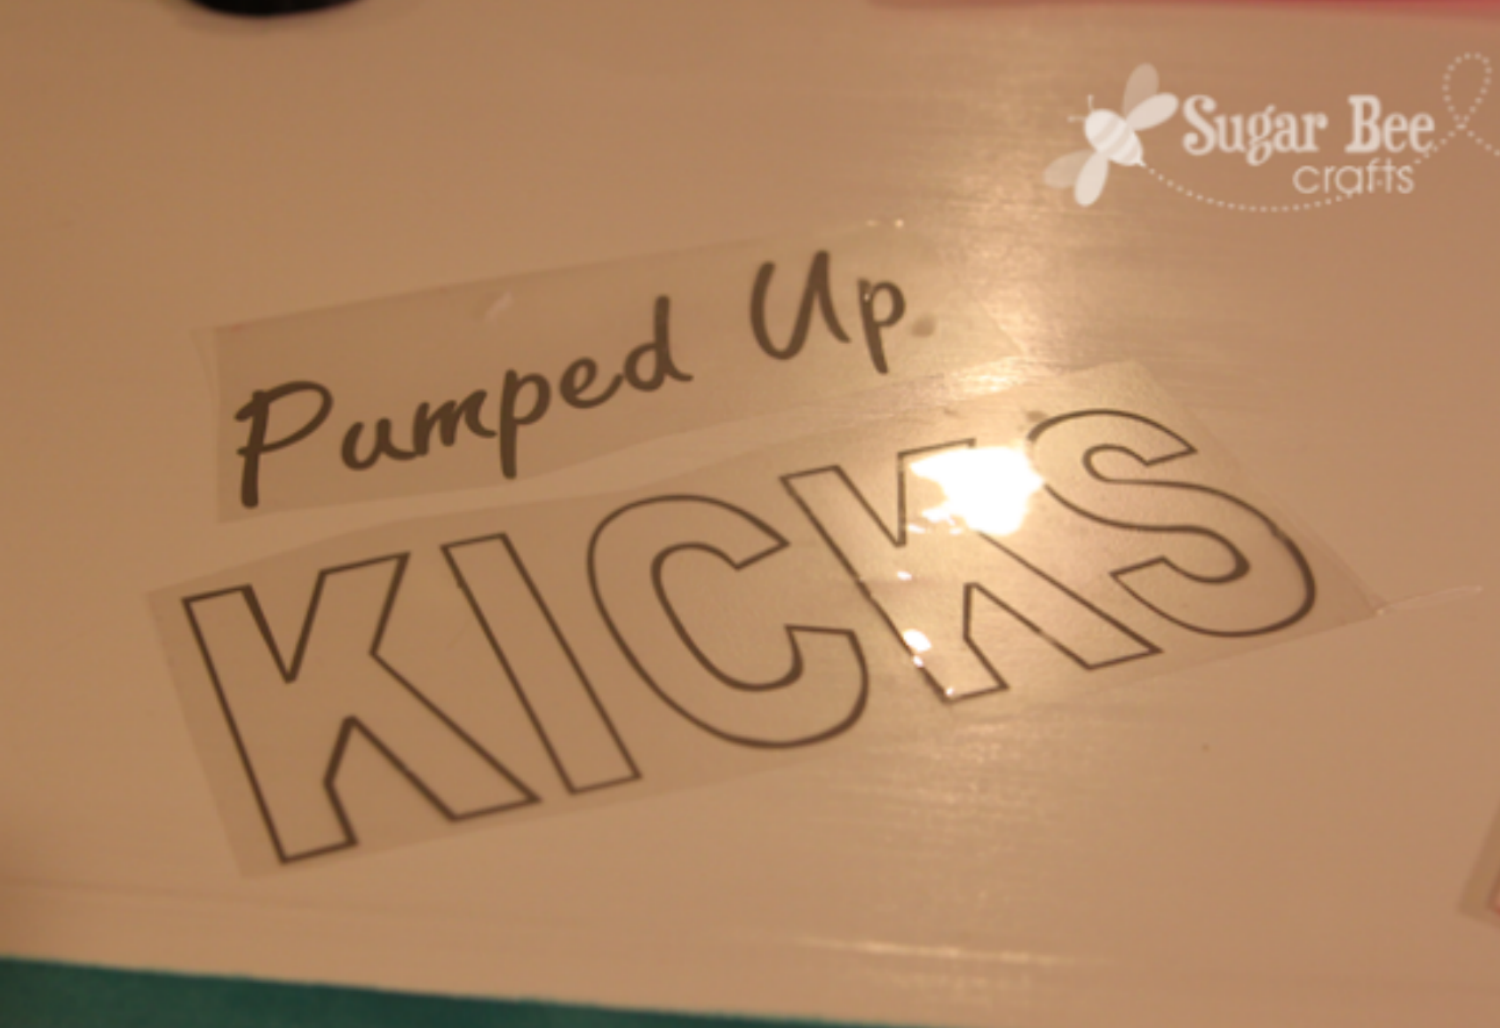
That allowed me to sew in some fabric for a little more fun - - see - the silver is the iron-on heat transfer - so fun!!

Recent Posts
-
NEW Holographic Eclipse Heat Transfer Vinyl
April 15th, 2024 3 Ways to Use the New Holographic Eclipse Heat Transfer Vinyl from Siser …Apr 29th 2024 -
Hop into Spring with Cute Easter Vinyl Crafts
Do you love our Vinyl? Sign up for Vinyl Club today to get FREE vinyl and save big! …Mar 28th 2024 -

Fixing Wrinkles and Bubbles in Vinyl
How do you get air bubbles out of vinyl? There are a few different ways to ensure a flawless …Mar 26th 2024