
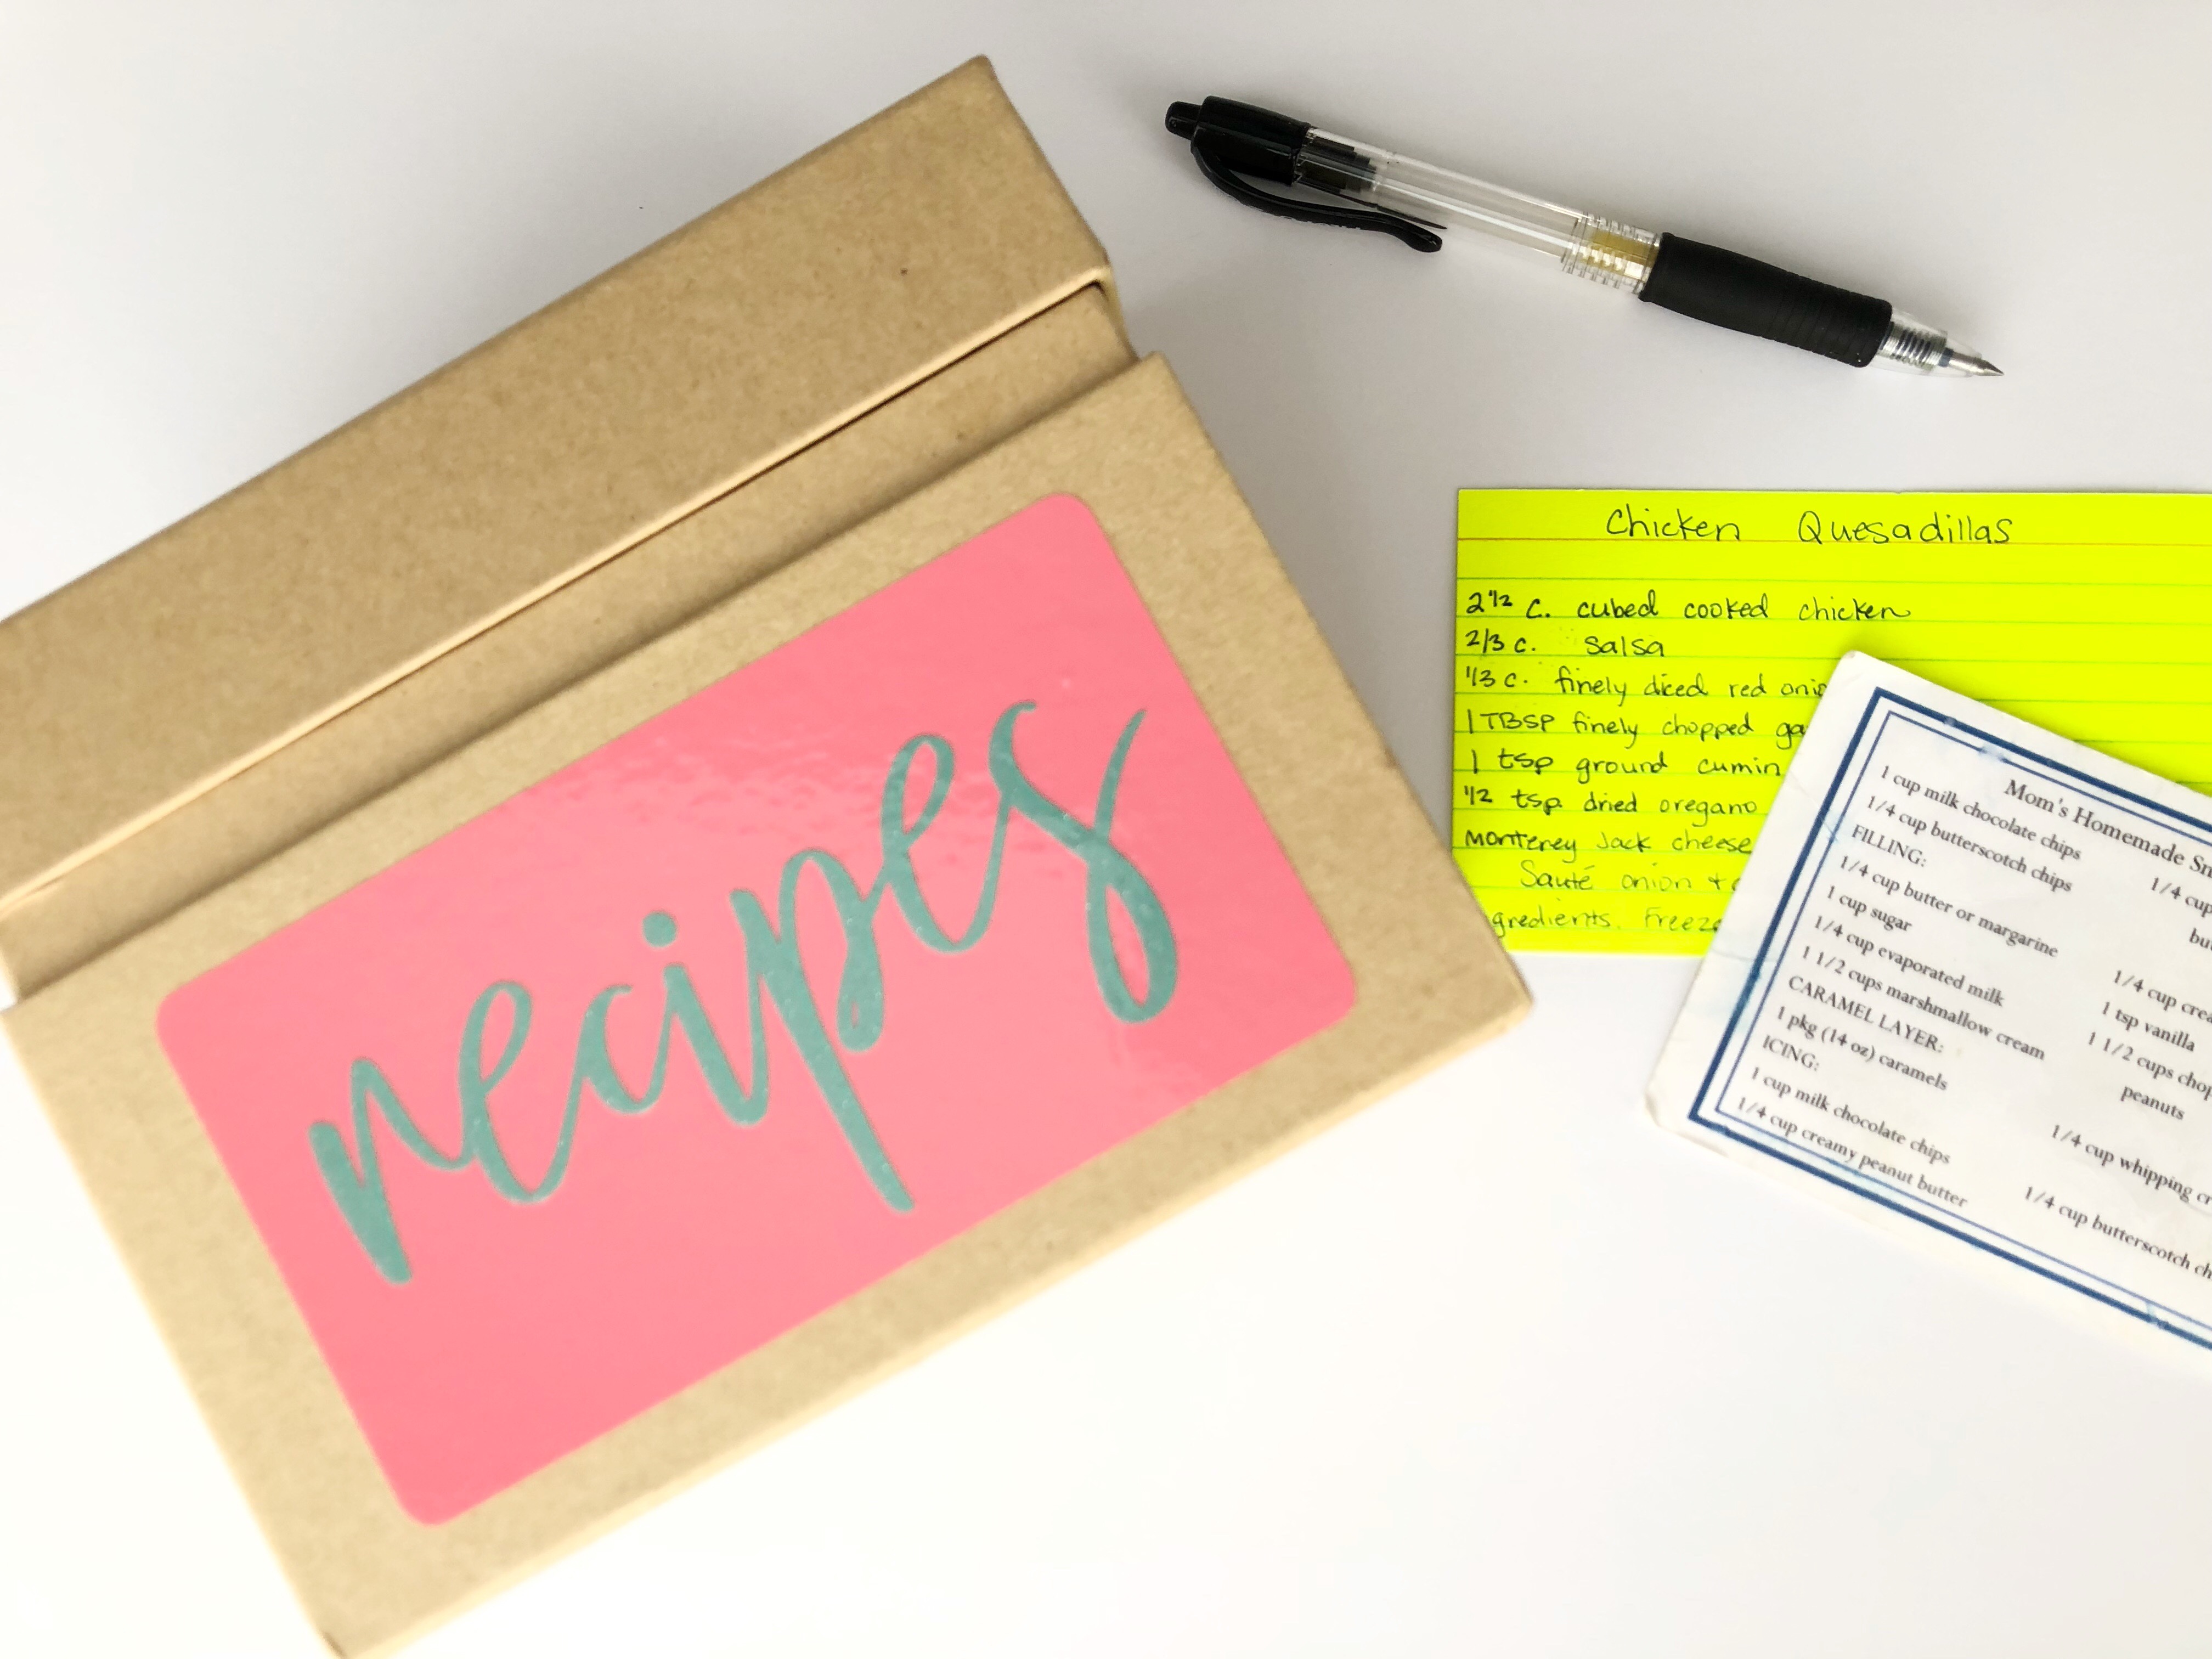
Recipe Box with vinyl
Hey friends! Can you believe it's already a new year? Time sure does fly by when you're having fun doing lots of crafting!
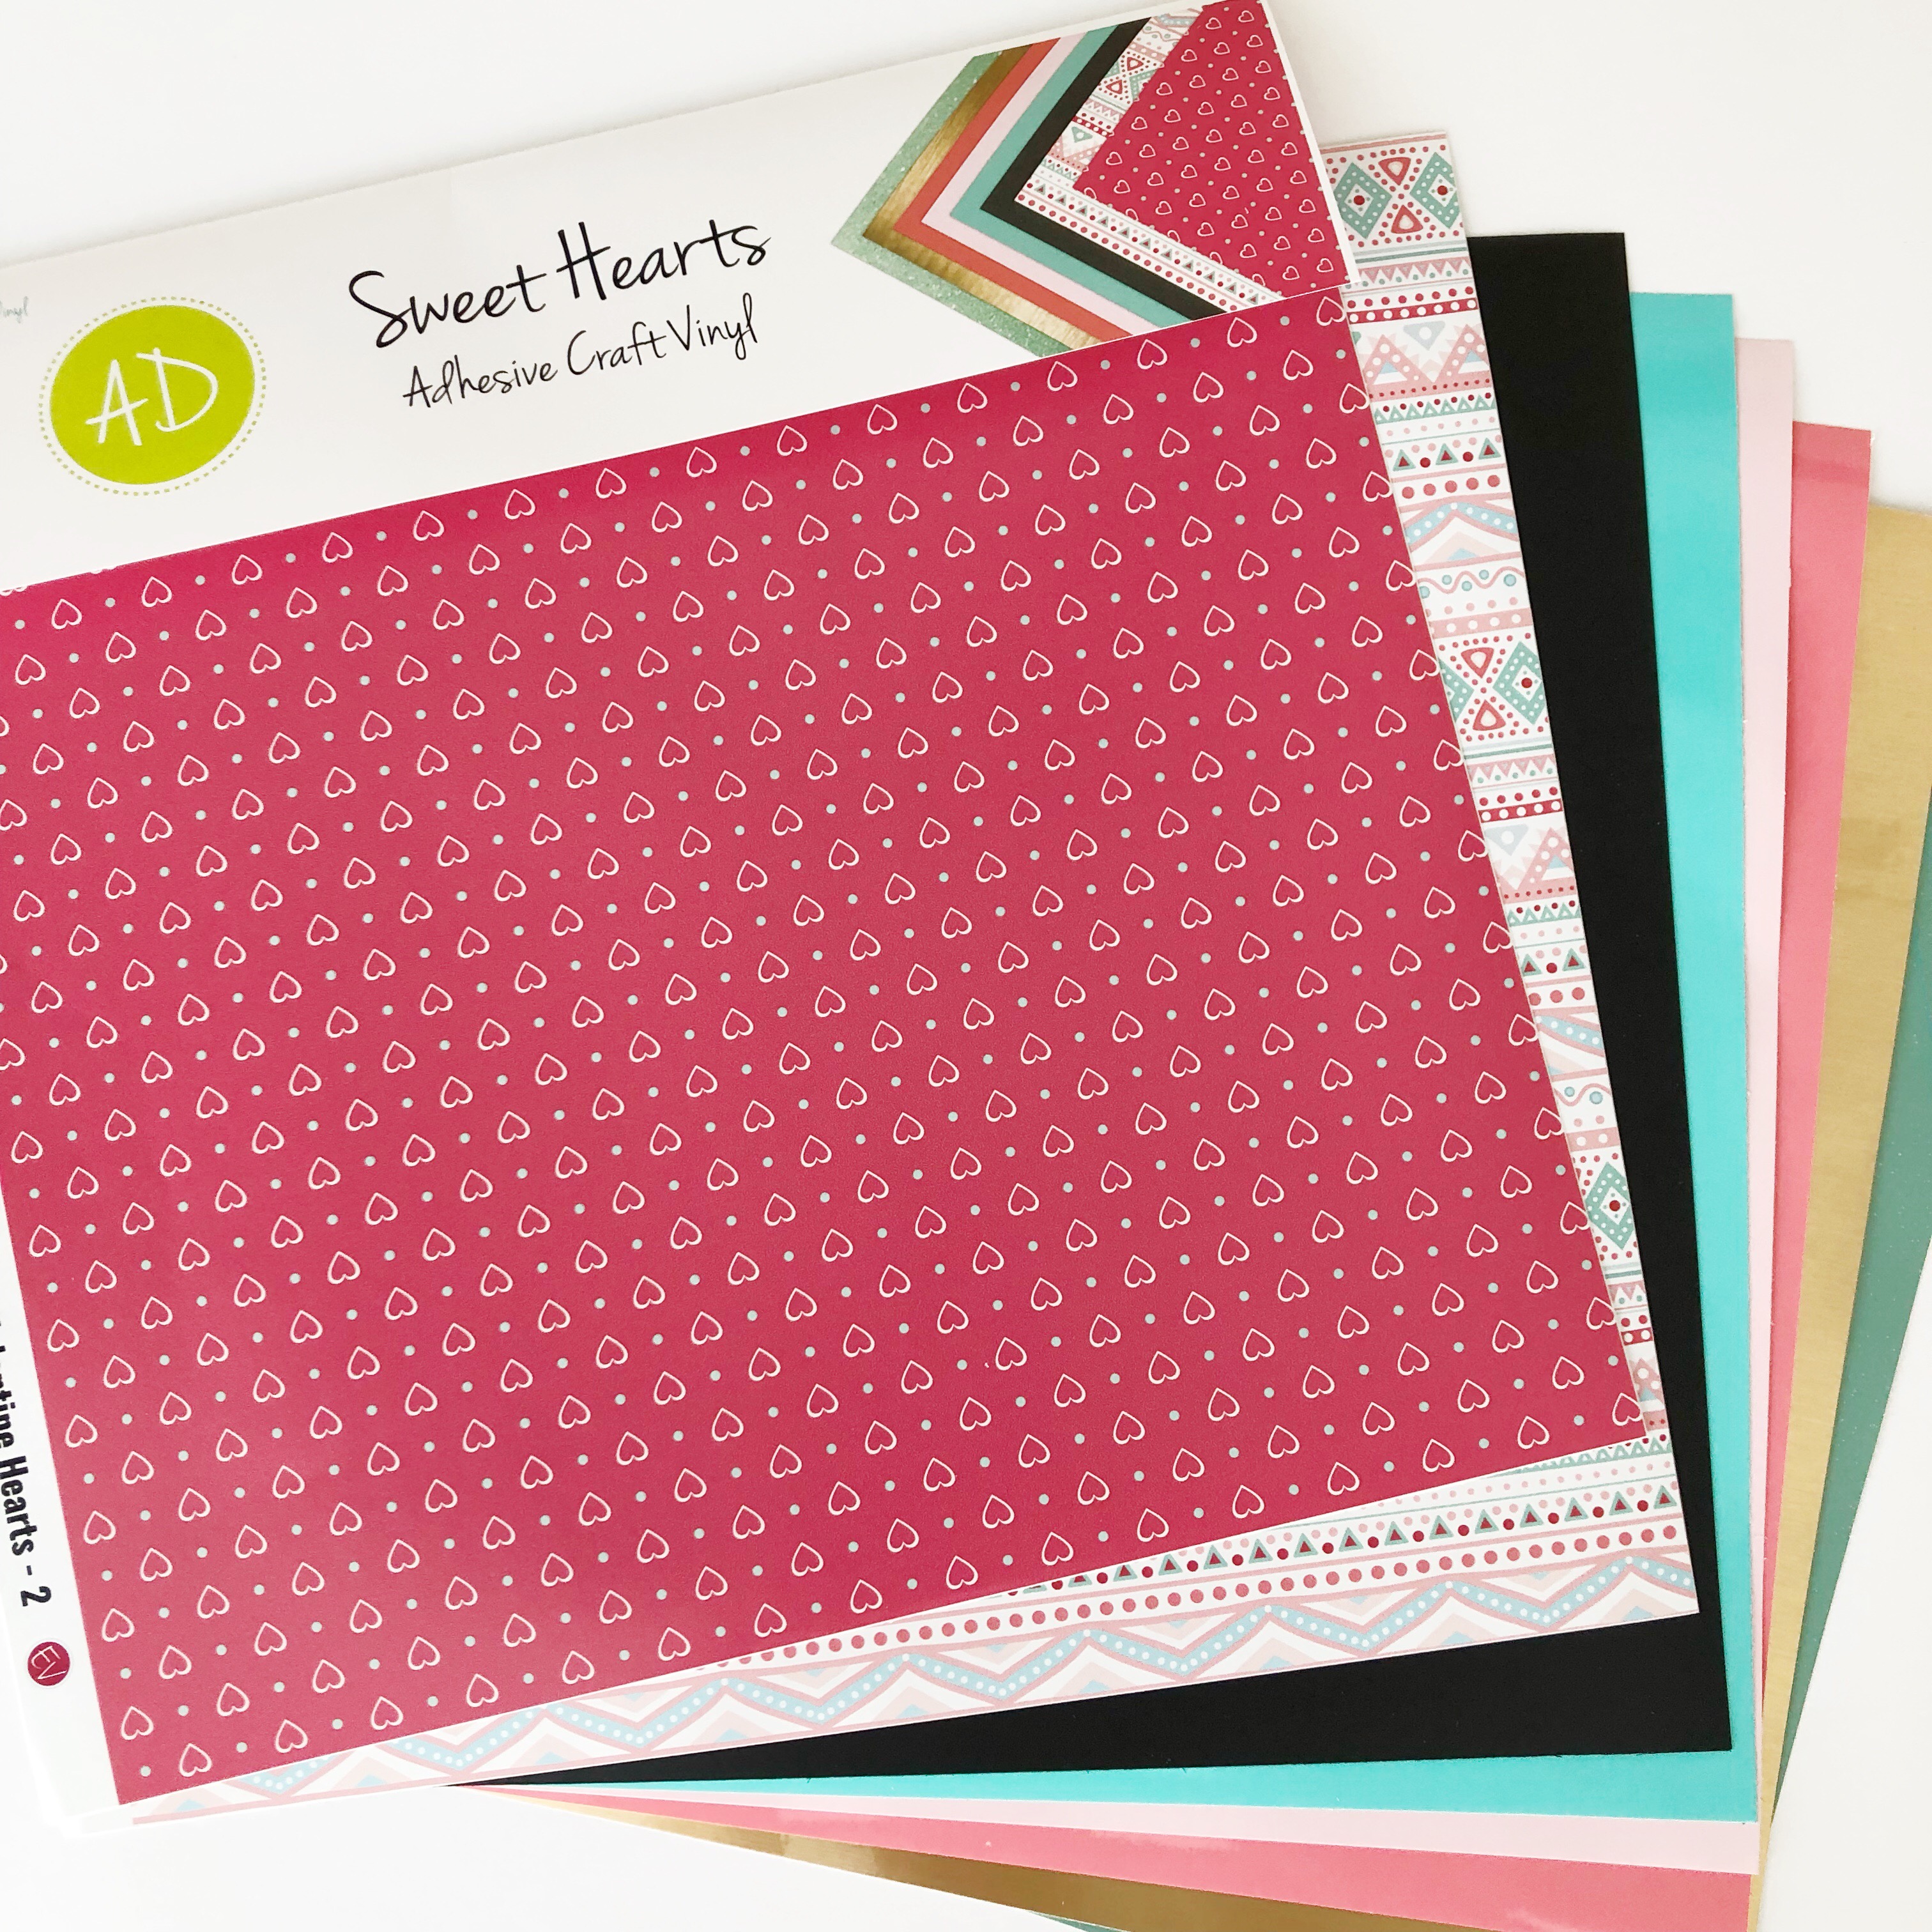
Today I want to show you a simple project that uses adhesive vinyl to brighten up a plain recipe box. And what's even better...the adhesive vinyl I used is from the new "Sweet Hearts" Valentine Pack. So let's get started!

Supplies:
-Sweet Hearts Valentine's Pack adhesive vinyl
-cutting machine (I used a Silhouette Cameo)
-weeding hook or craft tweezers
-blank recipe box (I found mine at Hobby Lobby)
Step One: Prepare design in software
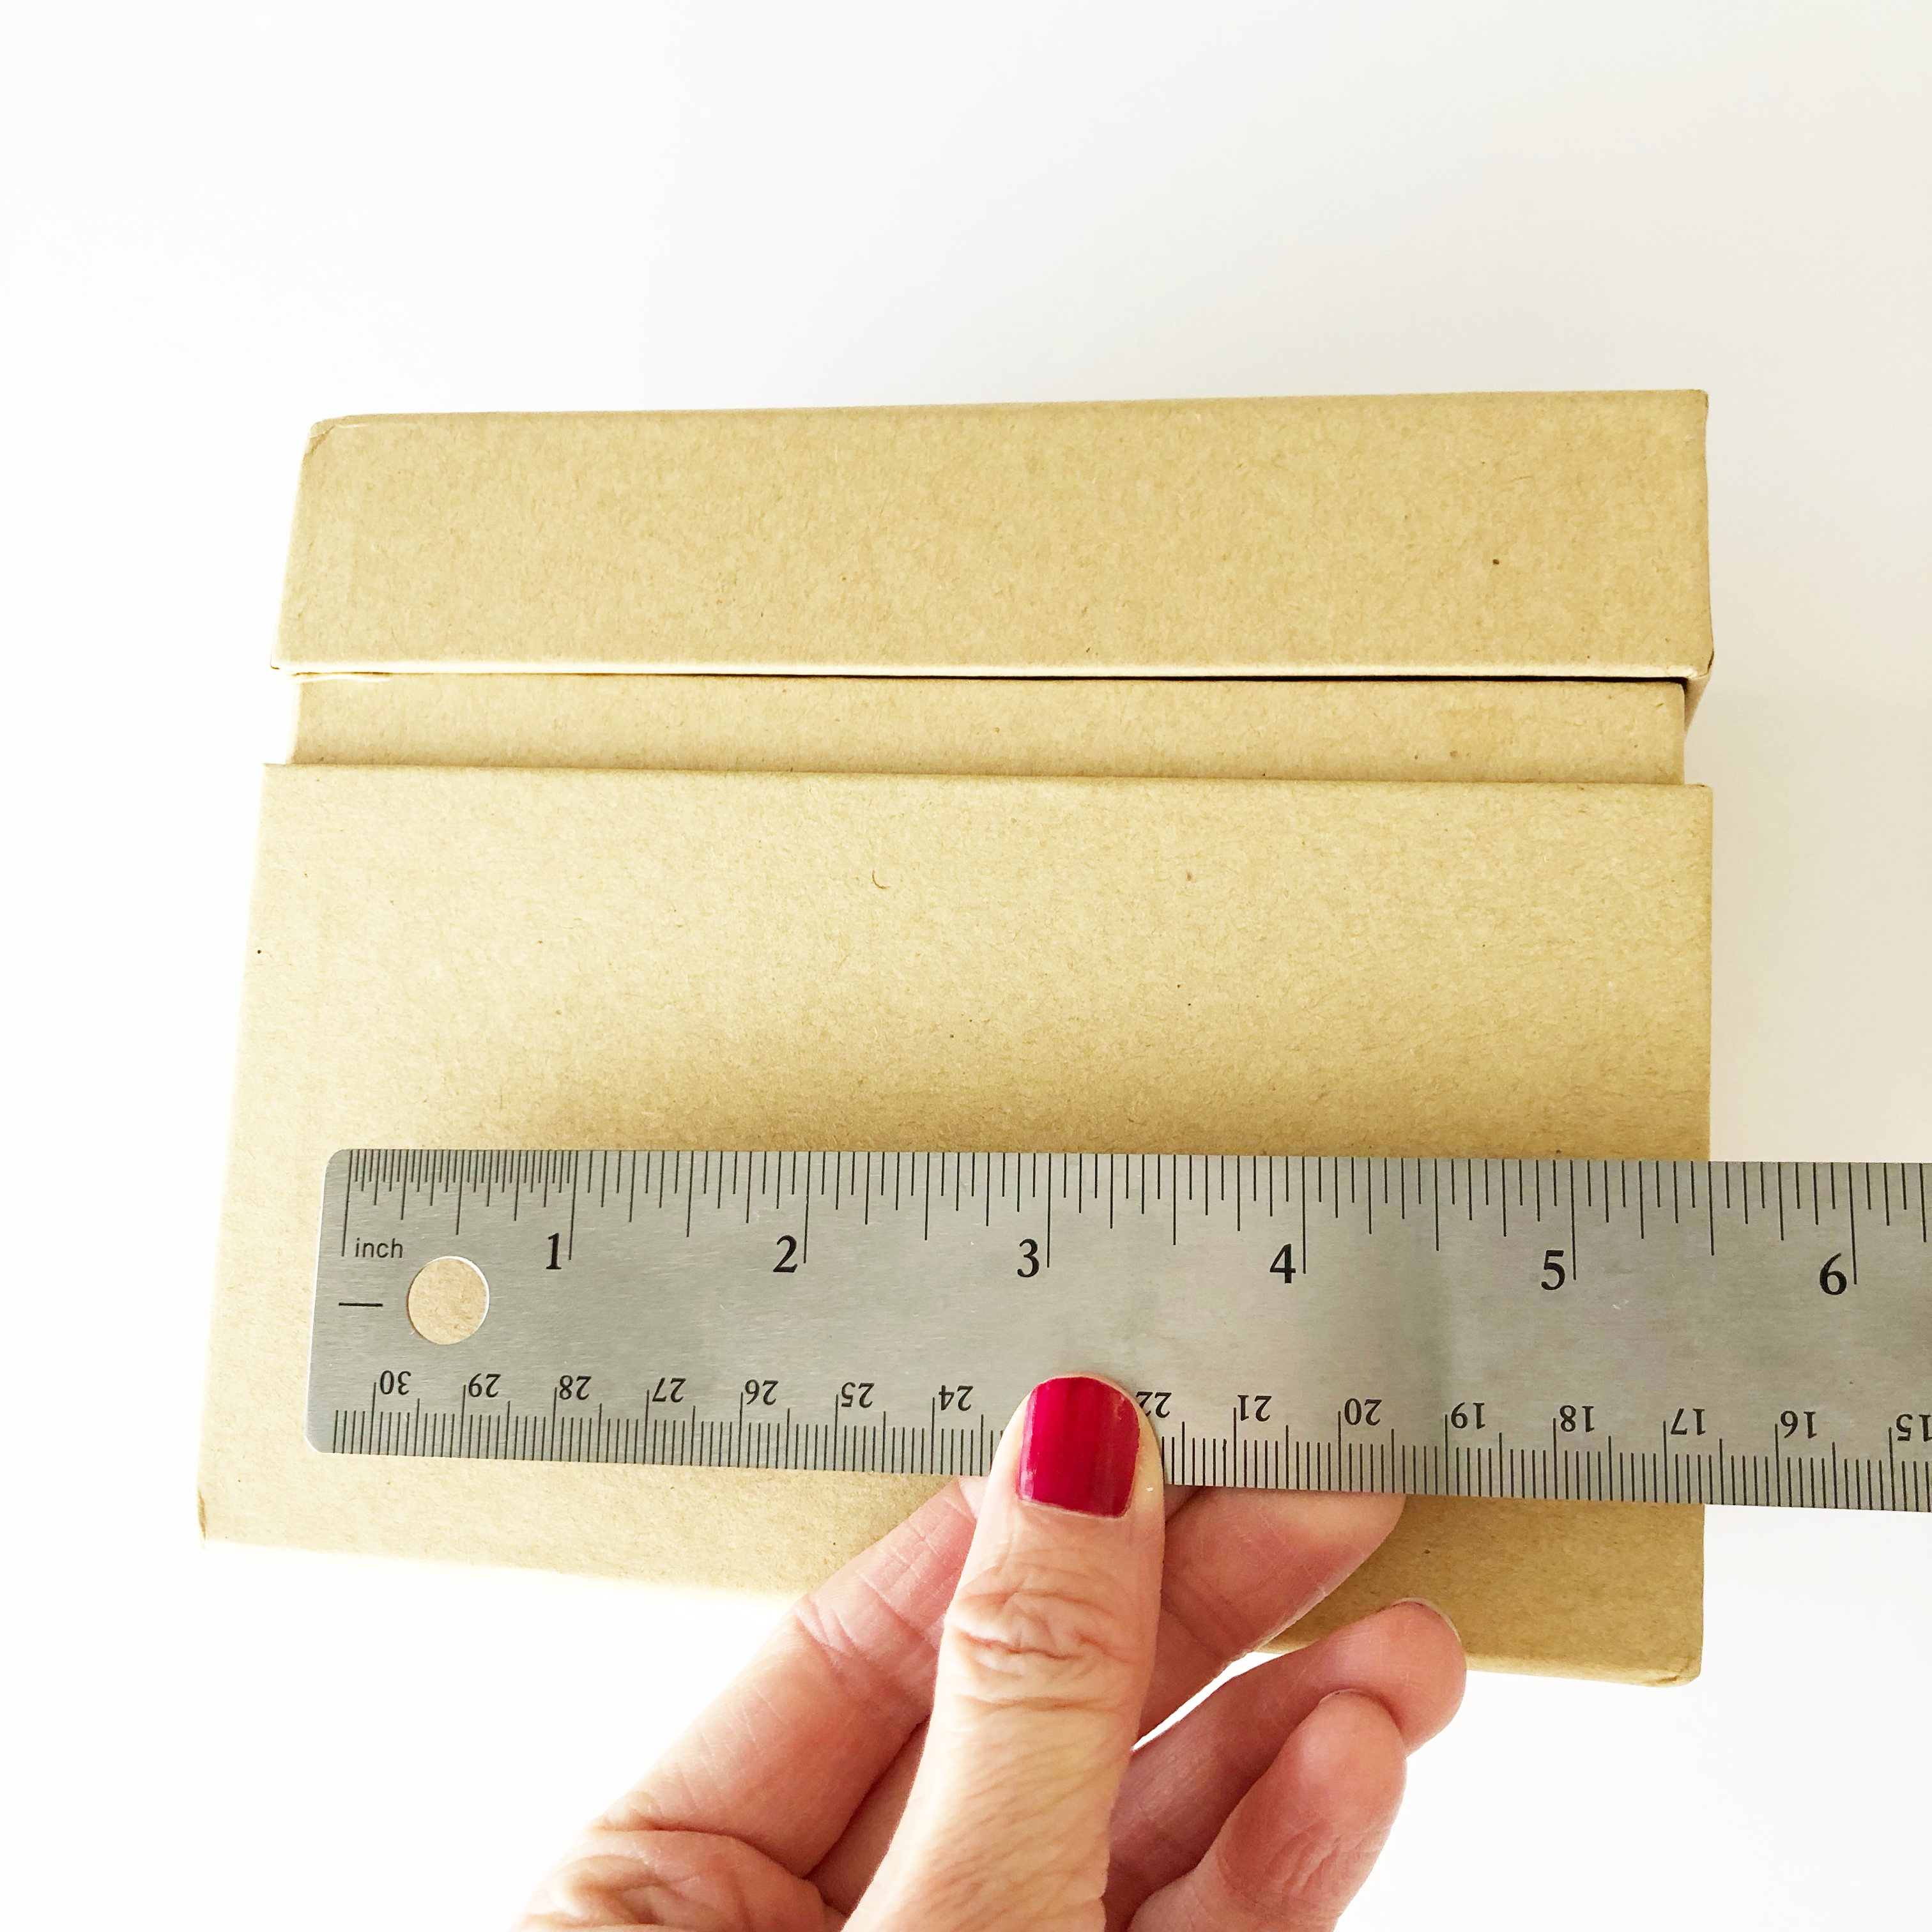
First, measure your recipe box to see how big you want your vinyl label.

Next, open your software program (I used Silhouette Studio) and use the text tool to type out your word.

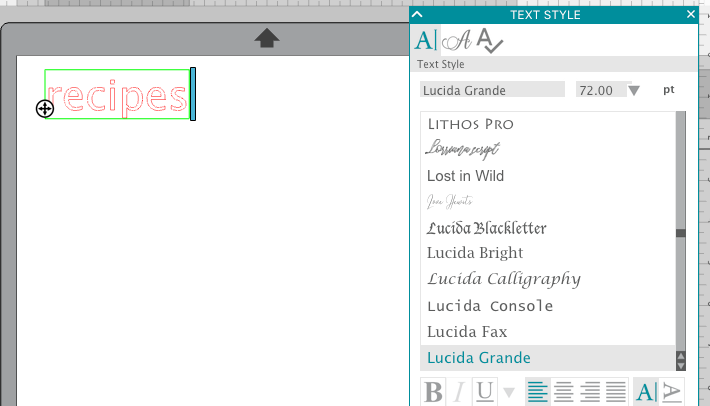
Fill the text with color and change the font to your liking. I love scripty fonts!

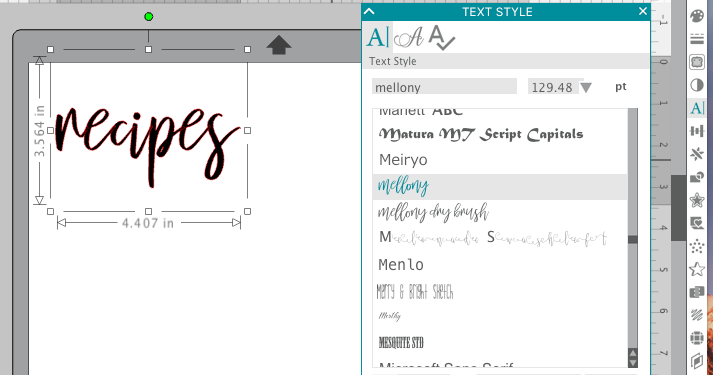
After it is sized, right click the text and select Weld so the text is one design instead of several letters overlapping each other.

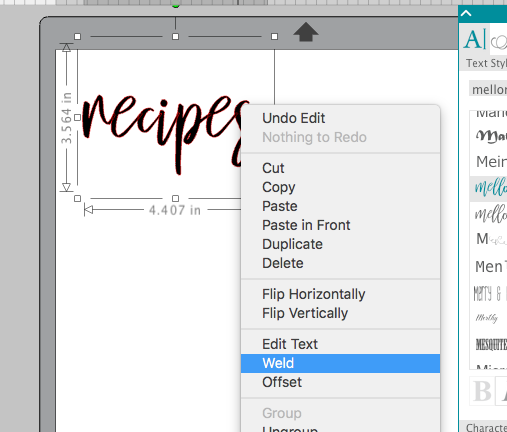
To add some more dimension, I wanted to layer the vinyl with a coordinating border. This is easily created by drawing a rectangle around your text.

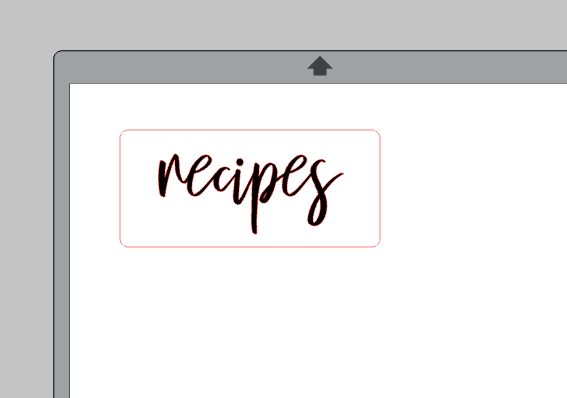
Now we have our two separate label pieces!
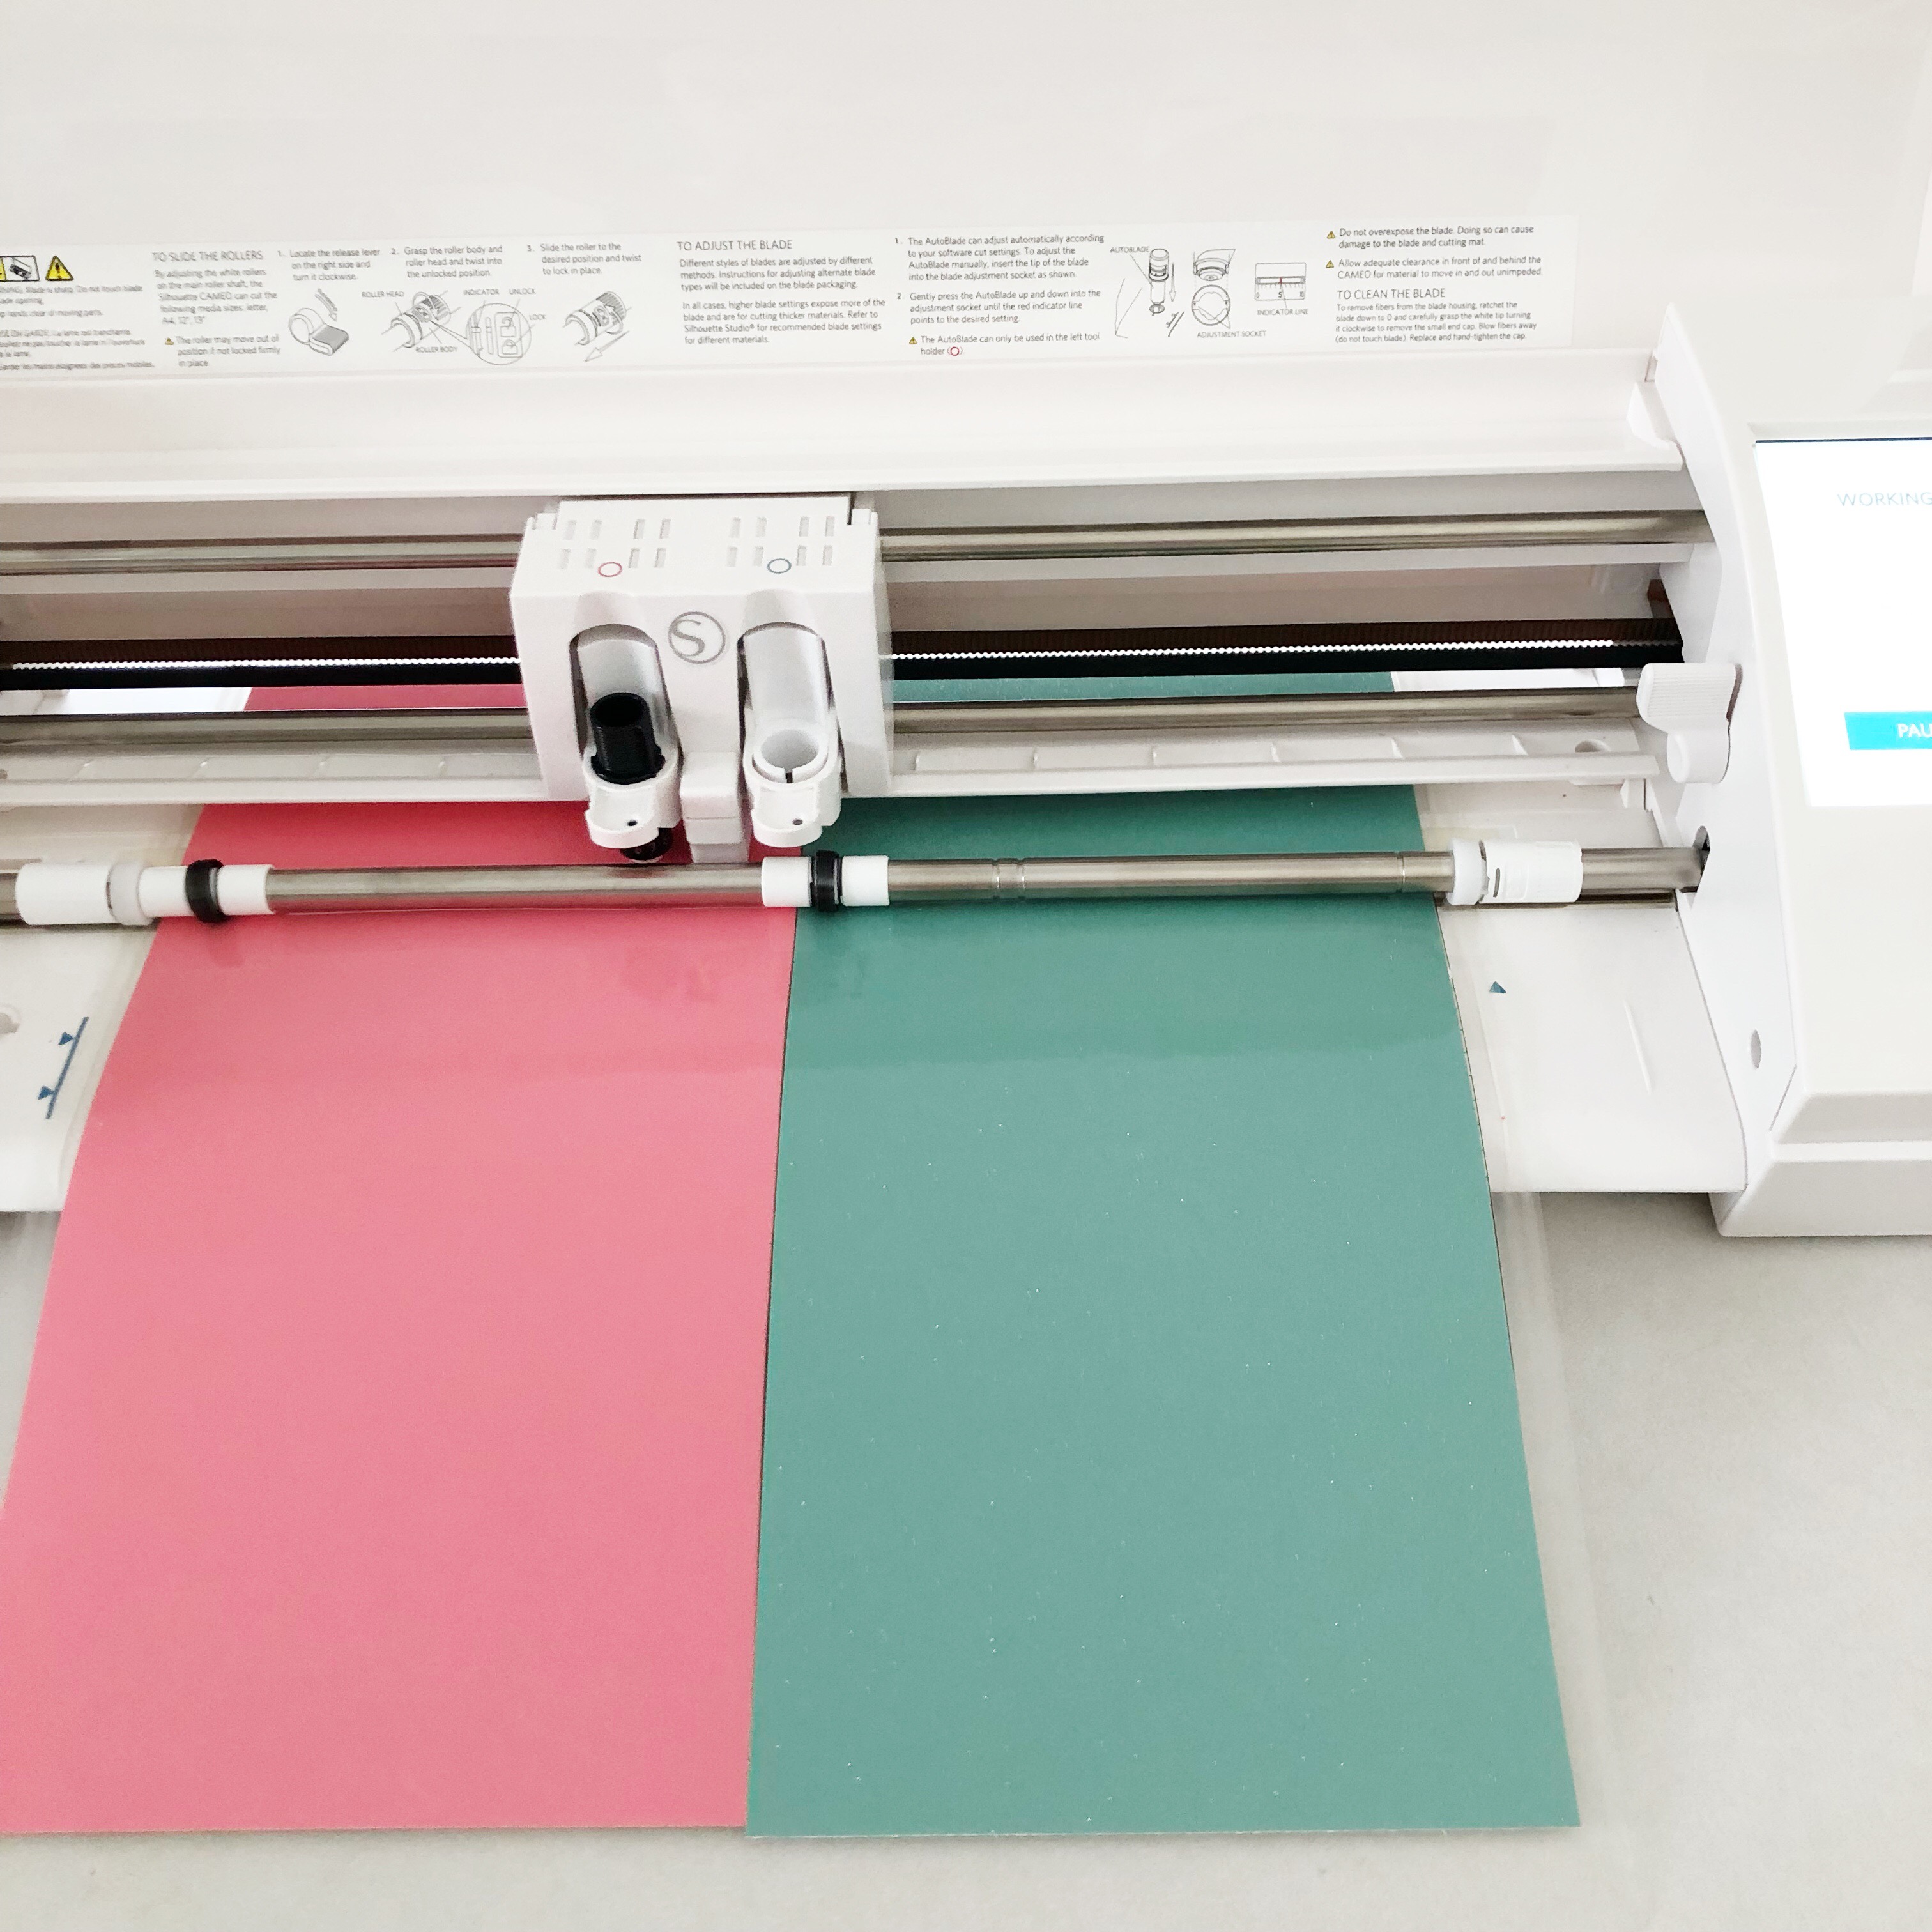
Step Two: Cut out vinyl designs
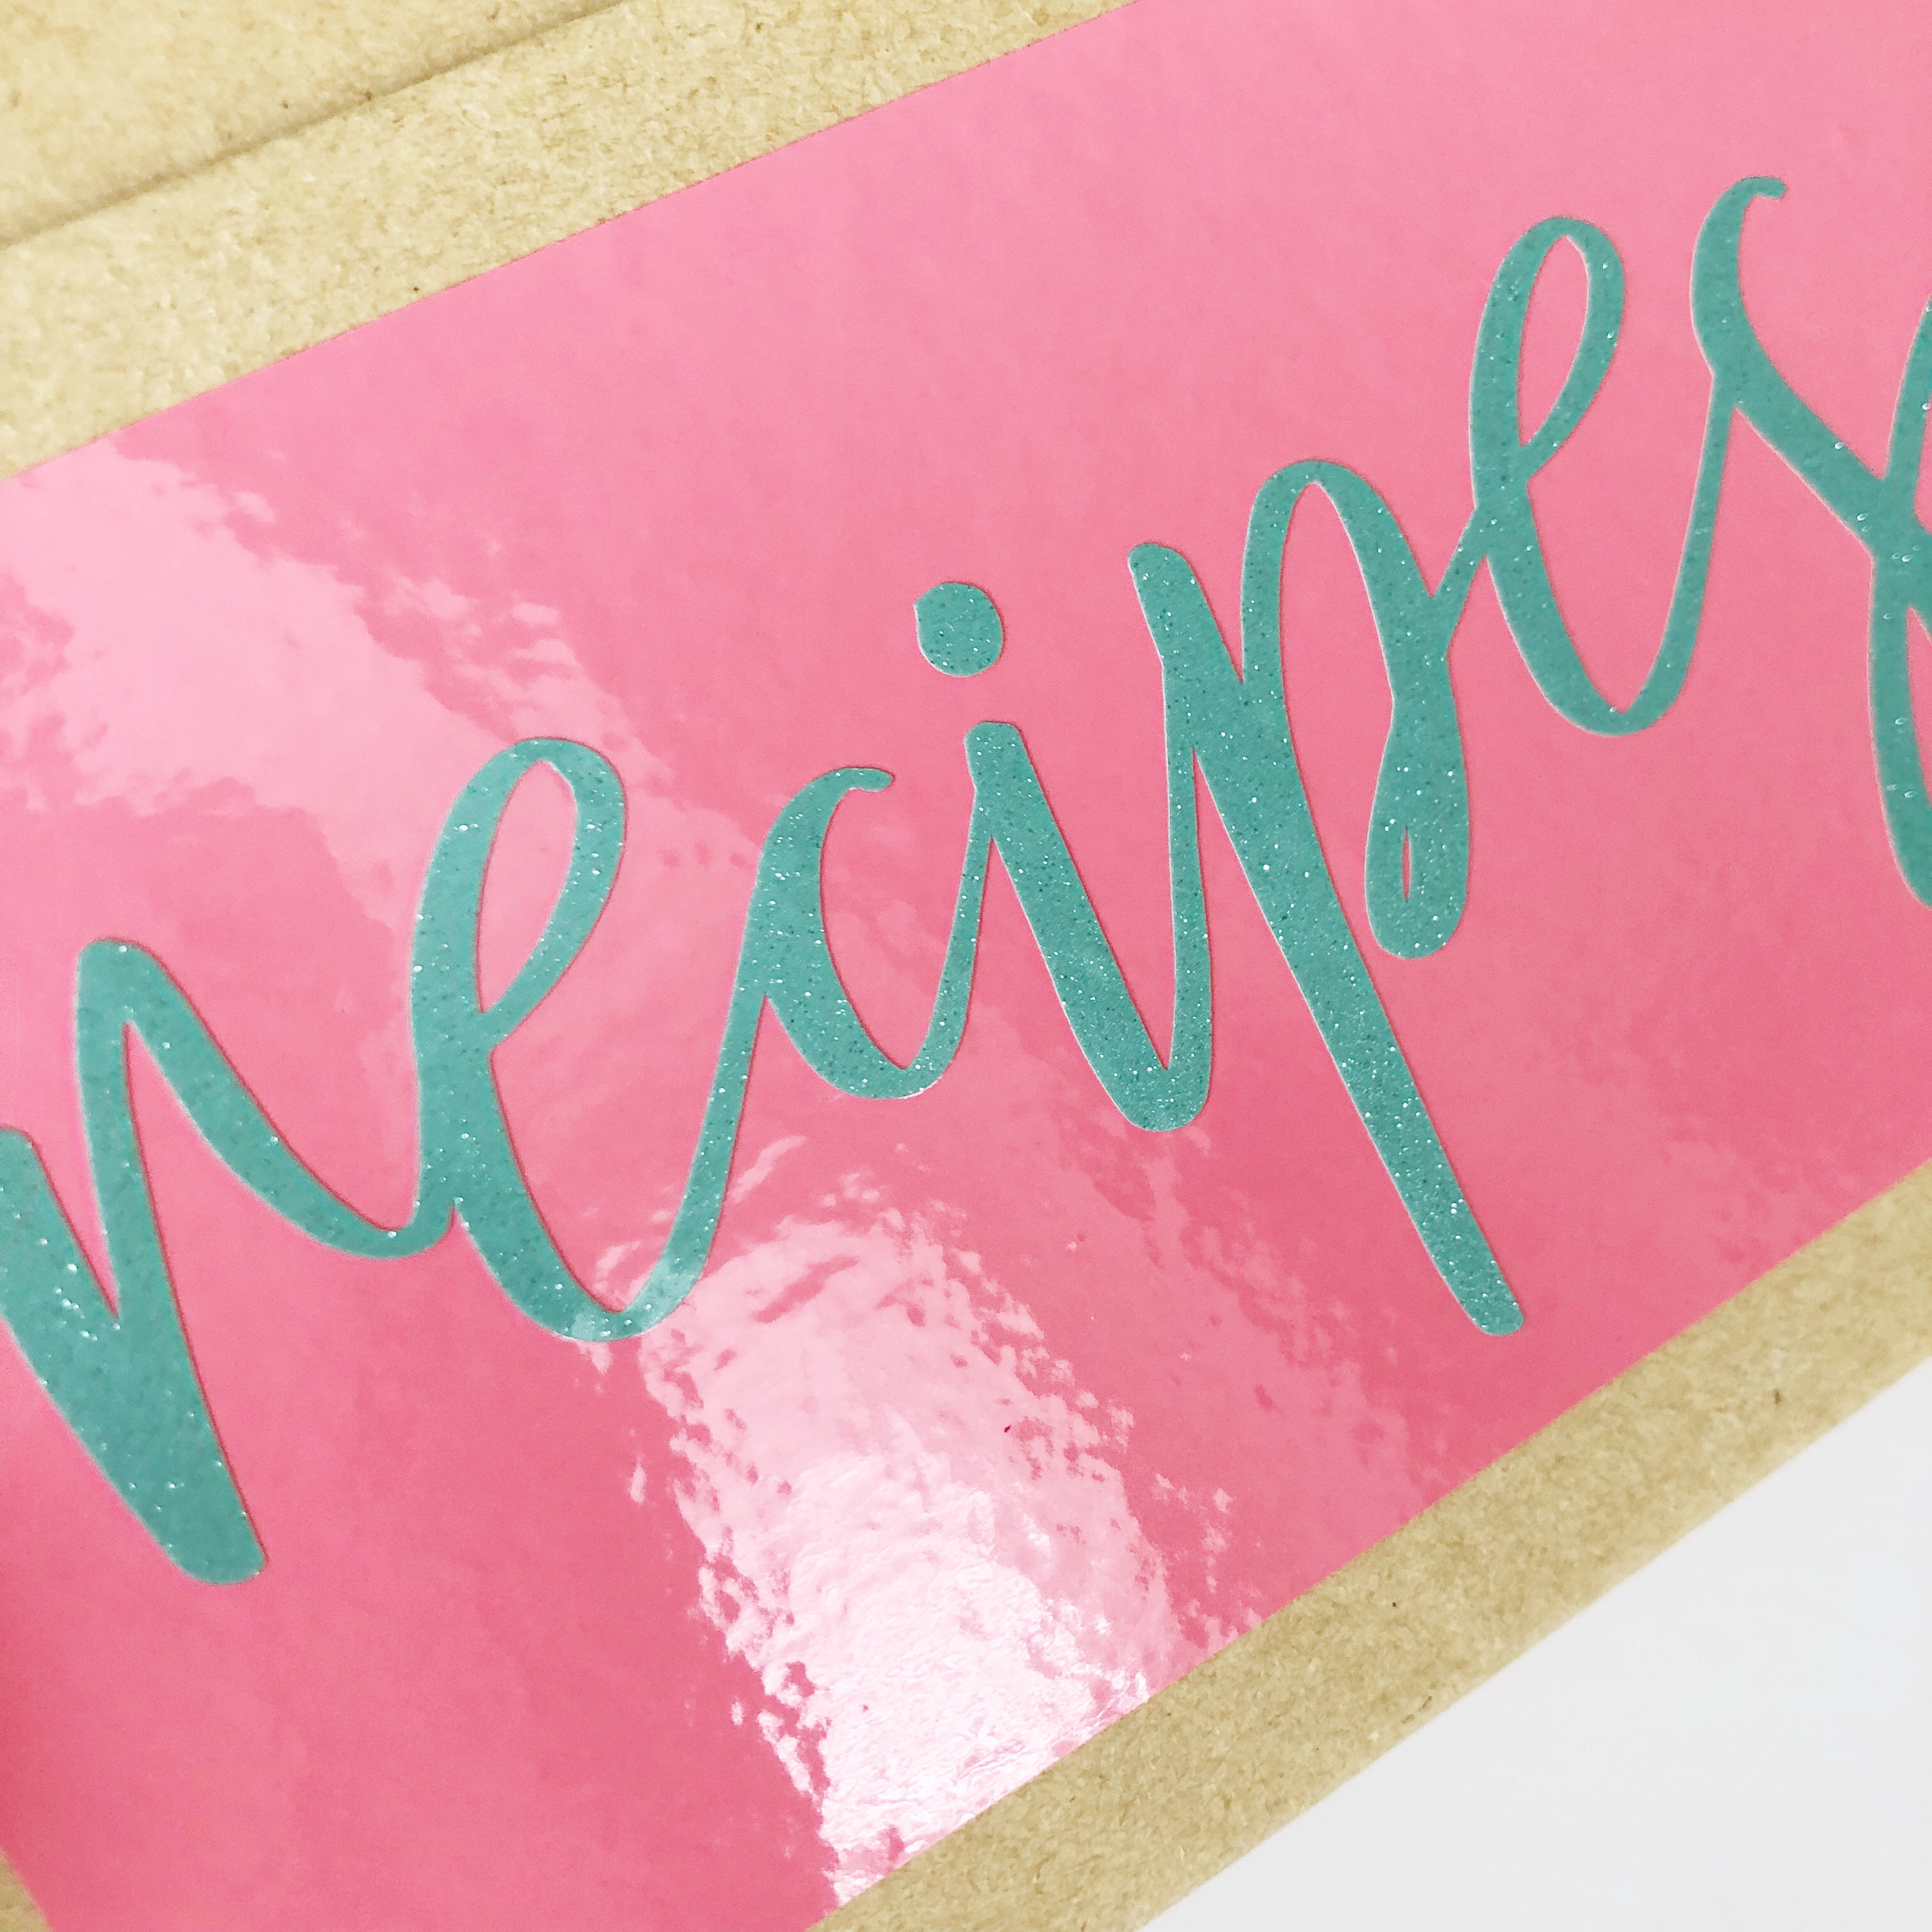
Check out these super cute colors from the Sweet Hearts Pack! I chose to use the glossy coral color and the glitter teal.

Go to the cut settings window and select the material you'll be cutting. The Glossy Vinyl settings worked great.

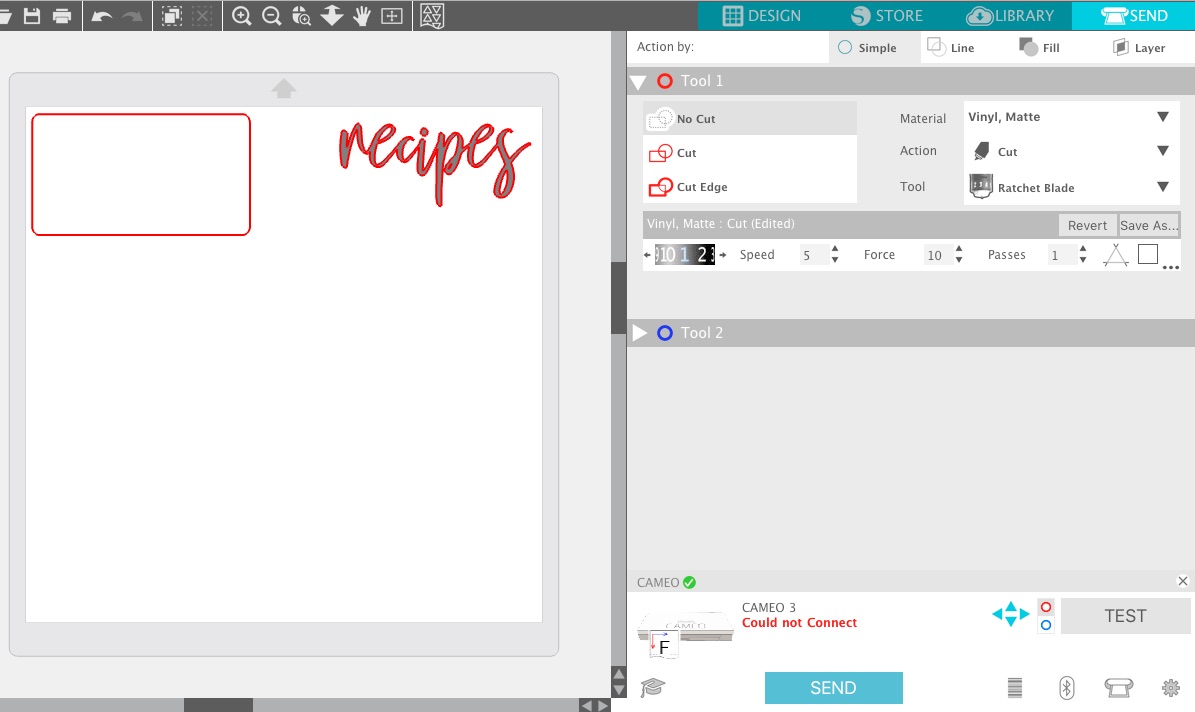
Place your adhesive vinyl onto your cutting mat and load into the machine, then send to cut!
Step Three: Weed vinyl designs
After both parts of the vinyl label have been cut, it's time to weed! Begin by peeling off a corner of the vinyl, leaving just the text.
Use a weeding hook or a pair of craft tweezers to peel out the little insides of the letters.
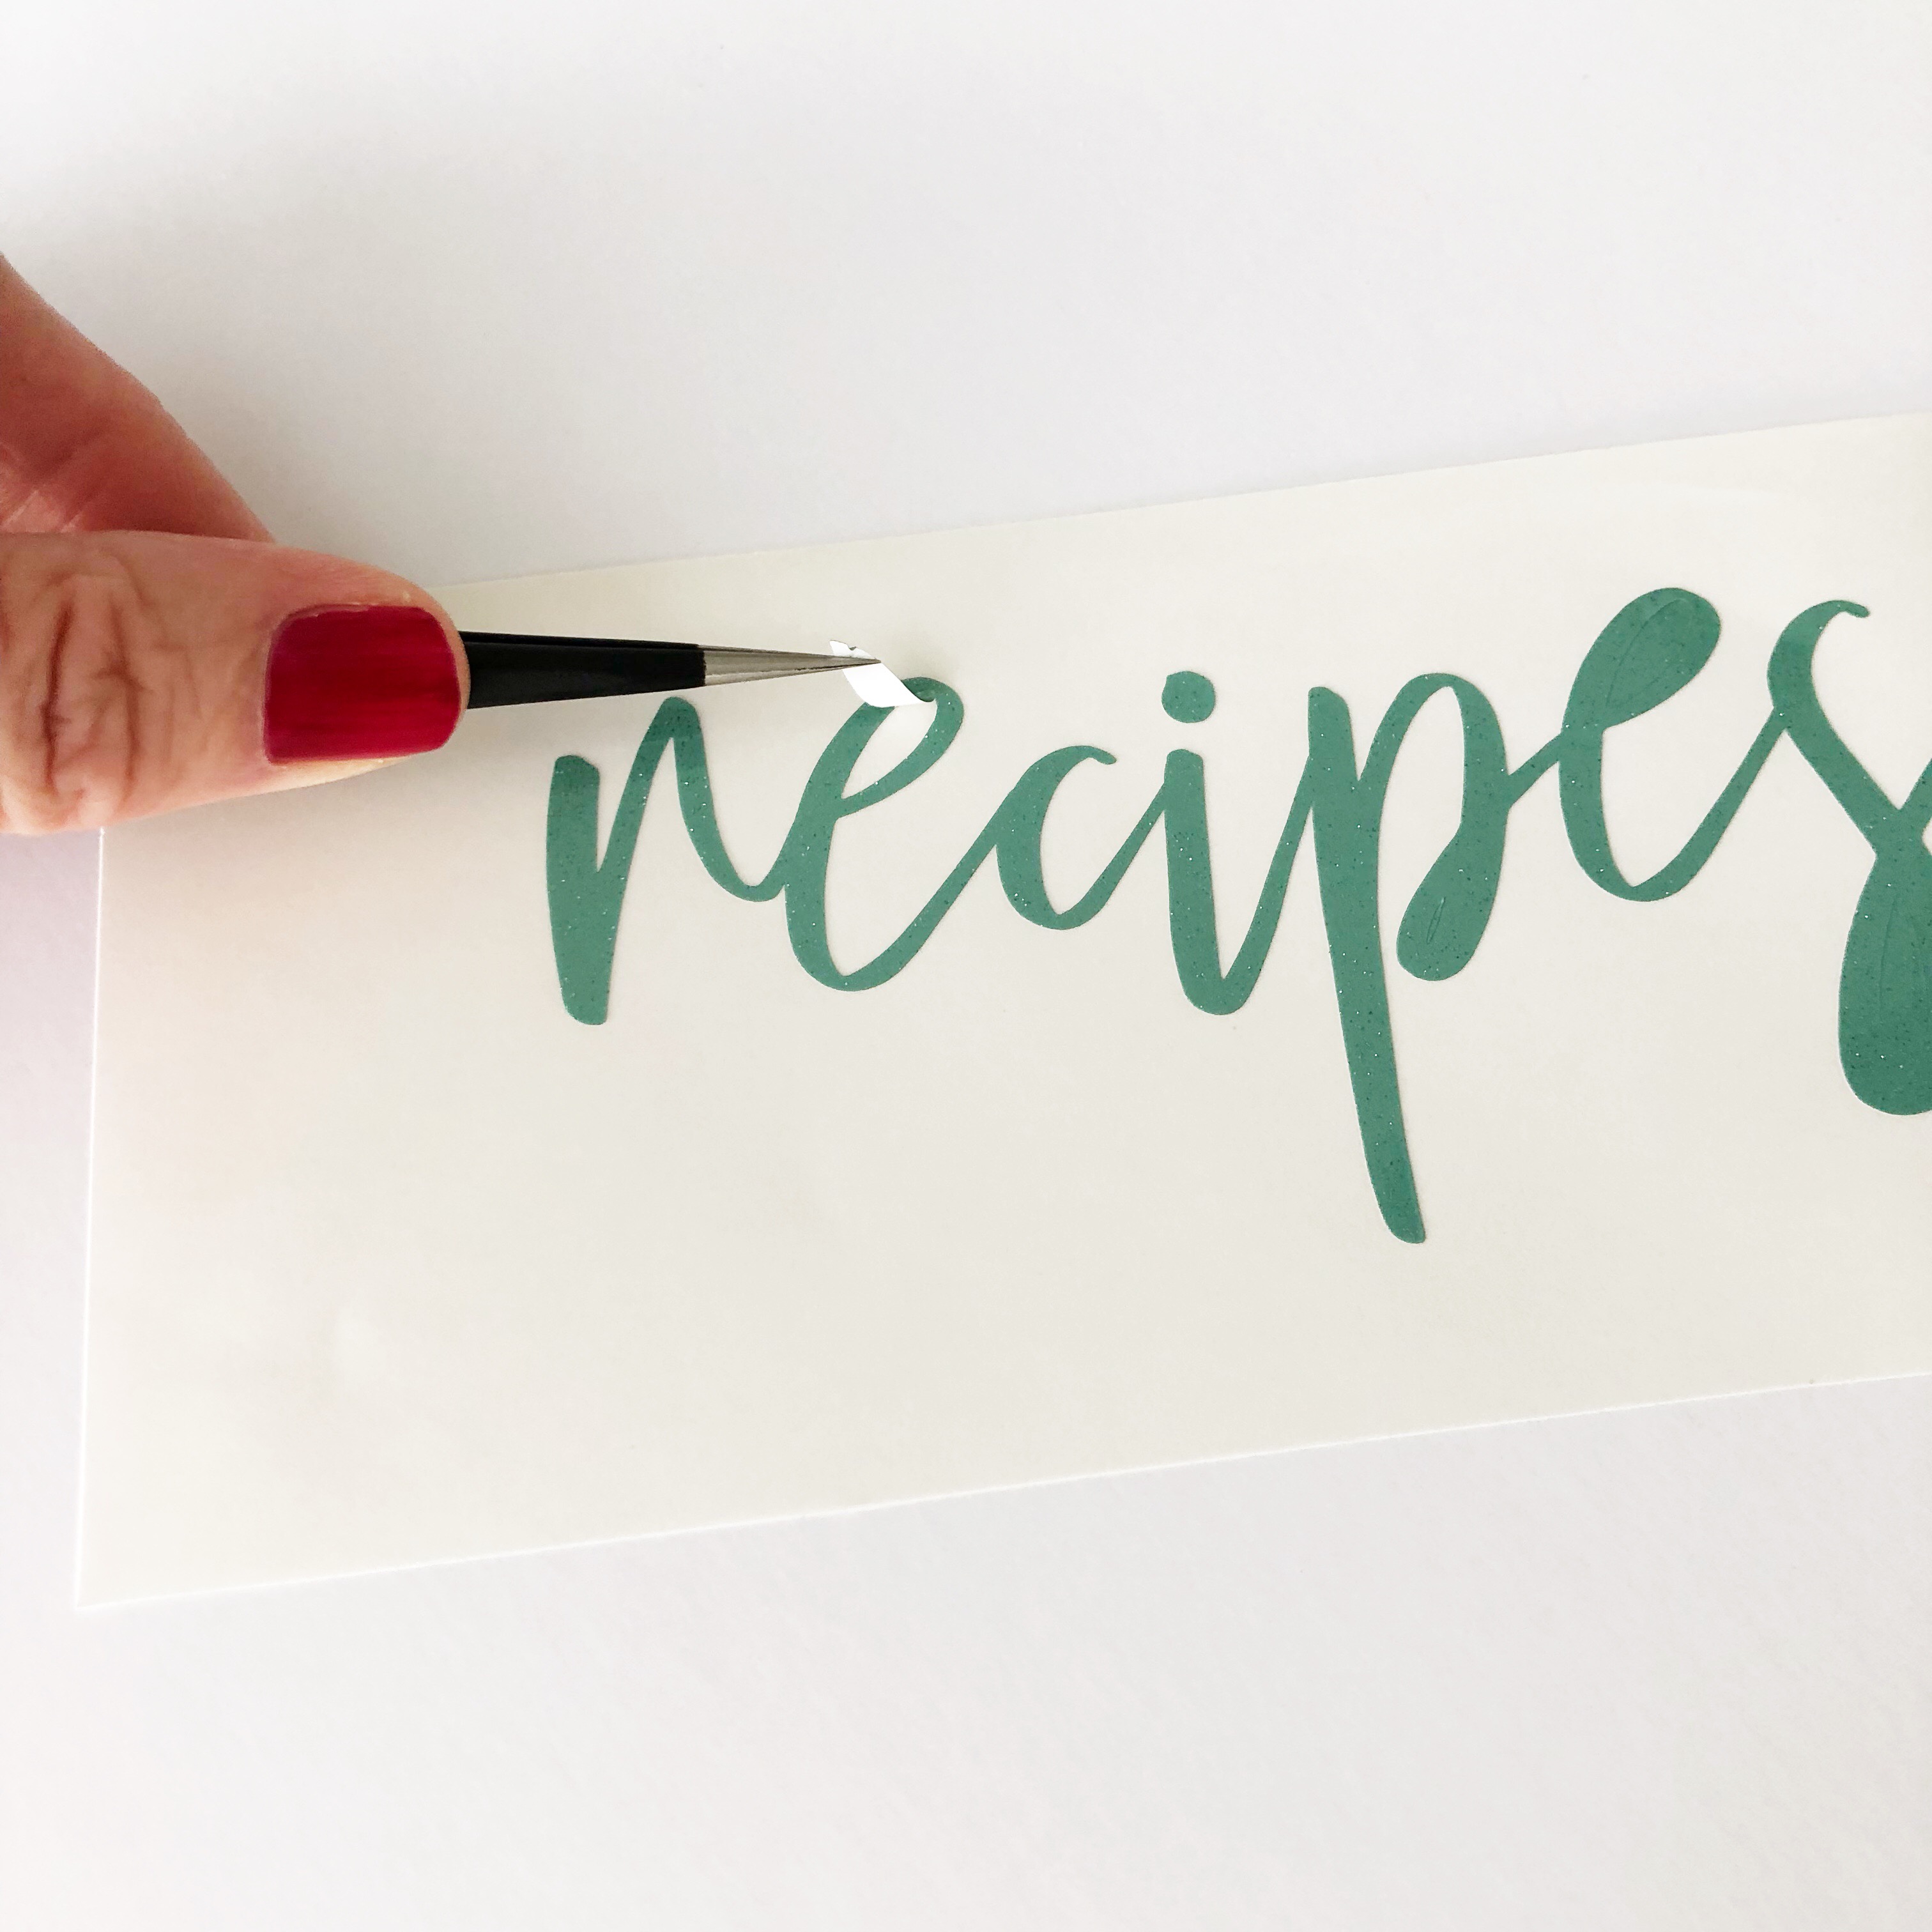
Continue until both parts of the label have been weeded.
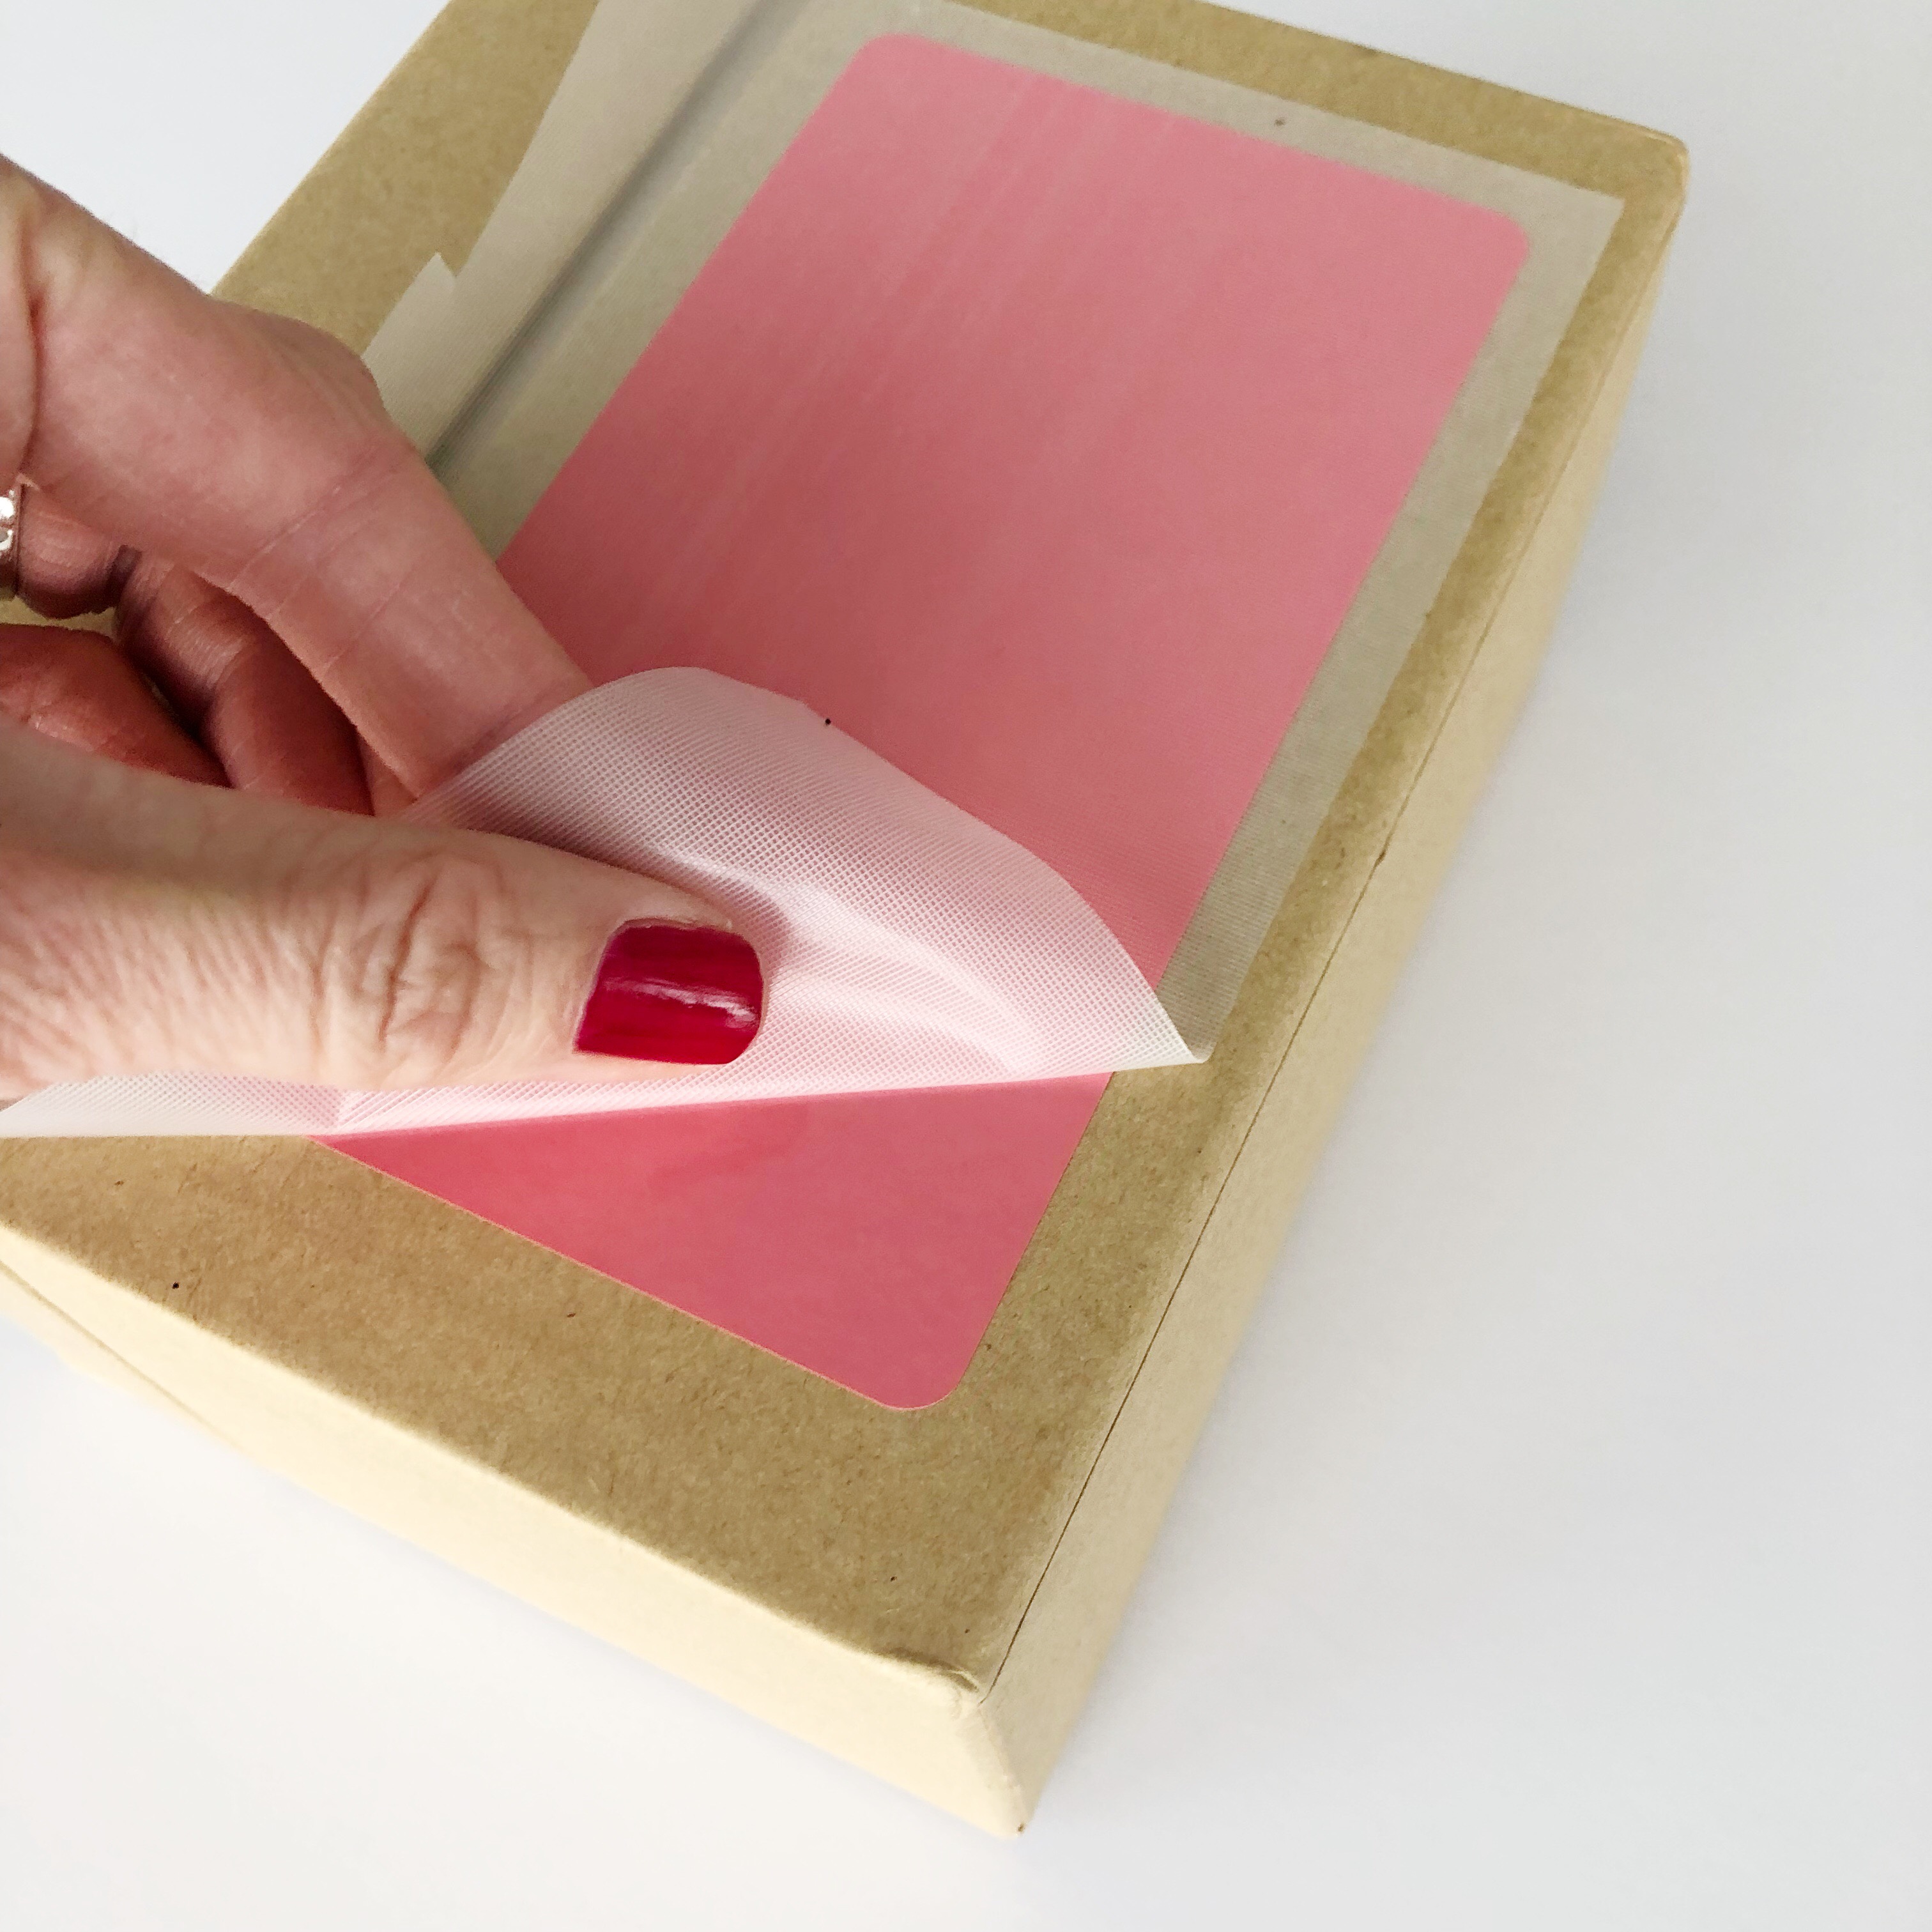
Step Four: Adhere label onto recipe box
Now that our label is ready to go, it's time to stick it on our recipe box! Place some transfer tape over each design.
![]()
![]()
Peel off the backing of the first pink layer and stick it onto the box. Carefully rub it on and peel off the transfer tape.

Do the same for the glitter layer. Peel off the backing to expose the adhesive side of the vinyl.

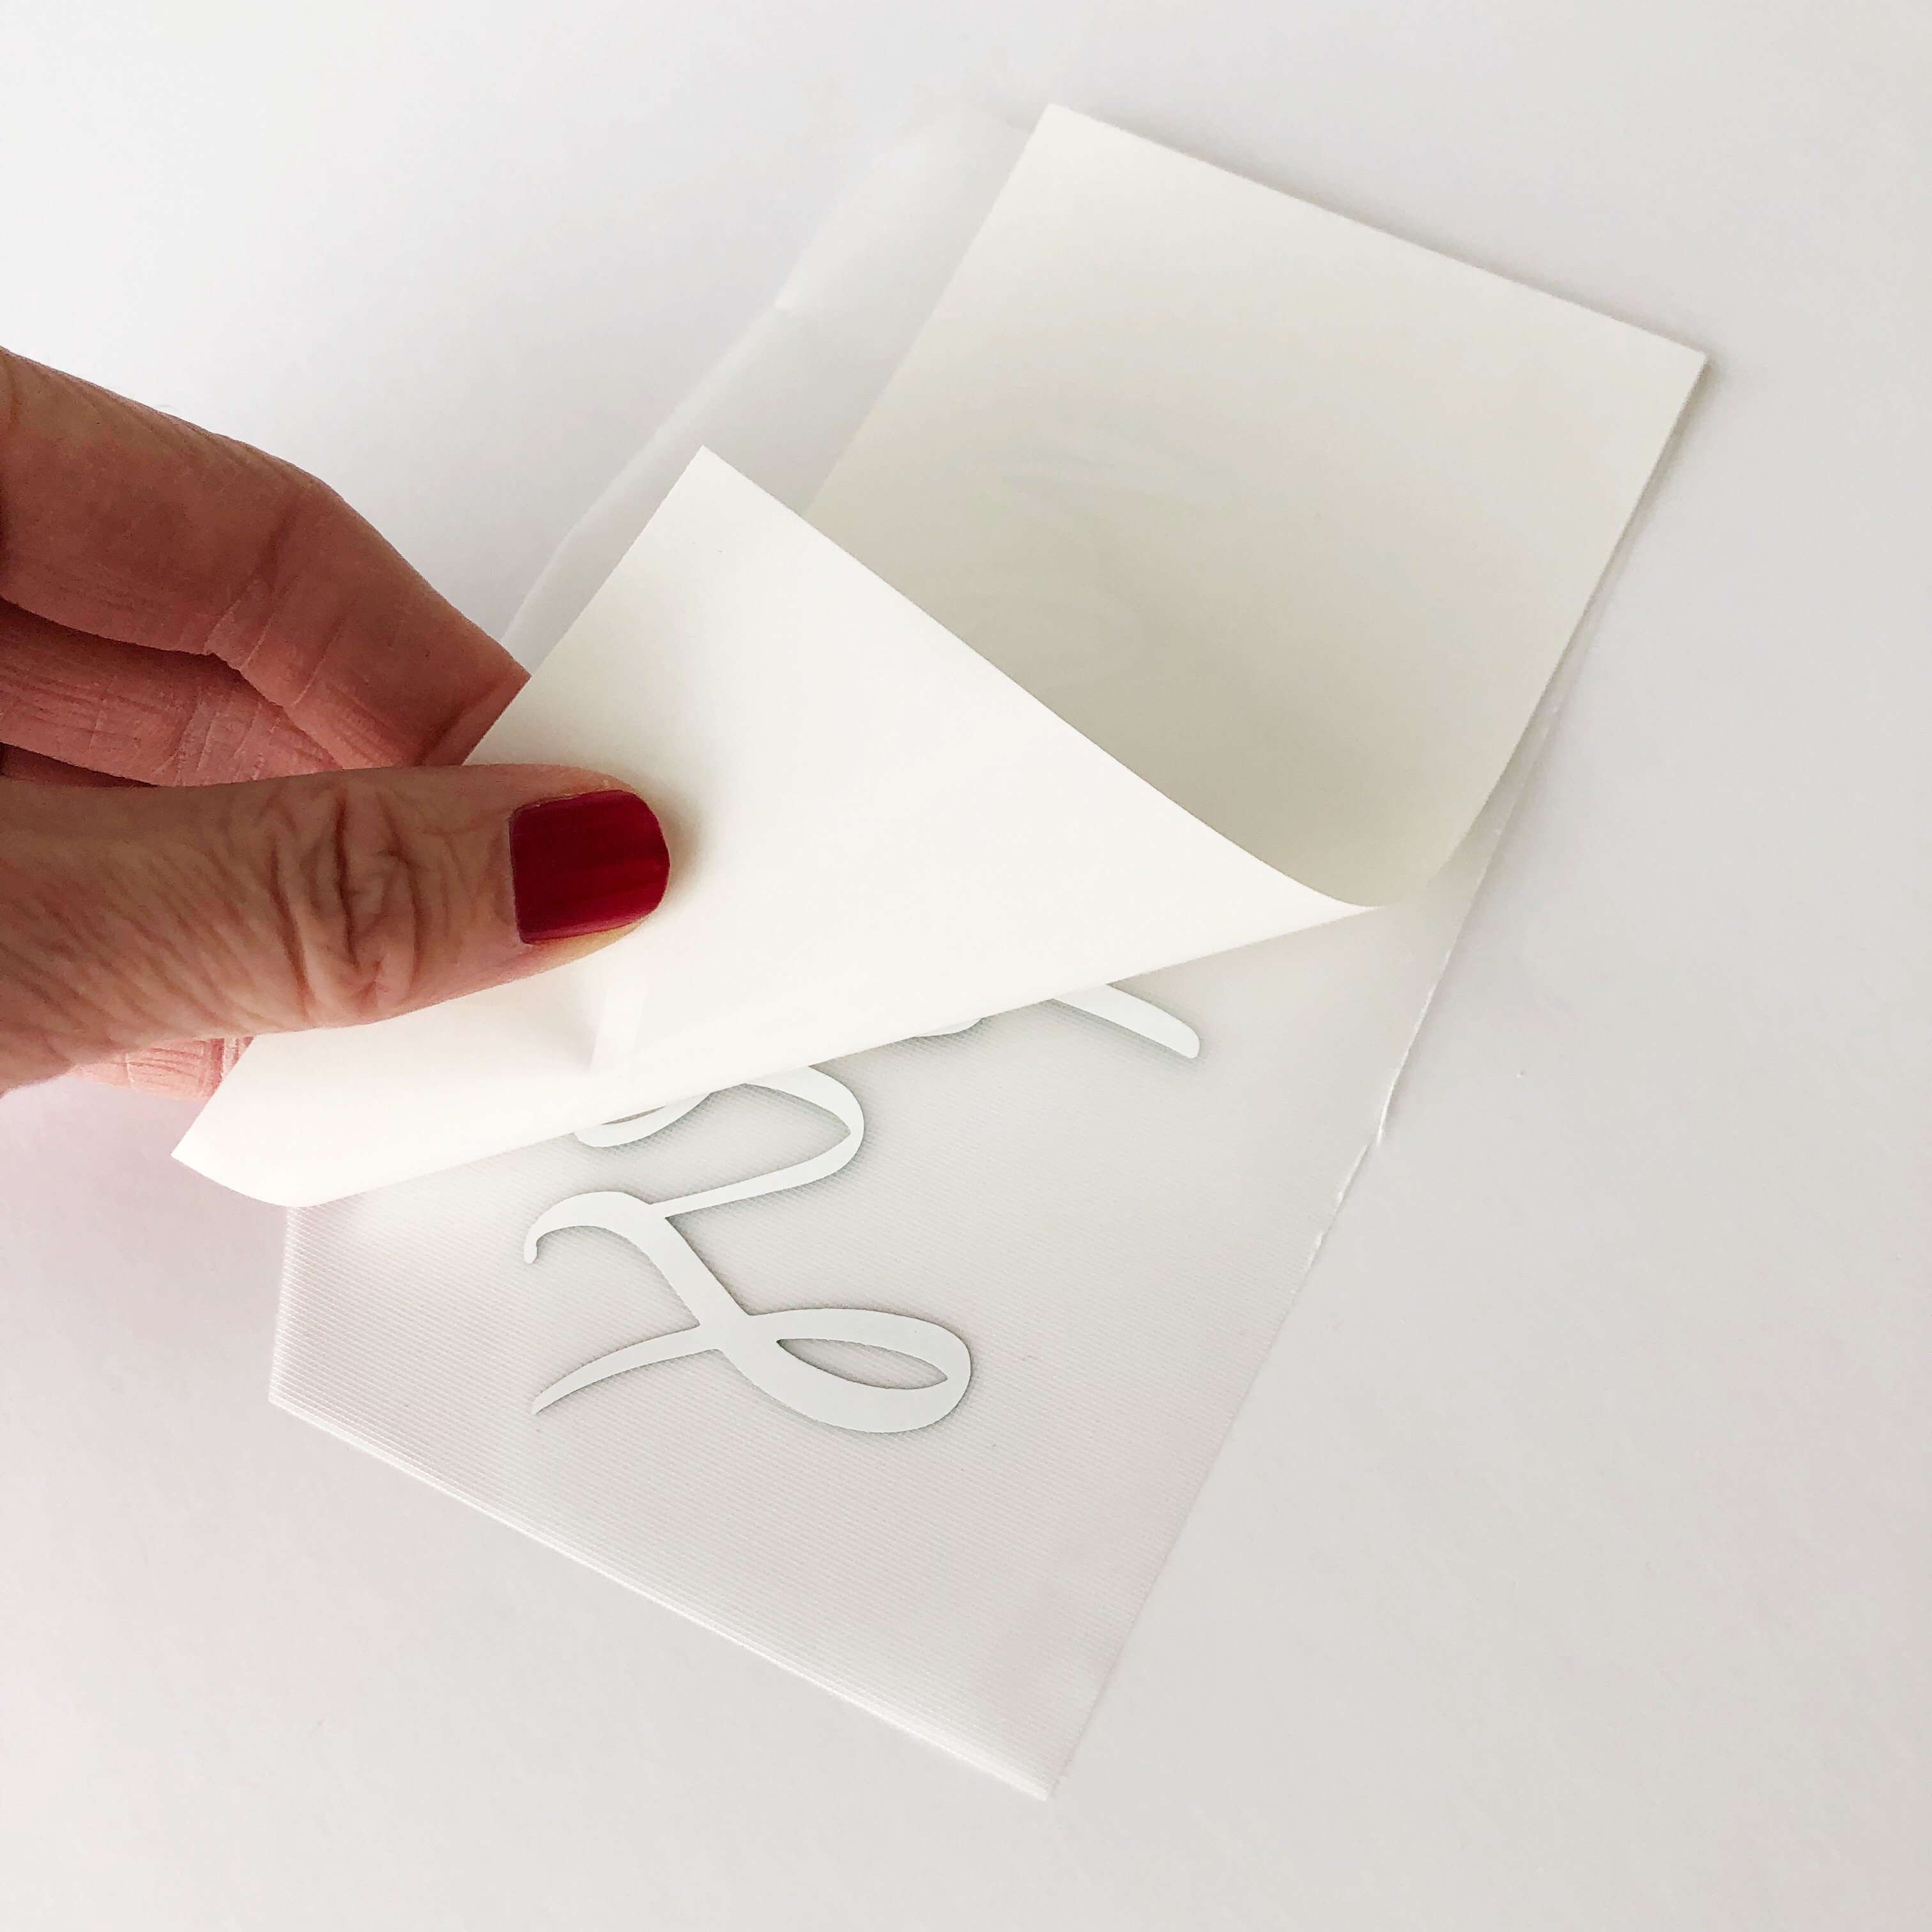
Place the text in the center of the coral border, and use a scraper tool to smooth it on. Then peel off the transfer tape slowly for the second layer.
![]()
![]()
Check out how pretty that teal glitter is! All the heart eyes over here!

And now we have our customized recipe box that "just so happens" to match my kitchen mixer. (Coincidence? Nope!)
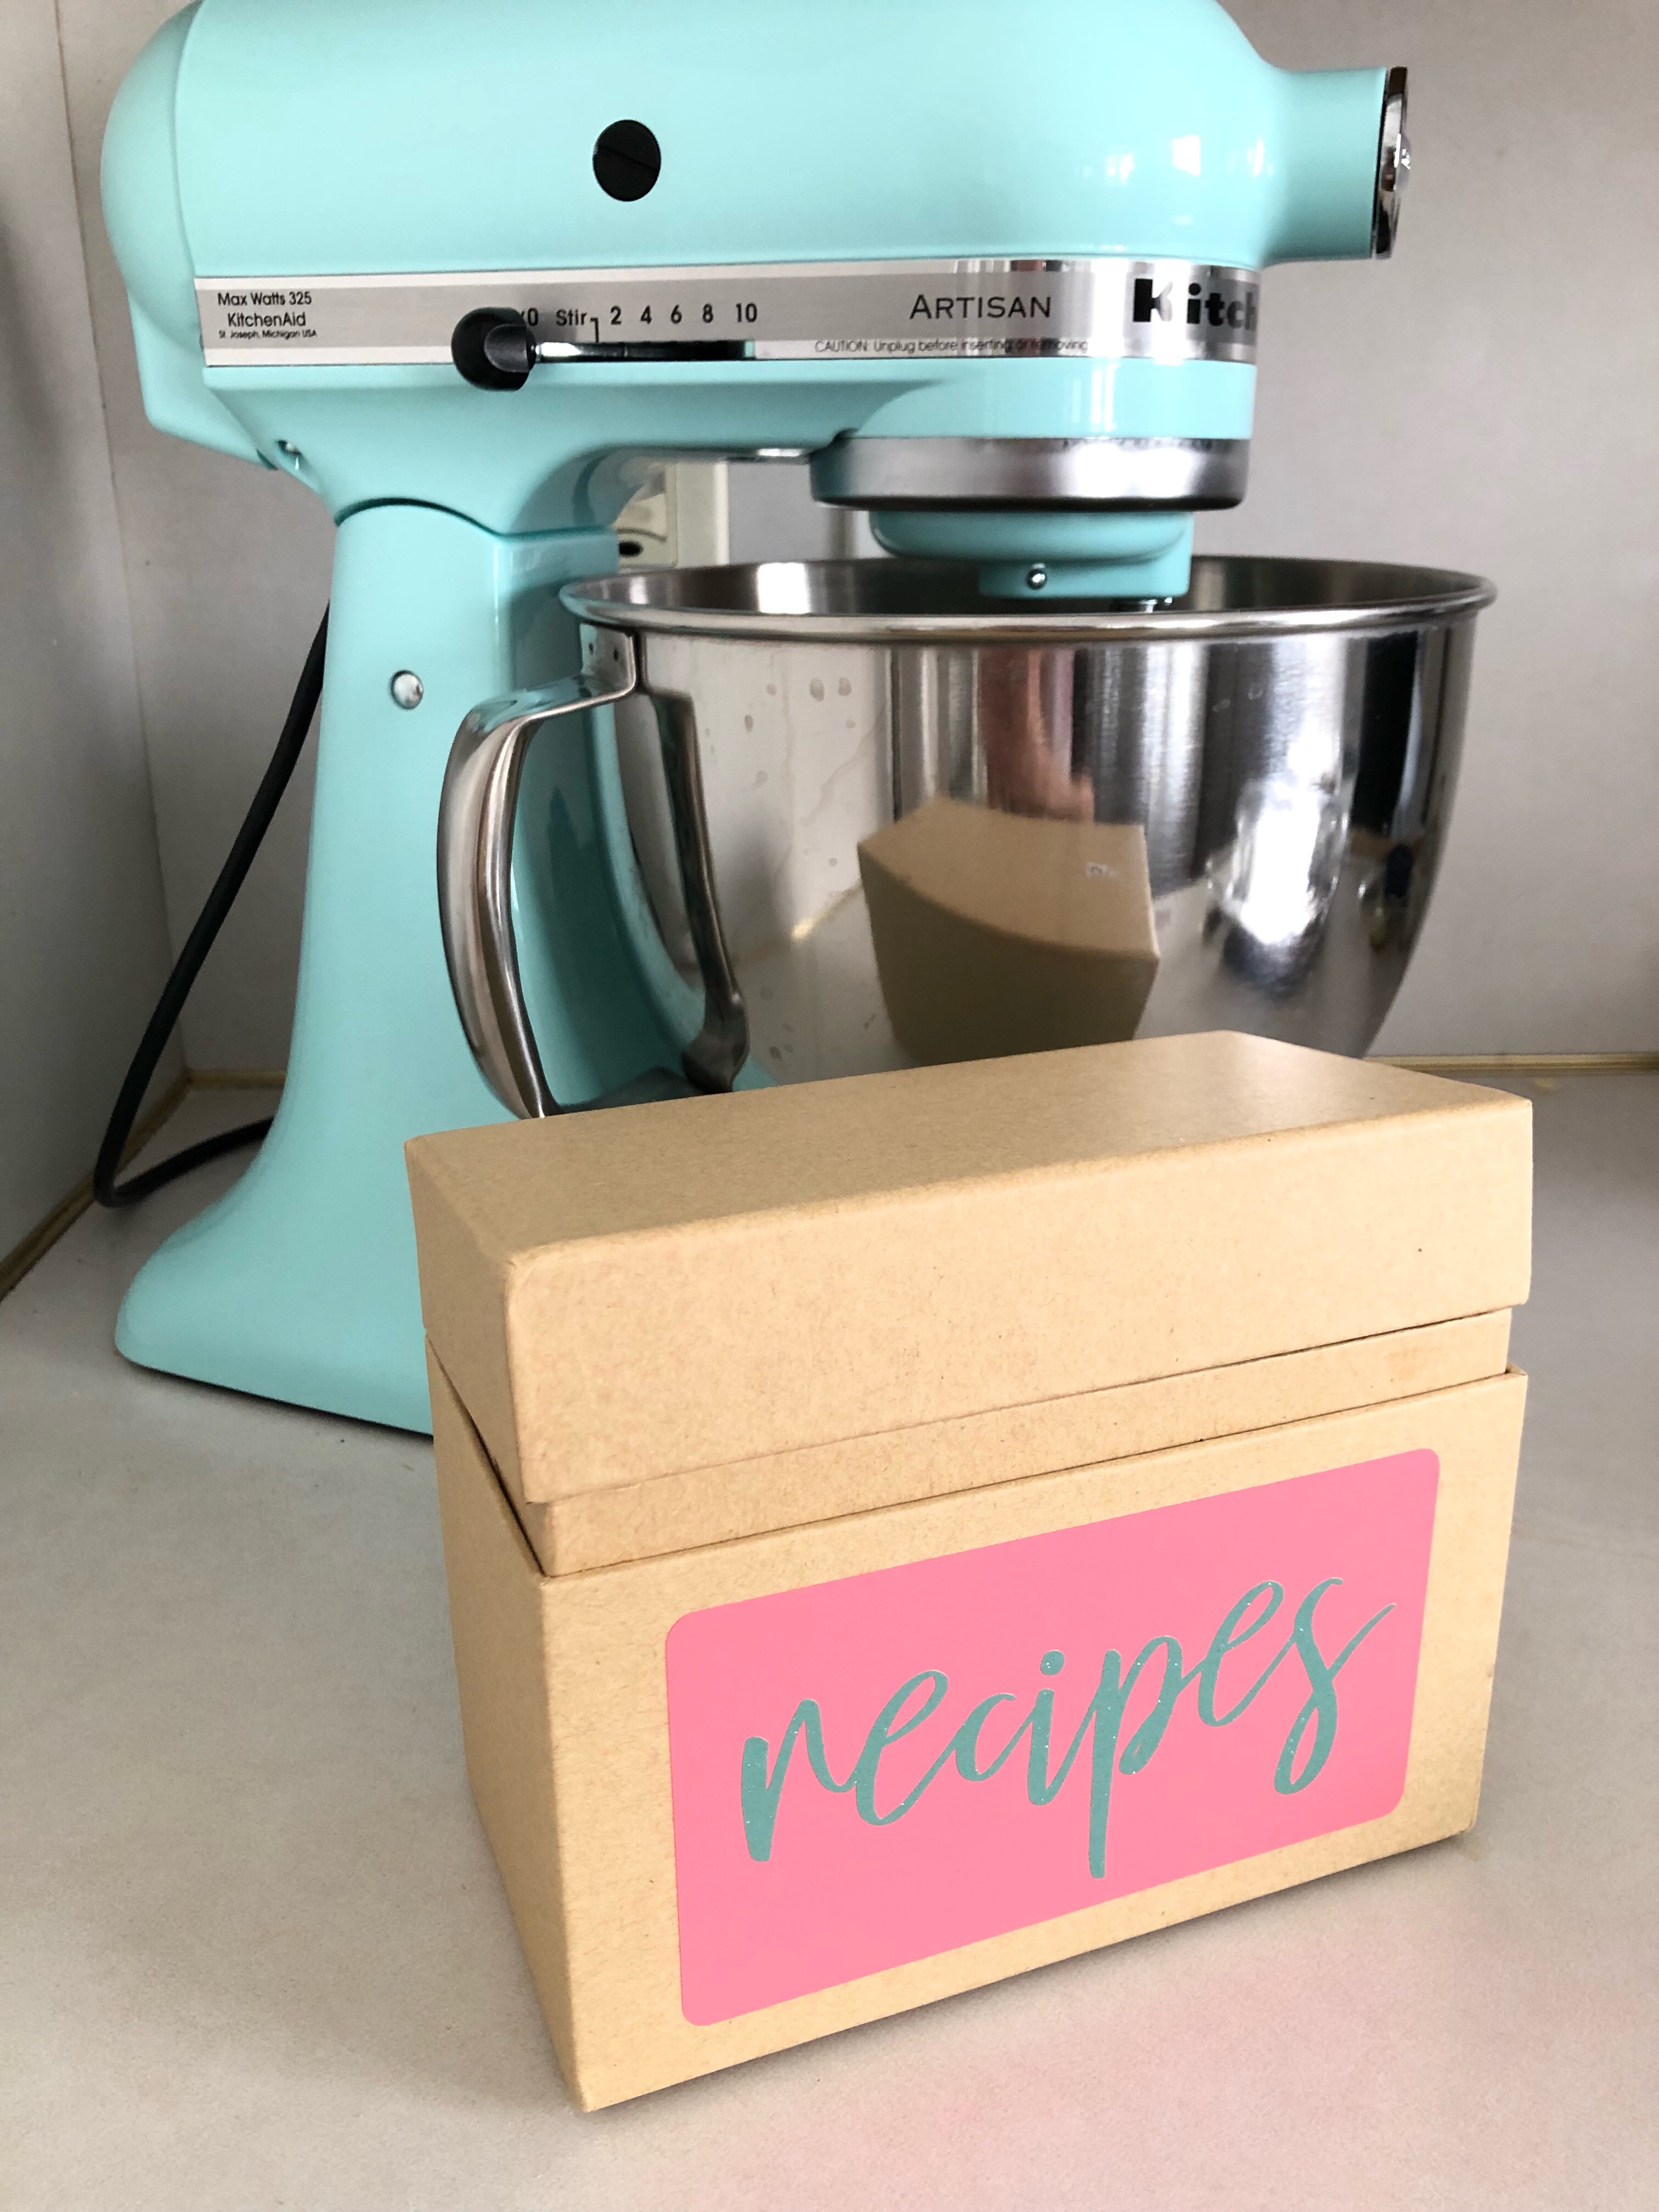
With adhesive vinyl, you can truly customize anything your heart desires! Happy crafting friends!
Recent Posts
-
NEW Holographic Eclipse Heat Transfer Vinyl
April 15th, 2024 3 Ways to Use the New Holographic Eclipse Heat Transfer Vinyl from Siser …Apr 29th 2024 -
Hop into Spring with Cute Easter Vinyl Crafts
Do you love our Vinyl? Sign up for Vinyl Club today to get FREE vinyl and save big! …Mar 28th 2024 -

Fixing Wrinkles and Bubbles in Vinyl
How do you get air bubbles out of vinyl? There are a few different ways to ensure a flawless …Mar 26th 2024