
Silhouette Upgrades Designer Edition Part 1
Silhouette Upgrades Designer Edition
Hey Everyone, its Starla with ExpressionsVinyl.com. Todays blog is all about upgrades that Silhouette offers. Not to be mistaken with the Free Software Updates.
I am going to show you the fun features that you will get when you decided to upgrade from the Silhouettes Basic free program to the Designer Edition or Designer Edition Plus.
This turned out to be a very large blog, so we will break it down into 3 parts. This is Part 1.
Lets Start off with Installing the Upgrades, its very simple.
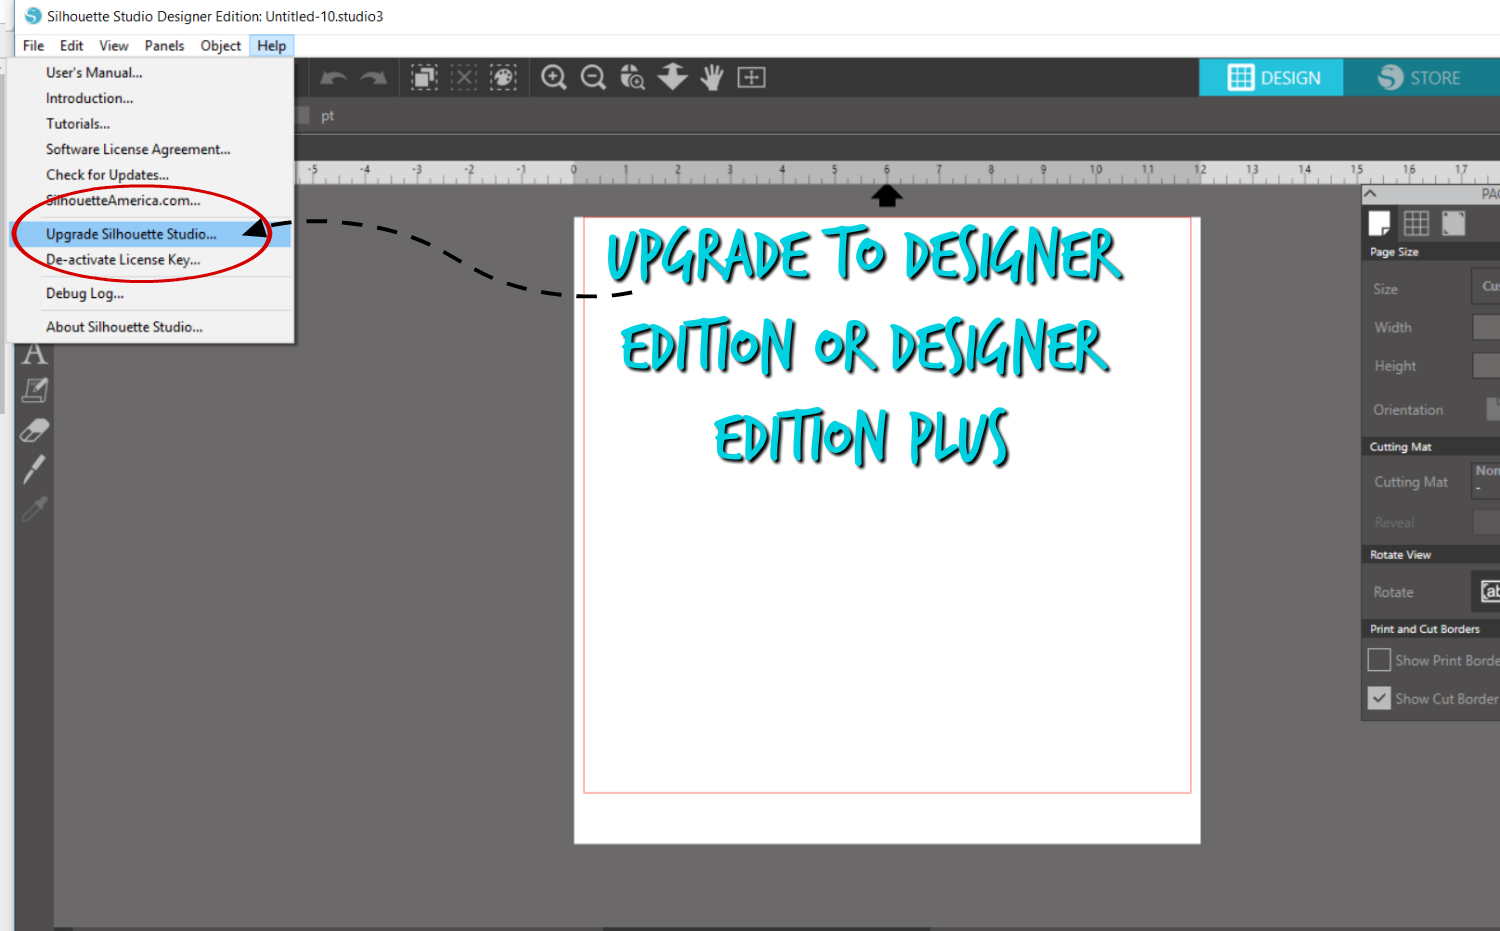
After you have purchased your desired upgrade all you will need to do is open up your current Silhouette Program and in the upper left-hand corner under the Help category and you will select the Upgrade Silhouette Studio
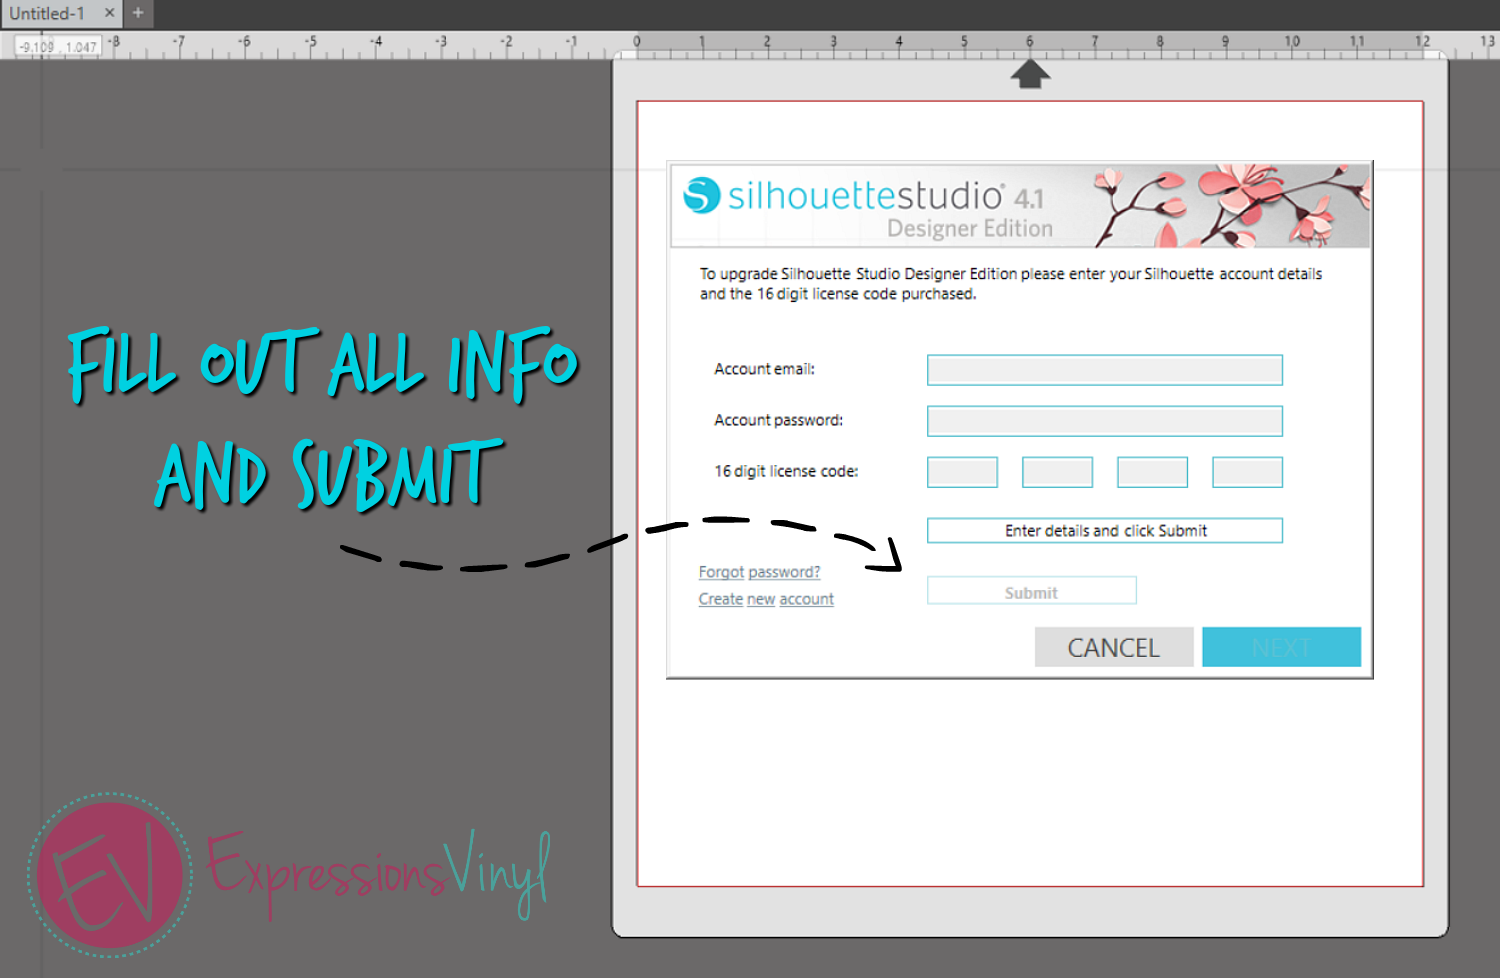
Next you will enter in the 16 digit code that you received via email or card into the boxes shown.
TIP~ Your code for the Designer Edition should start with a SSDE( Silhouette Studio Designer Edtion)
The upgrade will rightaway be applied.
NOTE: If you have had to wipe your computer or completely start over with your program and you have had this edition before, the code will always be under your account info under the STORE option.
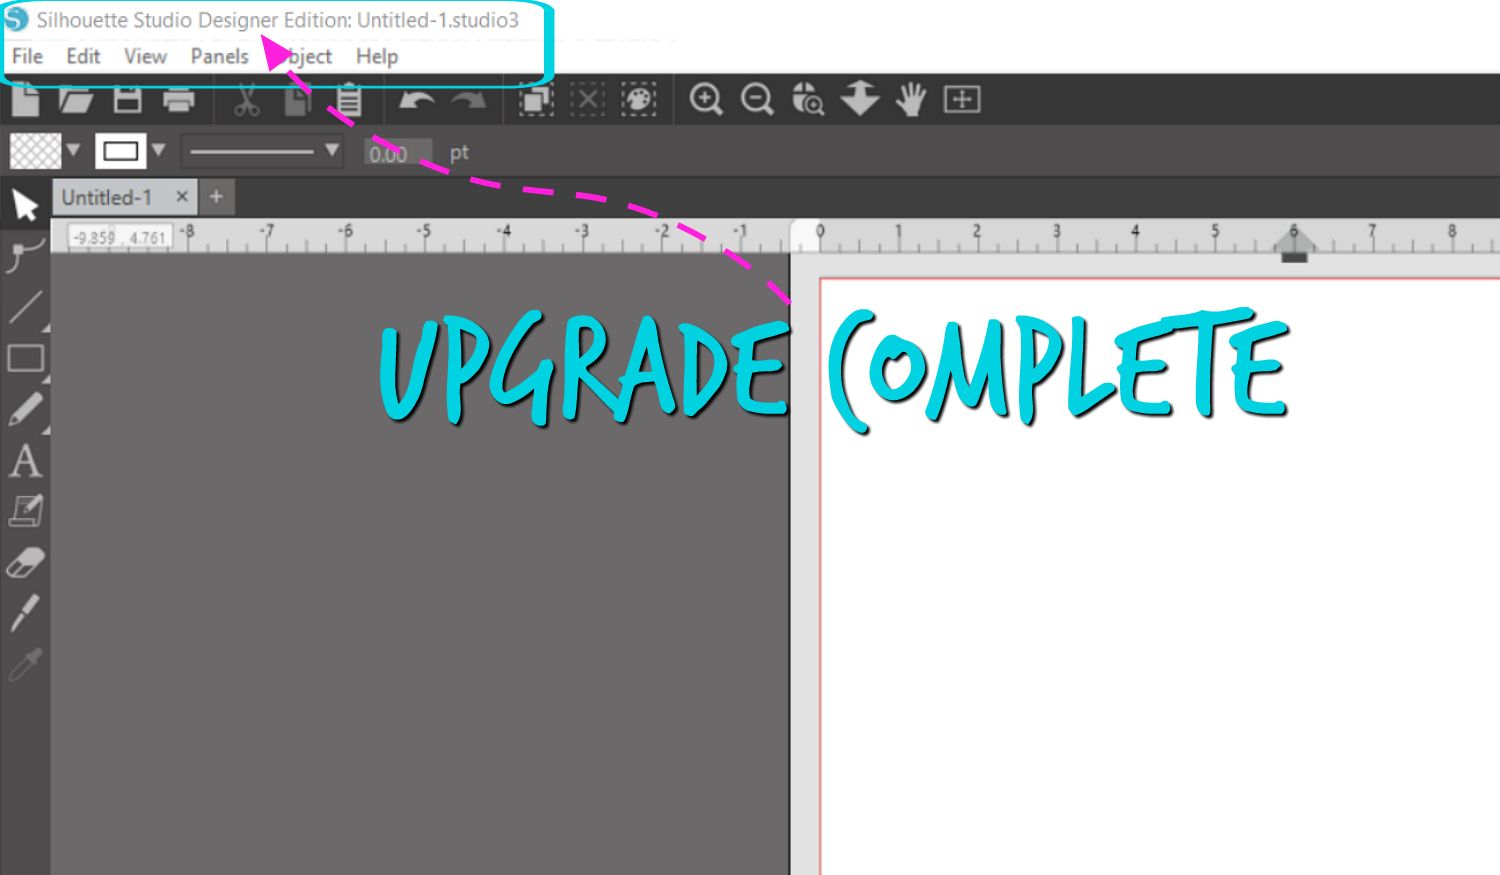
The upgrade should show at the top of the screen. Welcome to Designer Edition!
There are quite a few new features in this upgrade from the Basic to the Designer Edition. Such as,
PART1:
PART 2:
PART 3:
- Trace by Color/Magnet Trace
- Rhinestone Conversion
- Glyph Support/Font Managment
- Basic Warp
- Pop-Up Creator (Advanced)
I am going to pin point each of these and why they are so neat to have in your program, we will break it into parts, lets start with the first Part 1:
~ Importing SVG and PDF Files:
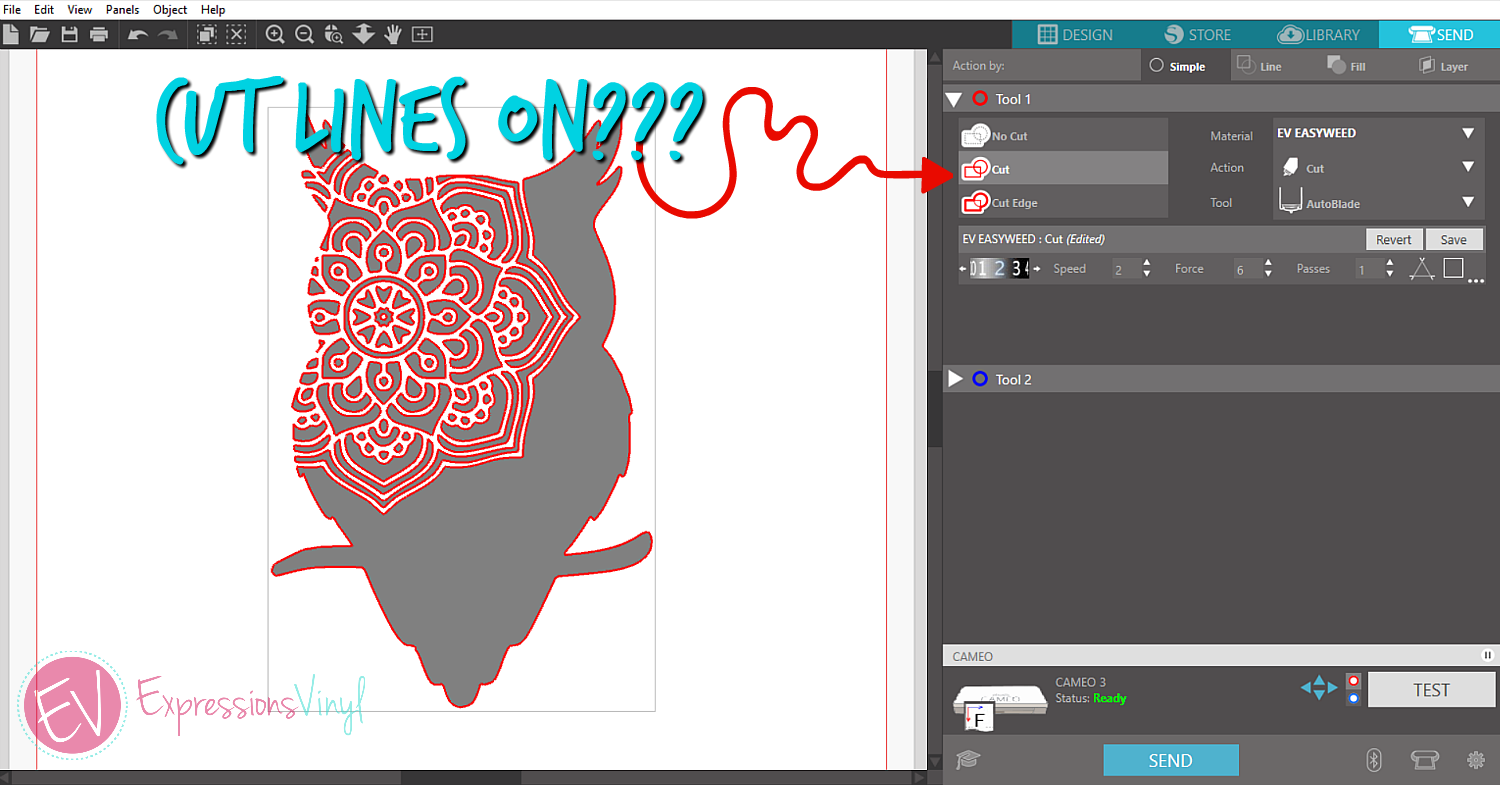
This one is huge, it makes purchasing images so easy. I do not have to anything to the image except perhaps turn the cut lines on in the SEND icon if they are not already active.
Simply download the SVG in to a folder of your choice ( some files may need extracted, I just create a seperate on for all SVG), in Silhouette Stuidio, under File select open and locate the correct file, then drag it onto your work space.
You can even drag it into your library if you wish.
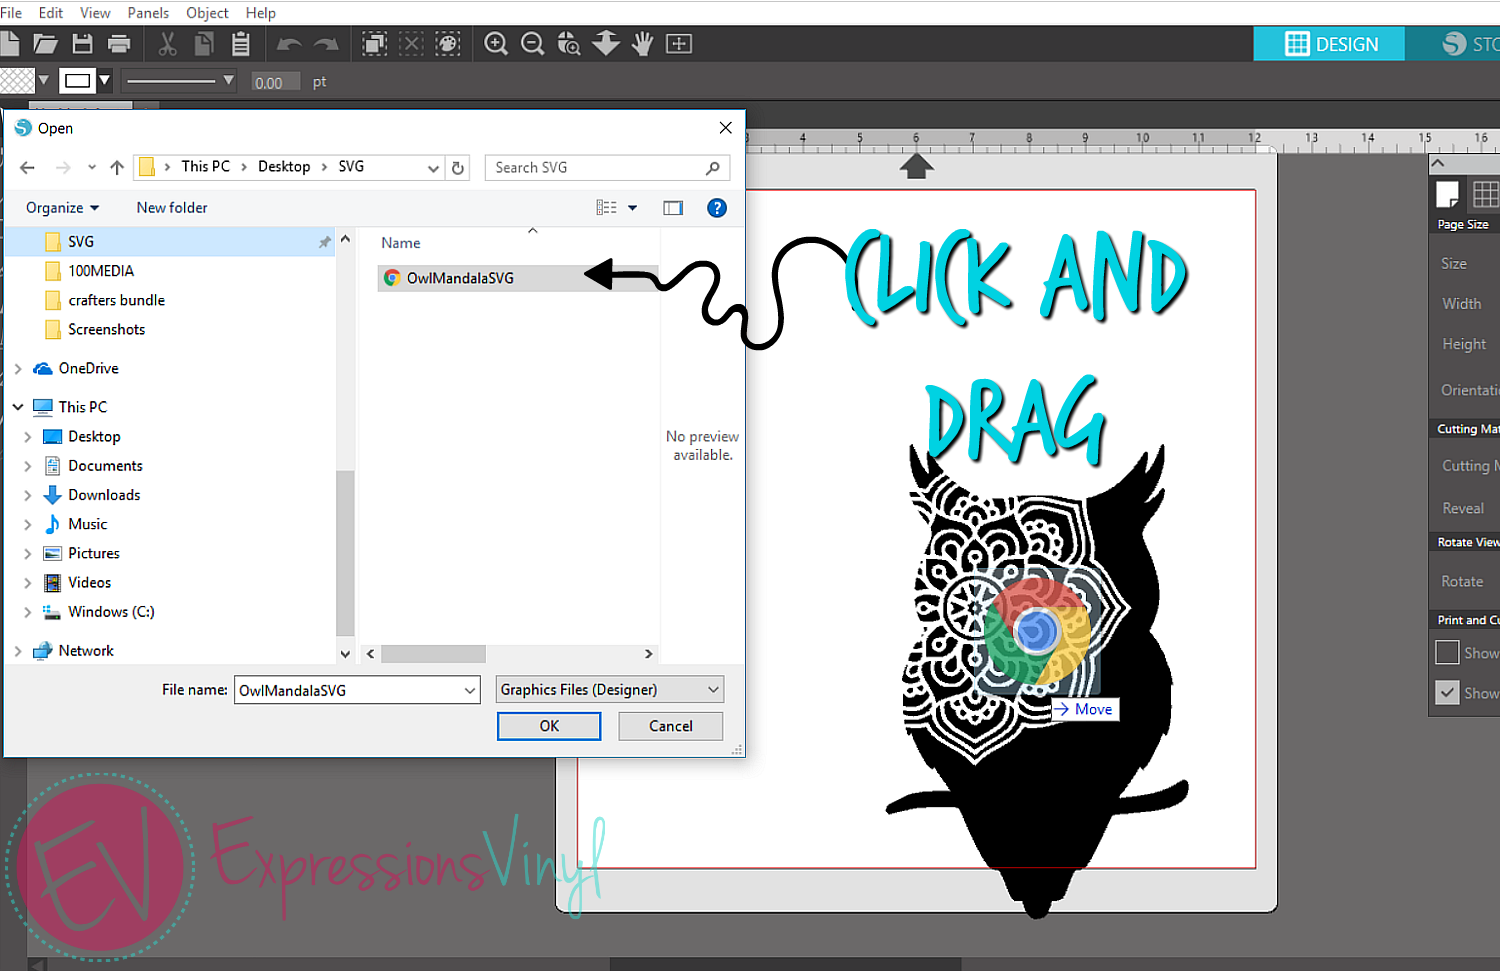
(Image: OWL Mandala) By WispyWillowDesignsCo
Your line thickness may be higher than normal, you dont need to to be higher than 0.00 to cut the file.
Edit your image however it needs to be sized or stretched and then once it is ready to be cut you are all set to go, just make sure those cut lines are on. If they are you are set to SEND.
let try a pdf, you can import them as Vectors or images. Vector will be useful for cutlines whereas an Image is great for Print N Cuts. If the file has multiple pages select the page you wish to import.
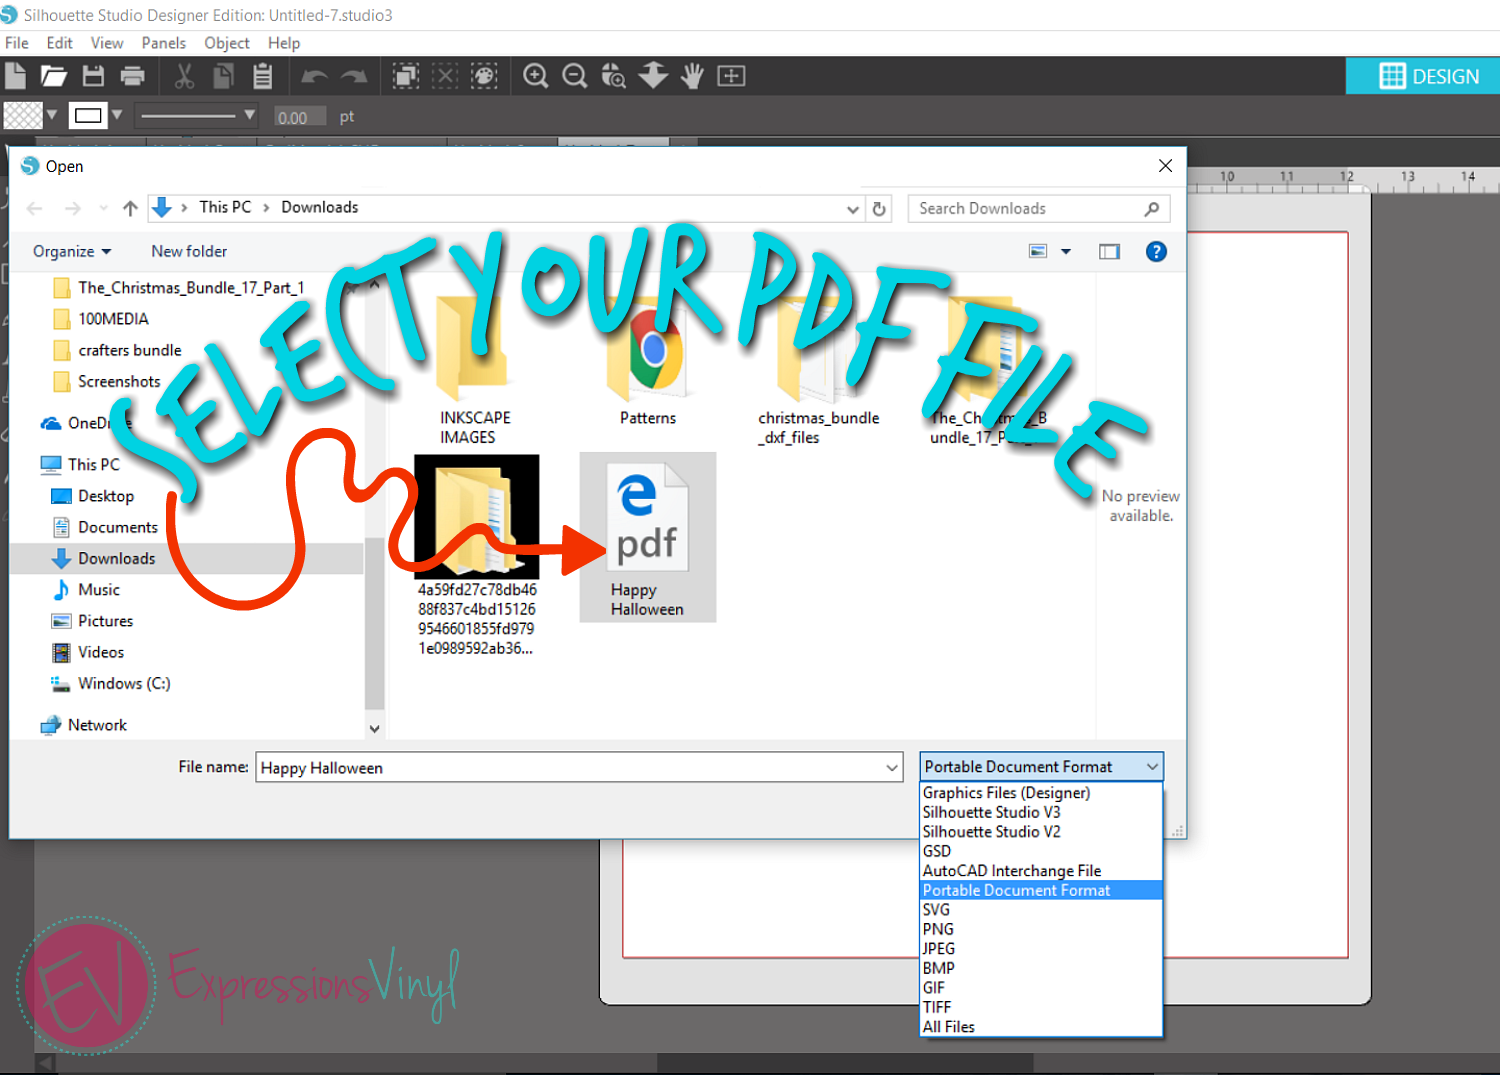

(PDF File: Happy Halloween Quilt File)~ By Amy Bradley
Then same thing as the SVG format, send to cut and check to make sure cut lines are active, if doing a print and cut, check the cut edge setting.
~Layers(Including cut by layer)
Cutting by layers makes it easy to name and categorize you colors prior to cutting, here I have categorized each color in its own category and listed those images in that color. It also is nice to have for a reminder of the color material name.
This come in handy so you do not have to move or adjust on the work place after everything is in place.
You can hide or lock each color so they do not move once set up.
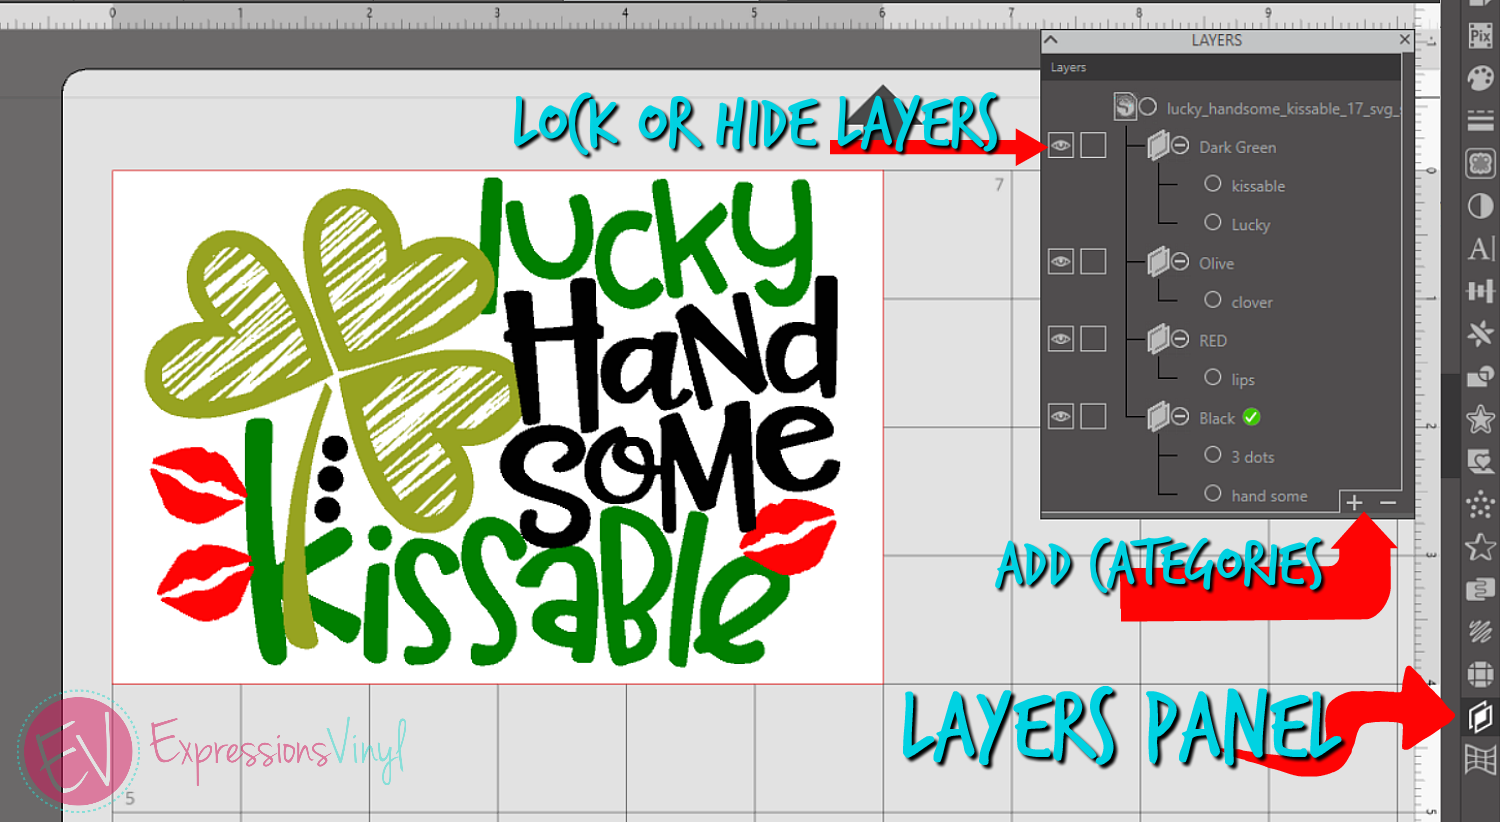
(Image: Lucky Handsome Kissable)~ By SoCuteAppliques
When it comes to cutting your layers, make sure that the Layers action is selected, this will show the designated colors you previously set up.
There are two options for cutting, you can either select the color to cut one at a time...
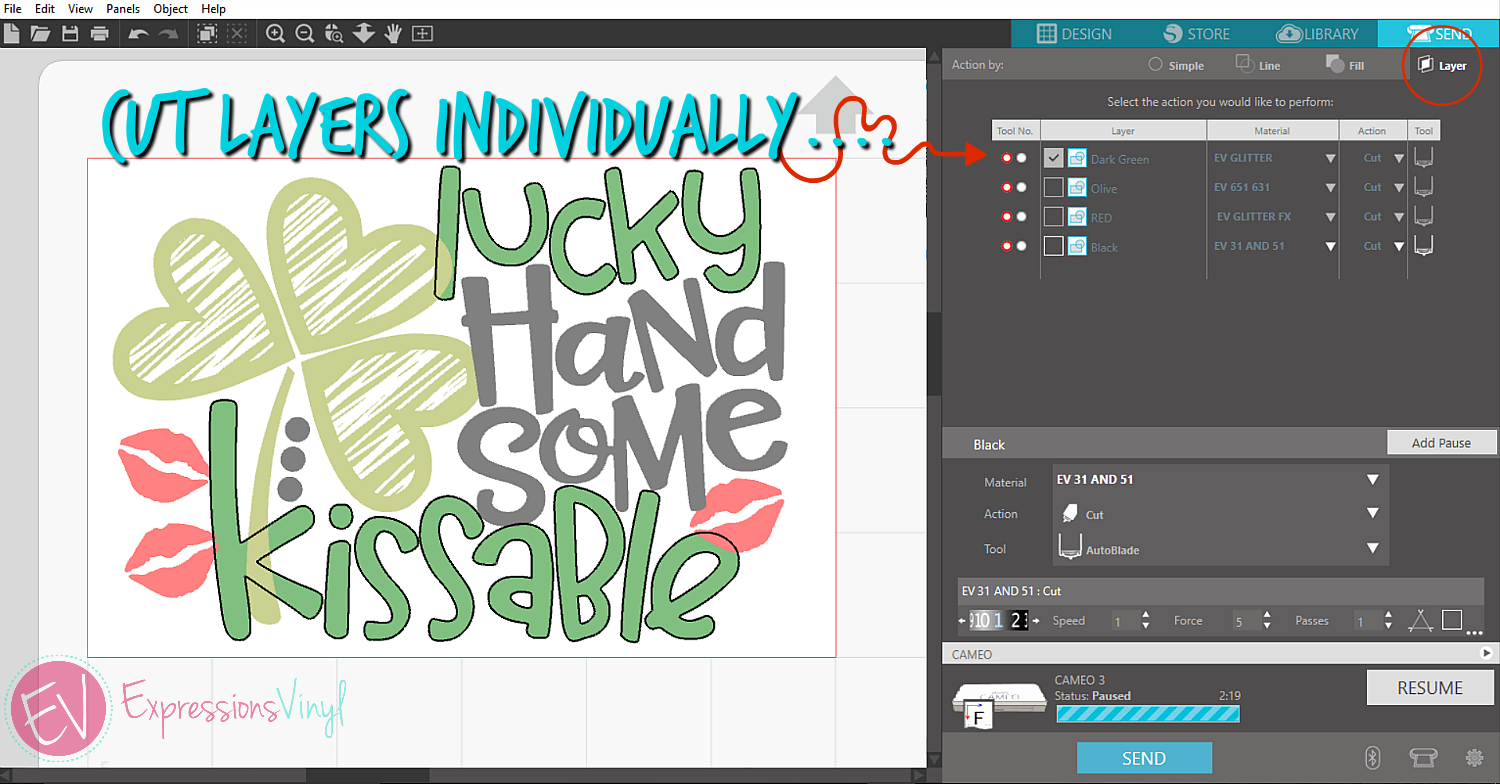
....or you can check them all and have the cut pause in between for you to unload and change out the color. Add pauses by selecting the color and Add pause.
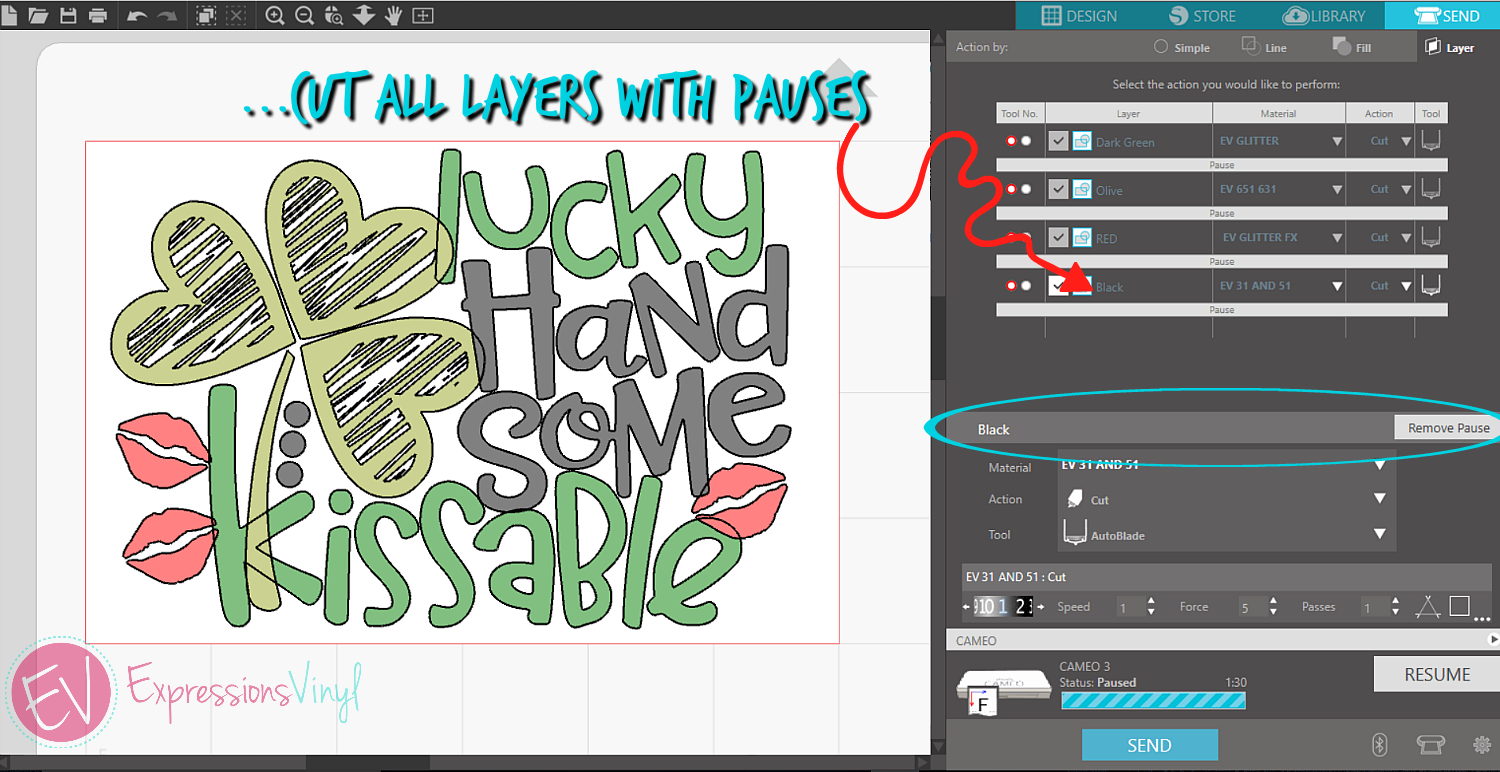
You will have to RESUME the cut, in between layers, this makes for quick material change.
NOTE: You can adust all the different types of material and blades in here as well before the cuts are a go.
~Rulers and Guides
Once you try these Rules and Guides you will be lost without them if you ever are on another program that does not include these. These work for precision measuring and placement.
Page Set Up Icon will show all these settings adjustments, you will still have your Grids and Snap to Grid, but now you show Guides and Snap to Guides.
The guides are bull down lines from your Rulese that images can snap onto making things very easy to line up.
While the crosshairs make squaring things off very simple like creating a weeding box.

You will gradually find out just how handy these crosshairs and guides will come into play when designing your projects.
~Nesting:
This feature comes in handy if you are wanting to get as much out of your cut surface for as many images as you can.
You can nest images either to the cut area or any shapes for you boundaries.
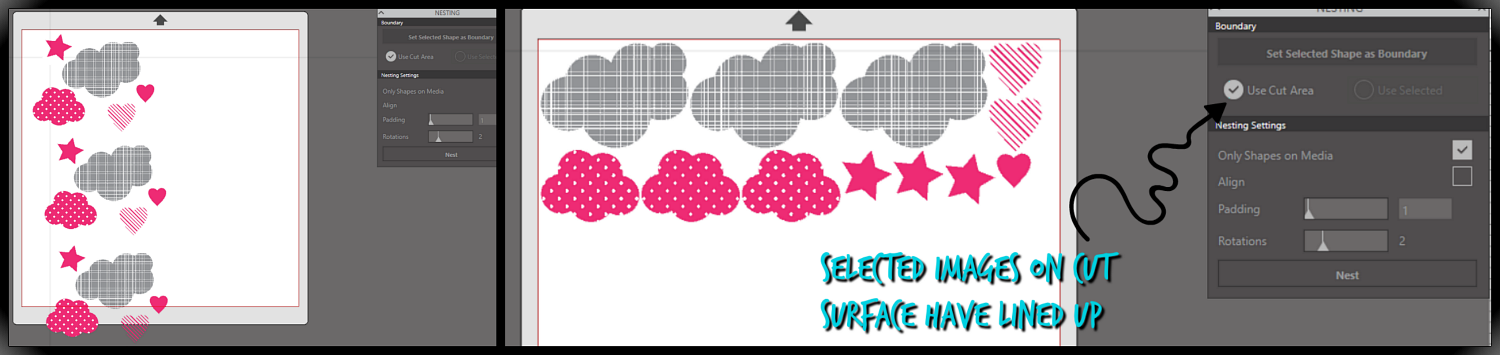
(Image:Clouds, Hearts and Stars) ~ By Echo Park
Only images on your mat will next if the box for the setting is checked. If it is not checked any other items outside the mat will also be toss onto the cutting area.
To cut images into a shape, simply select the Use Selected while the shape has been set as the boundary.
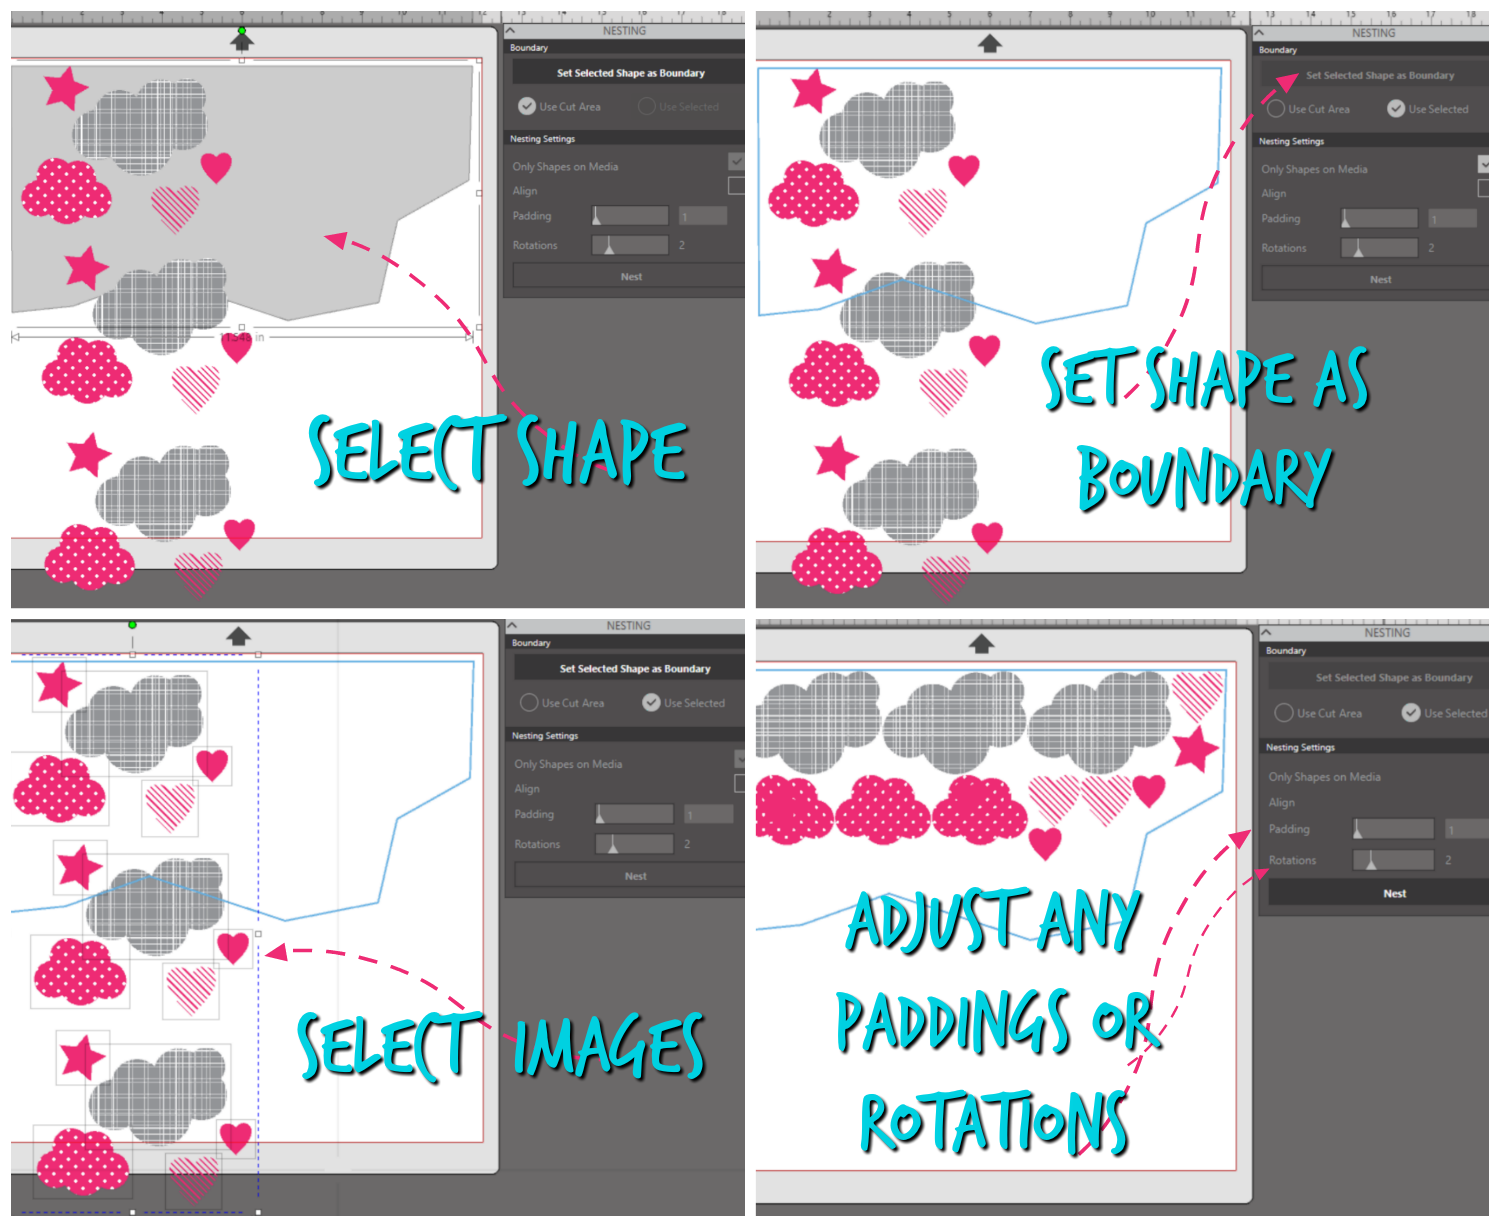
Padding is the space between your images while rotation is how many time the image will rotate to find the best position, sometimese it takes more rotations and sometimes less.
NOTE: The shape option will come in very handy when used with the PixScan Mat for any funny shapped materials.
~Shadow Feature:
The Shadow Feature will add a dropshadow to any Image or Text, it will be found under the image effects Icon.
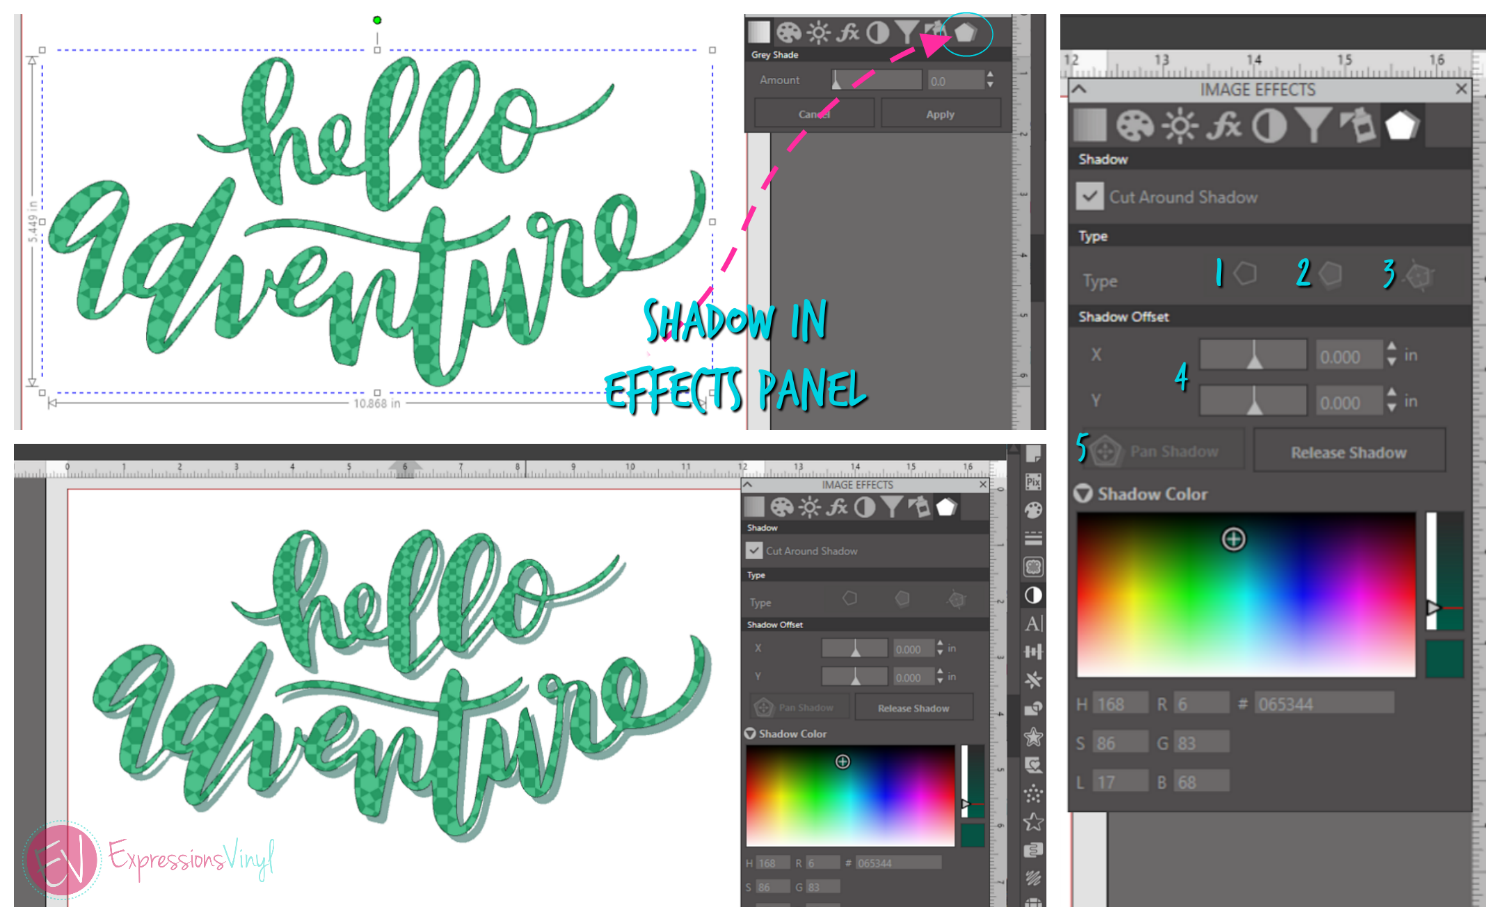
(Image: Hello Adventure) By: Jenny Highsmith
After you have applied the shadow to your image, you can do some adjustments to the shadow.
1: Plain image or undo if you do not like the outcome of the shadow
2: Dynamic, this means you can rotate you image with the shadow and it will keep in line with am imaginary light source so no matter which way you turn it they will allshow the same shadow.
3:Fixed Shadow will keep the shadow in its original place if rotated.
4:The X and Y asis will allow you do move the shadow up and down or from left to right.
5: Pan: Panning the image will allow you do move the shadow around freely.
You can also adjust the shadow color tint from a bright color to a grey scale color.
Note: You can also check the 'Cut Around Shadow" to make some fun images with a Print N Cut'
That was a quick rundown of Part 1 of 3 of the Designer Edition, if you need further guidance and would like to see videos on each topic in more depth you can do so my selecting the specific category near the top.

Recent Posts
-
NEW Holographic Eclipse Heat Transfer Vinyl
April 15th, 2024 3 Ways to Use the New Holographic Eclipse Heat Transfer Vinyl from Siser …Apr 29th 2024 -
Hop into Spring with Cute Easter Vinyl Crafts
Do you love our Vinyl? Sign up for Vinyl Club today to get FREE vinyl and save big! …Mar 28th 2024 -

Fixing Wrinkles and Bubbles in Vinyl
How do you get air bubbles out of vinyl? There are a few different ways to ensure a flawless …Mar 26th 2024