
How to Modify your Glitter HTV Project for Layering
So you want to layering Glitter Heat Transfer Vinyl, and have been told it won't work. Well that is true, but you can modify the images for a fake layered look. I will show you how.
First start off with your images:
- Sassy Lassy~By Sophie Gallo, (Silhouette ID: #185722)
- 5 Clover Shamrock Set~ By Lori Whitlock, (Silhouette ID:#75118)
Compile the images you wish to use and arrange them how you would like them to look in the final application to the shirt.
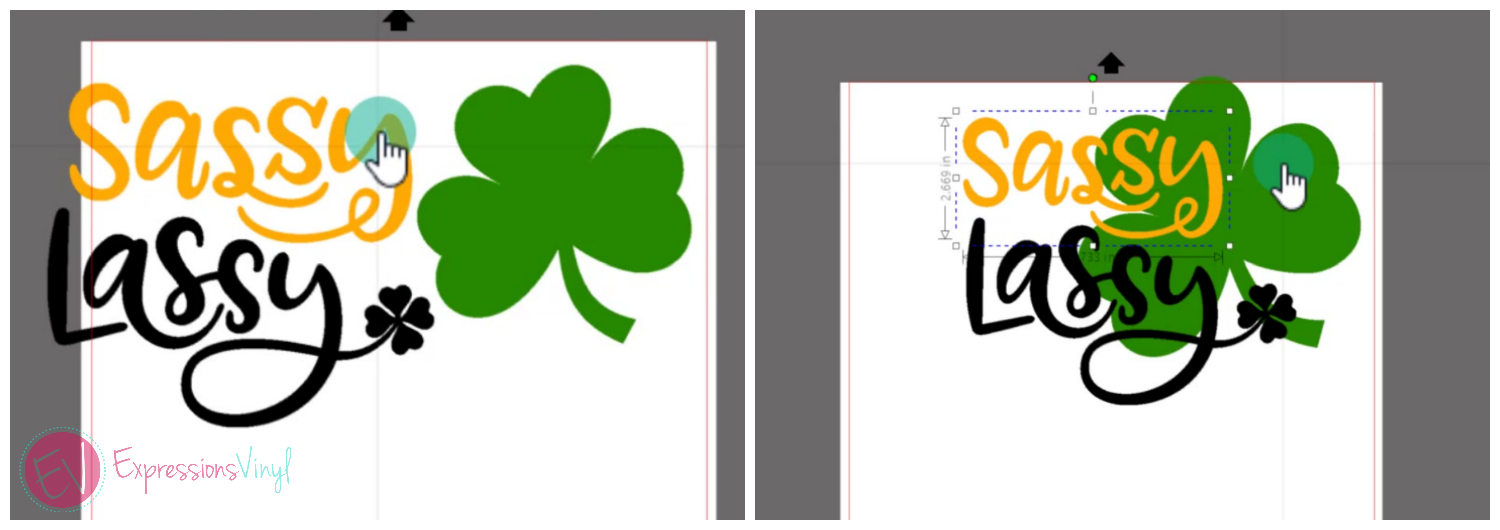
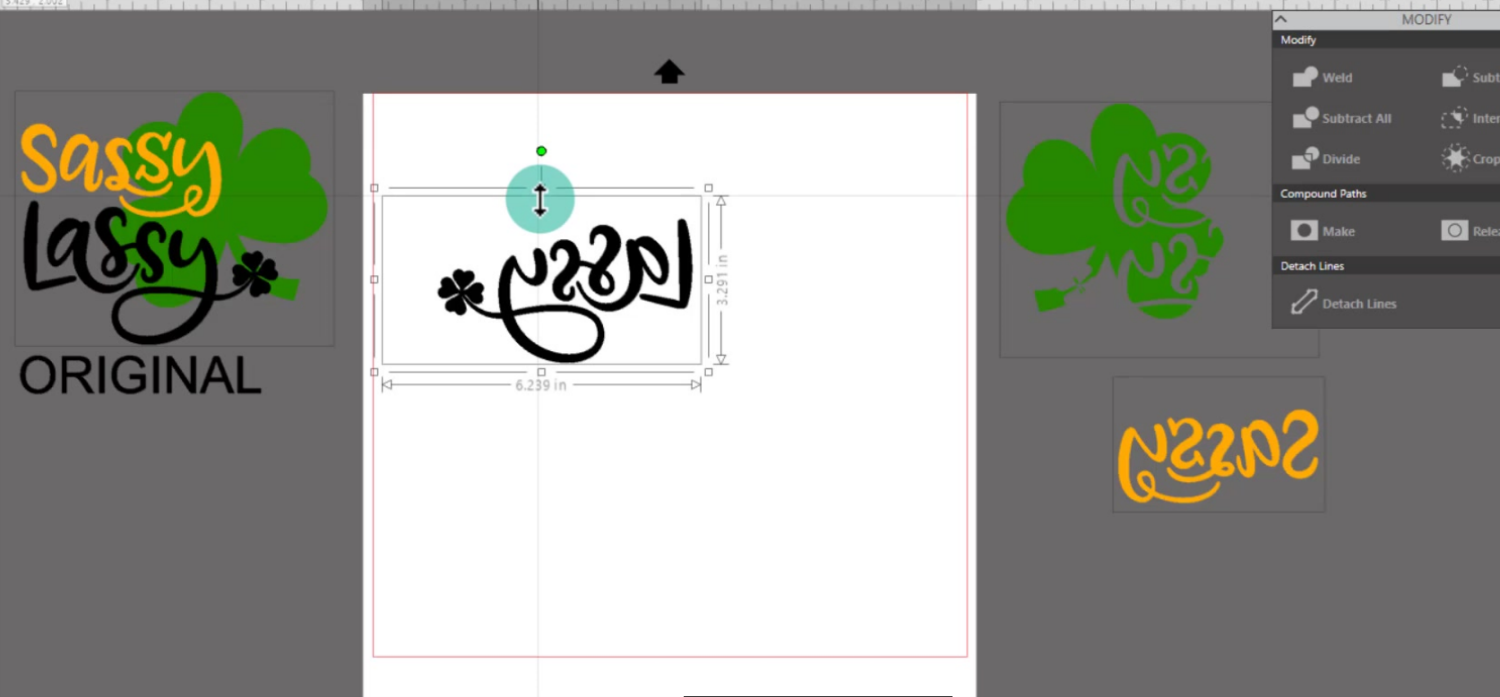
Once you have them where you would like, as I have done in the second photo, group any images together that will be considered as one, such as the color co-ordination, lassy is all grouped, sassy is one group as well as the Clover.
NOTE: Make a duplicate so you have an original image in case there is a reason to start over or you need to make different modifications.
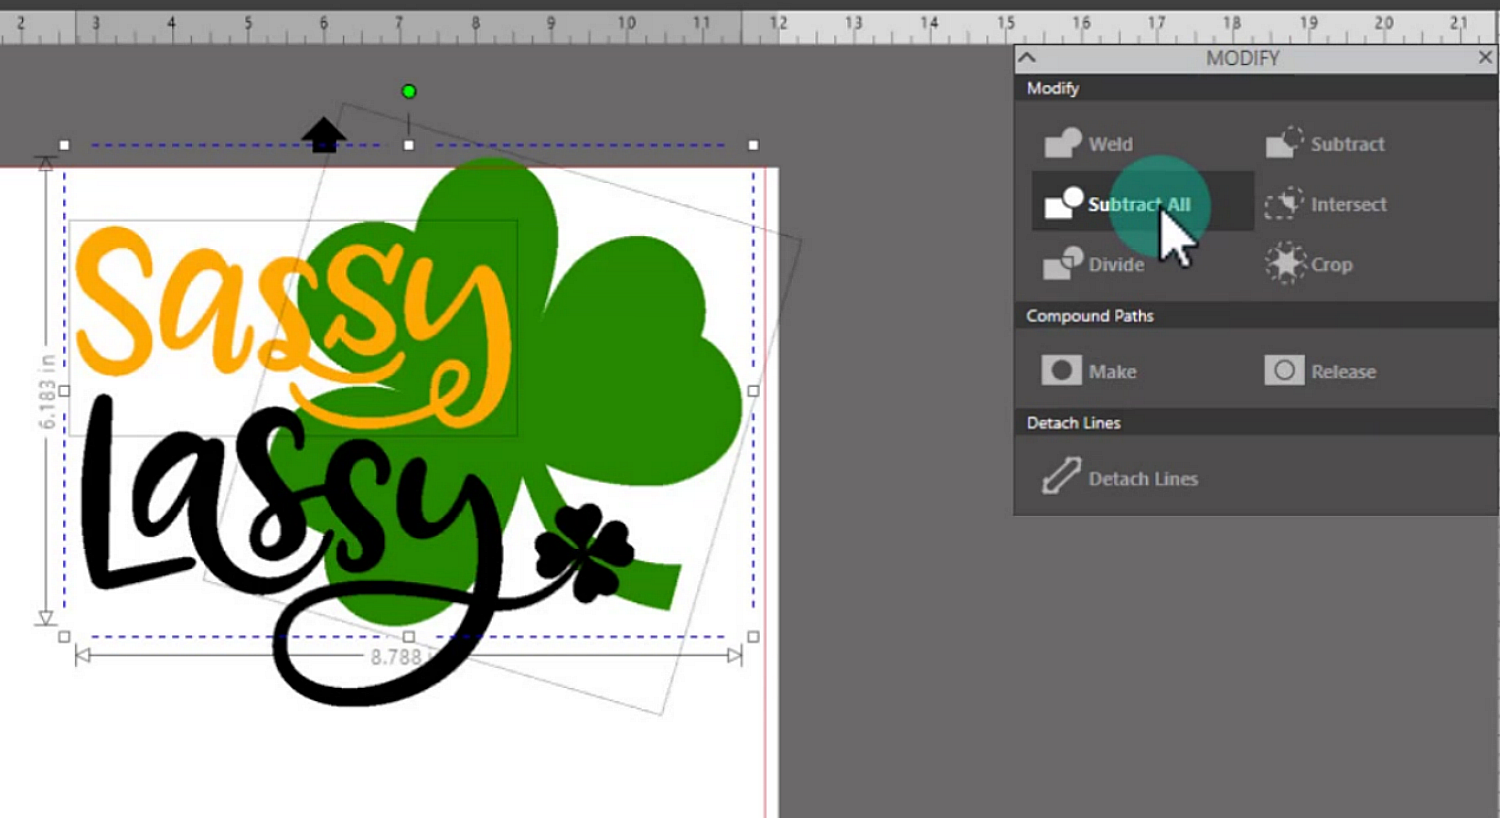
Next you will need to select 2 images you wish to modify. First we will start with our Sassy and our Clover. You can do so by selecting one of the images, then holding shift, and then select the second image.
In your Modify Icon, which looks like a rectangle and circle overlapping, select the "SUBTRACT ALL" option and it will rid any spots that your top image(s) are covering.
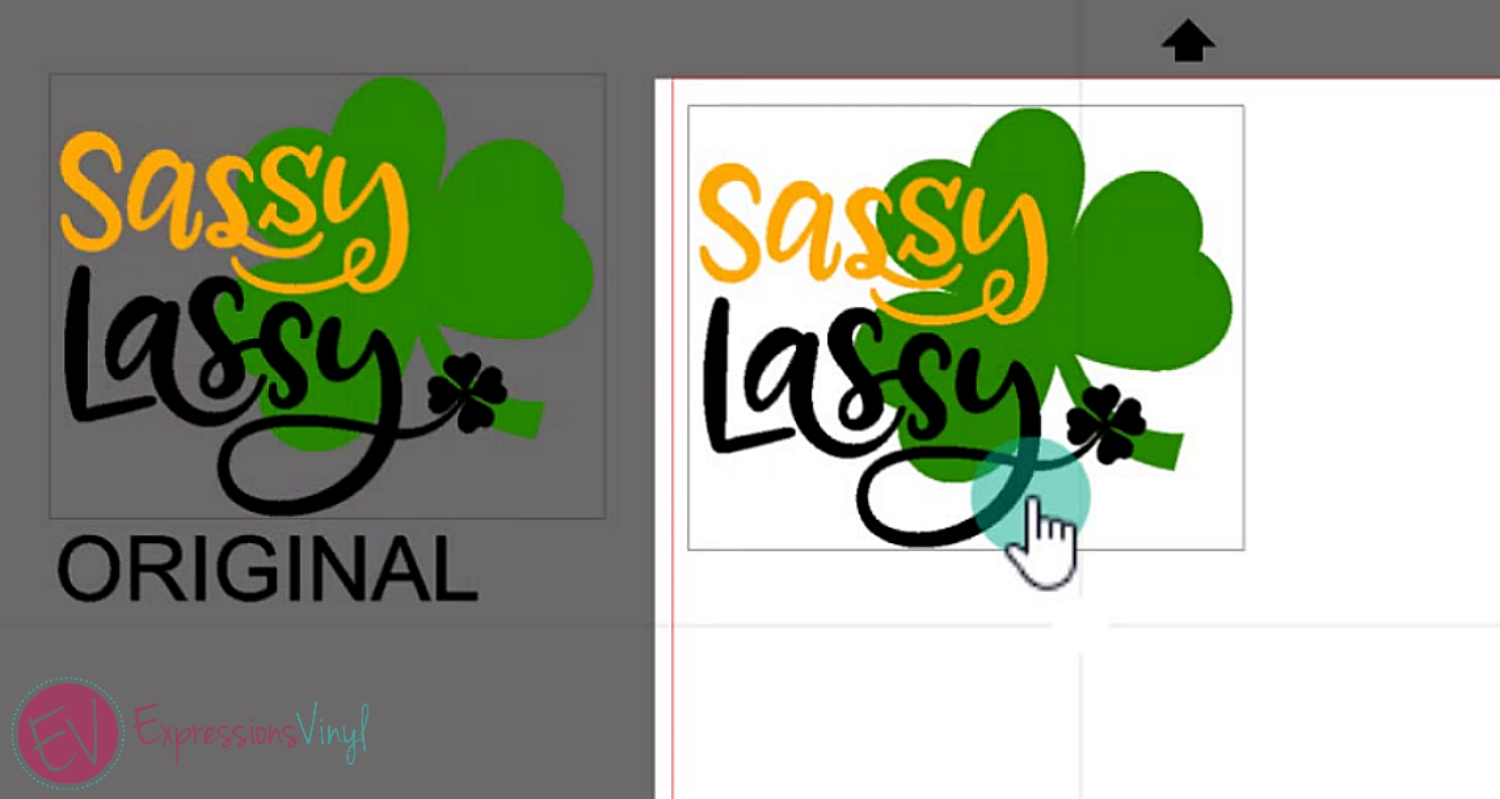
Repeat these same steps will all layers you wish to subtract, this will create a puzzle like look. You may then want to group and loose pieces so you can relocate them on your work area easily.
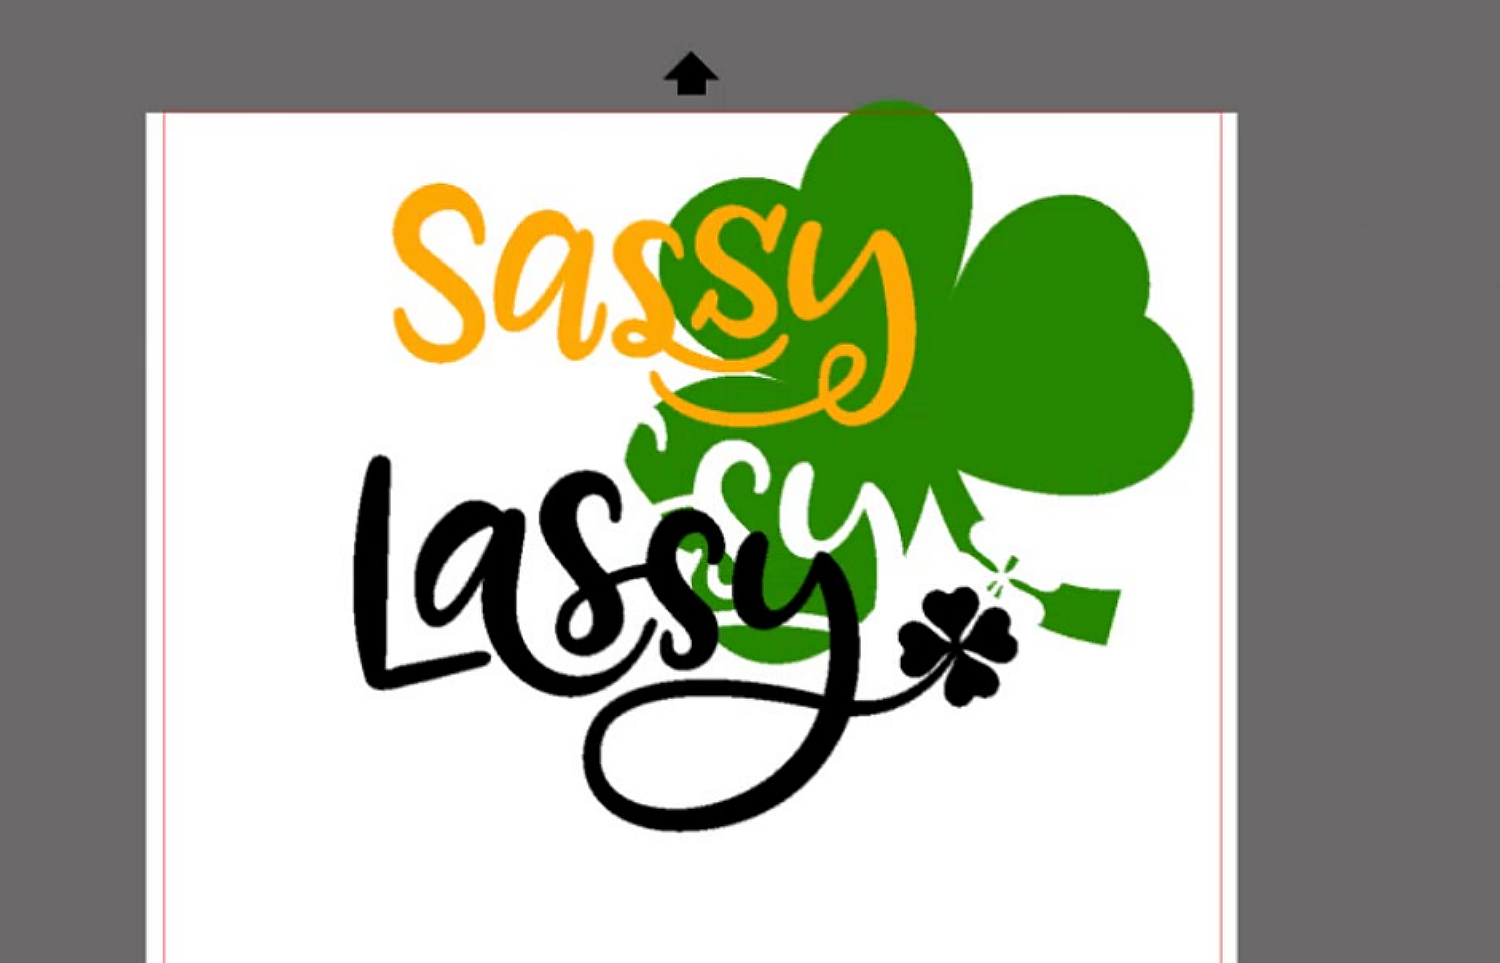
You can now adjust the size of the image according your projects needs.
Then keeping the weeding box full around the more prominate image for easy alignment on the garment, mirror and cut out all you pieces.
You can adjust the weeding boxes around the "puzzle pieces" since they will fit right in place of the negative space on the clover.
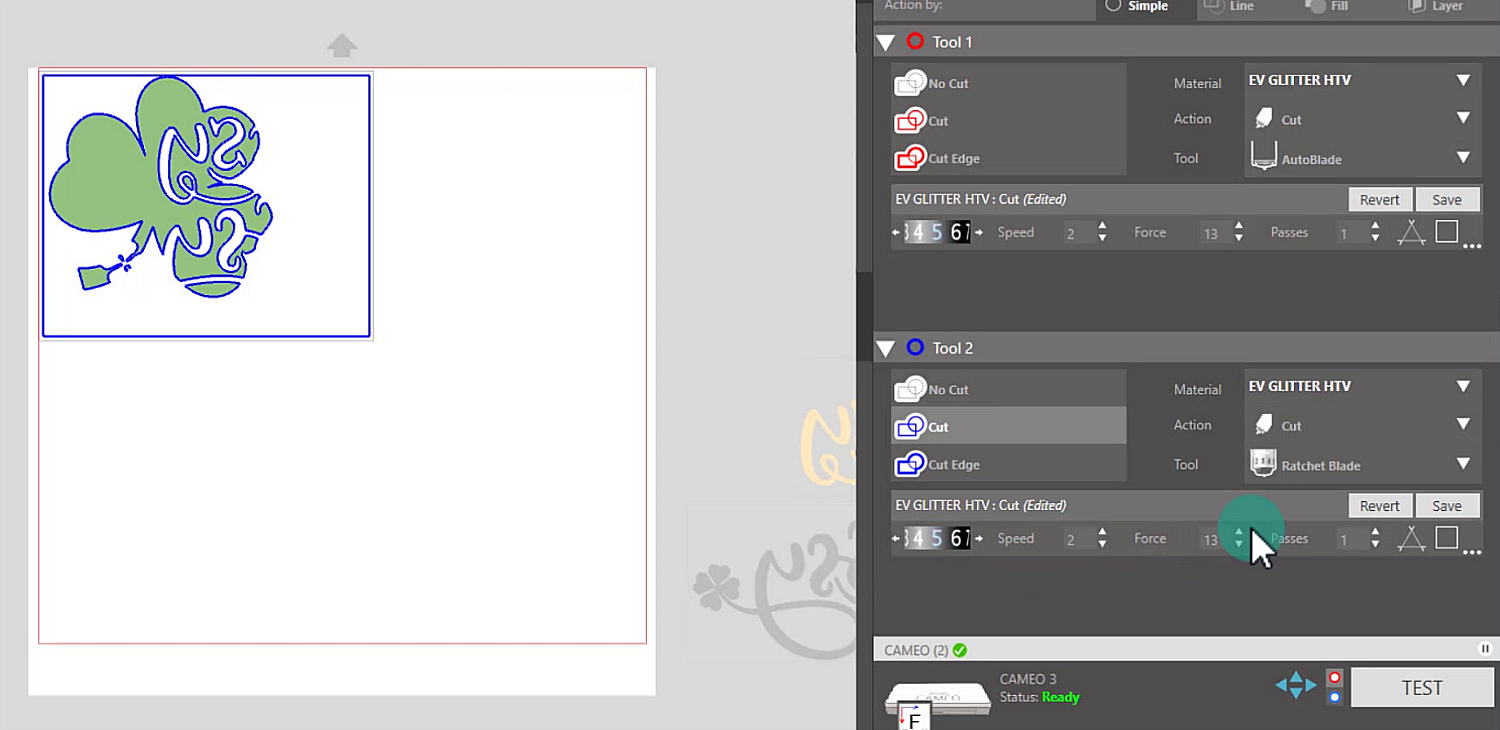
You are now ready to cut. With your images mirrored, select the material type you are cutting. In this case I am cutting Siser Glitter HTV.
My settings may be a little different than yours. I have created a custom setting in the program to use with ExpressionsVinyl's Settings chart, it is little deeper since my blade is dull.
NOTE: Custom settings are nice to use as a gauge. If you are adjusting a lot, it may be time for a new blade.
Repeat these steps with the rest of your glitter colors.
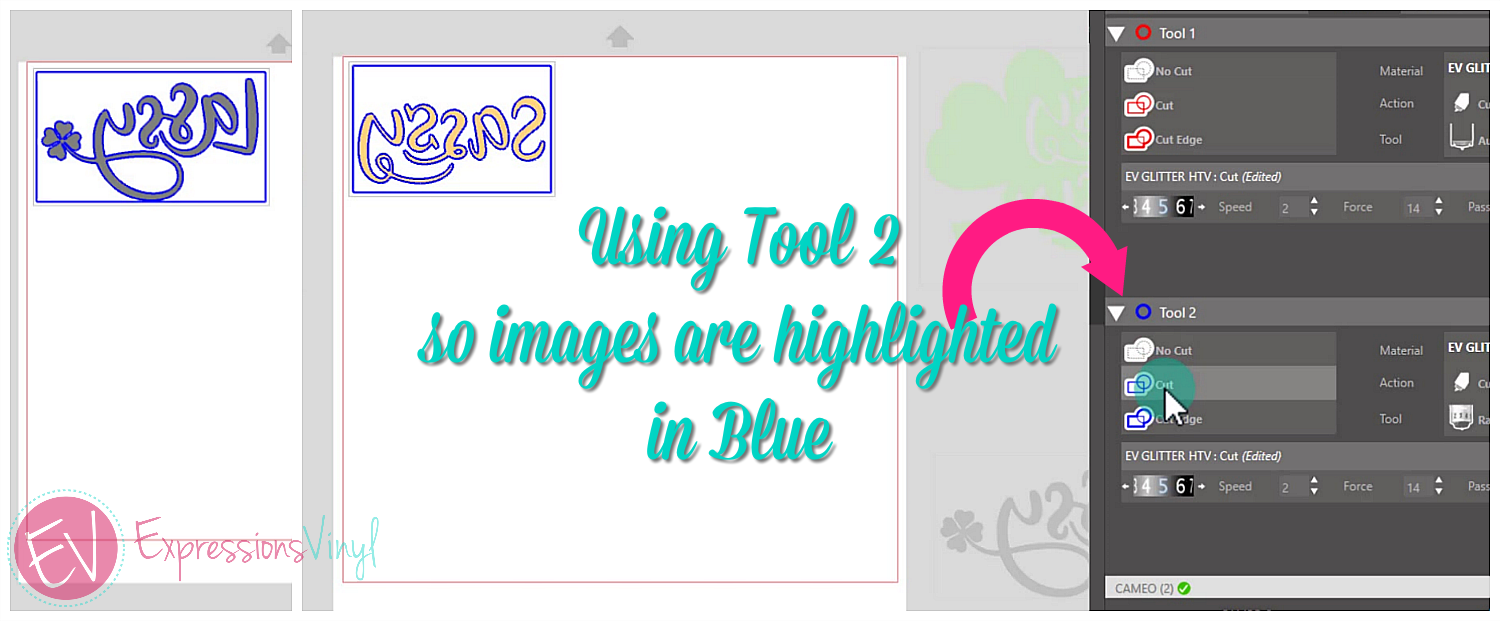
I recommend using the Premium Blade with Glitter HTV or any dense or thick material for best results. In the Cameo 3, I am cutting with my Premium in the Blue Tool 2 location, so make sure that you have it set correctly.
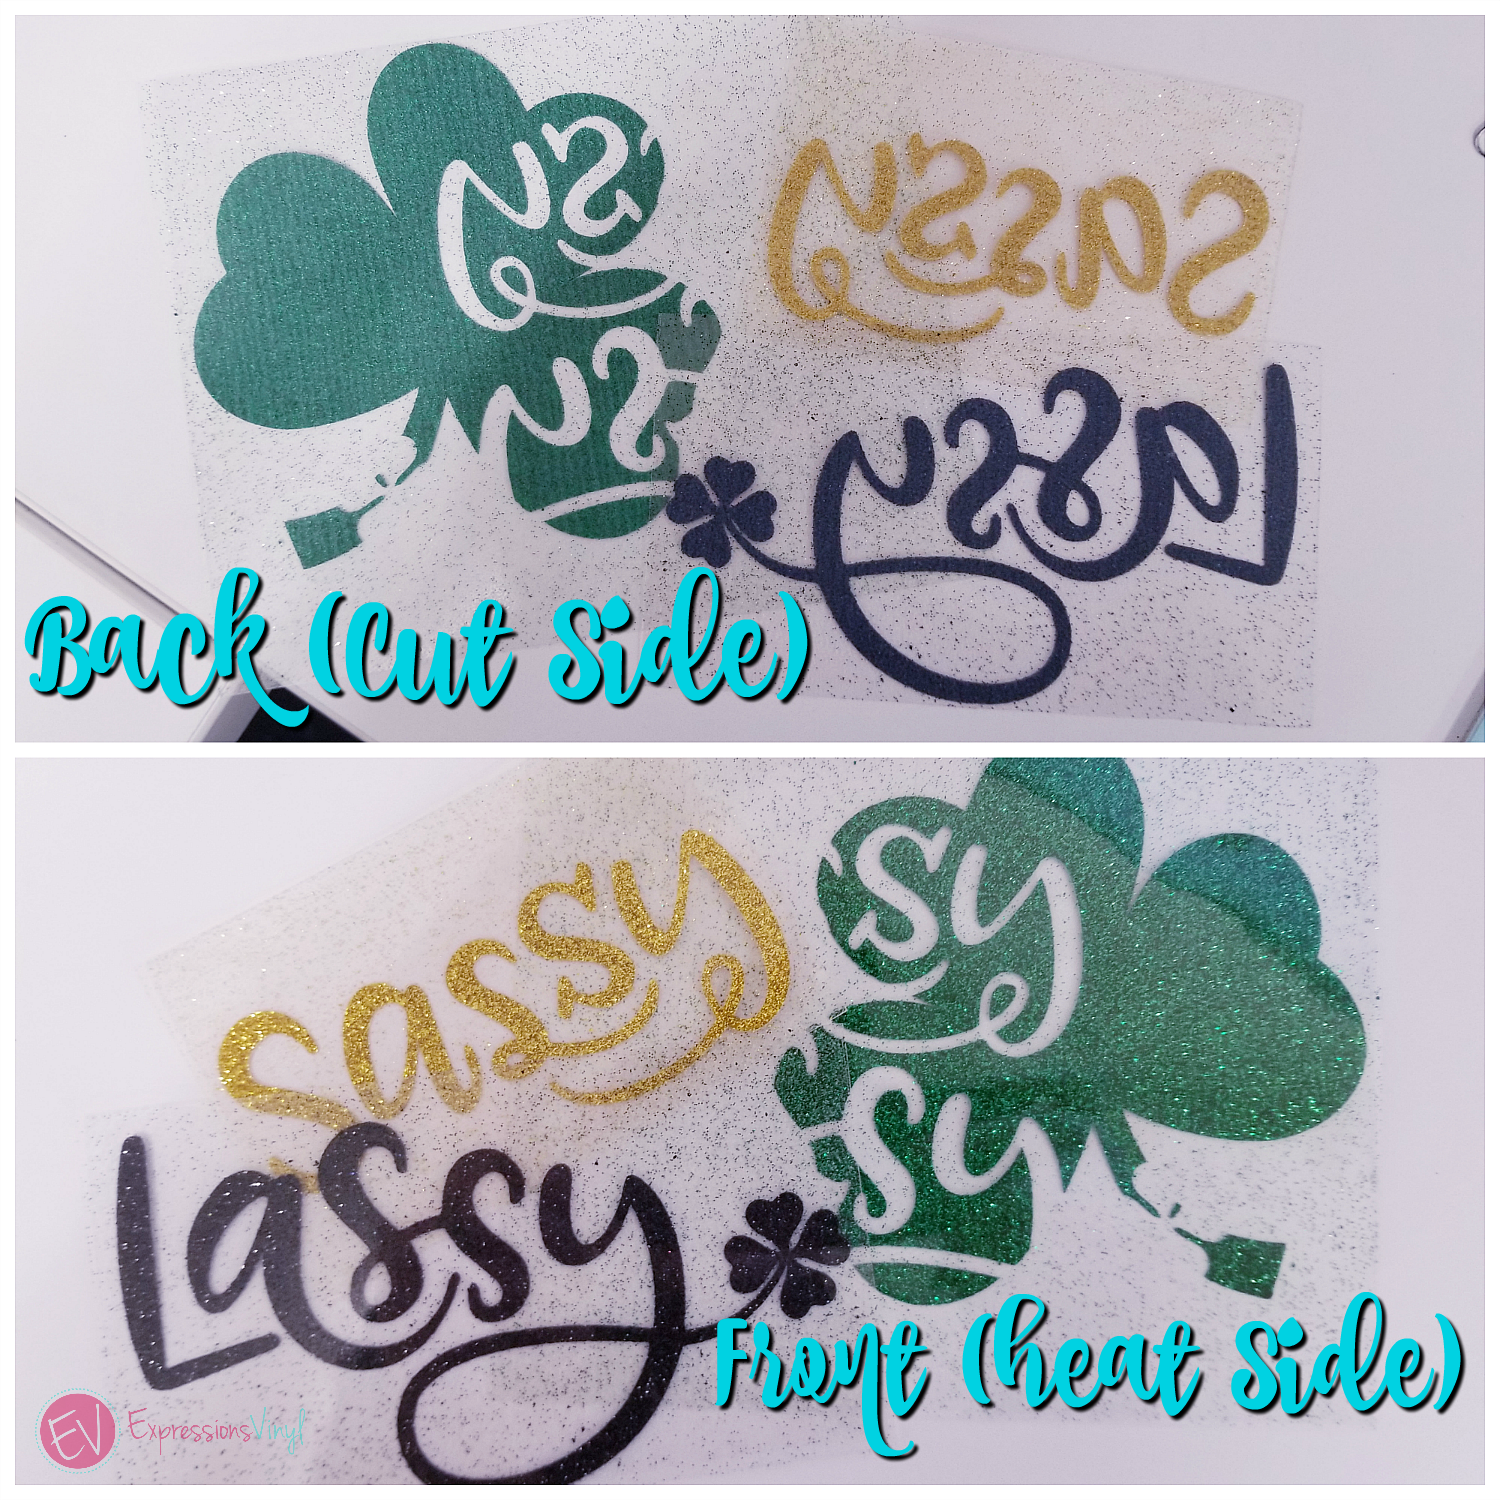
(Glitter HTV: Grass, Gold and Galaxy Black)
You are now ready to press. Siser Glitter HTV is a Hot Peel with firm pressure at 320 Degrees for 15-20 seconds.
For three layers like this, split your time, so your first layers will not exceed the 20 seconds, I like to do the first two for about 3 seconds, so 1,3 and then 14= 20. Give or take.
I hope you found this helpful, go and try it out now.

Recent Posts
-
NEW Holographic Eclipse Heat Transfer Vinyl
April 15th, 2024 3 Ways to Use the New Holographic Eclipse Heat Transfer Vinyl from Siser …Apr 29th 2024 -
Hop into Spring with Cute Easter Vinyl Crafts
Do you love our Vinyl? Sign up for Vinyl Club today to get FREE vinyl and save big! …Mar 28th 2024 -

Fixing Wrinkles and Bubbles in Vinyl
How do you get air bubbles out of vinyl? There are a few different ways to ensure a flawless …Mar 26th 2024