
DIY Easter Carrot Sign
Hey everyone,is Starla with ExpressionsVinyl.com. We are going to make a some cute wooden carrots to use in your home, on a door hanging, or in this case we are going to add it to a wreath. And the Carrot File is FREEEEE!!!!!
We are also going to show you a few fun tips and tricks a long the way, like applying the Glitter Heat Transfer to Wood, Transfering HTV on to Adhesive safely, the Knock Out Technique and we will just have some fun doing it. So check it out.
But If you want to get a jump start on your vinyl order for these, here is what you will need:
Vinyl:
Siser Glitter HTV Translucent Orange
Images:
Carrot Patch Bundle Studio File
Supplies:
Any type of hard wood
Sand Paper
Acrylic Paint (I used: Apple Barrel Pumpkin Orange, Folk Art Lime Green, and Ceramcoat Christmas Green)
So to start off, you will need to cut your cut File out of the Oramask Stencil Vinyl, you can size this file however large or small you want, just keep in mind once you cut the Stencil, you dont want to resize it after that, so that the vinyl will be the same size (Roughly).
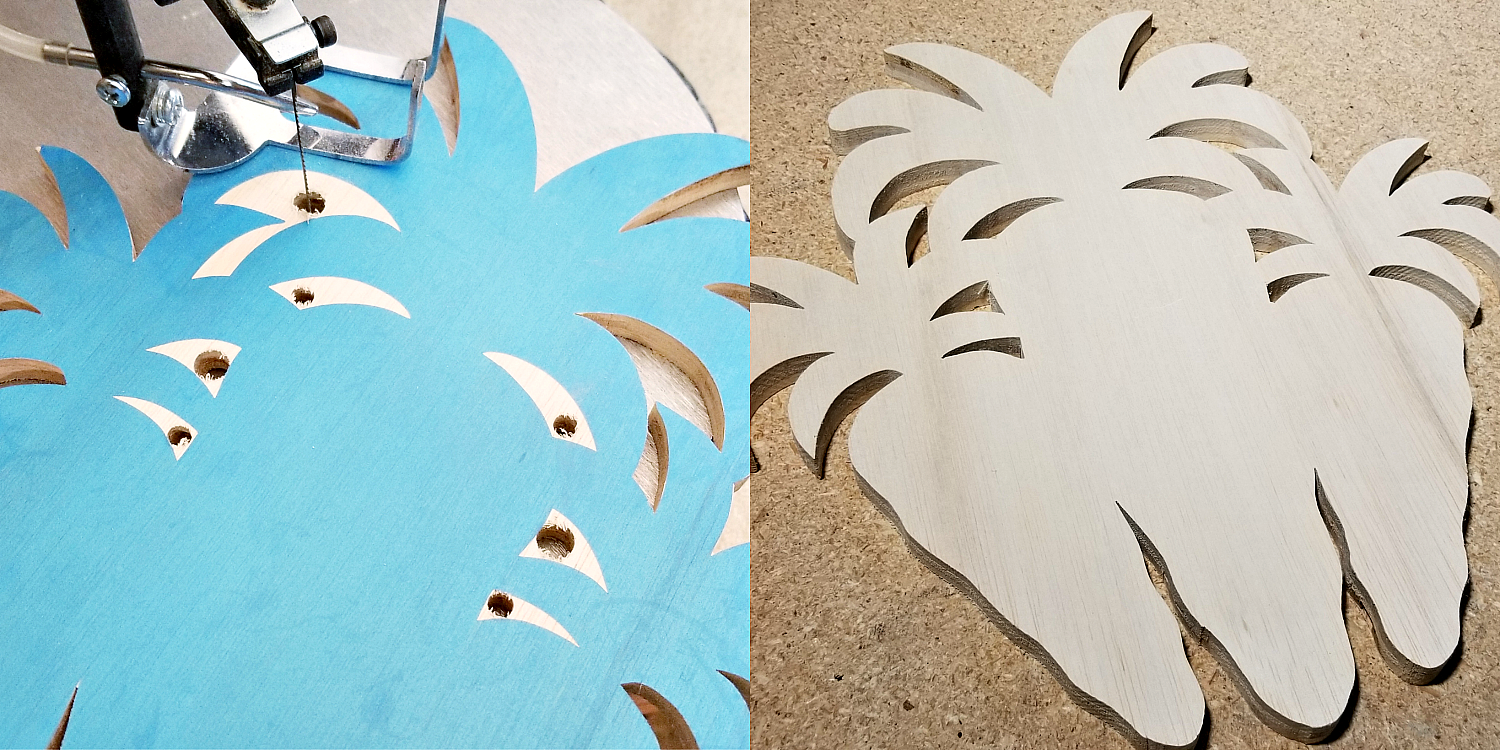
* Roughly because you are working with a saw and there are room for error in following the Oramask
Now that you have your carrots cut out, dont forget to prep your wood with a good fine sandpaper and a thin clear coat to seal any porous areas the wood can have.
Once the clear coat is dry, you are ready to paint.
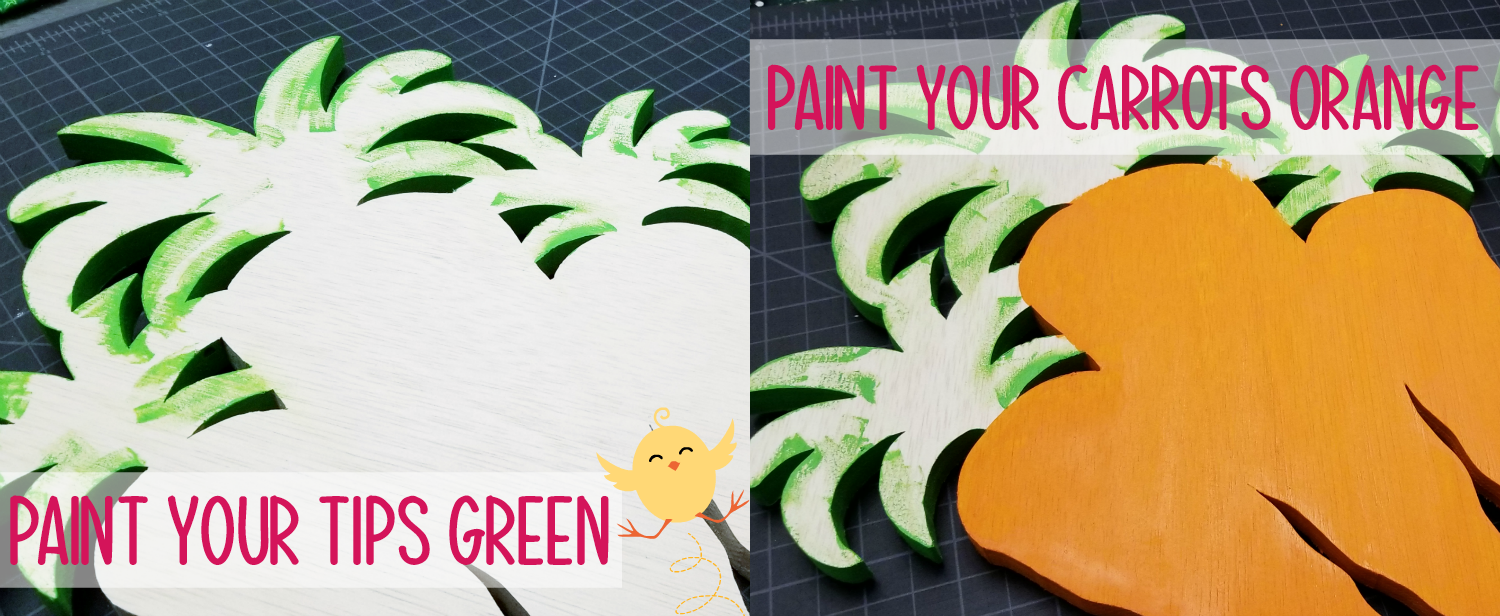
I did not paint the whole thing since we are putting vinyl on just the tops and we want to compare applying the Glitter HTV to a painted surface vs a non-painted surface.
*You do need to let the paint dry completely before it comes into contact with a heat souce like an iron or press.
Now you are ready to apply your Opal Vinyl to your carrot Tops.
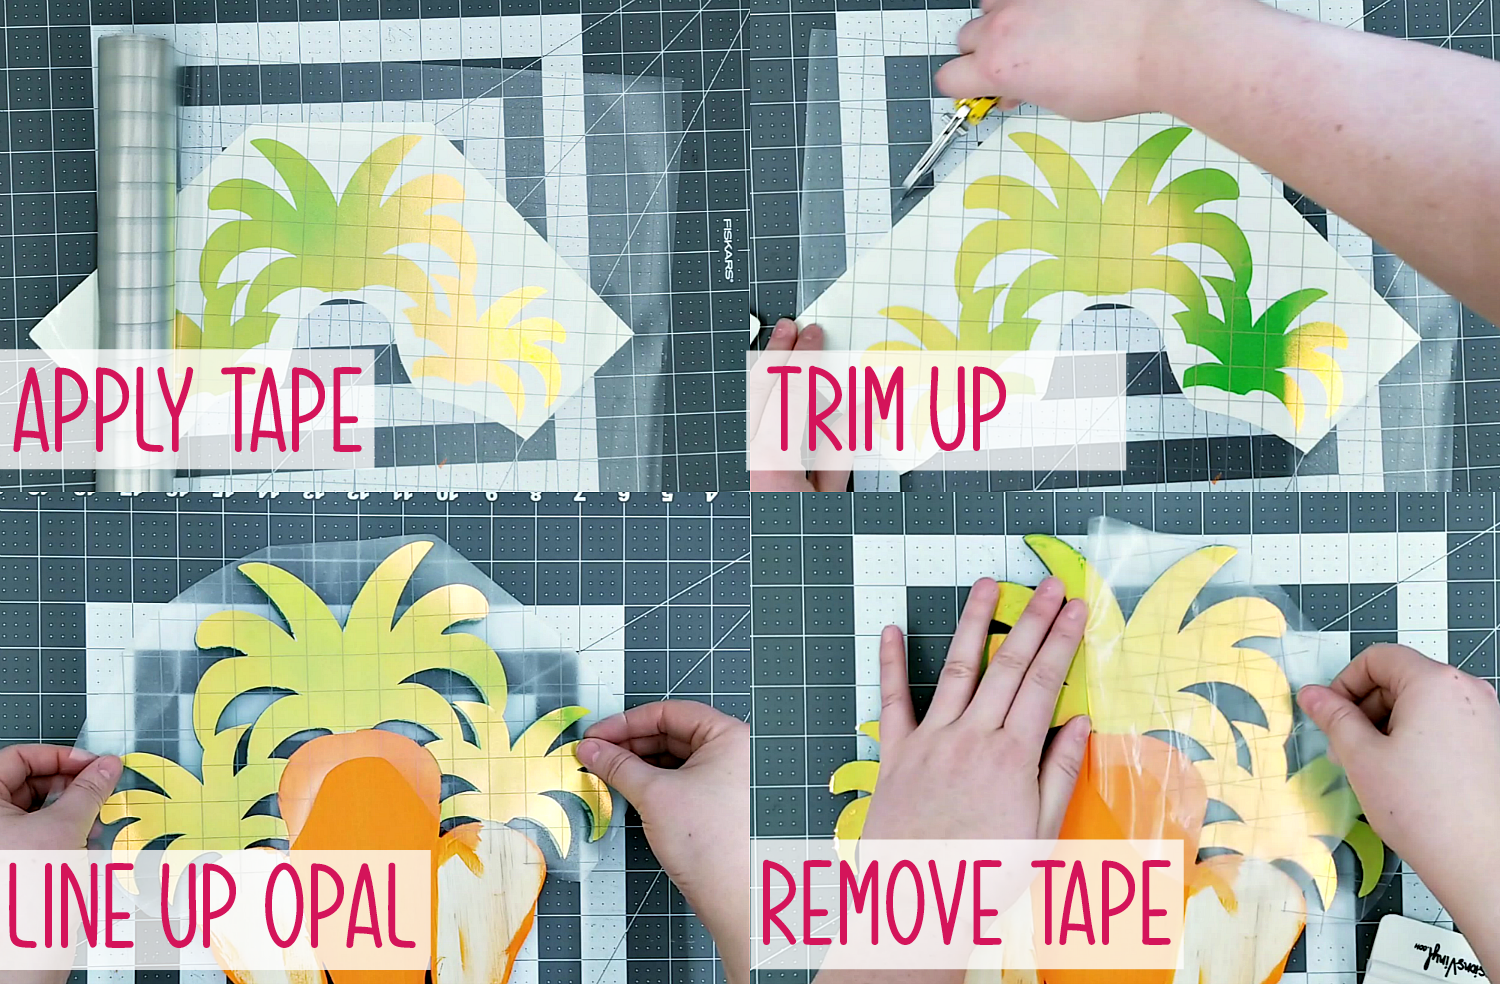
Alright now for the fun part, you are gonig to now iron your Glitter Grass Green HTV onto the Opal. This can damage the vinyl if the iron is too hot, just about the middle setting is perfect and go slow and steady. The Opal is pretty forgiving so if it gets a little to warm, use the to your advantage and smooth it down. Once it cools it will have a nice bond to the wood.
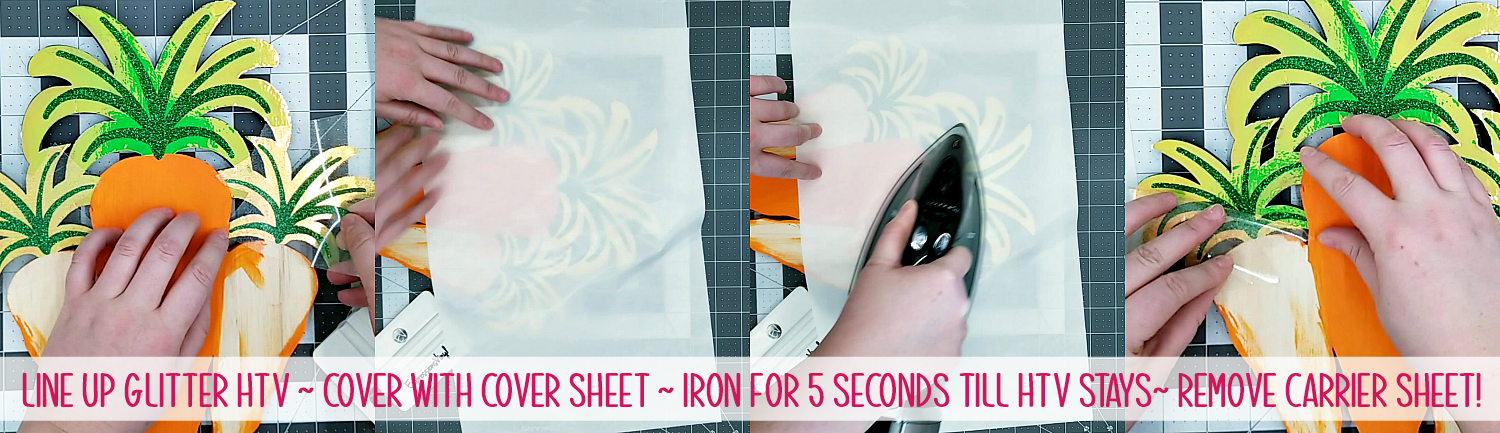
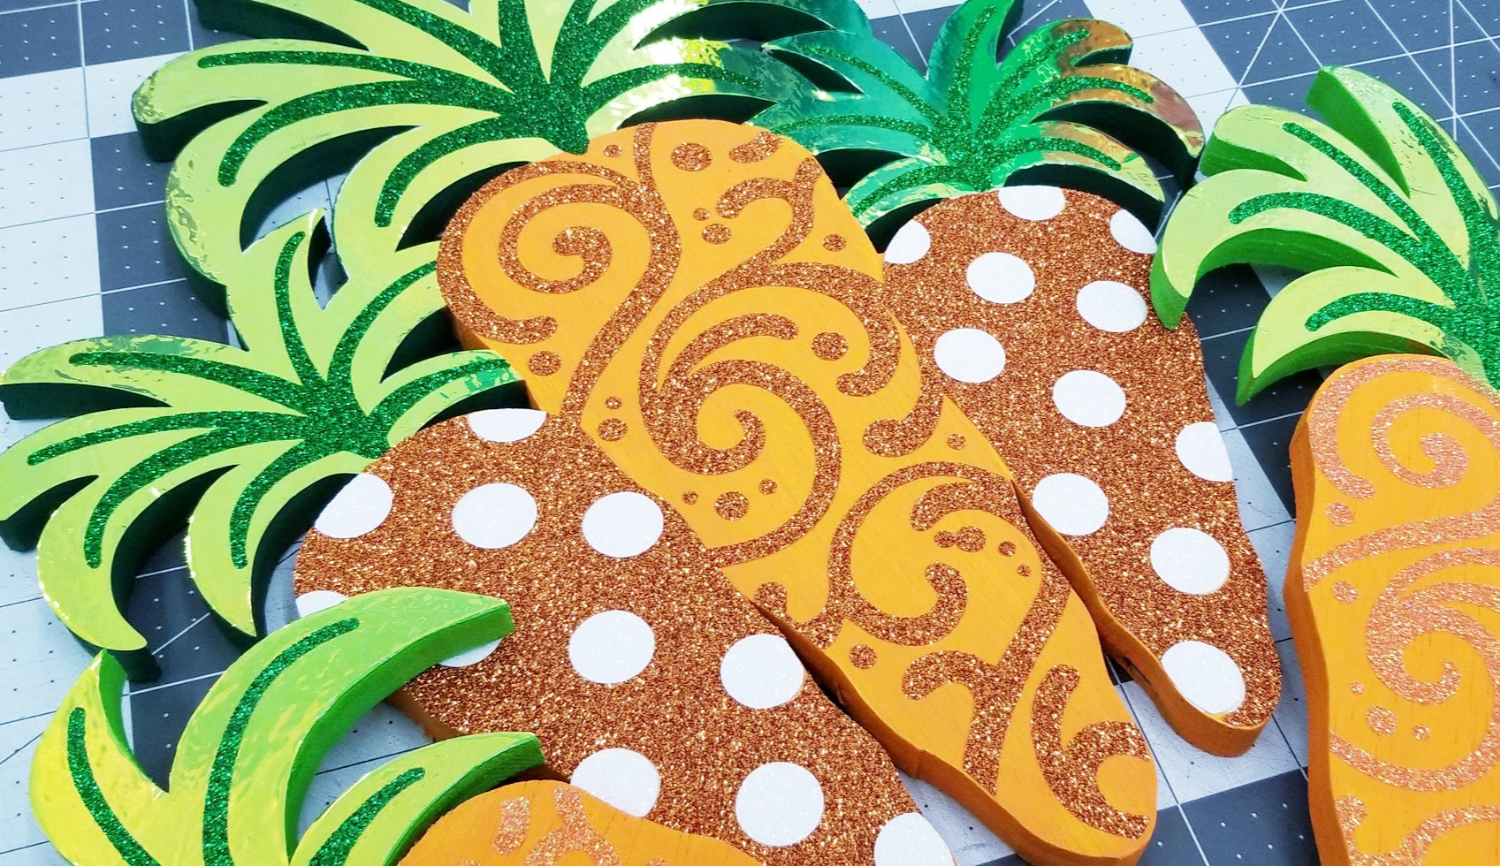
Then simply repeat the same technique applying the Translucent or Copper Glitter HTV....
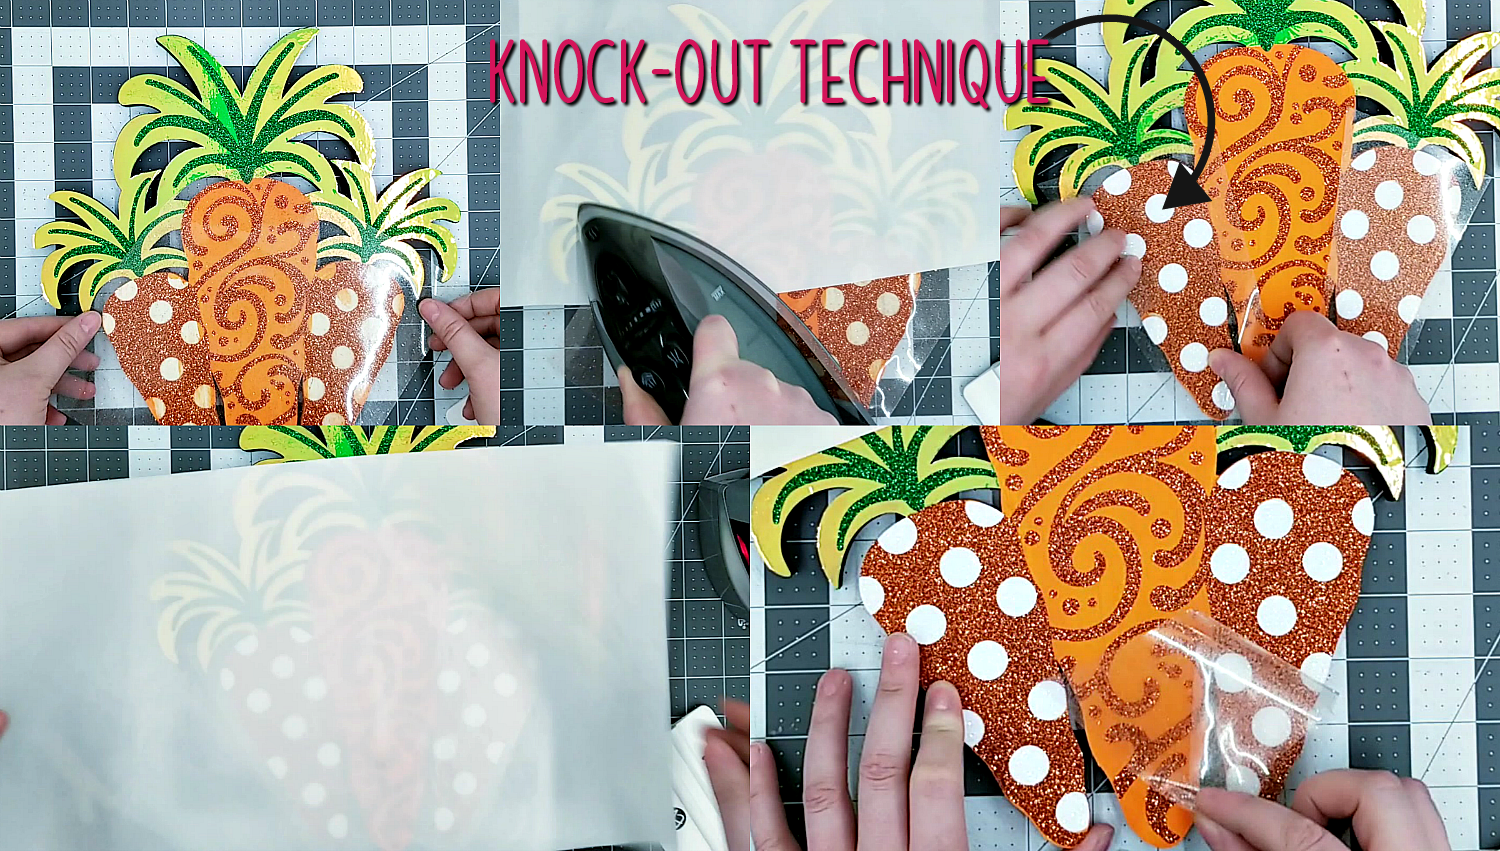
Place down your Copper or Translucent Orange Glitter, then apply the Rainbow White Glitter HTV Dots into their knocked out spots.
*Be mindful of the opals at this point in trying not to get them more heat.
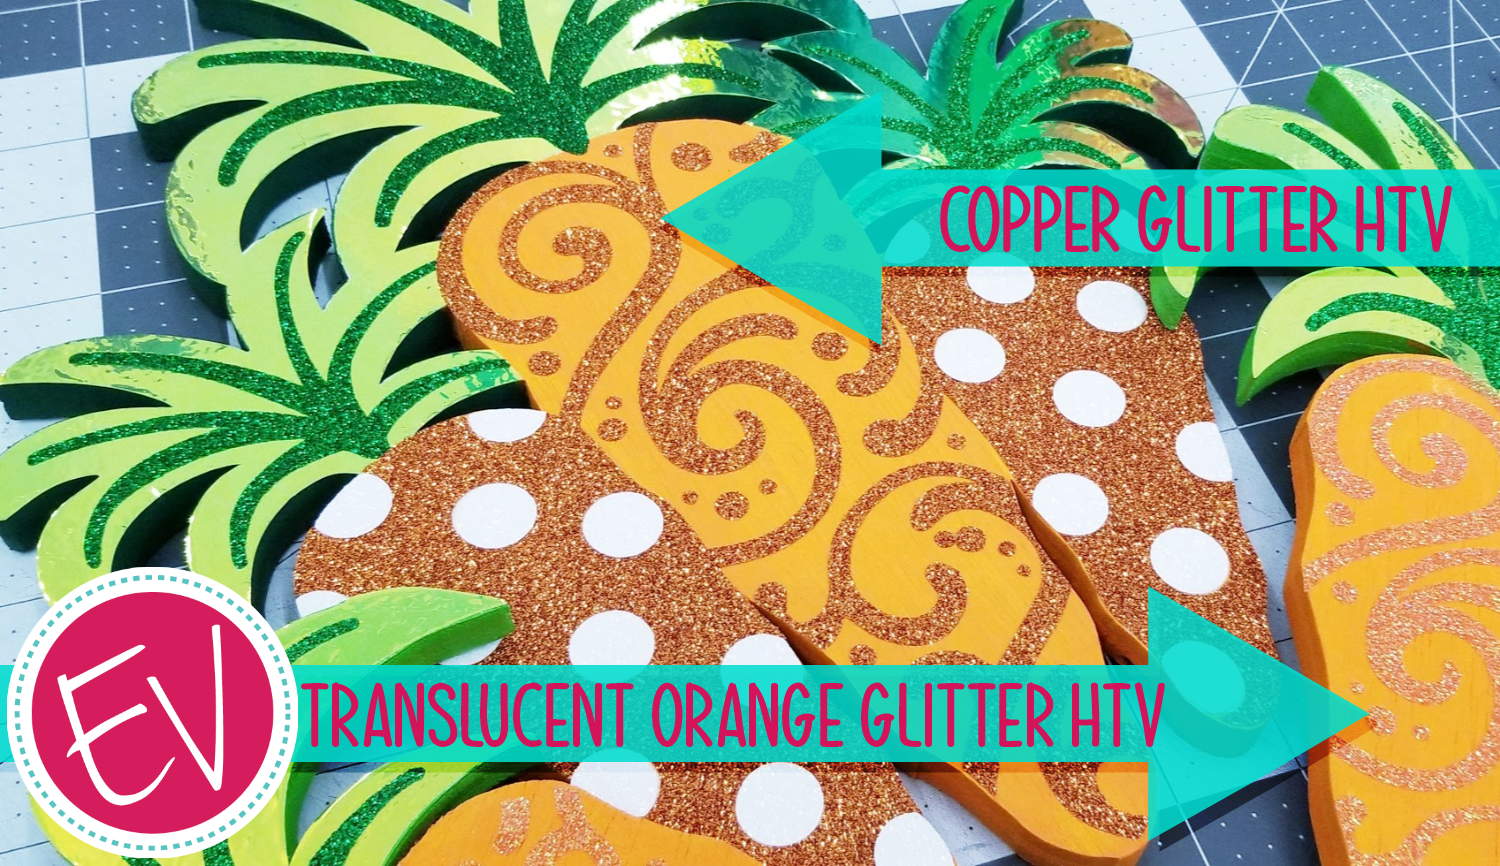
Alright! You are now done with your Carrots!!! Which do you like better? Copper or Translucent Orange Glitter HTV? I love the Translucent Orange since it can change the color of the paint or Vinyl behind it. Also check out the Translucent Pink Glitter HTV.
Thanks for stopping by now go get that FREE cut file and get ta making your own fun Easter Projects, and share them with us on Facebook, YouTube and Instagram.

Recent Posts
-
NEW Holographic Eclipse Heat Transfer Vinyl
April 15th, 2024 3 Ways to Use the New Holographic Eclipse Heat Transfer Vinyl from Siser …Apr 29th 2024 -
Hop into Spring with Cute Easter Vinyl Crafts
Do you love our Vinyl? Sign up for Vinyl Club today to get FREE vinyl and save big! …Mar 28th 2024 -

Fixing Wrinkles and Bubbles in Vinyl
How do you get air bubbles out of vinyl? There are a few different ways to ensure a flawless …Mar 26th 2024