
Halloween Bag
Hey y'all, it's Elyse here today to show you how I made a really simple and cute Halloween bag with heat transfer vinyl.
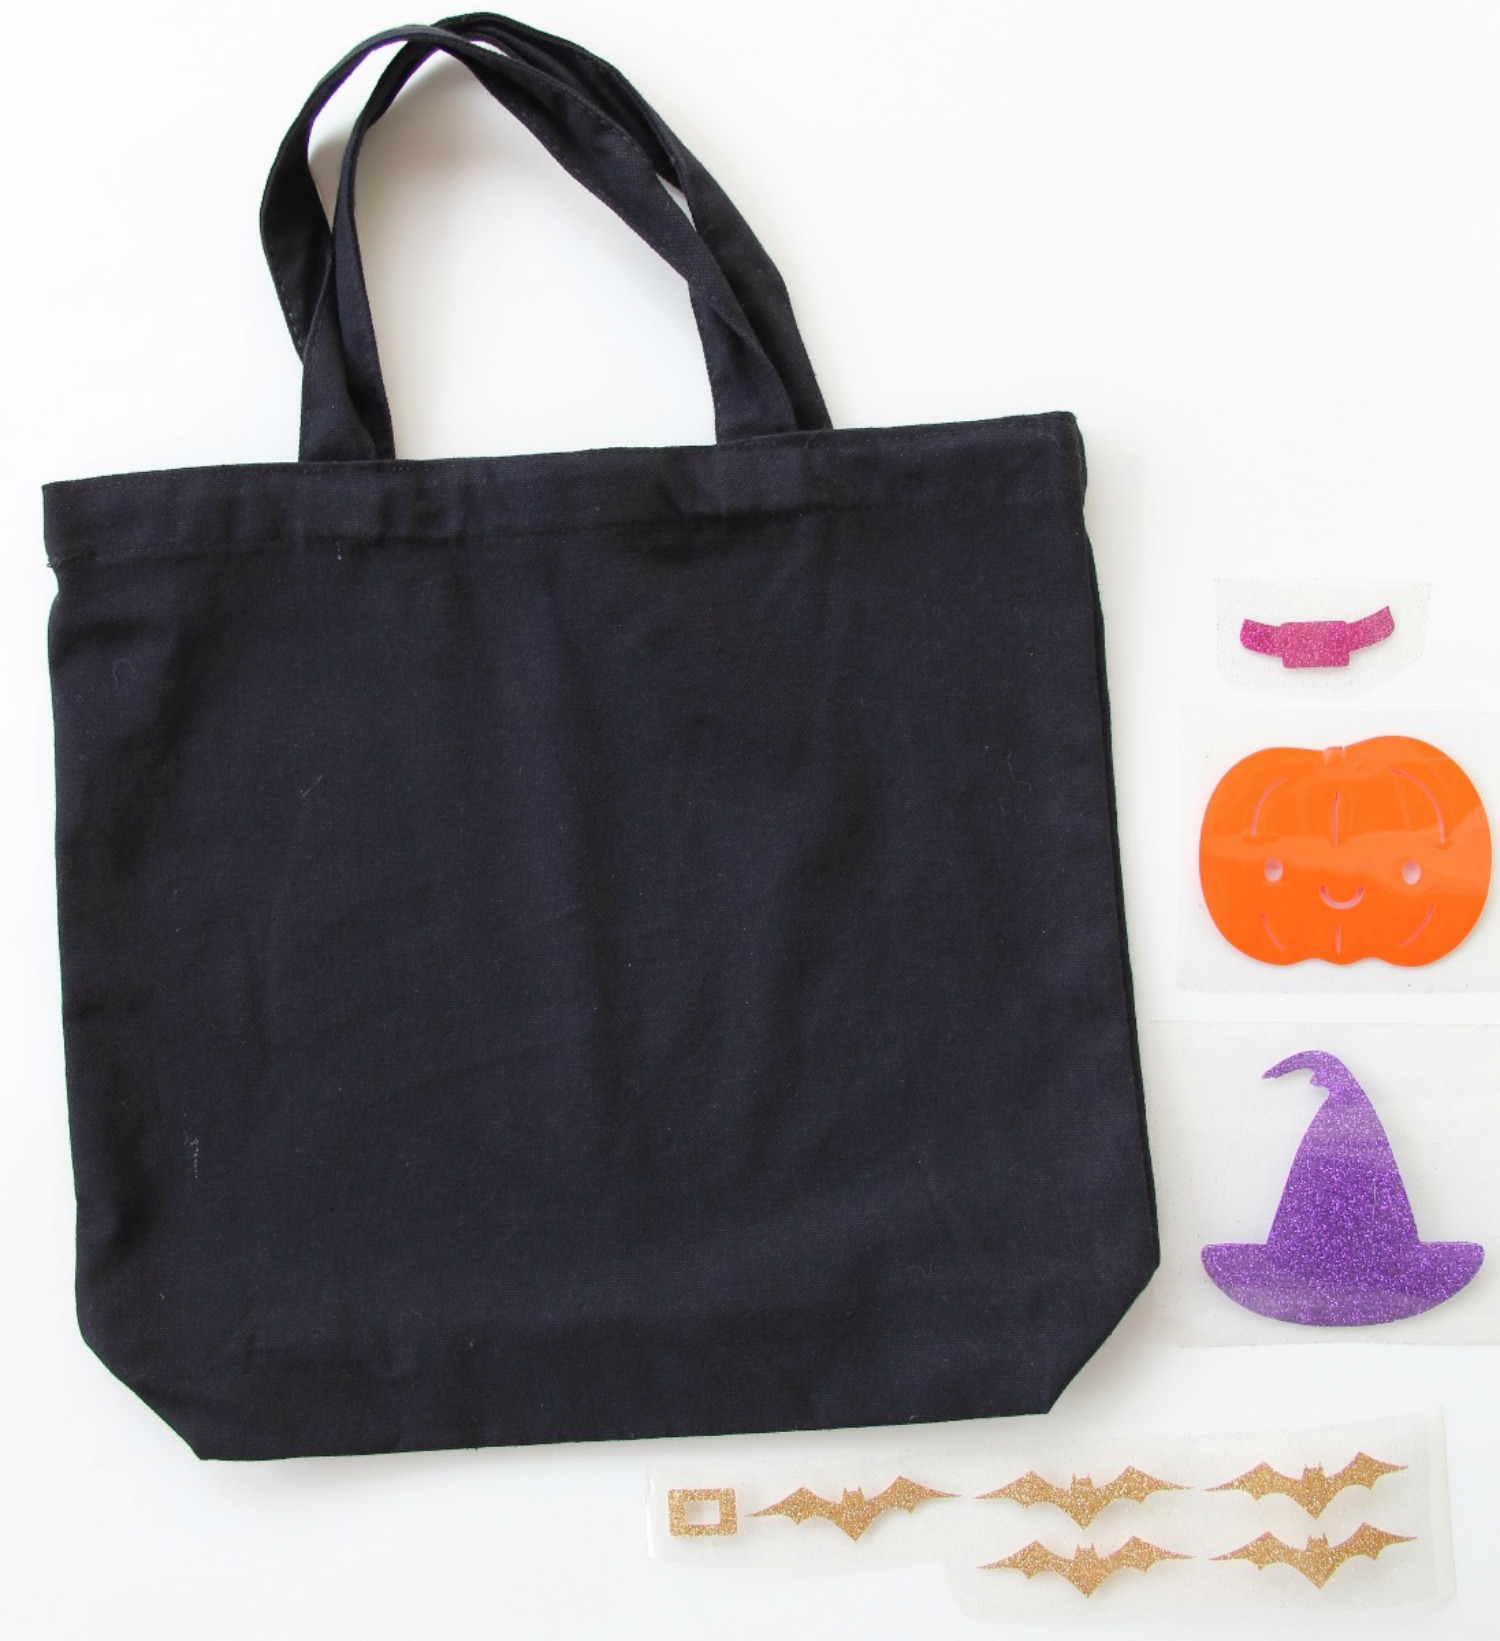
The vinyl I used was:
-Glitter Heat Transfer in eggplant, hot pink, light green, and gold
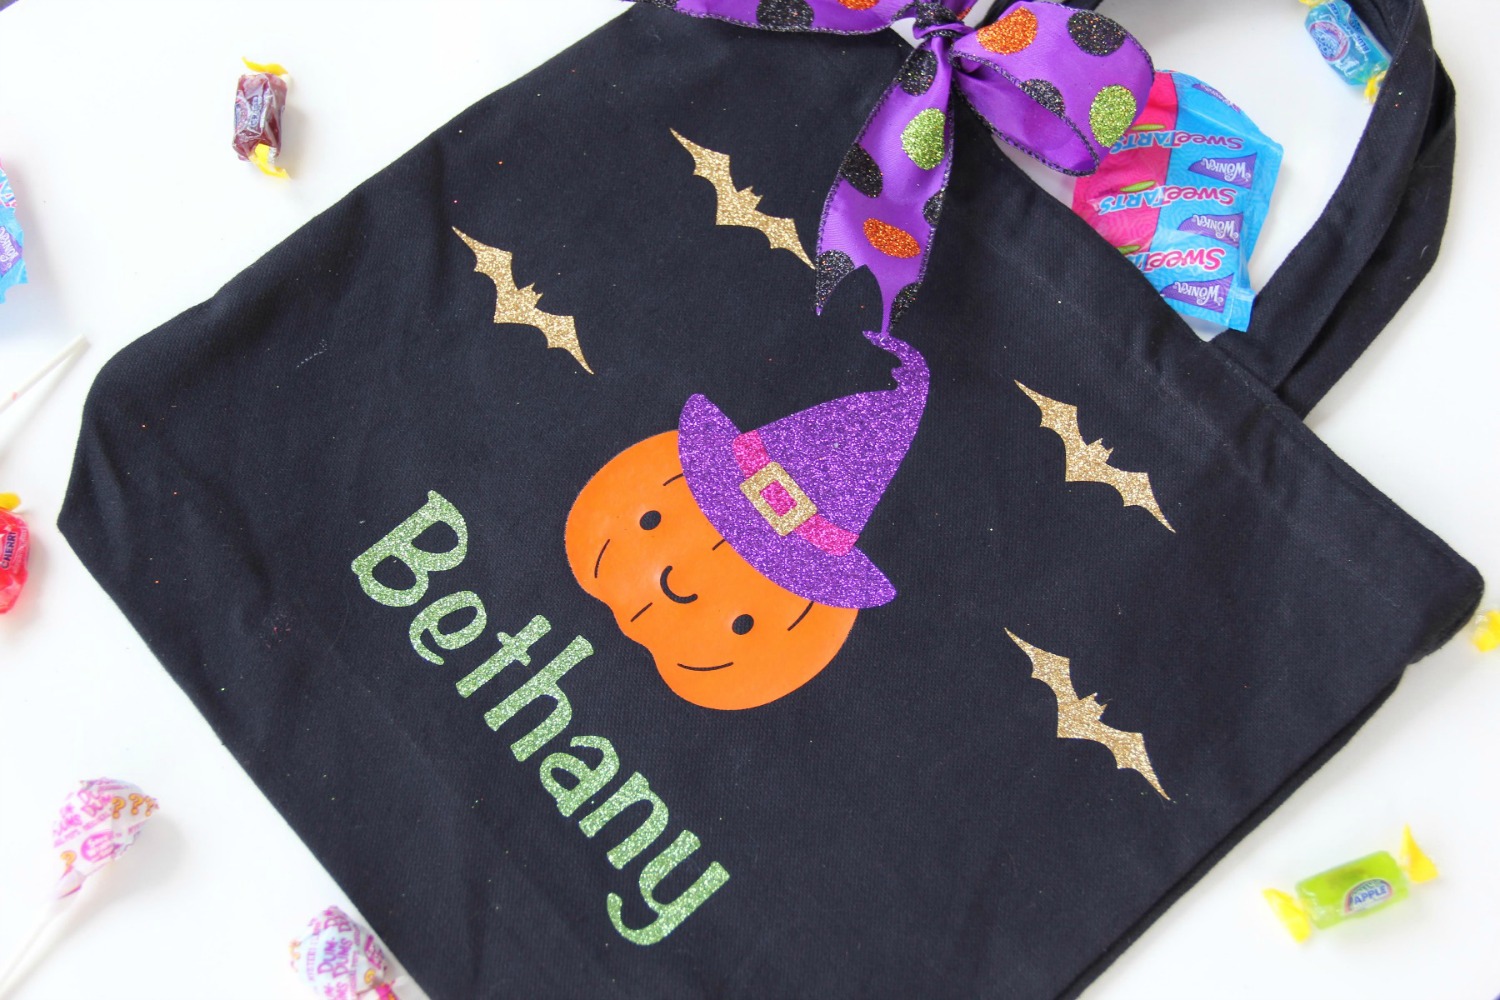
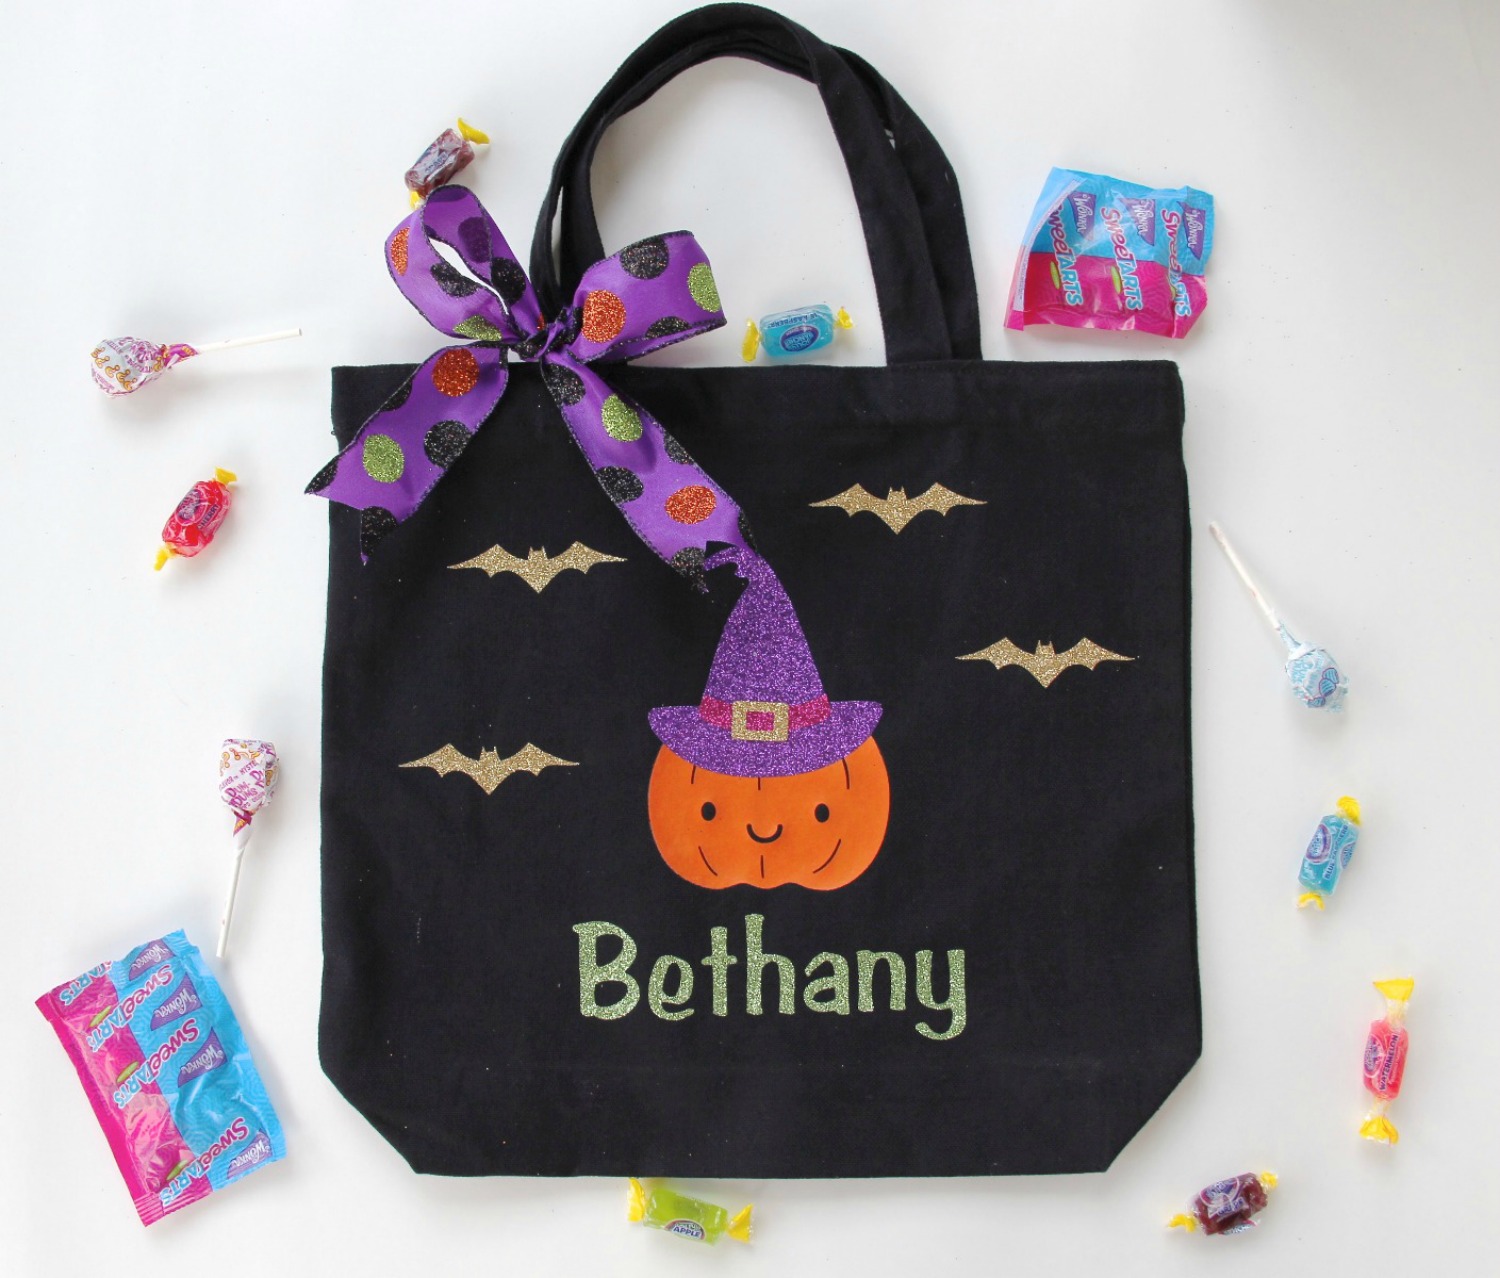
I combined a witches hat and pumpkin design that I had and added bats to fill up more space on the bag.
Let's begin!
Step 1: Pick out a pumpkin, witch's hat, and bat design that you like.
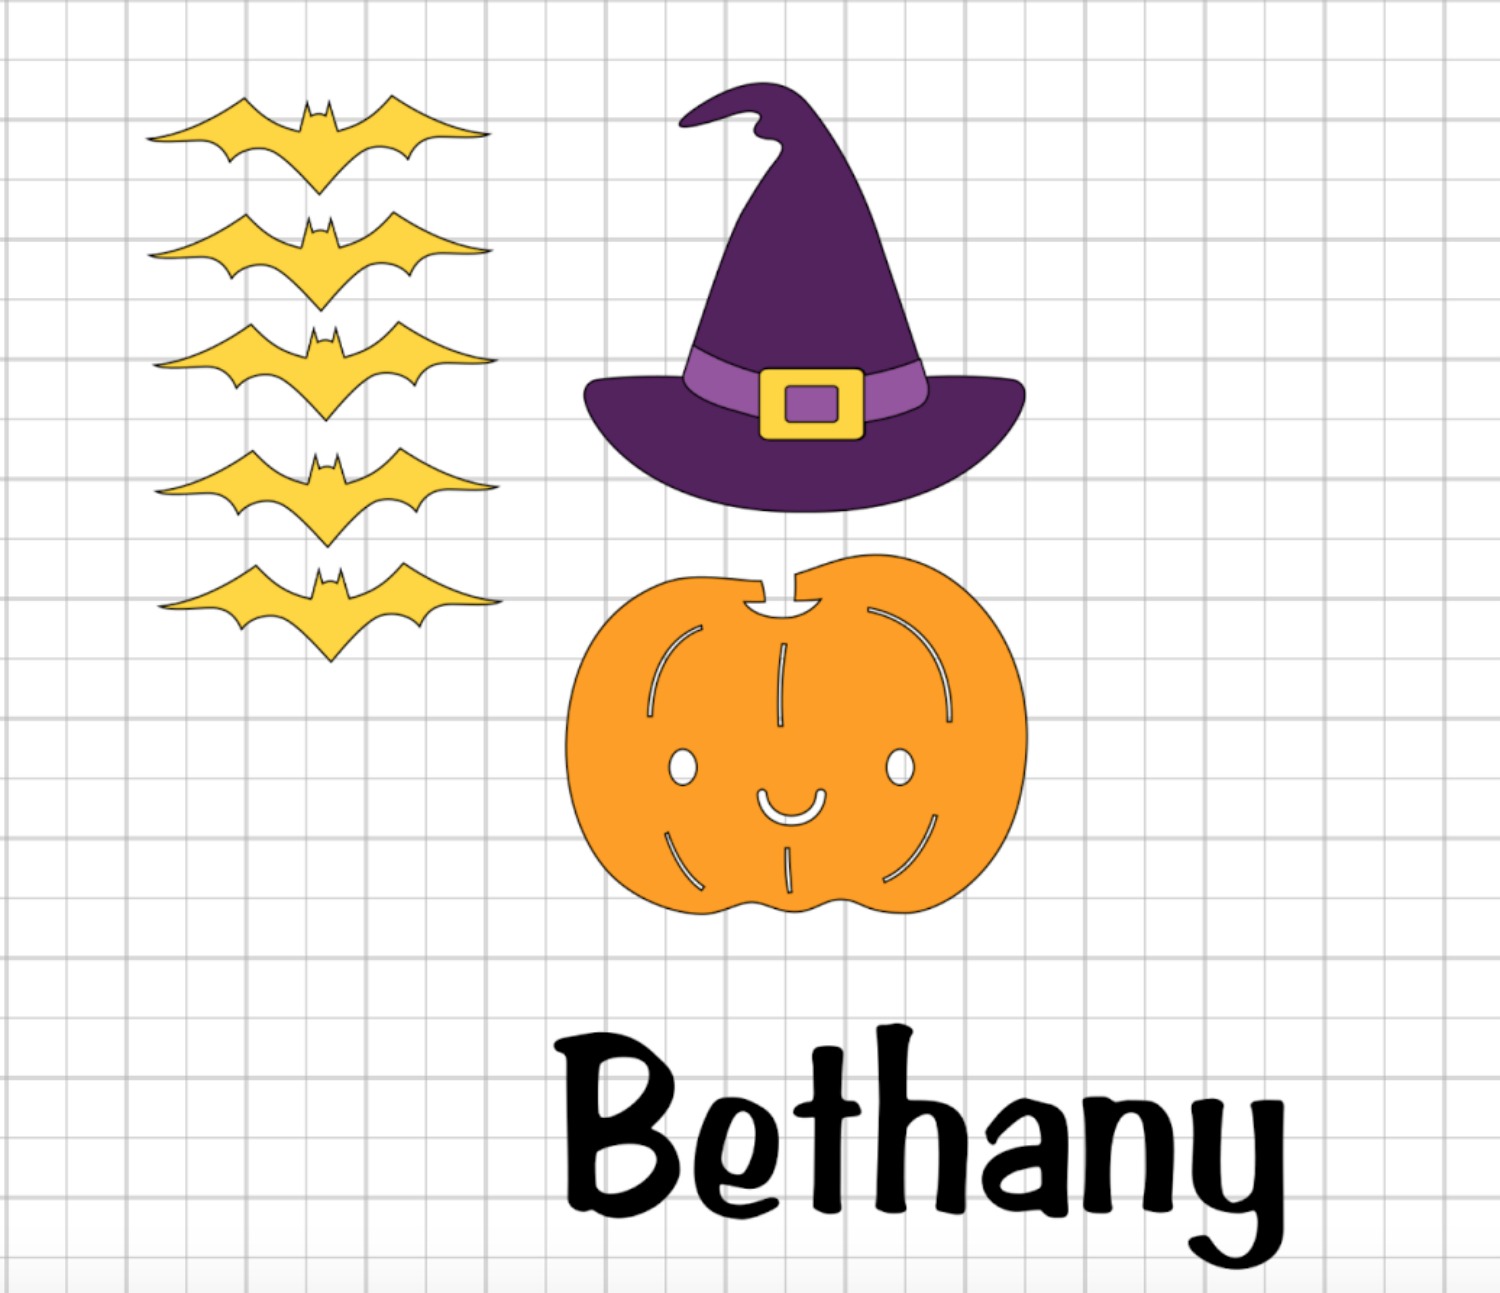
Step 2: Cut out the designs and weed them, I find it so much easier to have all of the images ready to iron on at the same time. (my pumpkin is the orange Easyweed, the hat is cut out of eggplant glitter heat transfer, the band on the hat is hot pink glitter heat transfer, and the bats and buckle are gold glitter heat transfer).
*REMEMBER, glitter heat transfer needs to be top layers. It does not work when you try to layer non-glitter htv on top of glitter htv*
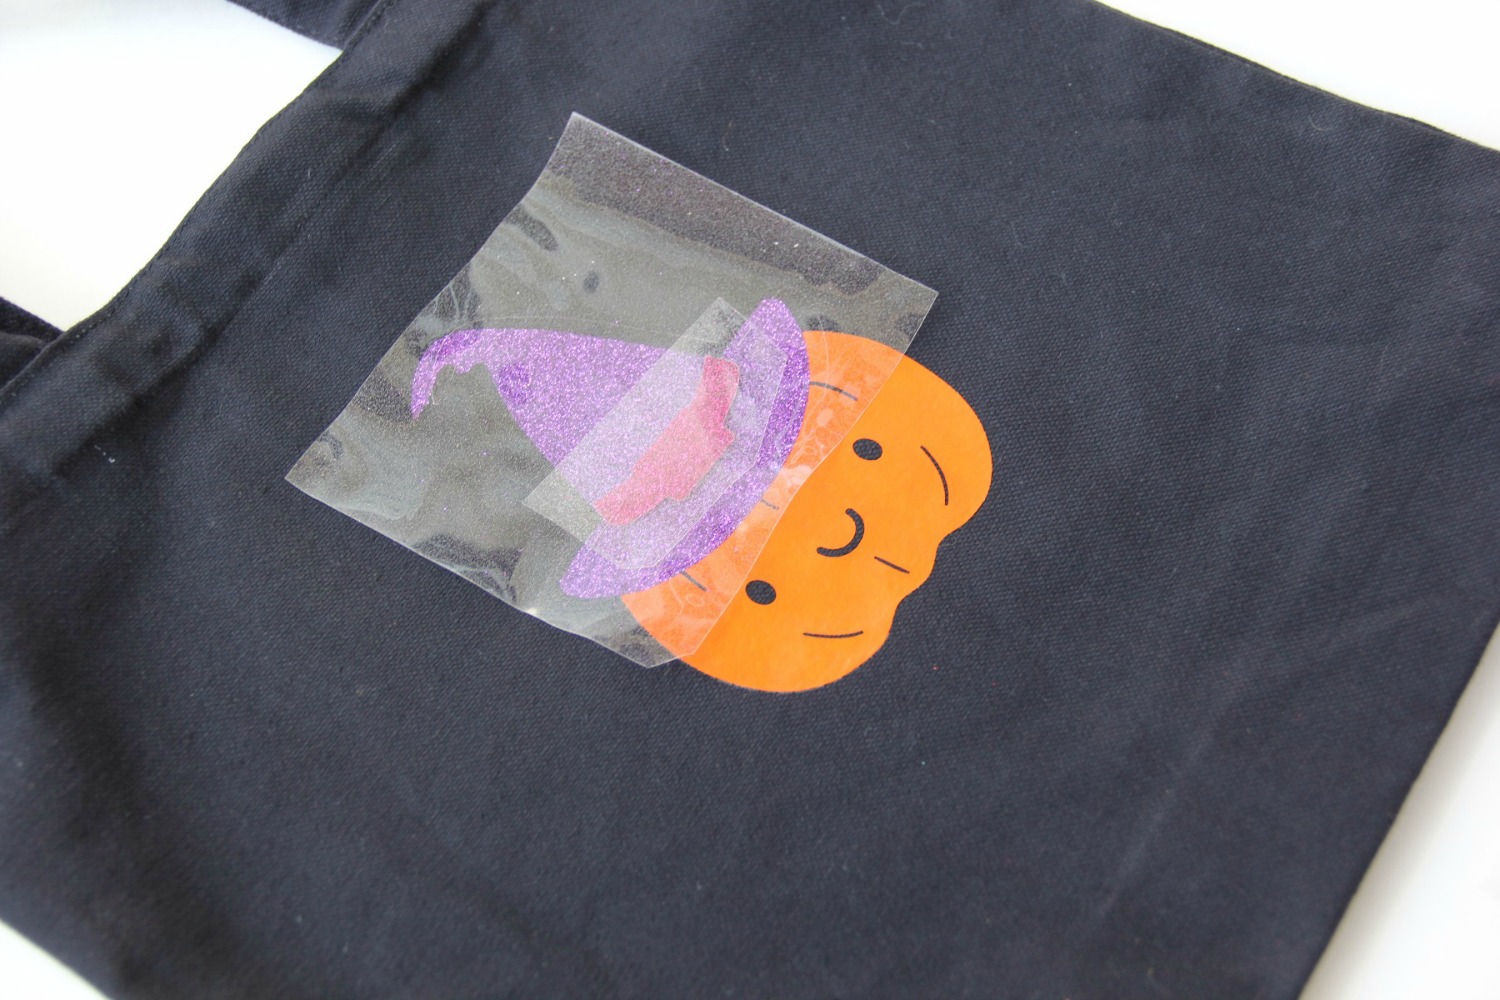
Step 3: Have your iron on the hottest setting (usually cotton/linen). Iron on your pumpkin first. Apply medium pressure for 10-15 seconds before removing the carrier sheet. EasyWeed's carrier can be peeled off when it is still hot or you can wait until it cools down; I prefer hot.
Step 4: After removing the pumpkin's carrier sheet, place the witch's hat on the pumpkin. Since the pumpkin should still be warm there is no need to preheat. Apply *firm* pressure for 10-15 seconds; peel the carrier sheet off while it is hot.

Step 5: Layer the next sheet, the hat's band. I don't want the previous layer to melt so I place the previous carrier sheet on top of the image and it's carrier sheet to cover more space. Again, apply *firm* pressure for 10-15 seconds then peel off the carrier tape. We are almost done!
Step 6: Add the buckle to the hat, the hat's carrier sheet, and press the iron on the image for 10-15 seconds.
HOORAY! The witch pumpkin is done! It's time to add the bats and phrase or name.
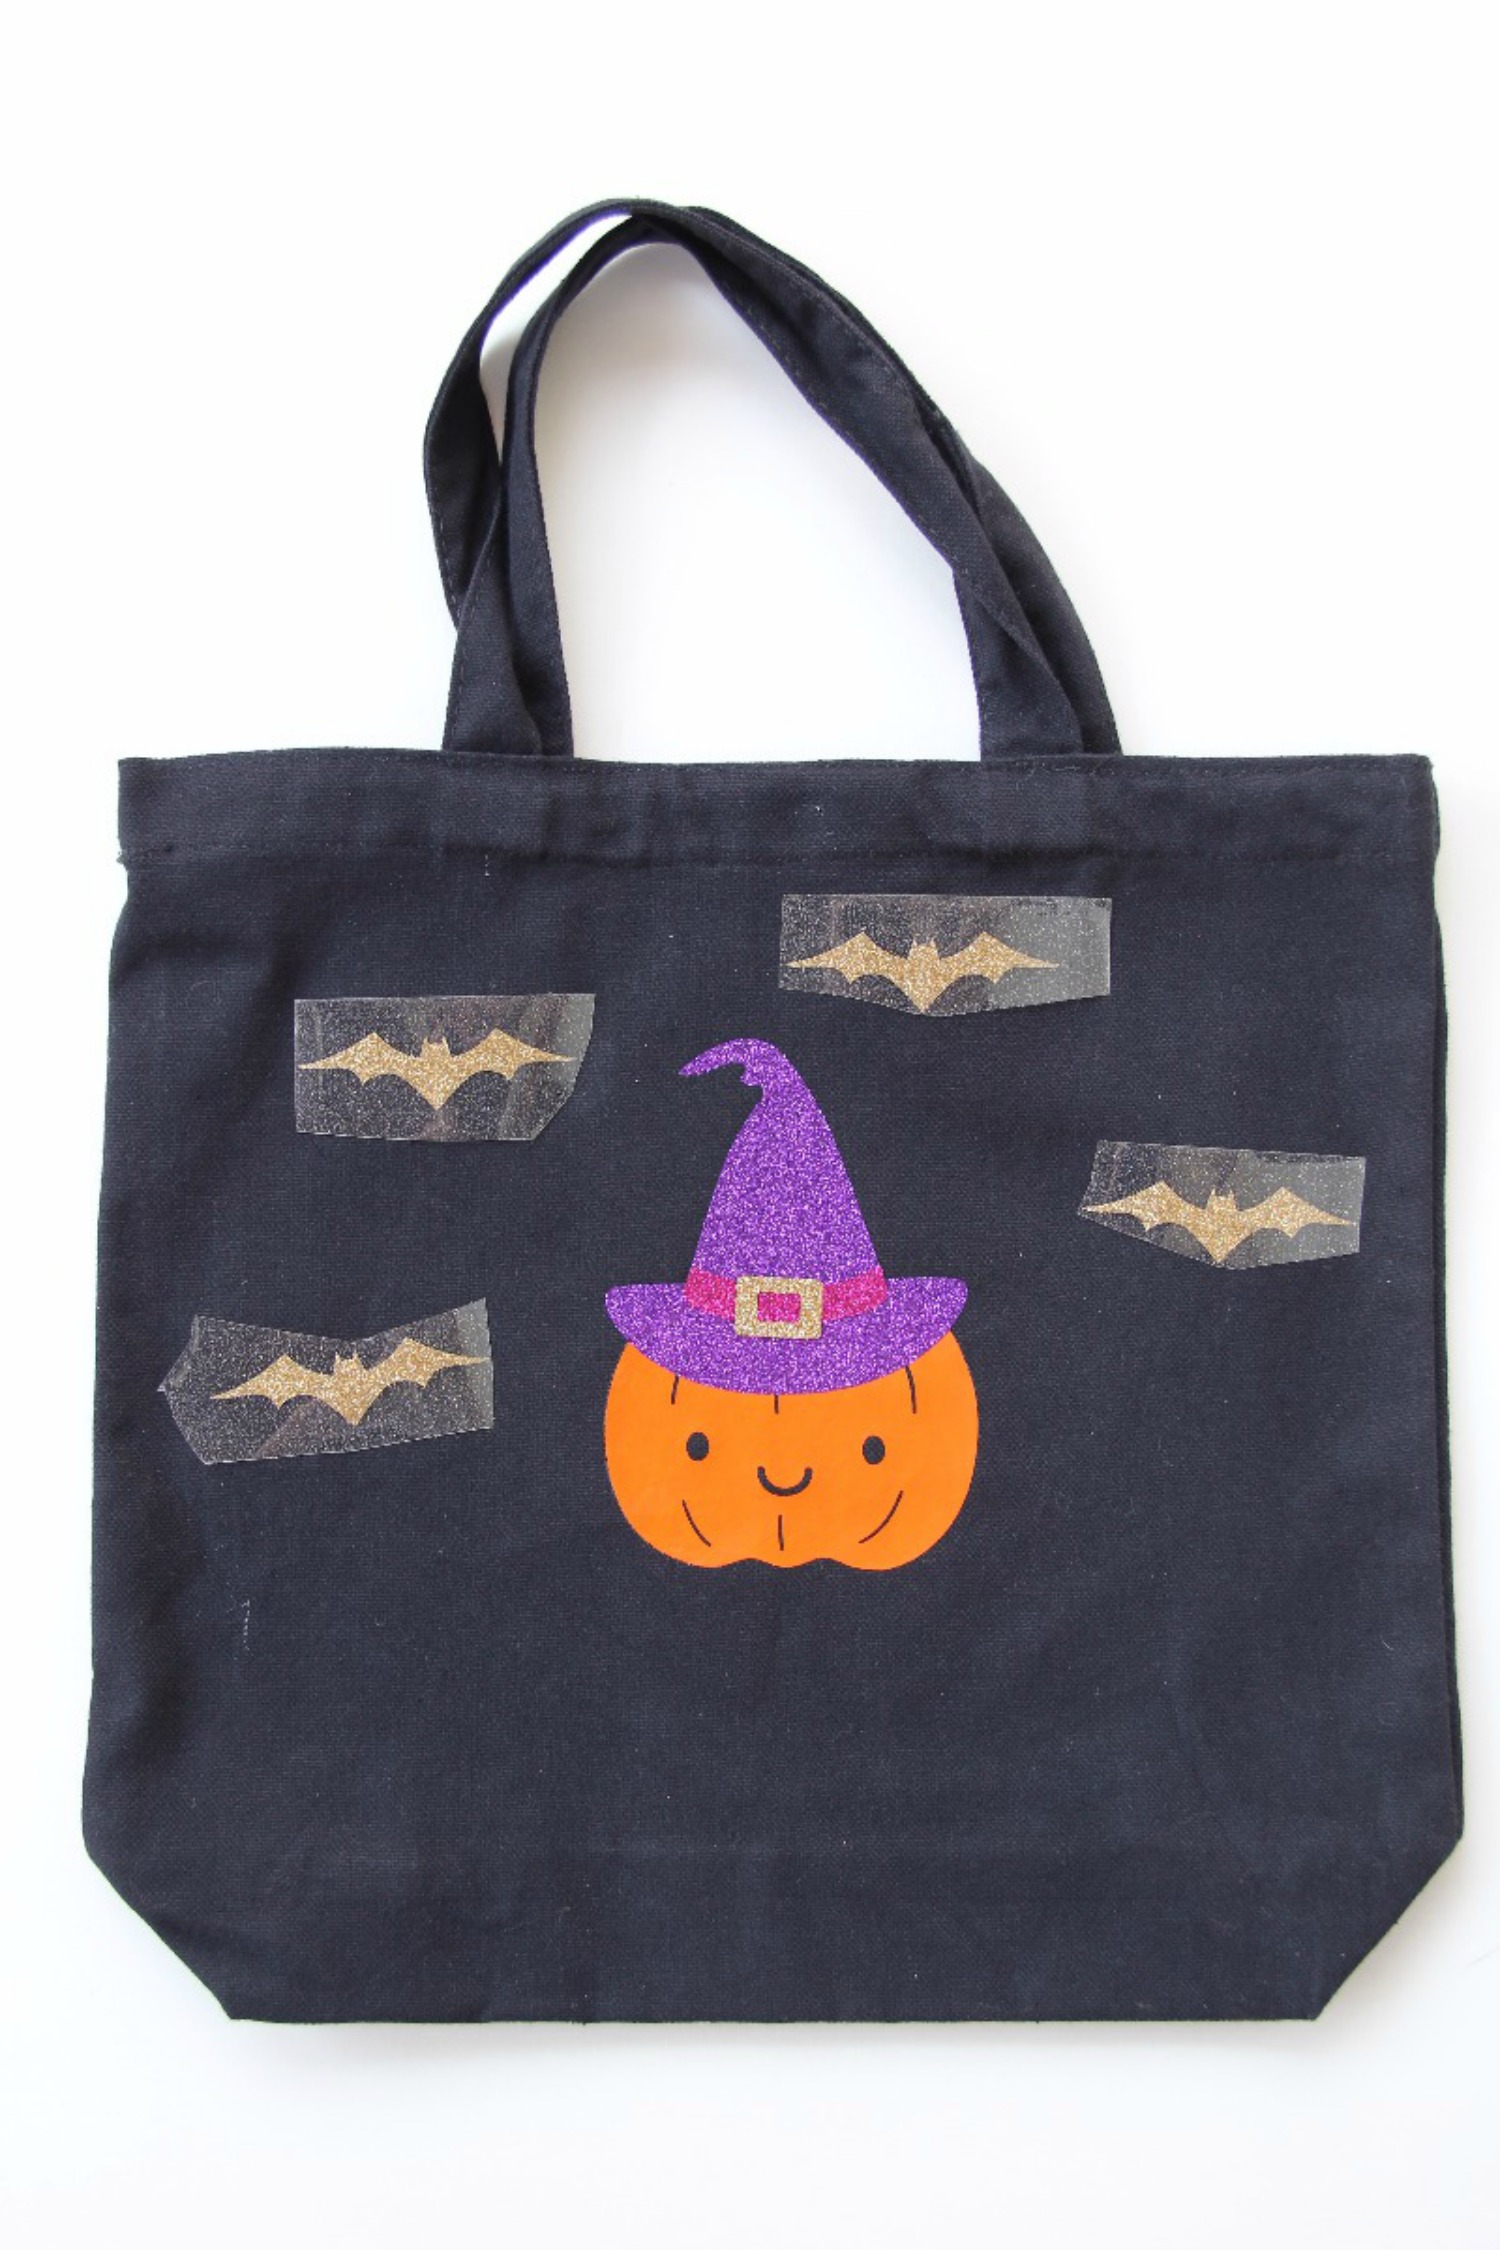
Since the area was not heated previously, preheat the area that you are applying the htv image for 3 seconds before applying the image. Using *firm* pressure press 10-15 seconds on each bat and then the name.

TA-DA! Your bag is finished.
I hope you have fun making a Halloween bag! If you have any questions please leave a comment or message me on my Instagram.
Happy Crafting!
Elyse
Recent Posts
-
NEW Holographic Eclipse Heat Transfer Vinyl
April 15th, 2024 3 Ways to Use the New Holographic Eclipse Heat Transfer Vinyl from Siser …Apr 29th 2024 -
Hop into Spring with Cute Easter Vinyl Crafts
Do you love our Vinyl? Sign up for Vinyl Club today to get FREE vinyl and save big! …Mar 28th 2024 -

Fixing Wrinkles and Bubbles in Vinyl
How do you get air bubbles out of vinyl? There are a few different ways to ensure a flawless …Mar 26th 2024