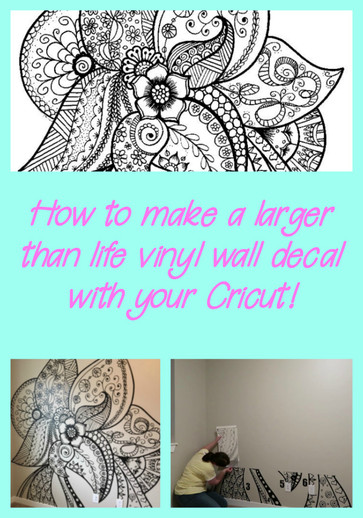
How to create a large vinyl wall decal with your Cricut!
Have you ever wanted to create a large vinyl wall decal but weren't sure how to do it or if it was even possible on your Cricut? I have, and it is possible on your Cricut! Join me now as I walk you through step by step how to do it.
To start off you are going to need a fun image to work with as well as a vinyl. I used Oracal 631 which is a removable vinyl that we recommend for indoor walls. You can find it here - ORACAL 631. The image I used was a drawing that I did and converted into a cut file.
Once you have your image in Design Space, change it to the size you would like to have it. I started out around 3 ft but the final version was larger than 5 ft by 5 ft.
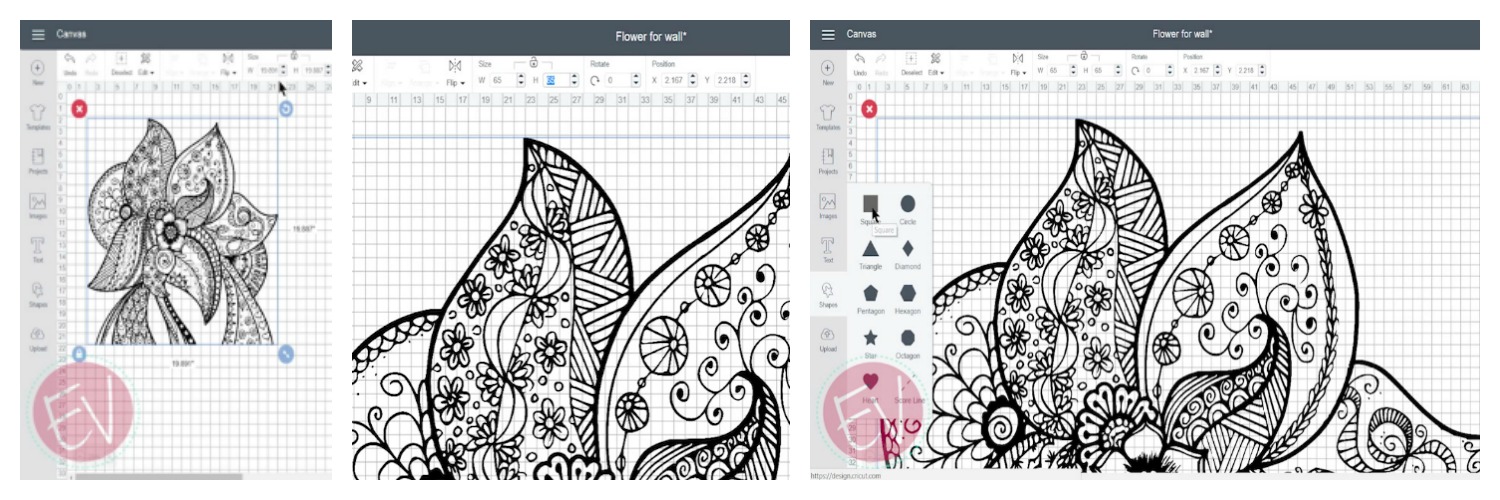
Next you will need to add a square in and change the size of it to fit the sheet of vinyl. I adjusted the size of my rectangle to be 11 x 22. if you want to go to the largest size that the Cricut will cut then go ahead and increase it to 11.5 and 23.5 inches. Duplicate that shape several times because you are going to need quite a few to slice your image.
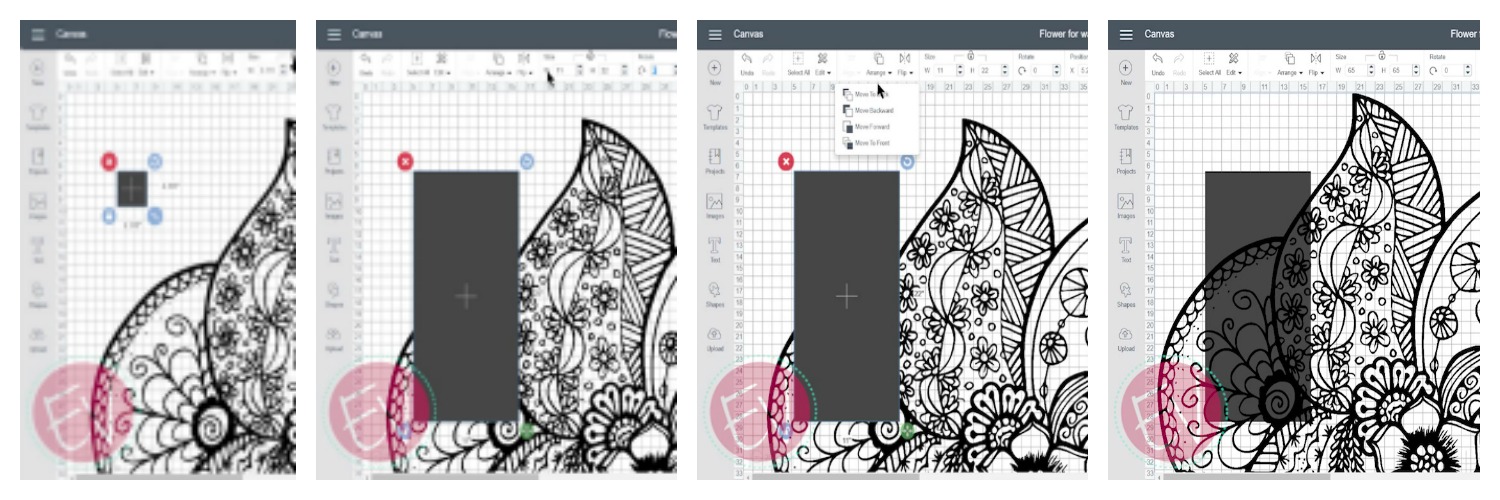
Before you start slicing, I found it helpful to move the image to the top left hand corner. Rather than drag it over there you will need to adjust the position in the top toolbar. Change it to 0 on both the X and the Y axis. Now Change your rectangle to that very same location. It's a little easier to have it in the background and you do that by selecting the Arrange and then Move to Back. Now that you have the rectangle in place and then main image in place you are ready to Slice.

Select the rectangle and select the Image. In the bottom right hand corner you will see the option to Slice. Once you slice the first set you will see all the pieces in the top right hand in the layers panel. Every time you slice something new it will appear on the top. From the layers panel delete the pieces that you do not need. If you accidentally delete the wrong one, don't worry, that's what the Undo button is for. Continue on with each of the remaining pieces. It is easiest if you don't try to move them all by hand, move with with the X and Y coordinates. If you followed the same sizes that I did and starting with the top row the first rectangle will be at X 0, Y 0. The second one at X 11, Y 0. Third at X 22, Y 0 and so forth. For the second row it will be X 0, Y 22 for the first. The second is X 11, Y 22 and the third would be X 22, Y 22 and so on. It might look a little confusing but once you get going and watching the rectangles move it will make sense.
As you are working through these steps don't forget to SAVE. I can't tell you how many times I had to go back to the last spot that I saved my image. Also, a little help that I found while doing it, as soon as you have sliced your section, change it to a different color. This will help you see which ones you have sliced and which ones you have not.
After I finished slicing all of the different sections that I needed I decided that I would add numbers to them just to help me know where each piece is at. Depending on the size of your image you may not need to do that. Insert a number and then just attach it to your image. This was a lifesaver when I finally started placing them on the wall.

If you have followed this far you are ready for the fun part. Make sure you save it one more time and then start cutting. Again, I used Oracal 631 because this is on an indoor wall. After all you pieces are cut and weeded out you are ready for the fun part. Allow yourself some time for the cutting and weeding process. Mine took a while.
I started placing it on the wall in the bottom left hand corner. This way I had the baseboard of the wall to help the bottom layer but also made it easier to know for sure that I had room for the entire thing. Start placing on your wall and matching each piece up to the one you just placed. I cut them down a bit right at the edge to make it easier to see. I am a fan of the paper transfer tape which is a little more difficult to see through. You can try it with any of the different types we carry. They are found here - Transfer Tape

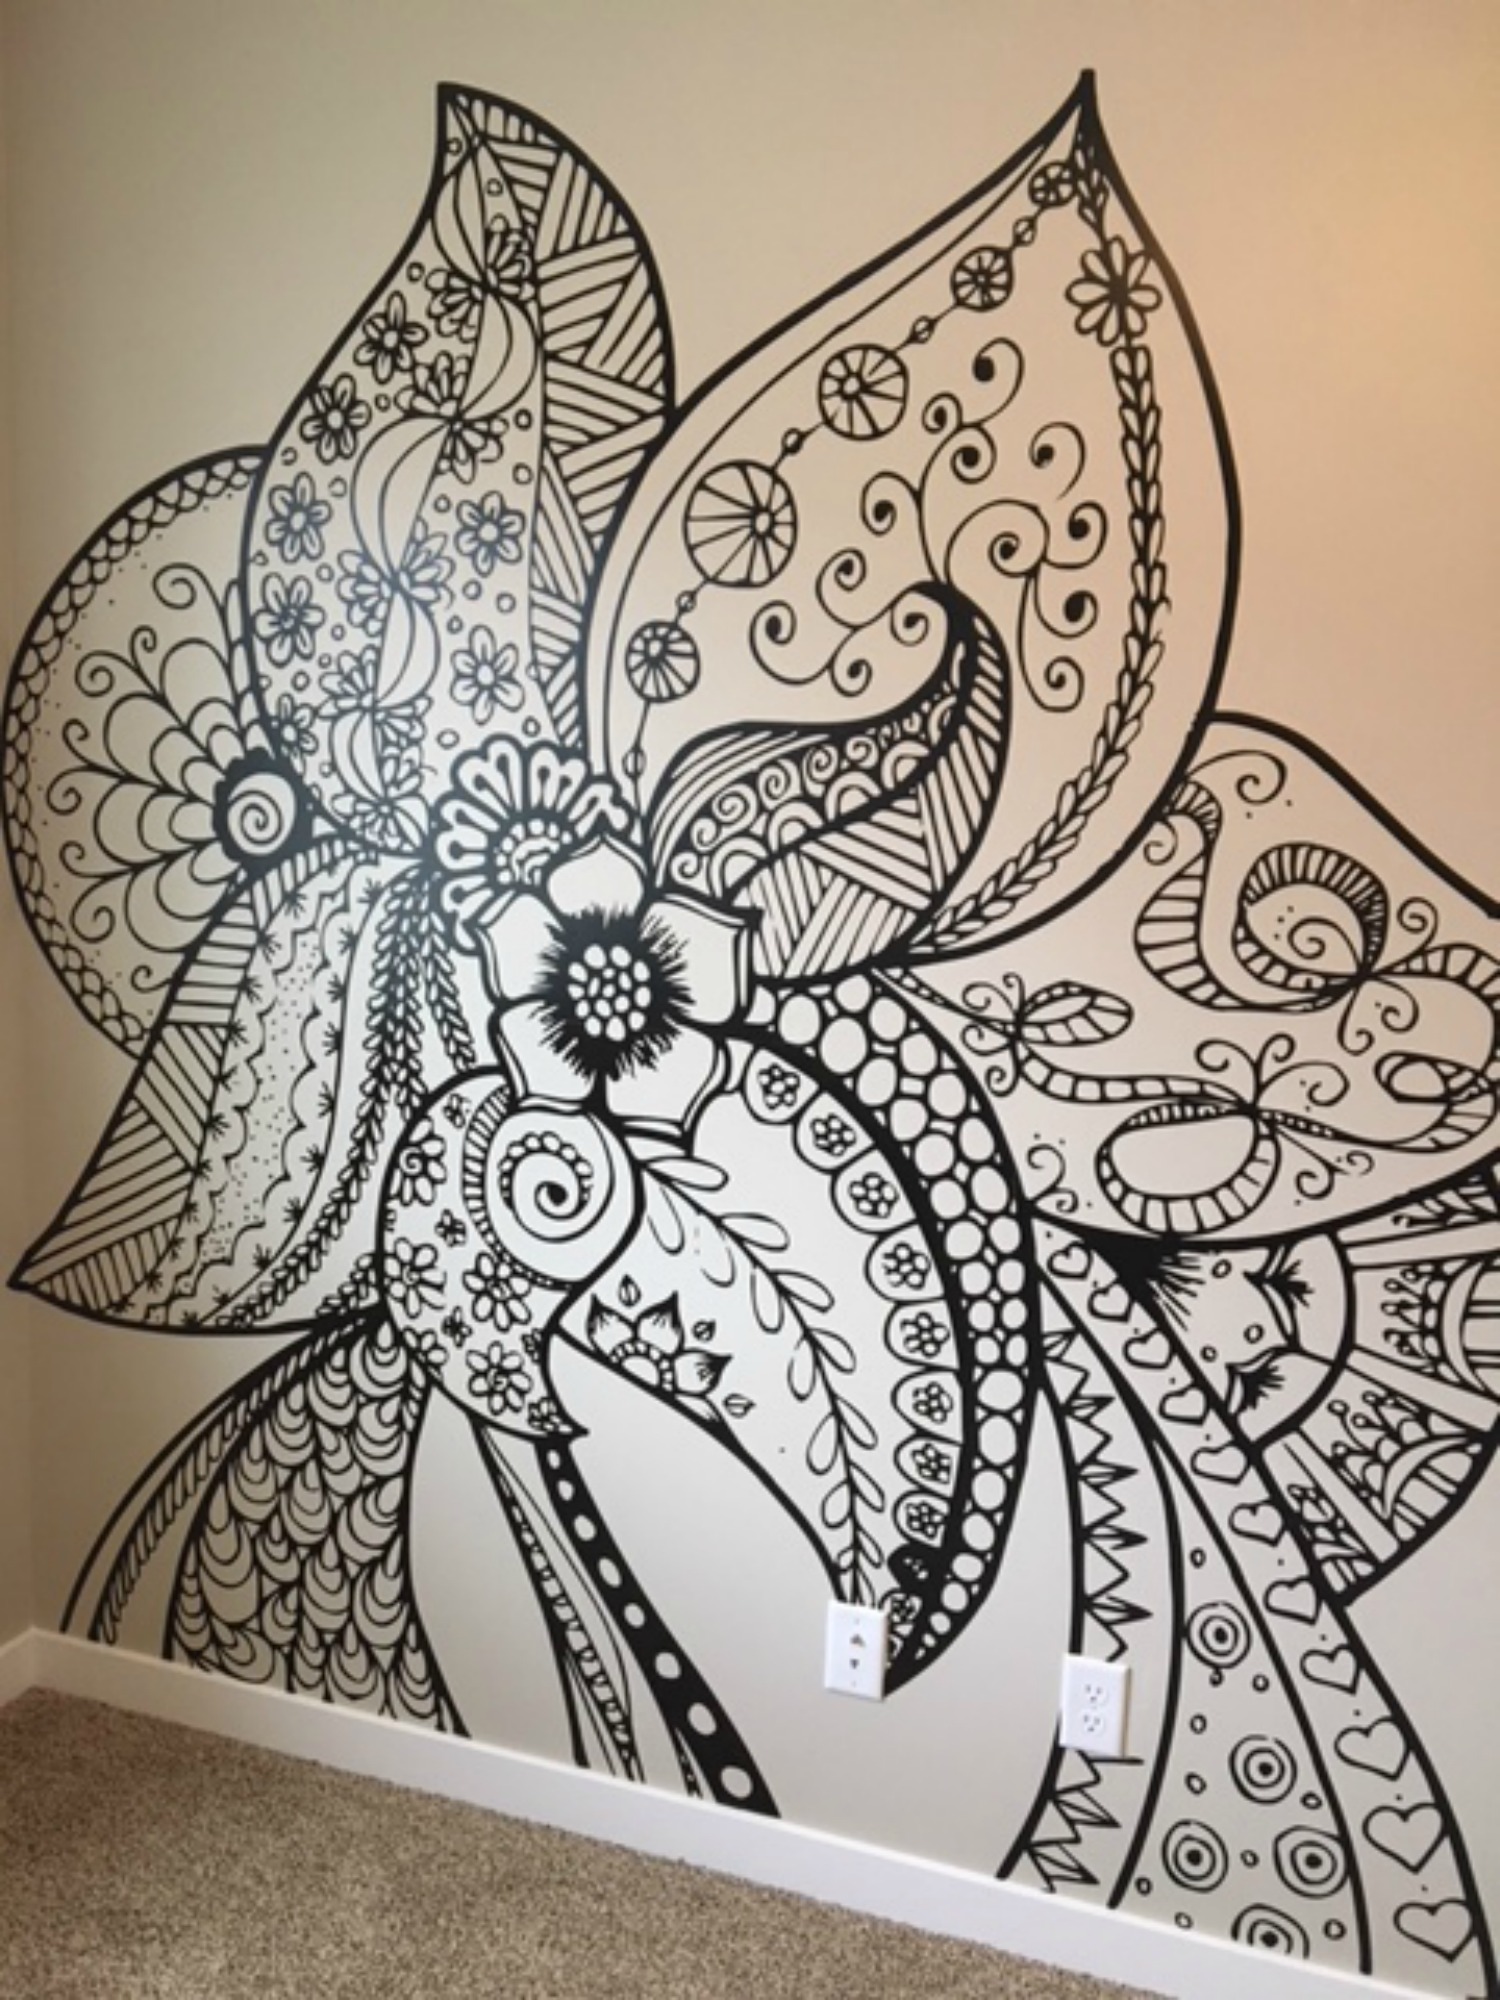
Have Fun!

Recent Posts
-
Hop into Spring with Cute Easter Vinyl Crafts
Do you love our Vinyl? Sign up for Vinyl Club today to get FREE vinyl and save big! …Mar 28th 2024 -
Fixing Wrinkles and Bubbles in Vinyl
How do you get air bubbles out of vinyl? There are a few different ways to ensure a flawless …Mar 26th 2024 -
20 Creative Craft Quotes You Will Love
March 12, 2024 20 Creative Craft Quotes You Will Love You can never have too many craft …Mar 12th 2024

