
How to make a Stencil using Oramask 813
Hey guys, it's Jessica from Expressionsvinyl.com, and today I wanna talk to you about our Oramask material. It's a stencil vinyl that you can make fun signs with, and we're going to make one today, but first I wanna talk to you about the material.
It's really thin, just like vinyl, and you cut it with the same settings. And you can see it's a little bit see through, and has a little more plastic feel than regular vinyl.

So those are some of the basics. Let's get started on our project. I'm gonna measure my board, so I know how big to make my design. So we've got about 10 inches across, and about nine and three quarters tall.

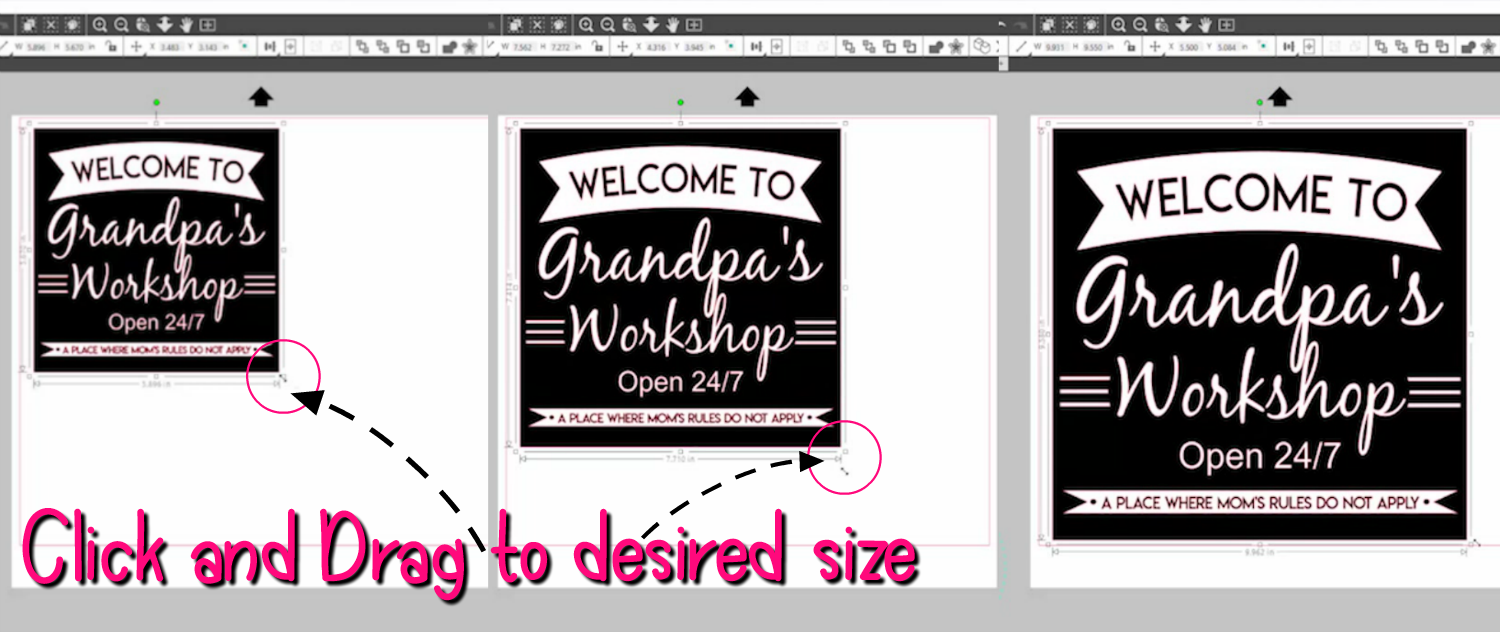
So now I am in my program and setting up my design,I've created this in my Silhouette program, and now I just need to size it. So I'm gonna go over here to the right hand corner, and change my width to 12 inches, and my project was 10 inches wide, so I'm just gonna grab that corner and stretch this out so it's the same size as my board. So we've got 10 inches, and then 9.6, which is perfect.
This cute sign is available here as a free file!!!!
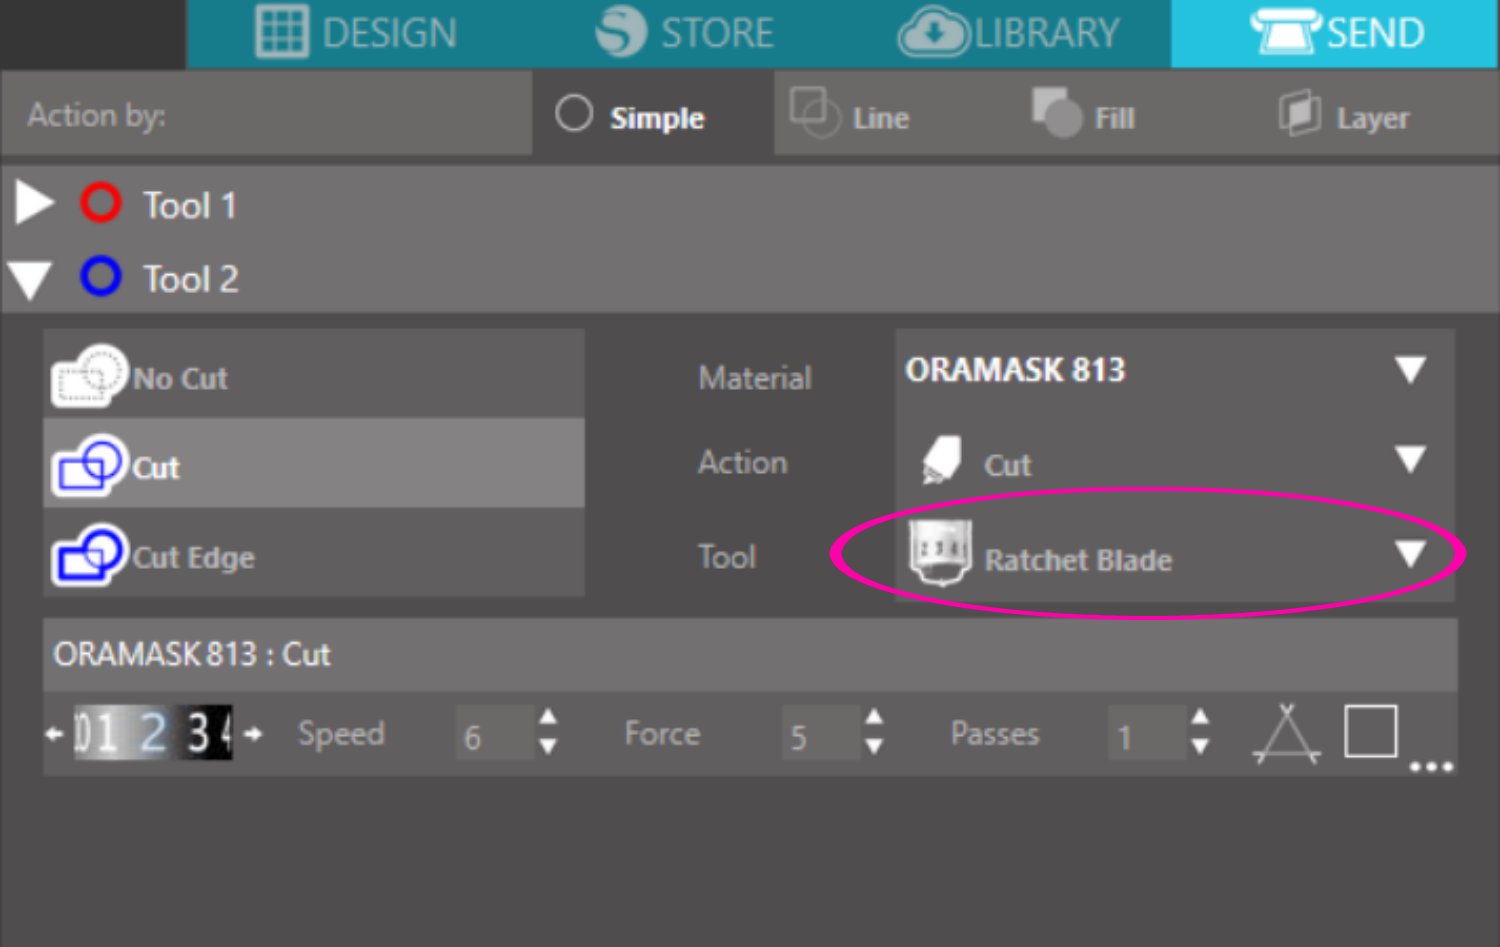
Now that I have this set, I'm going to send it to my machine. But first I'm going to change some settings. I'm not using the auto blade, I'm gonna use a Premium Blade, and we cut this just like we do regular vinyl, so I've got my blade on a 2, my speed on a 6, and my force at a 5. You can find all the cut settings on our website.
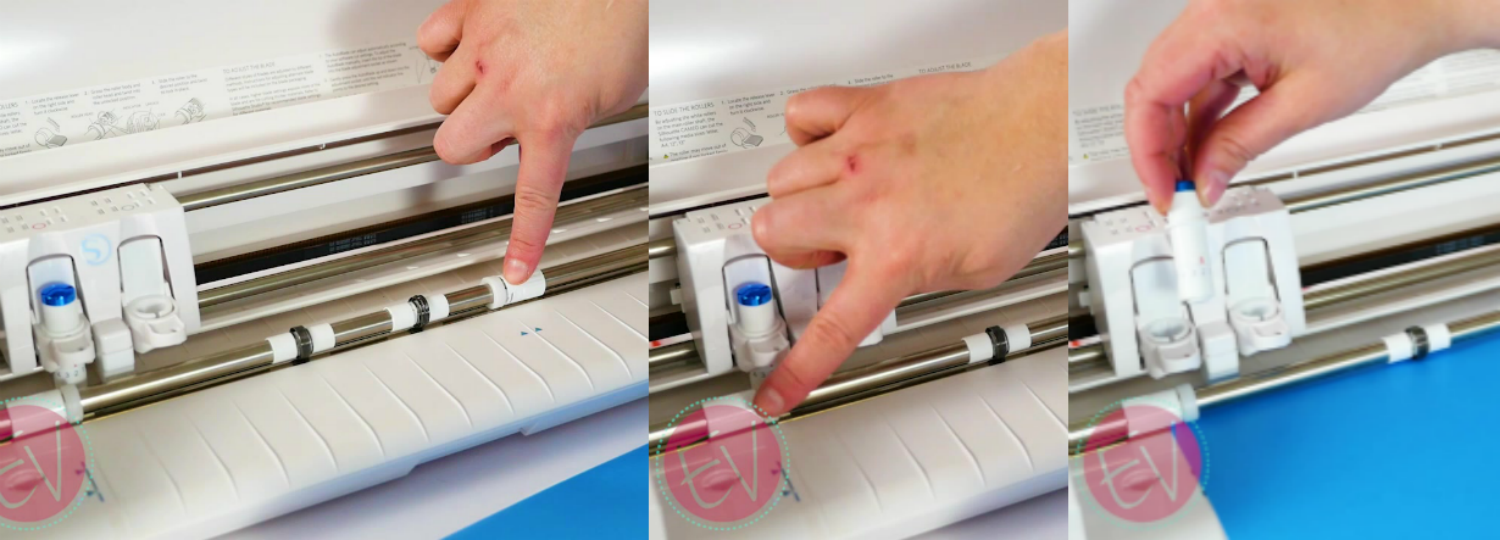
Now I can just load it into my machine. And I want to make sure it sits between these two rollers, and push load, and then make sure my blade is on a 2. And go back to my program, and send it.
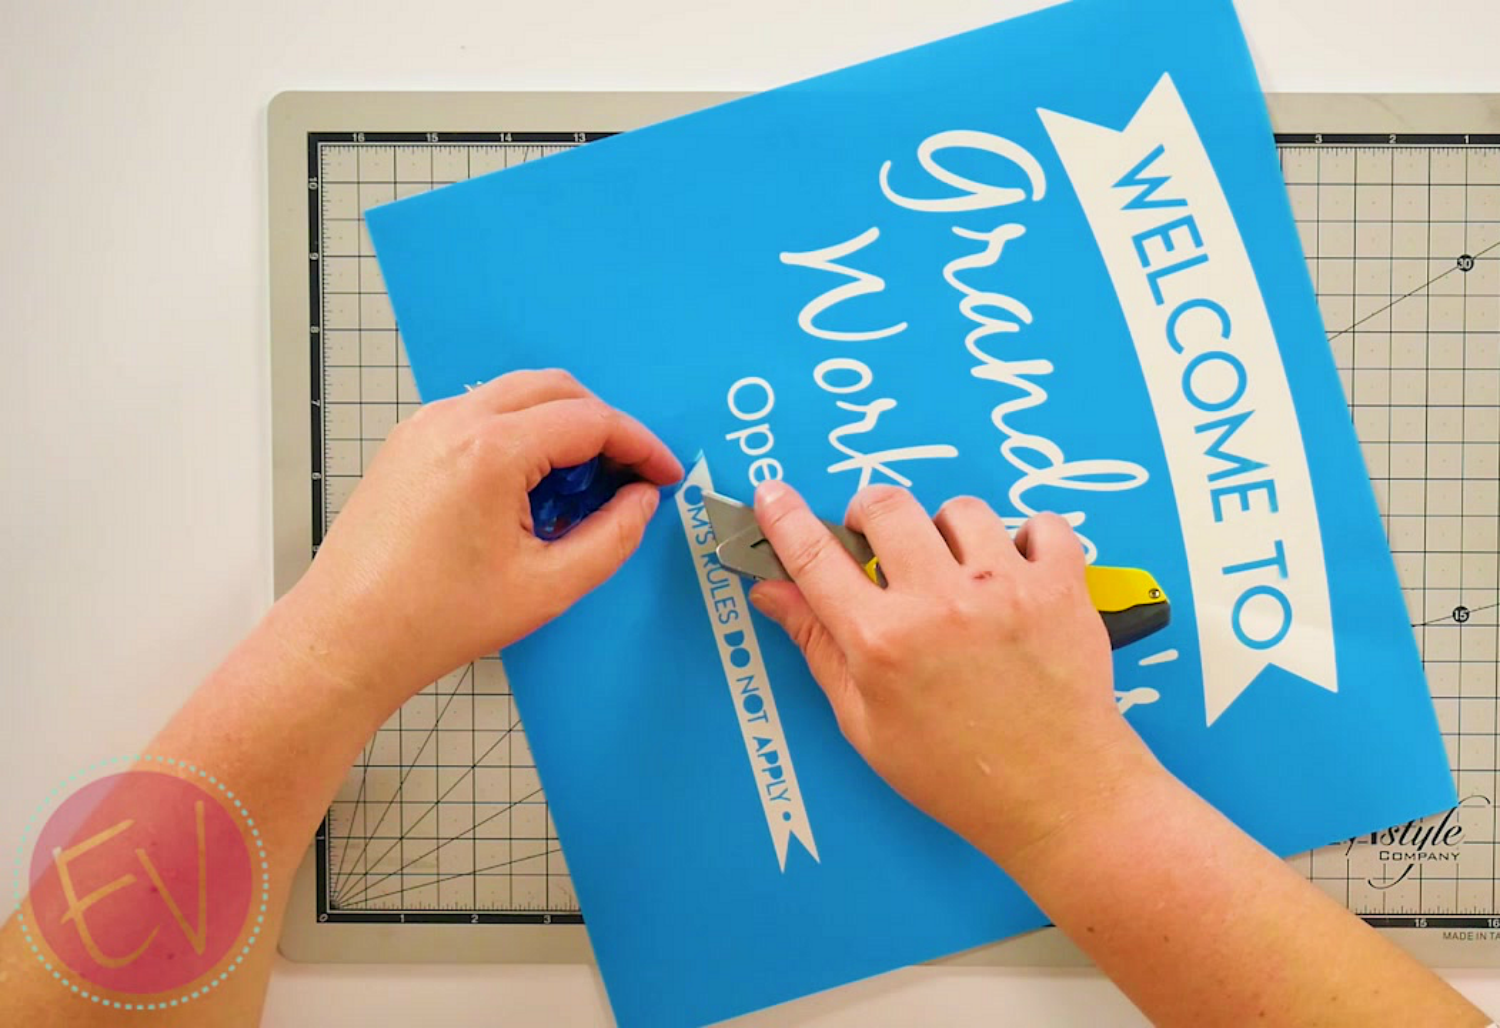
So I'm gonna weed this out opposite as I normally would a vinyl sign, because that is where my paint is gonna be.
Okay, so we've got that all weeded out and we are ready to put our Transfer Tape on. So I'm using the paper transfer tape, but any of our transfer tapes work great with the Oramask. Next just smooth this down with our Application Tool, and make sure we don't have any bubbles in it. And then I'm gonna trim off the edges. Okay, so it was important to make this the same size as my board. So I don't have any exposed edges, and I can just paint it up.
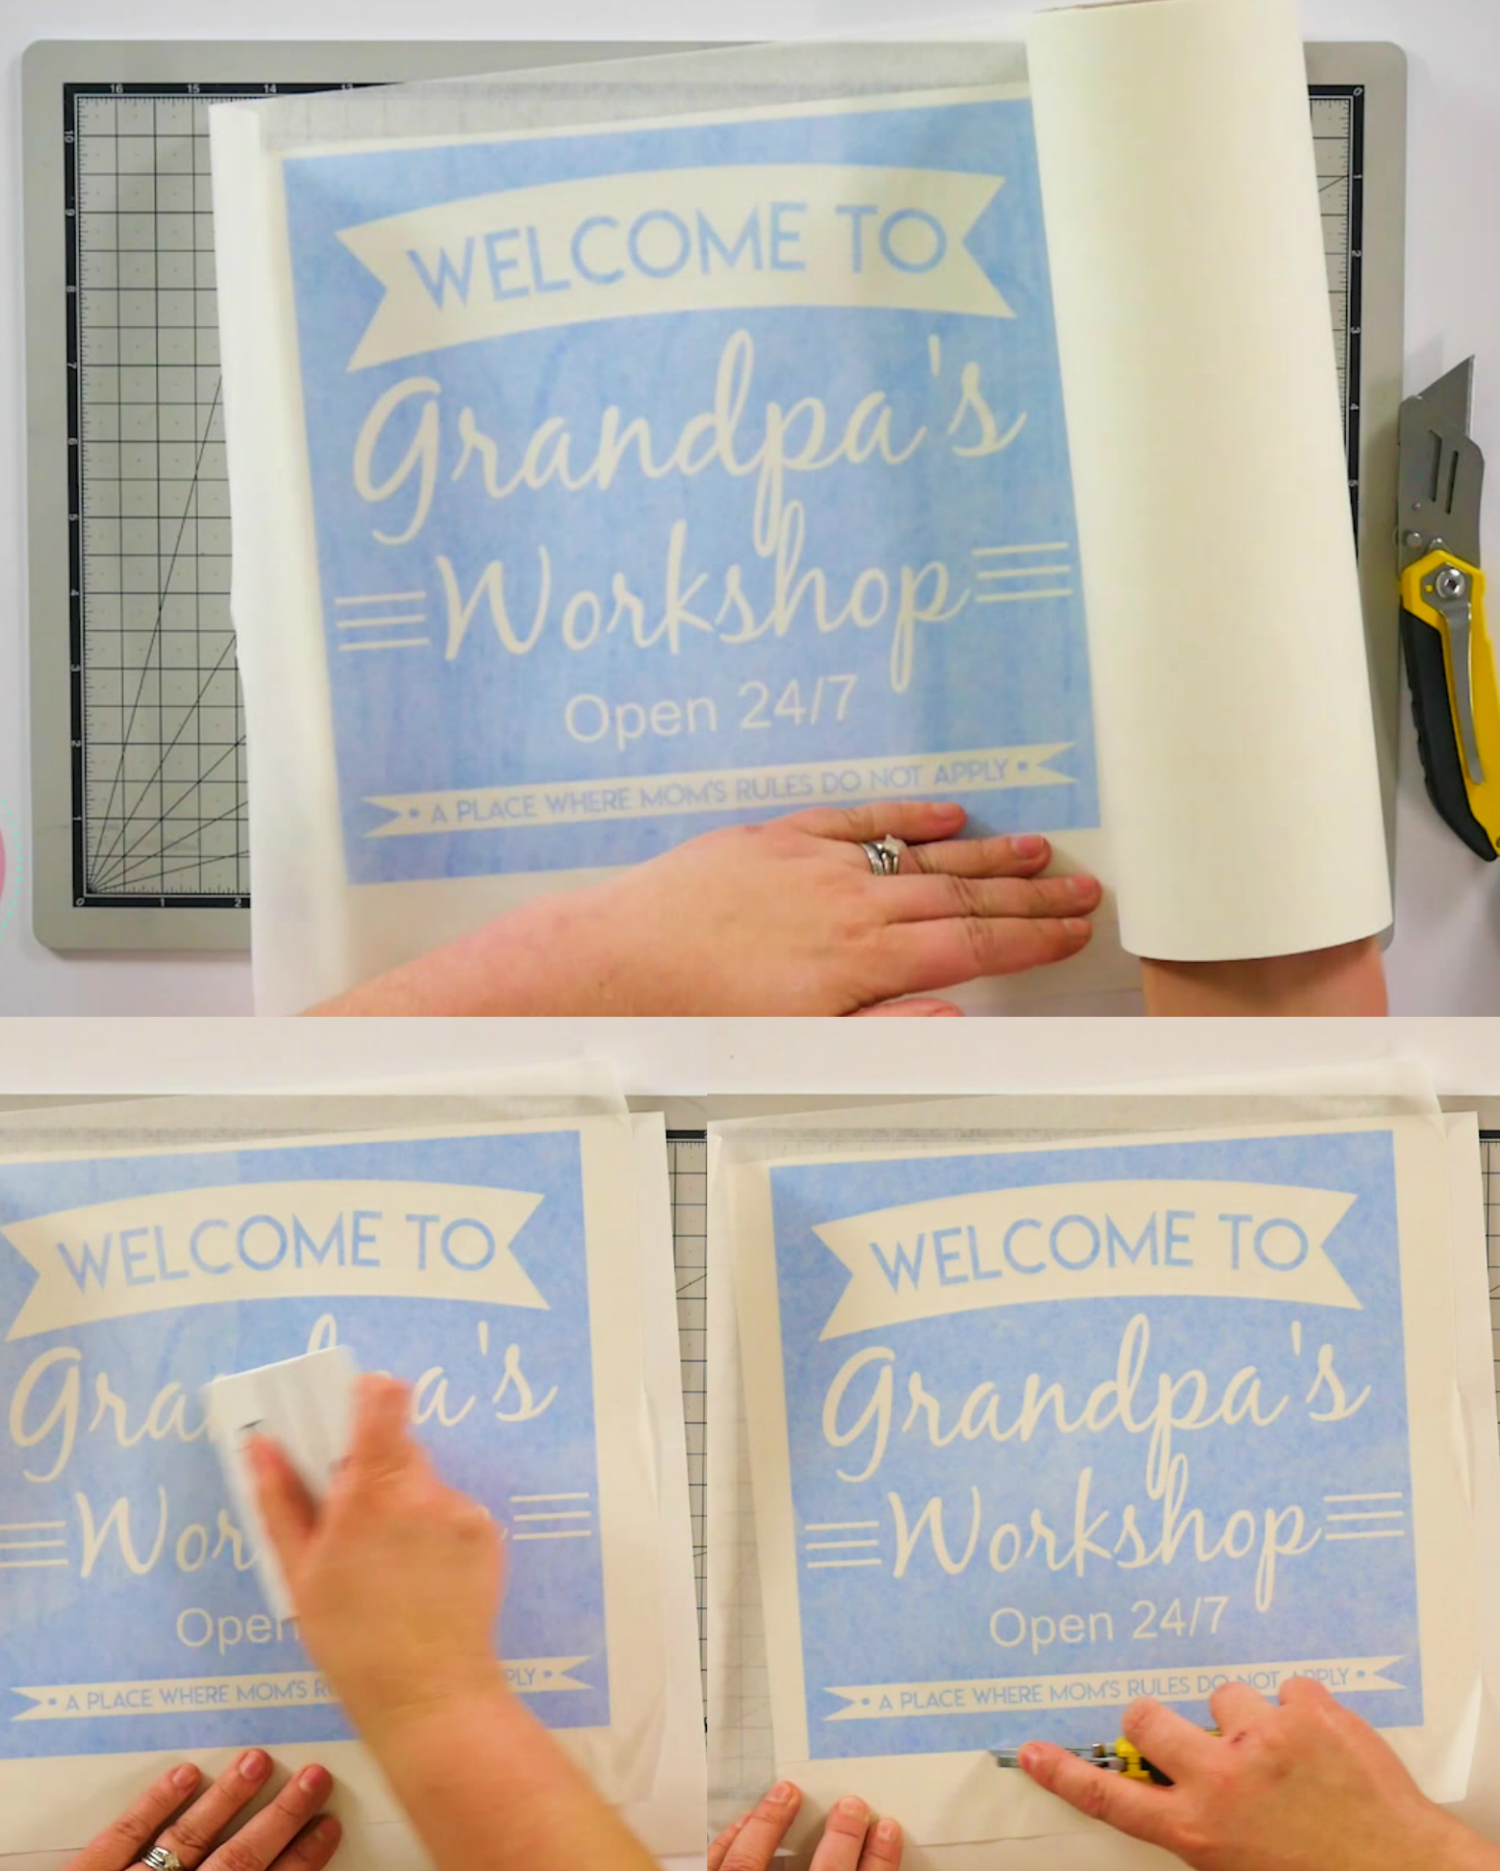
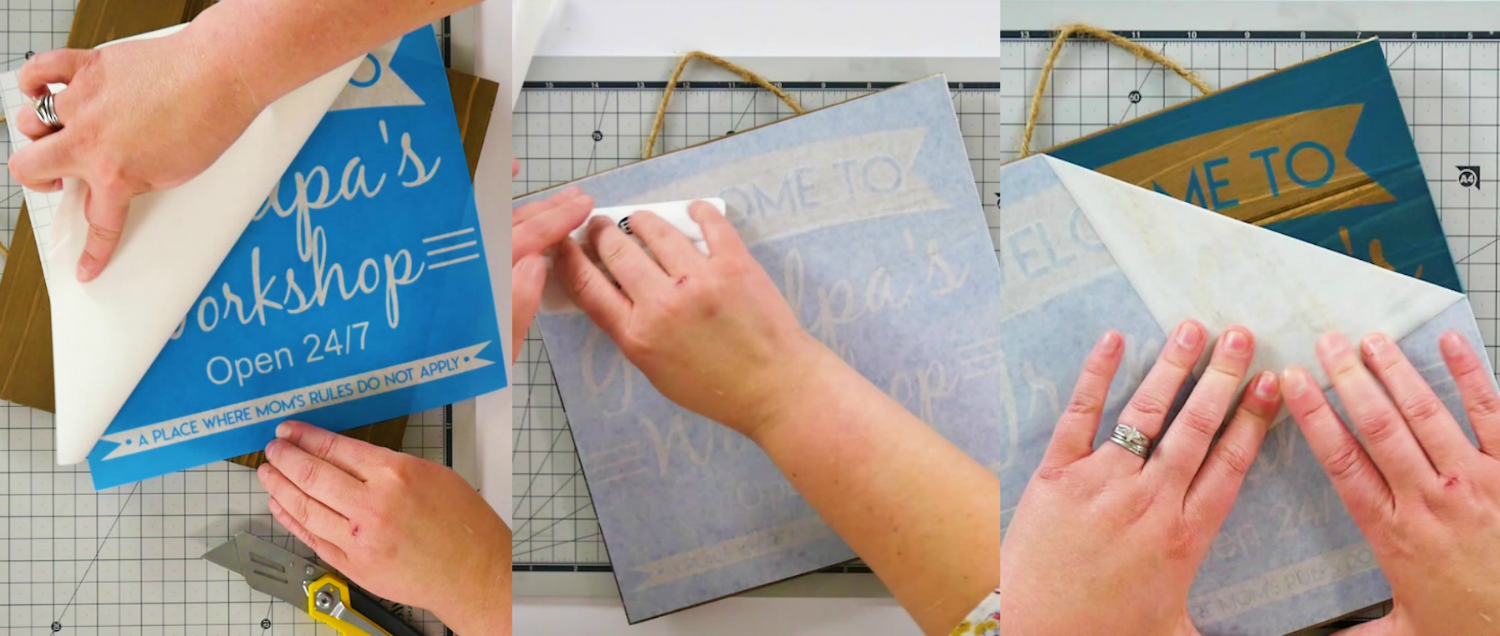
Now I'm just gonna peel off my Paper Transfer Tape and the Oramask away from that paper backing. And make sure I don't leave any letters behind, because that will mess up our stencil. Carefully get it centered on our board. Then using our application tool again, just make sure that Oramask is nice and stuck down, and peel off our transfer tape, leaving the Oramask vinyl on our piece of wood.
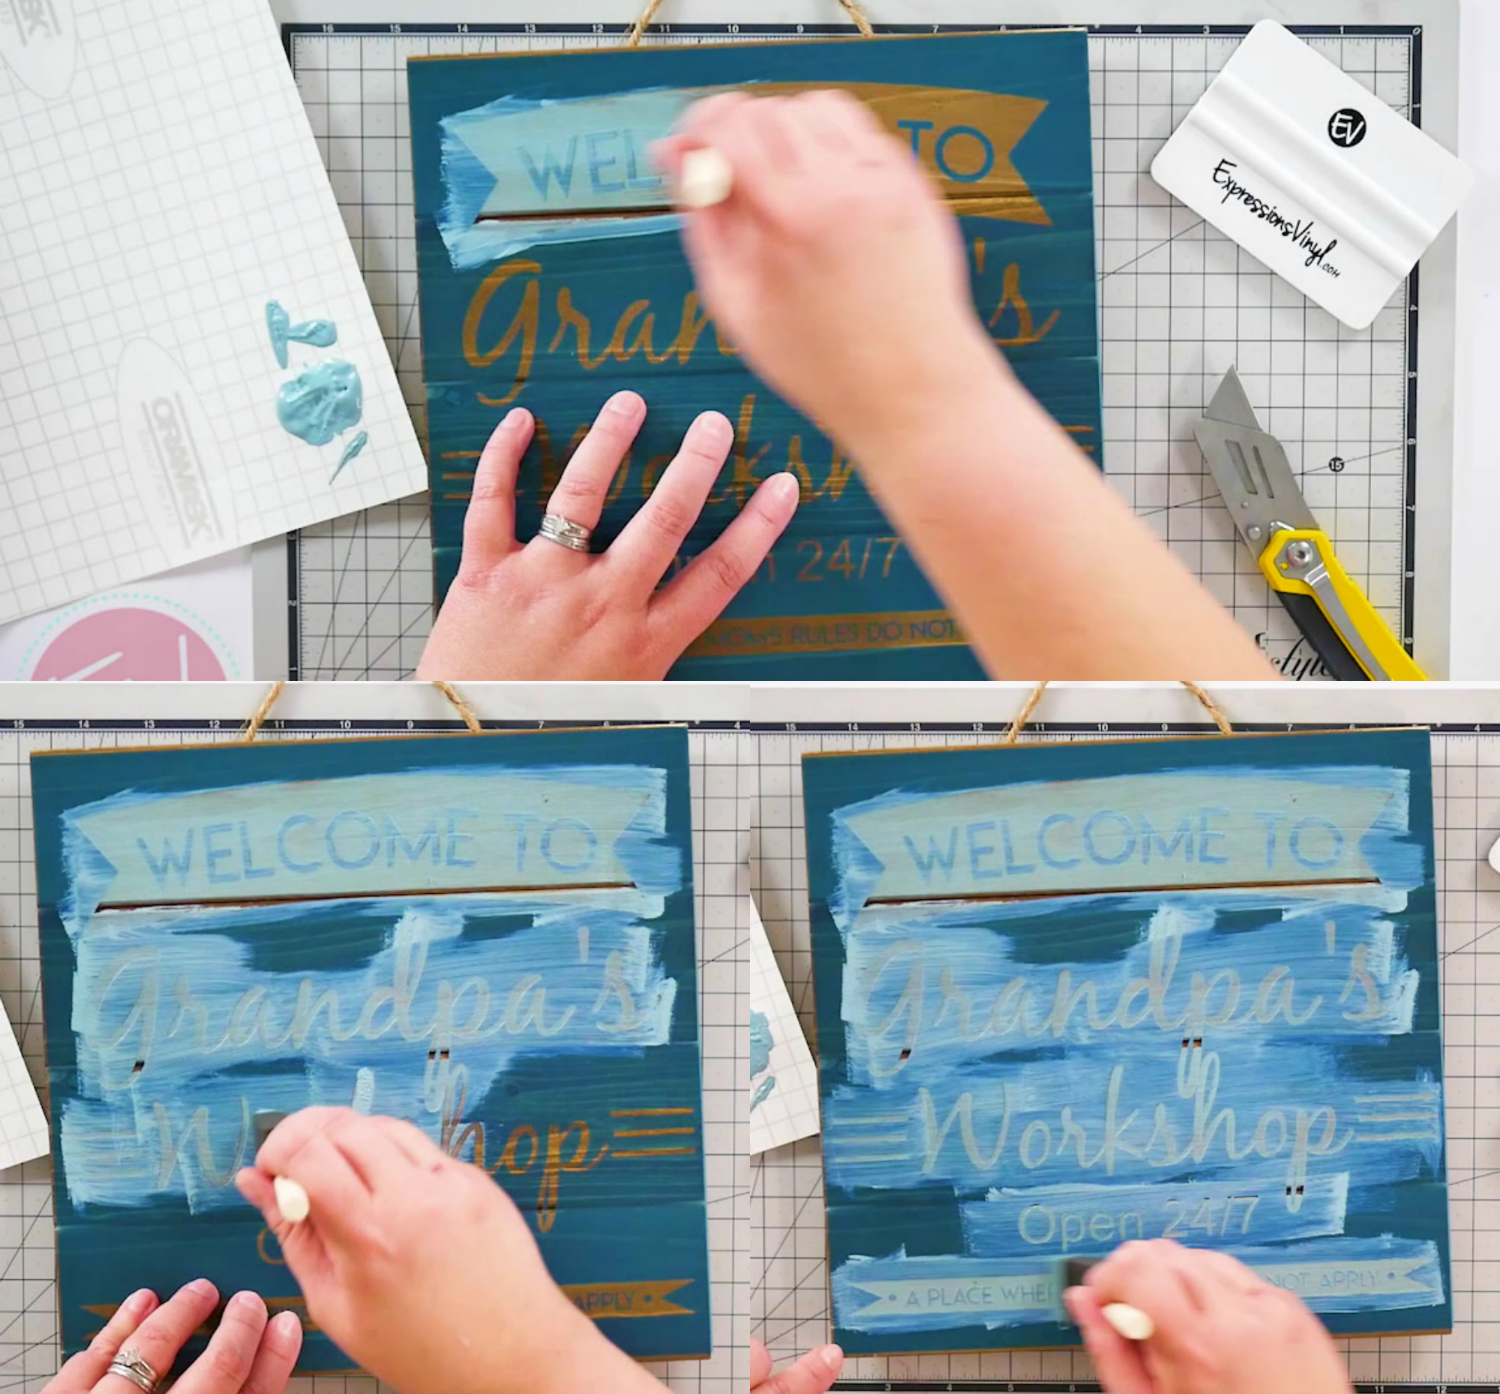
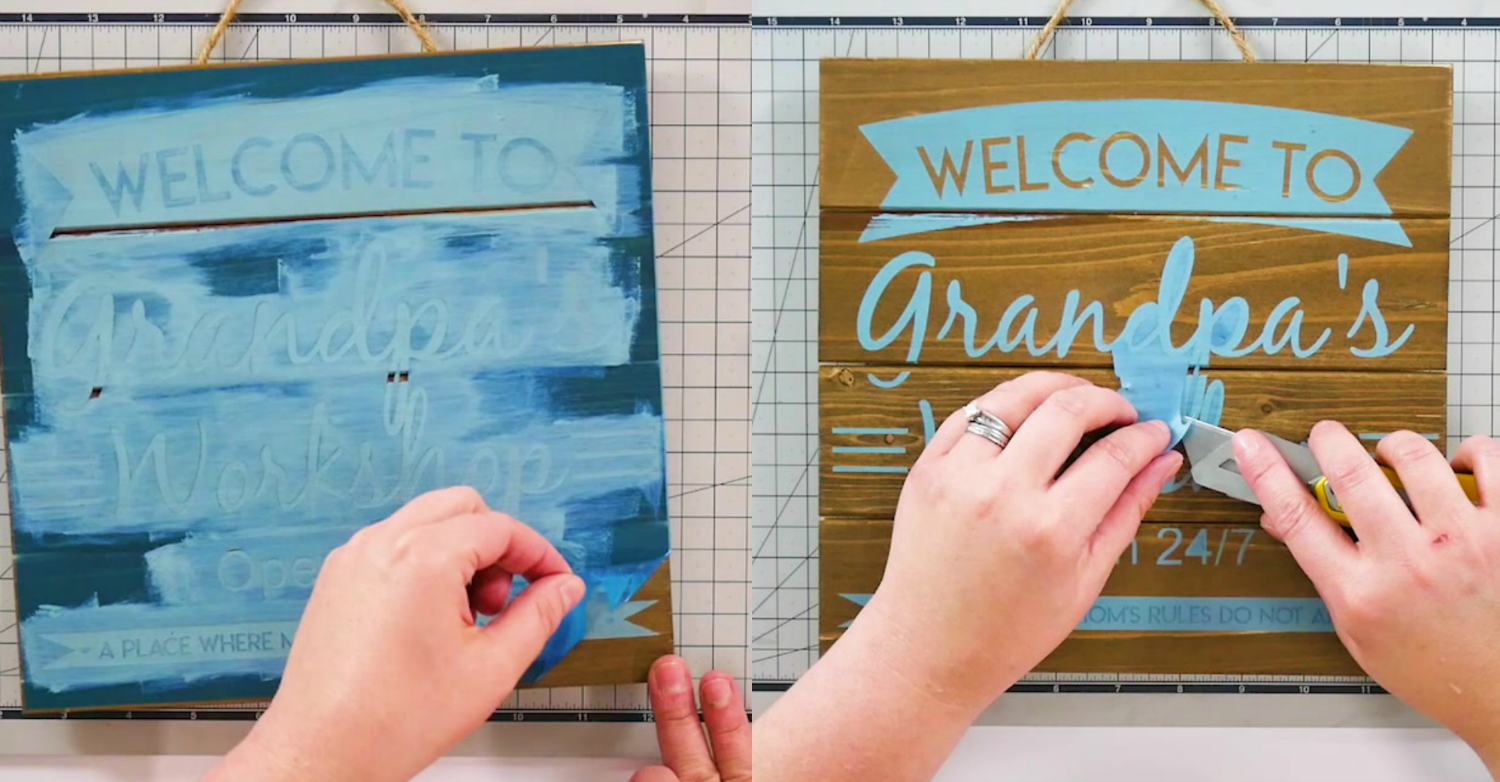
Alright, so now we are ready to paint this. And I am gonna save this little piece of our paper backing to put my paint onto and using a foam brush I am going to fill in all those little cracks. And the Oramask is perfect for this, it has a removable adhesive. So when you're done stenciling, you can peel it right up. So I'm just gonna apply a thin even coat right over the top. So we've got it all painted, and now we are ready to reveal our nice clean lines. So we're gonna peel off this Oramask, and I'm just gonna start in the corner. And the Oramask has a water based adhesive, so it peels off really easy, and seals those edges when you're painting.
My stencil is pretty much destroyed after peeling it up, so the Oramask is a one time use stencil material. So you can see we've got our Oramask all peeled off, we have nice crisp lines, and I love the Oramask, because you can really customize any stencil to be what you want for any project.

I'm really excited to give this to my father in law, and if you guys like this project, give us a thumbs up, if you wanna see more tutorials like this, go ahead and subscribe to our channel. Thanks guys!

Recent Posts
-
NEW Holographic Eclipse Heat Transfer Vinyl
April 15th, 2024 3 Ways to Use the New Holographic Eclipse Heat Transfer Vinyl from Siser …Apr 29th 2024 -
Hop into Spring with Cute Easter Vinyl Crafts
Do you love our Vinyl? Sign up for Vinyl Club today to get FREE vinyl and save big! …Mar 28th 2024 -

Fixing Wrinkles and Bubbles in Vinyl
How do you get air bubbles out of vinyl? There are a few different ways to ensure a flawless …Mar 26th 2024