
I Caught You
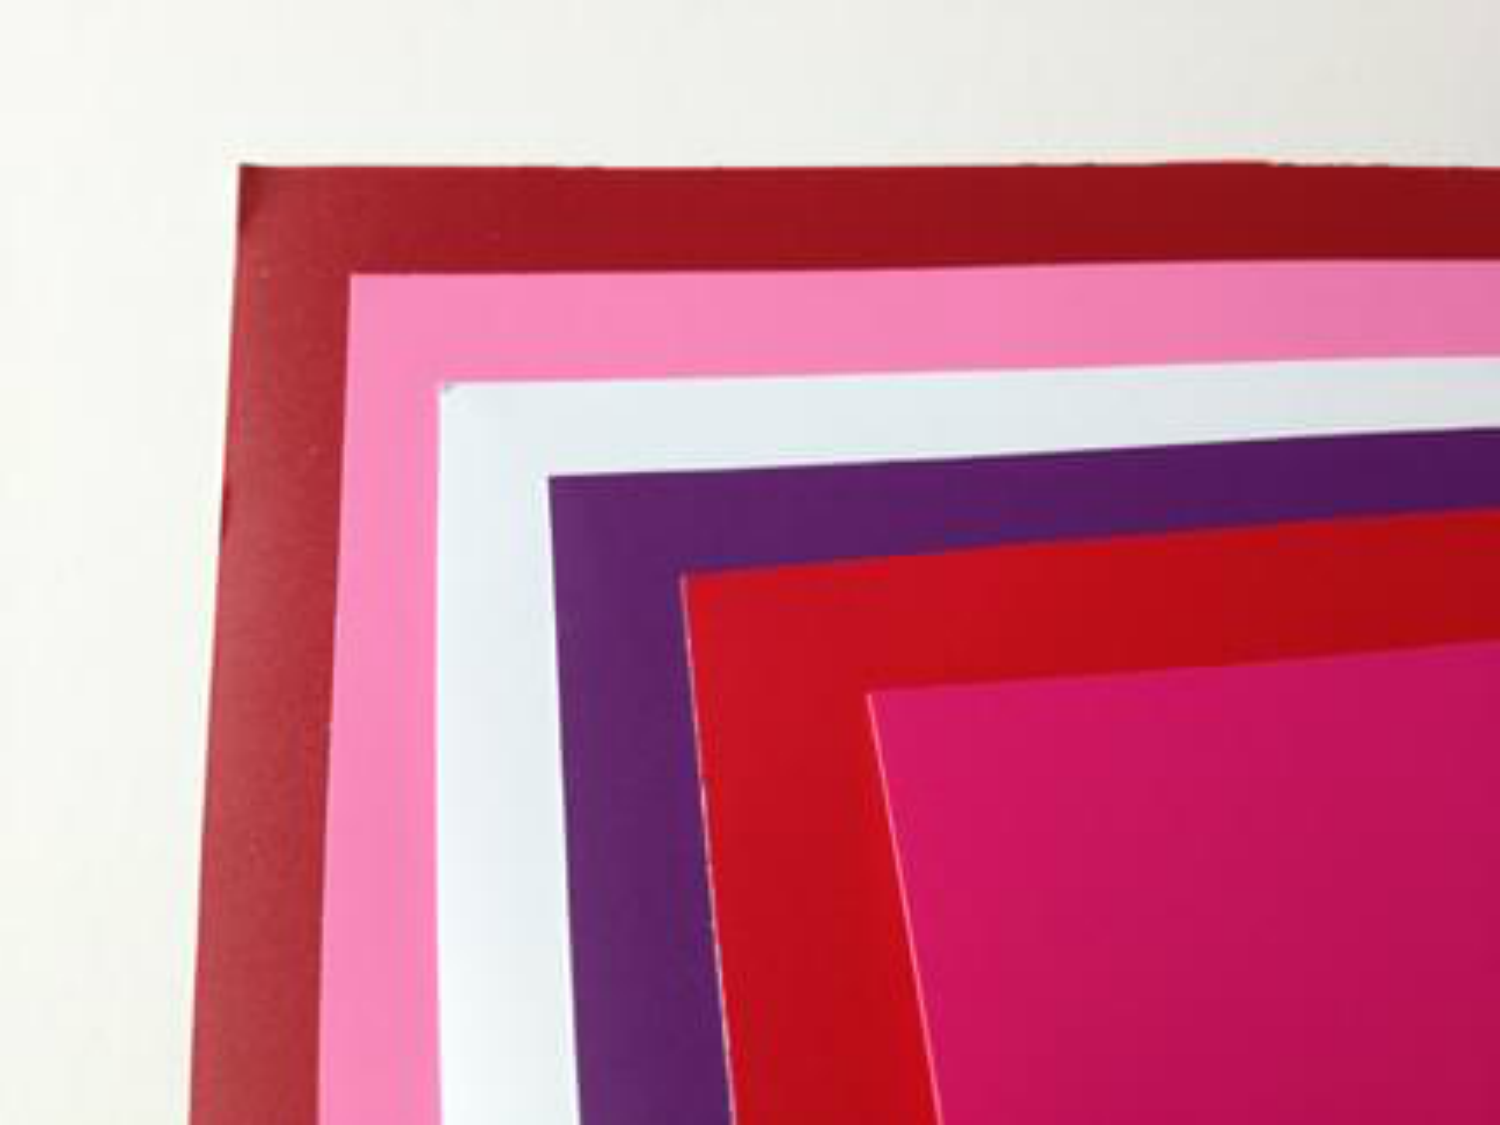
I came across this phrase online and I wanted to use it. We have this picture frame from IKEA that I wanted to use and I thought this was a great fit. I also wanted to use Expressions Vinyl's Valentine's Day pack which contains 6 sheets of vinyl. This pack rewards you with 12 points and it had 12x12 sheets of dark red, red, purple, dark pink, pink, and white.
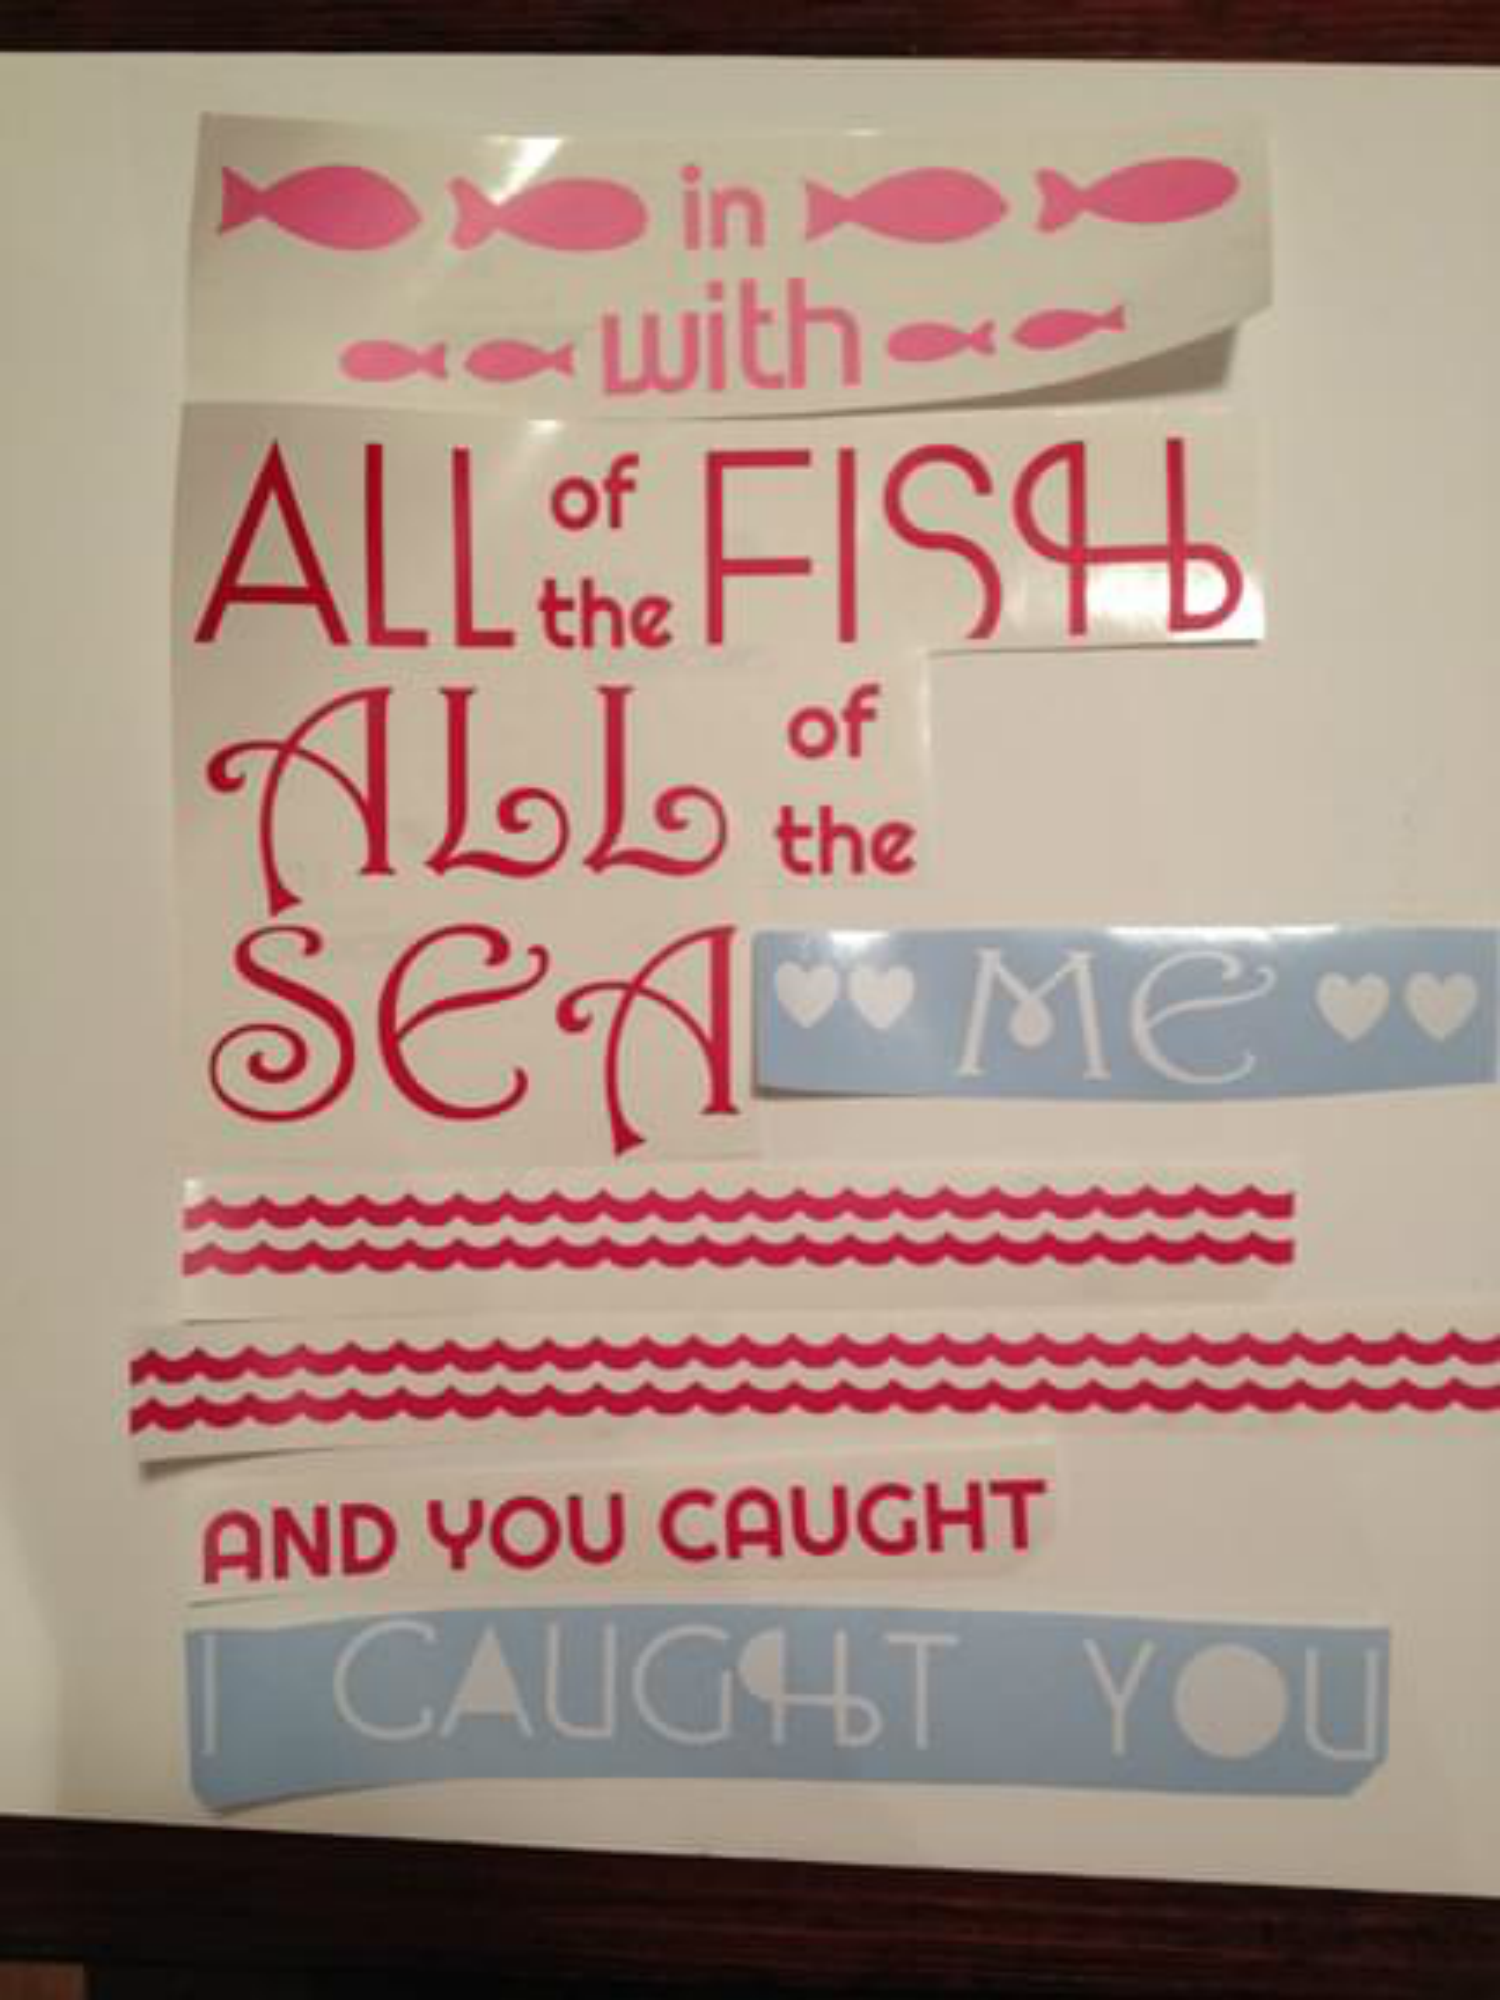
I will save you the time from recreating this, so here is the download file for the Silhouette. It is in a .zip file so you will need to download it first, then unzip the file before you are able to open it into your Silhouette program.
Once you open the file you will notice that I this in a large scale. Simply re-size and edit as needed. I also have all the design off the 12x12 cutting surface because I want to drag and drop, or copy and paste the right colors to the cutting mat based upon which color I will be cutting first.
I did this process for every color I wanted to cut out and then a weeded them all in preparation to be placed upon the glass.
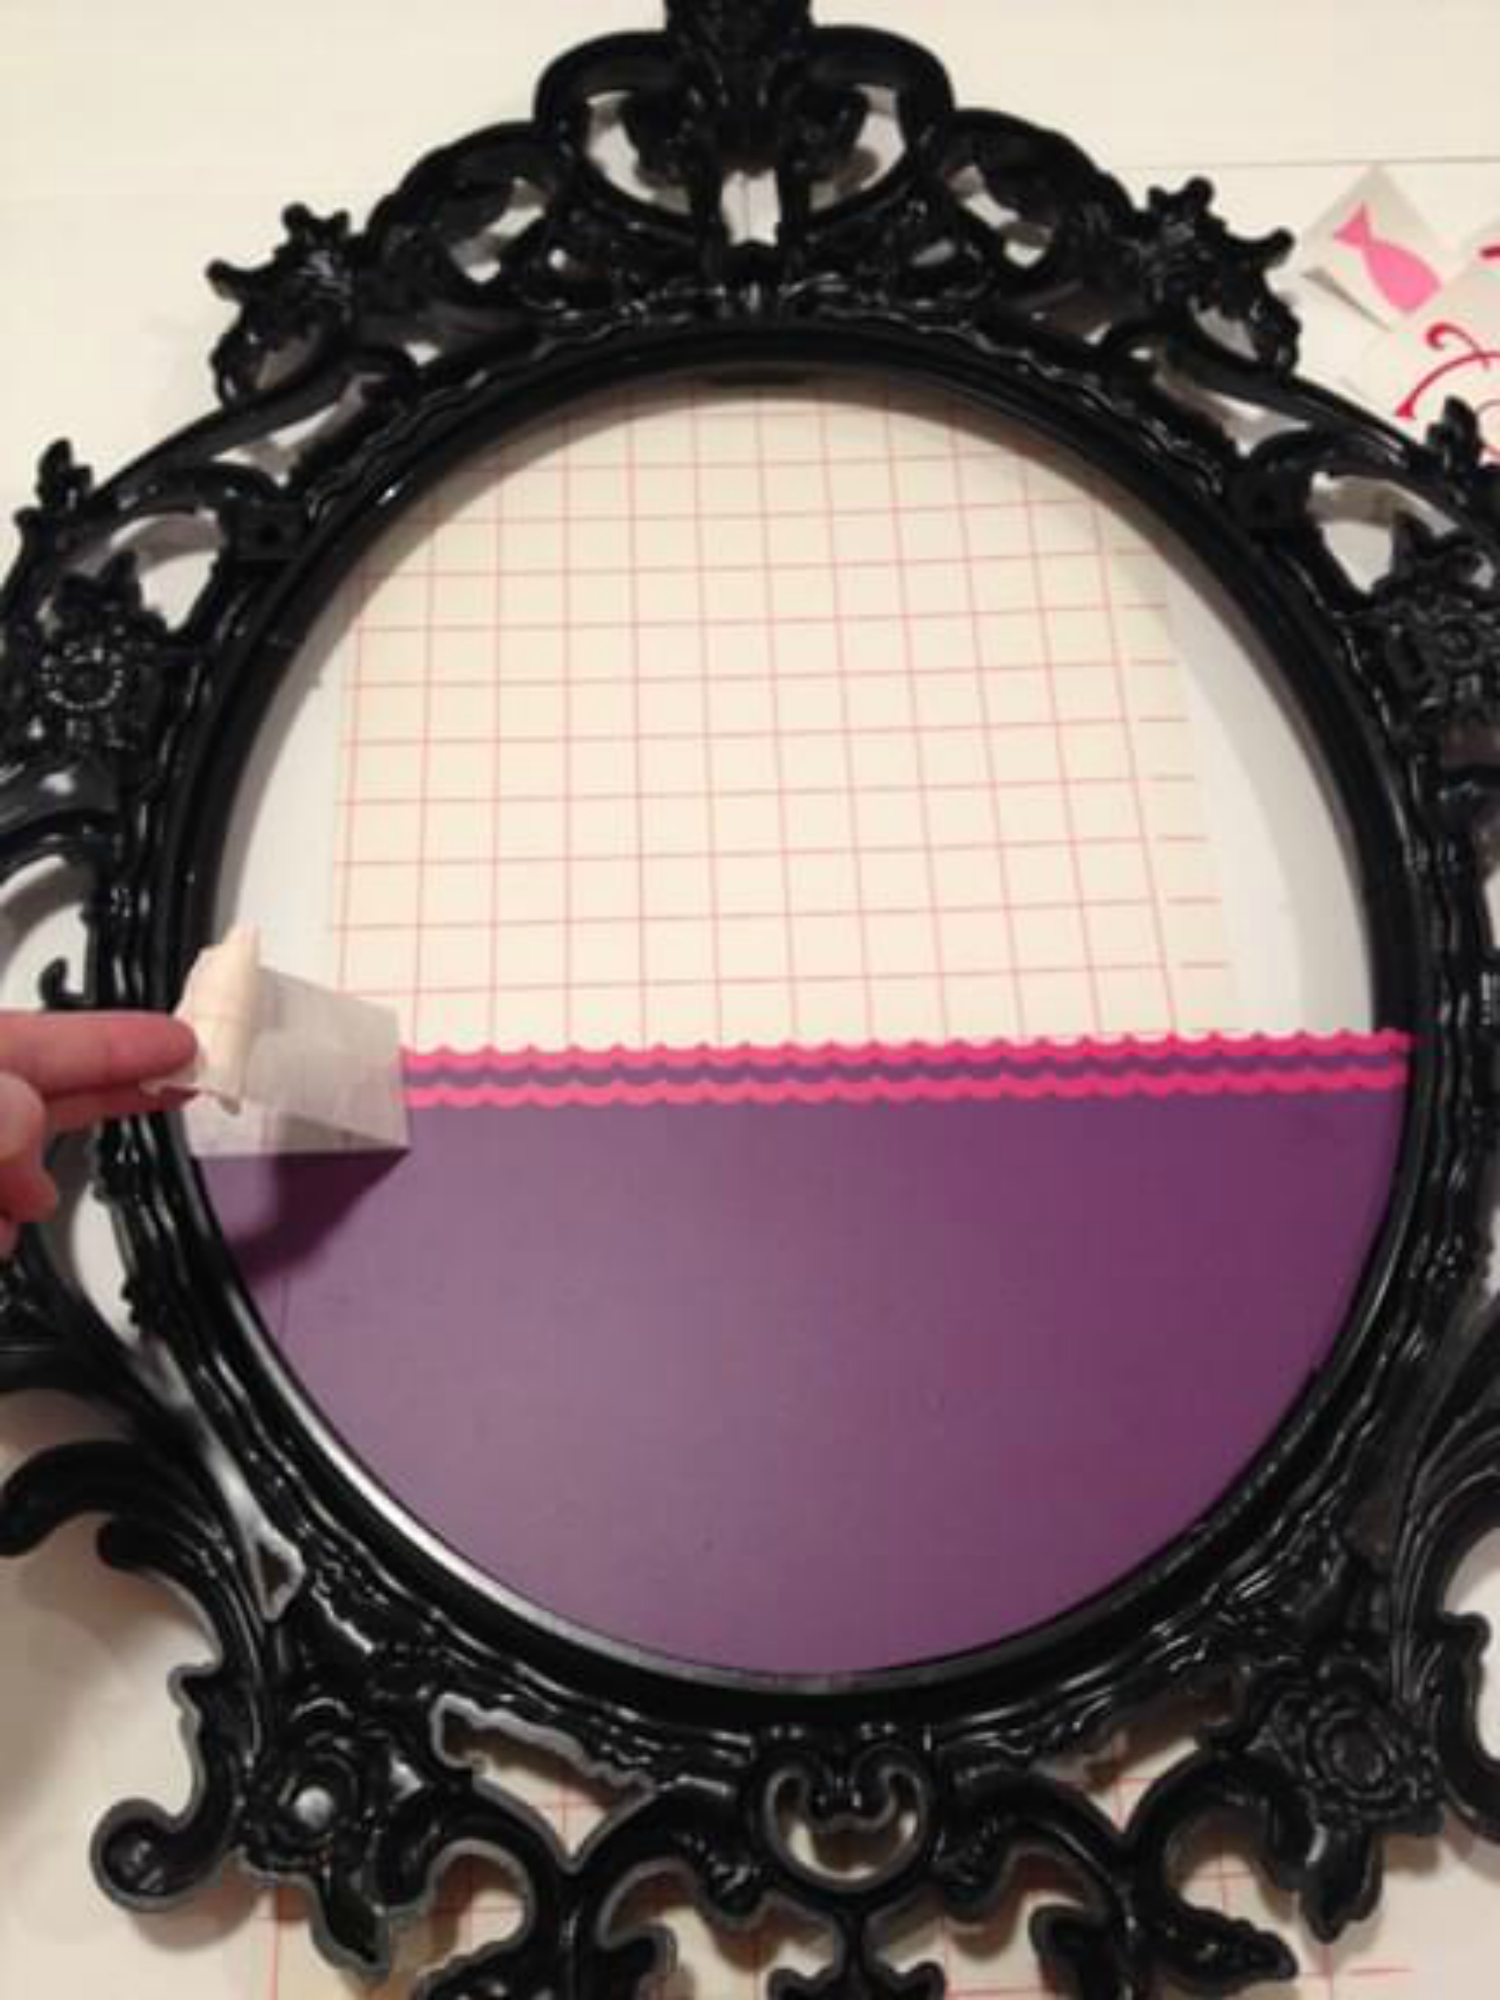
With all the pieces cut out, I needed to prep the glass for application. I wanted the bottom to be purple and to have waves separate the clear glass with the purple to create the idea that the bottom is water, (even though it's purple).

I cut the extra corners off the bottom and reused them to fill in the sides where 12x12 sheet of vinyl didn't cover.
Once the purple vinyl was measures and cut, I wanted to make sure that the glass would align straight once I applied it. So I used transfer paper under the glass to help align the top and bottom with the horizontal line for the purple vinyl.

Now that the purple is applied and the alignment is straight I can apply the dark pink waves. With the purple being straight with the frame, applying the wave is rather easy.

Next, I wanted to place all the text on the glass to get them aligned for their final placement.

To make this process easier, I took the glass out of the frame and aligned it with the transfer paper below it for a reference. The I used strips of transfer paper to tape the text down in it's desired spot.
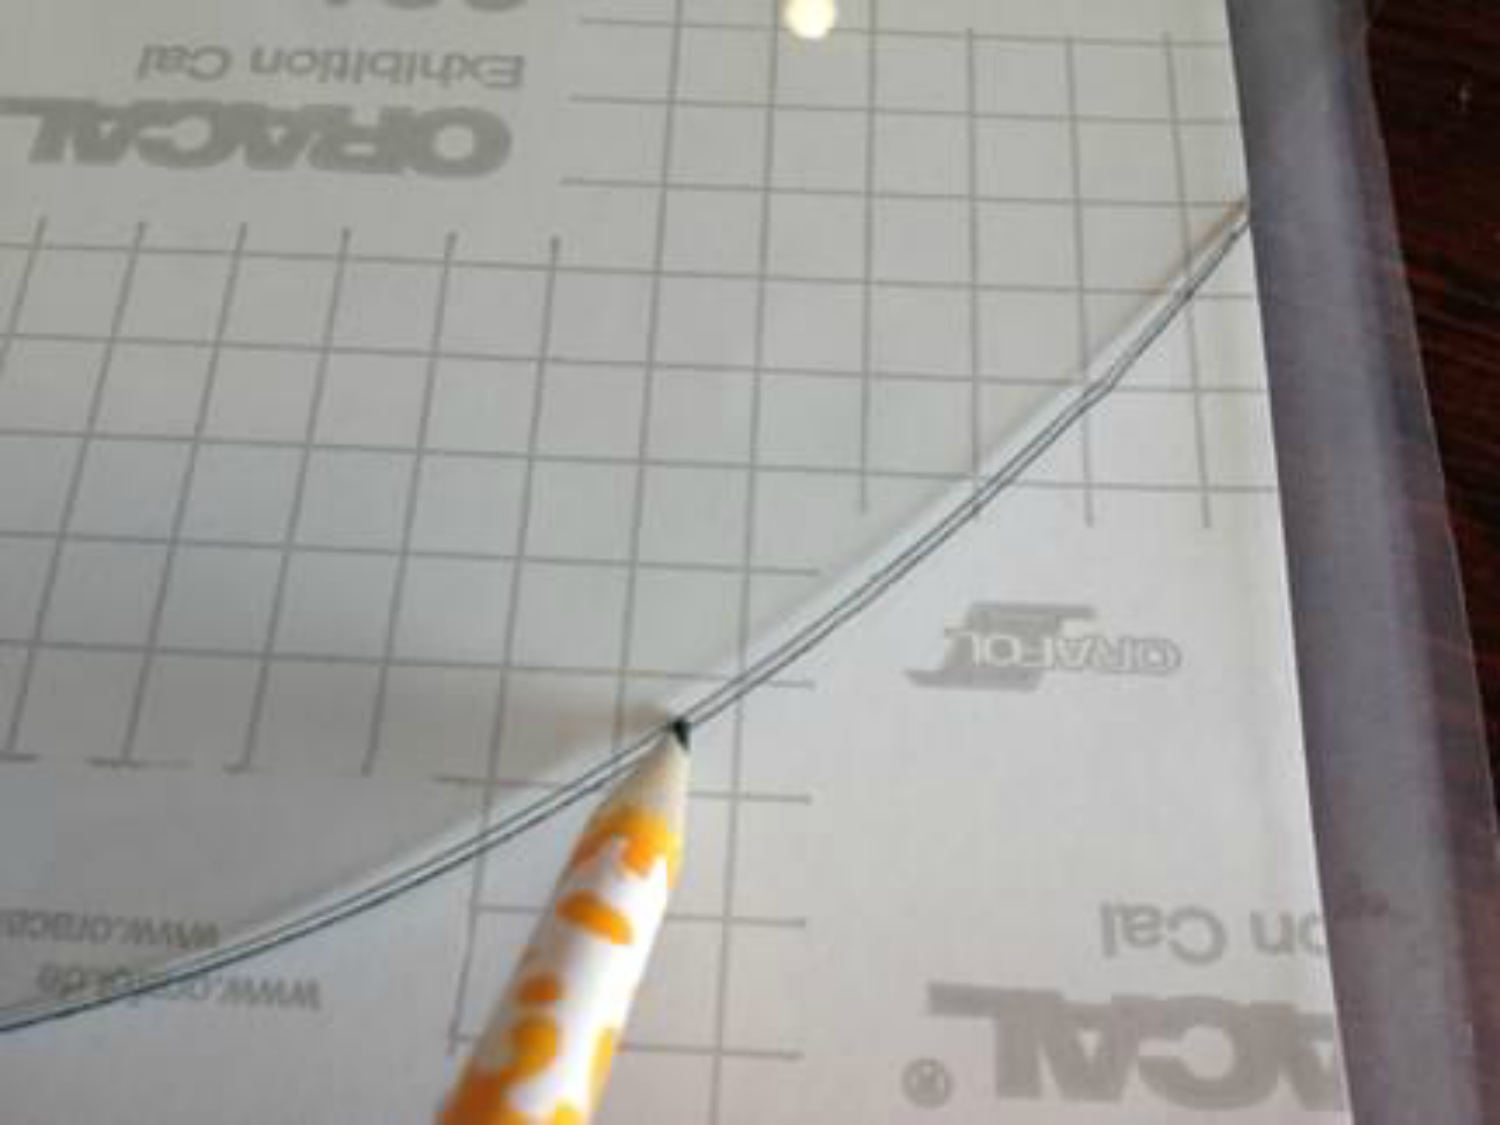
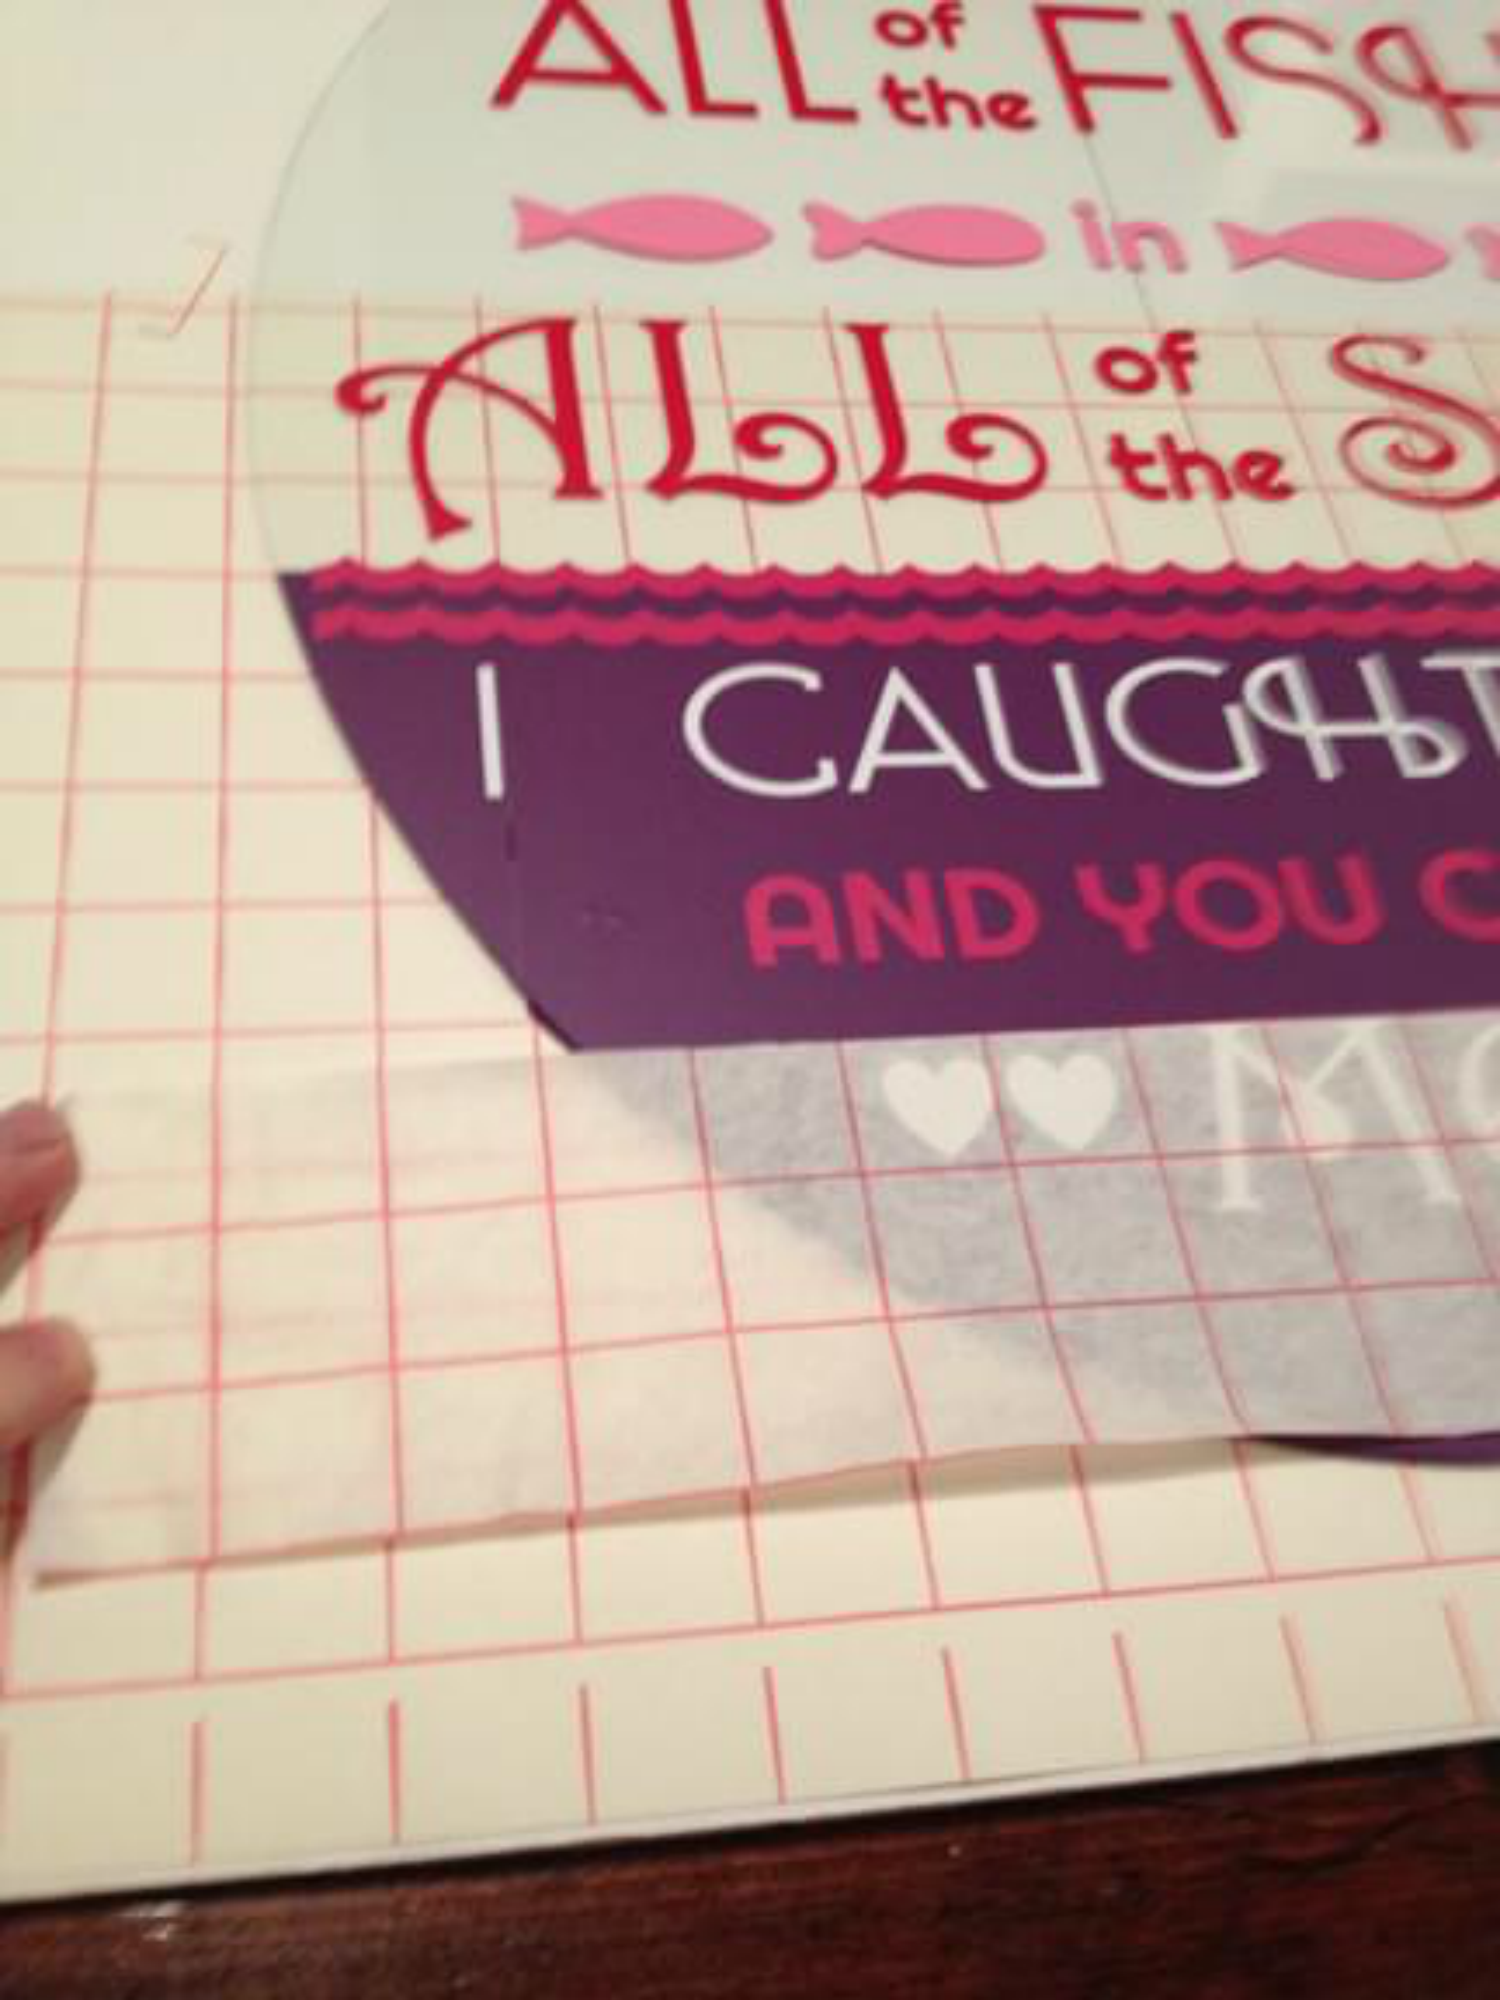
Because the phrase "ALL OF THE SEA" was to large to fit on a 12x12 I had to cut it out on a separate row. As some of you know, this creates a challenge when keeping the letters straight and aligned. So I will share a little trick.
To align my text again, I used some transfer paper to help align the text. I taped down the letters with strips of transfer tape to help keep them in place. The bottom of the font is not level so I aligned the font with the top of the text.

Once I got it where I needed it, I applied the transfer tape to lock it all in place for application. I did the same with all the other text. I used the transfer tape to help align where I would place the text. This made keeping things straight much easier. I would align the transfer tape with the letters on it to align with the transfer tape below the glass. I would adjust the transfer tape under the glass after every application to help keep it simple for every application. I applied the text row by row until all was complete.


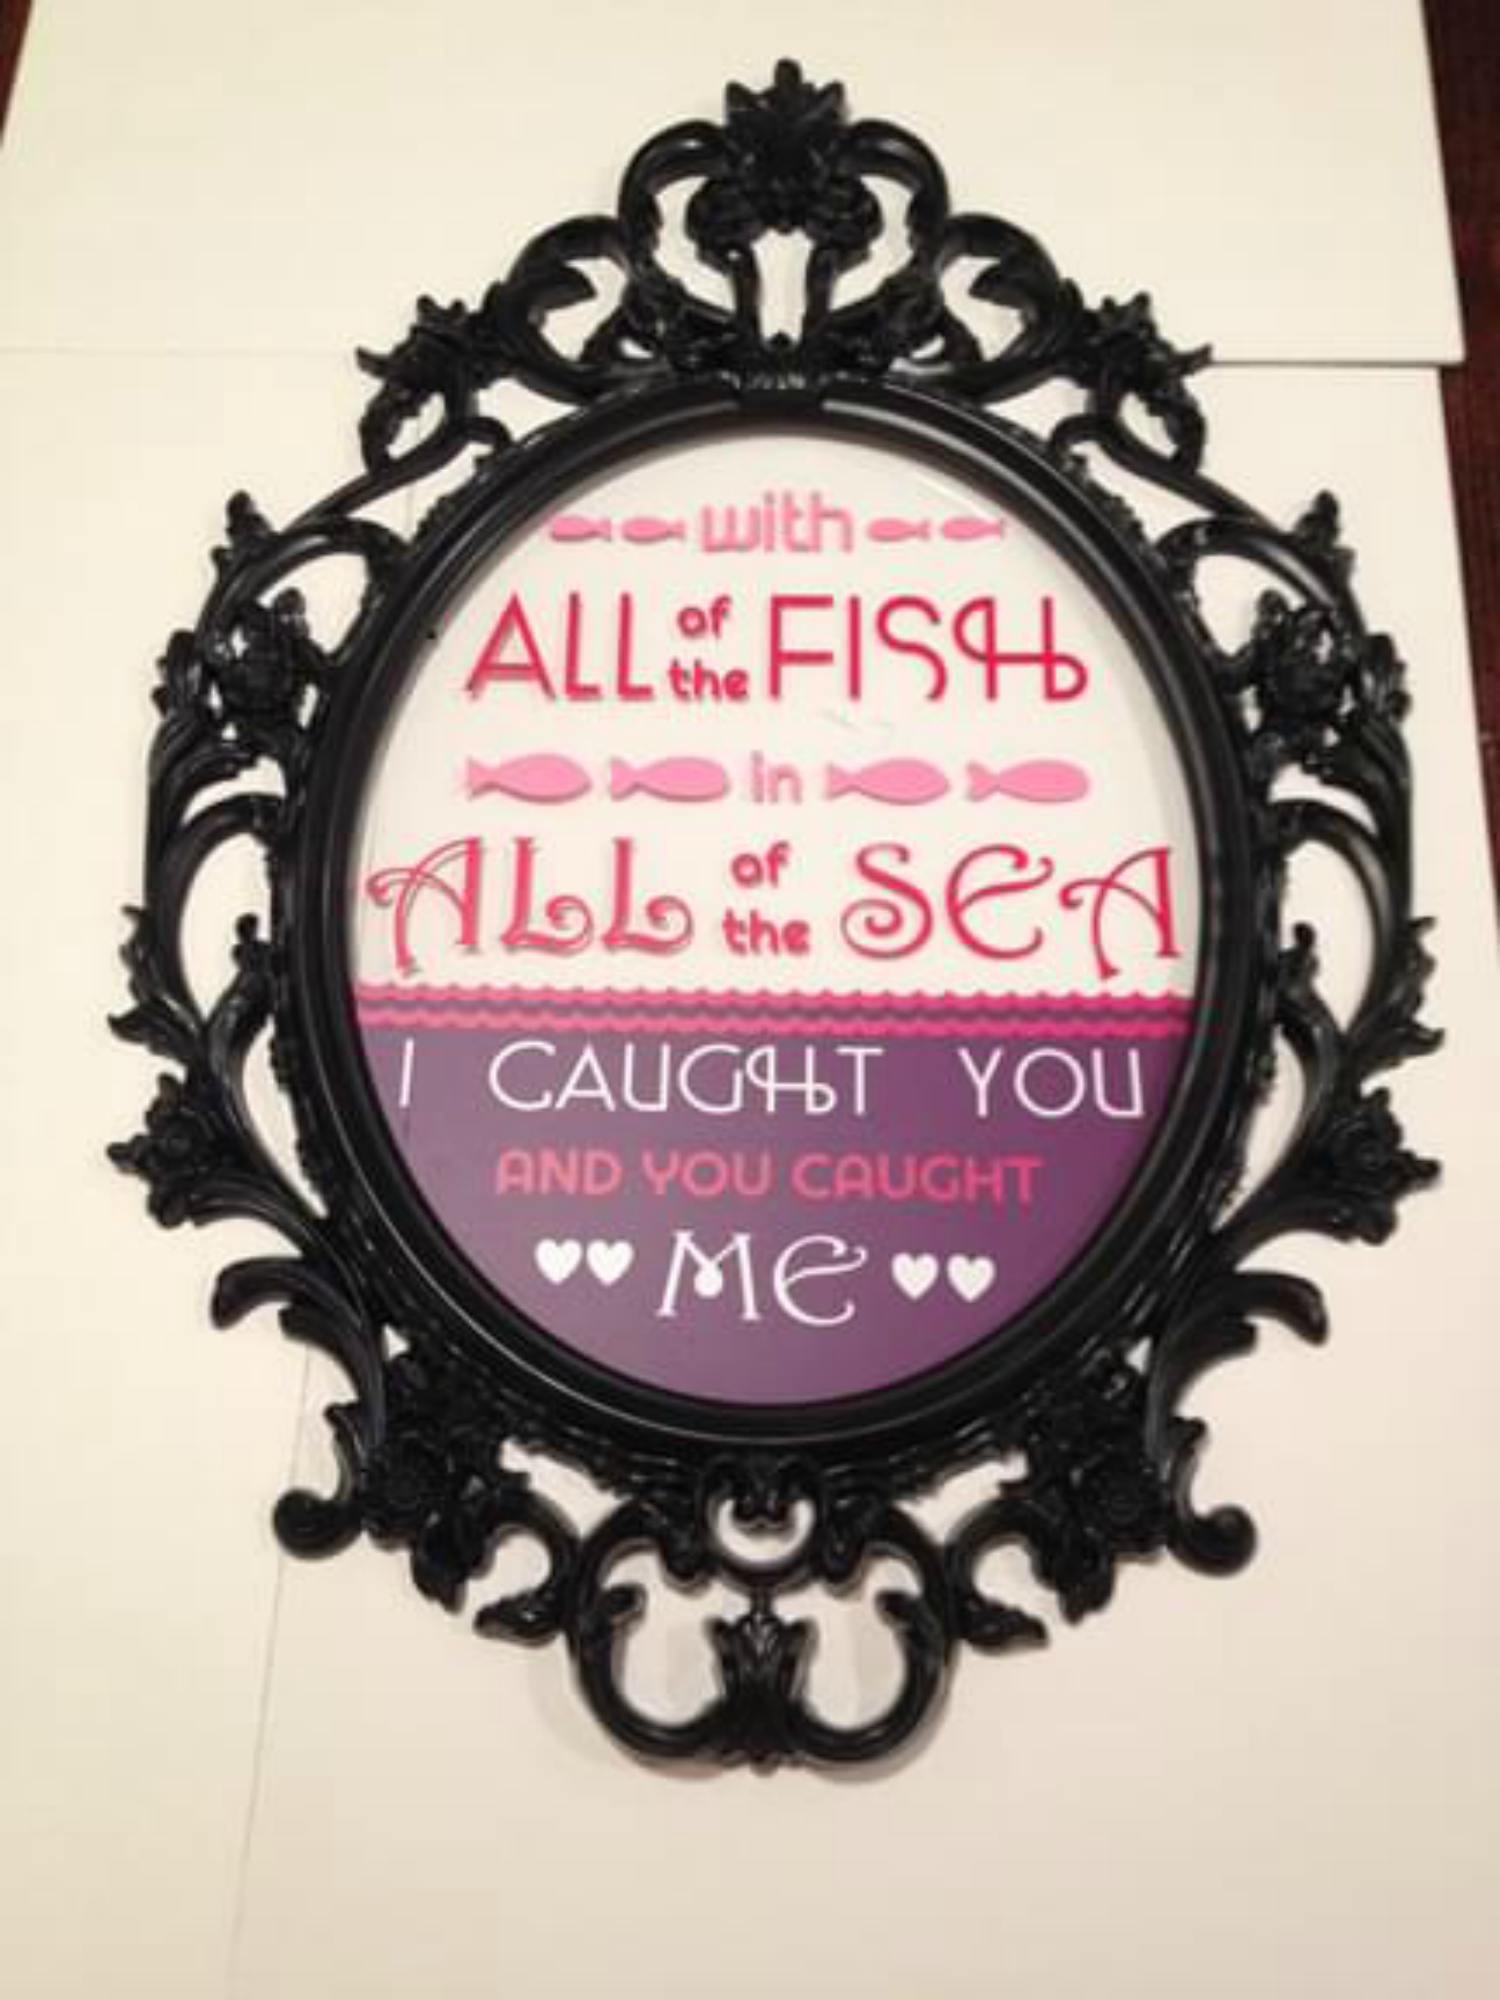
Once all the vinyl is applied I placed it in the frame. I checked the alignment with the frame to make sure it aligned properly. This picture makes it look crooked, but it turned out really well.
Recent Posts
-
NEW Holographic Eclipse Heat Transfer Vinyl
April 15th, 2024 3 Ways to Use the New Holographic Eclipse Heat Transfer Vinyl from Siser …Apr 29th 2024 -
Hop into Spring with Cute Easter Vinyl Crafts
Do you love our Vinyl? Sign up for Vinyl Club today to get FREE vinyl and save big! …Mar 28th 2024 -

Fixing Wrinkles and Bubbles in Vinyl
How do you get air bubbles out of vinyl? There are a few different ways to ensure a flawless …Mar 26th 2024