
Kids Finger Painting with Vinyl
Hello and welcome back to ExpressionsVinyl.com. March is National Craft Month, and with that there is a national Kids Craft Day on March 14th. If you don't have any ideas of what to do with your kiddos or class, I have a fun one for ya. Beware it may get messy .
We are going to finger paint with just regular Acrylic Paint (Kid Safe) You can also use Finger Paints.
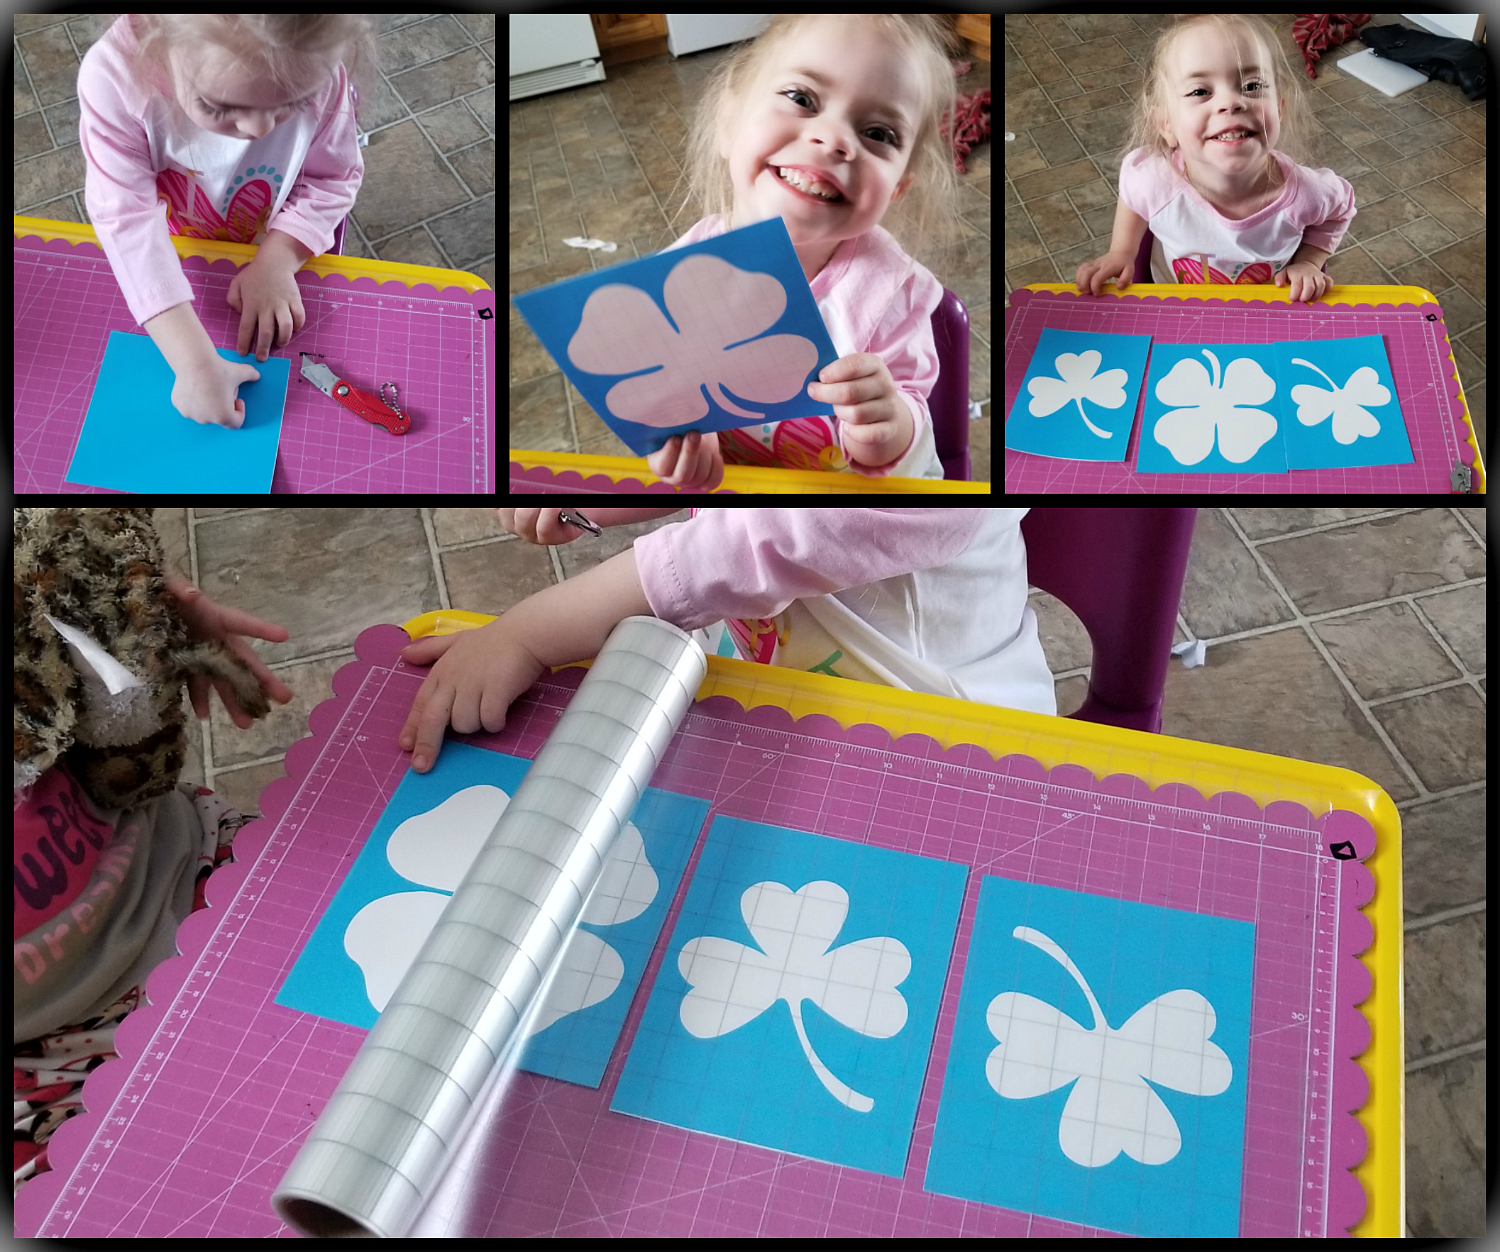
Start by having your vinyl images sized to your board surface. To save on space we did not cut them all in one line, this is totally up to you.
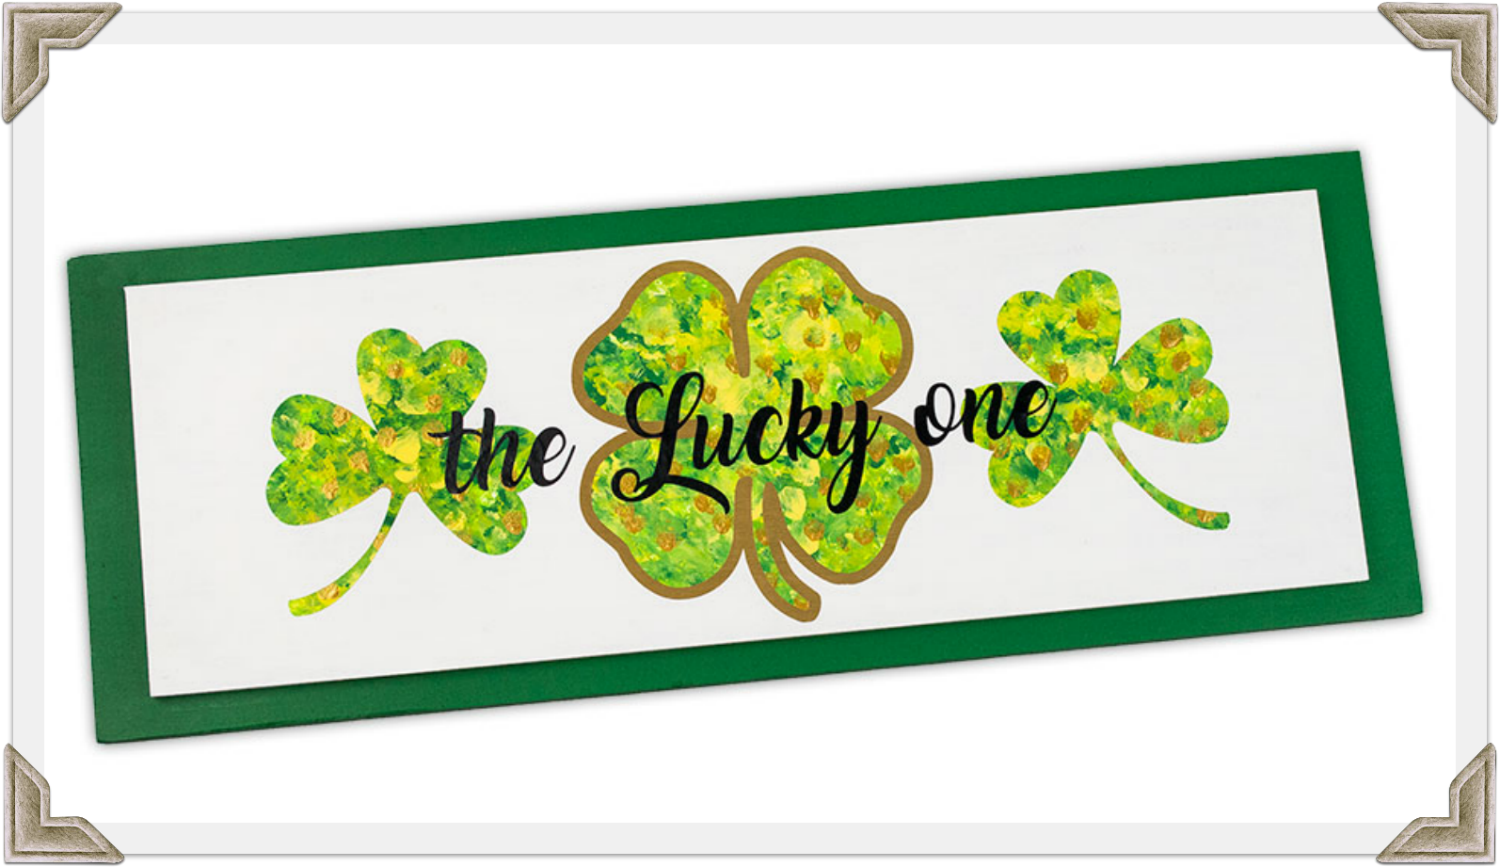
This board was 1/4inch MDF cut to 6"x18". Since it's March, we are all about those Shamrocks.

(Image: 5 Clover Shamrocks #28917)
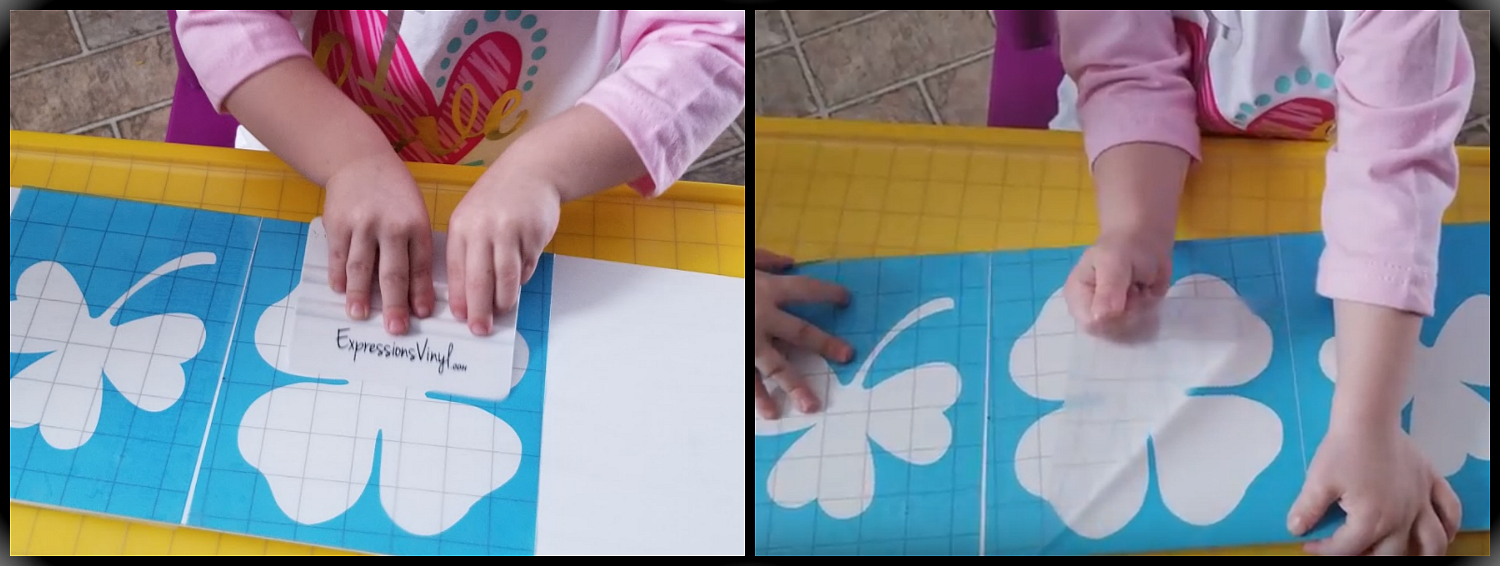
After cutting out your images, weed out the clover centers, square up the weeding boxes and apply that fun Gridded Clear Transfer Tape so you can easily line them up on the board.
Once you have the transfer tape applied line them up in on the board starting with the middle and give them a good burnishing and then remove the Transfer Tape.
You are now ready to paint.
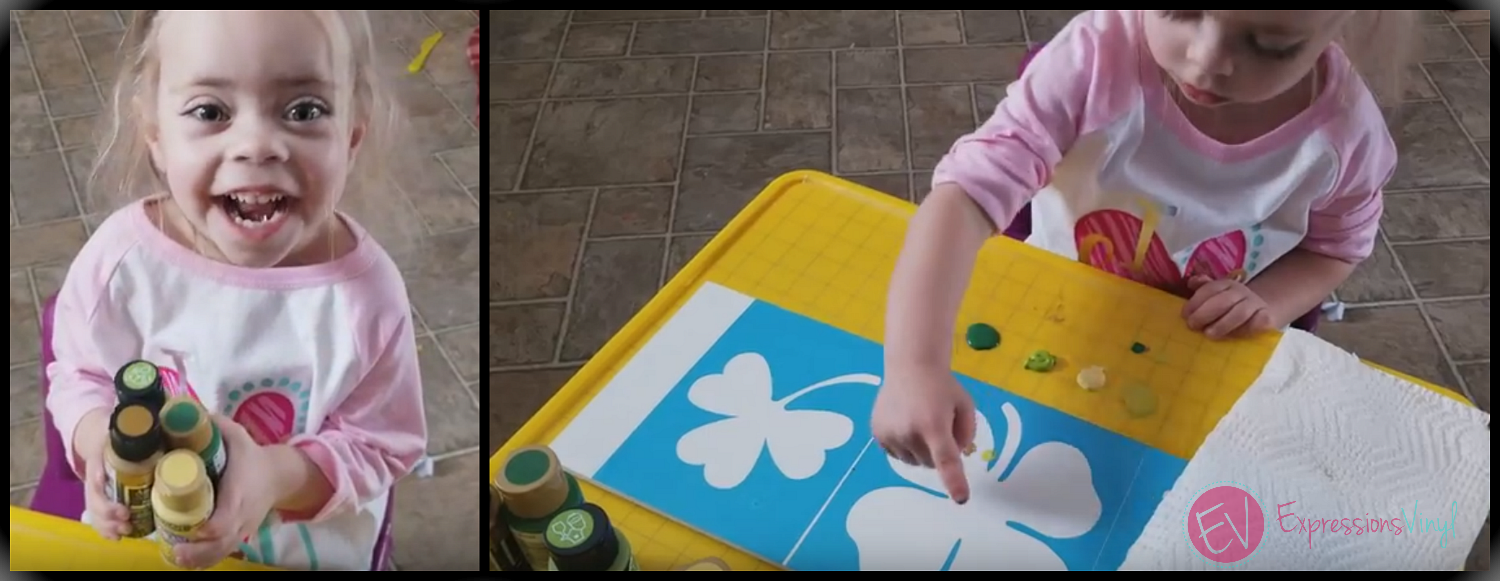
Place some transfer tape down on the table and squeeze out some of their favorite paint picks. They will be excited!
Then just let them finger paint dots all over the Oramask until the clovers are full of fun colors.
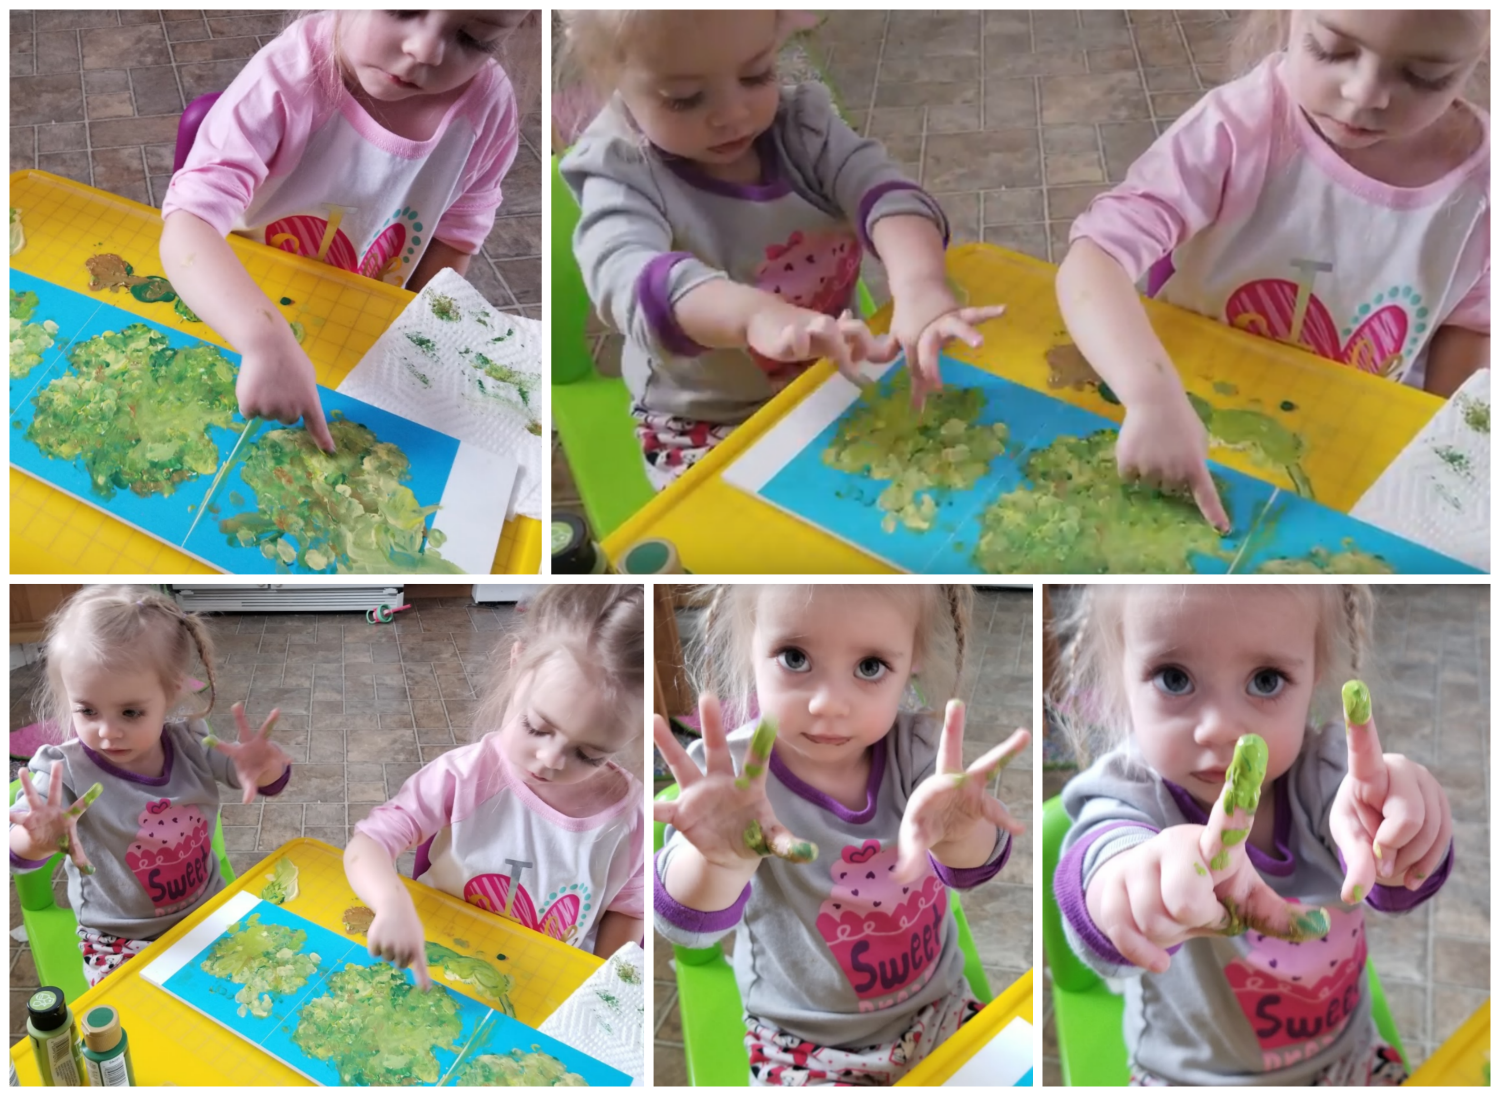
Some may be unsure of this fun project.
Let the paint dry fully since there may be quite few thick layers.While the paint is drying, cut out some fun Brushed Gold Chrome Vinyl for the offset of the middle shamrock and a fun Irish Phrase, I liked the "The Lucky One".
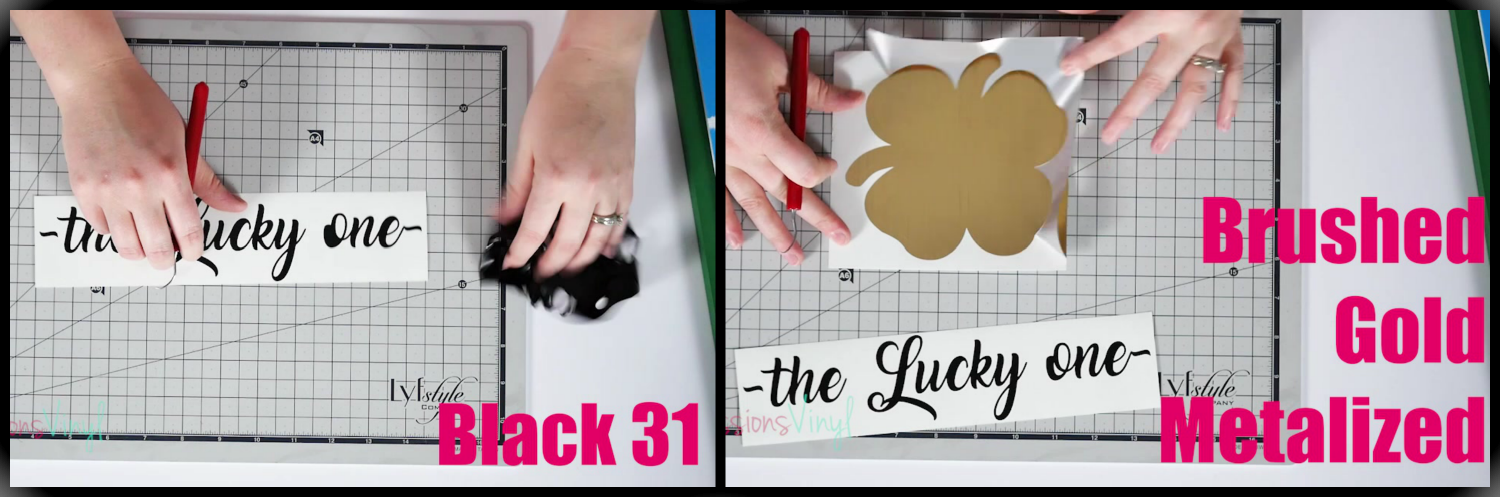
(Font) Amarillo
(Image) Silhouette Assorted Clover Shamrocks
Once your paint is dry simply remove the oramask and apply any touch up paint if needs be.
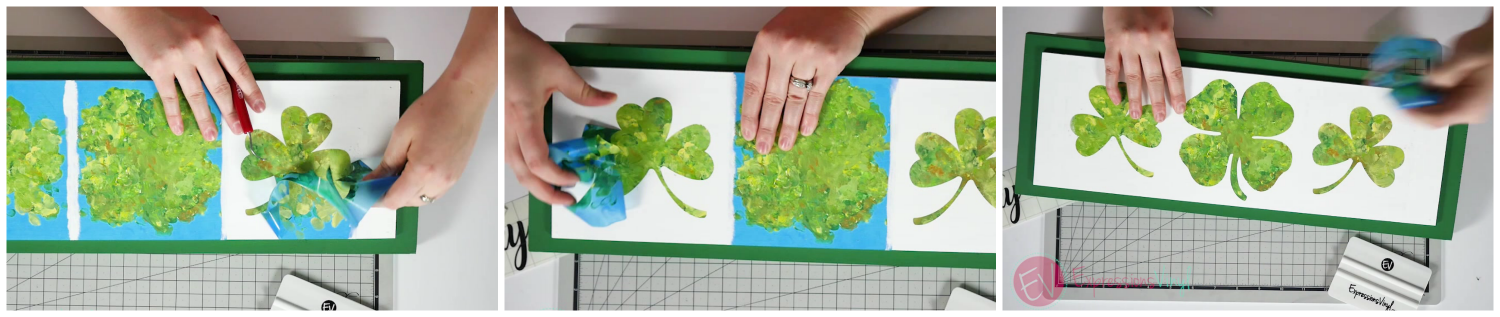
Transfer tape your vinyl. My favorite is the Clear Griddded Transfer Tape, it makes it easy to line images up and its little thicker so image just lay nice and flat.
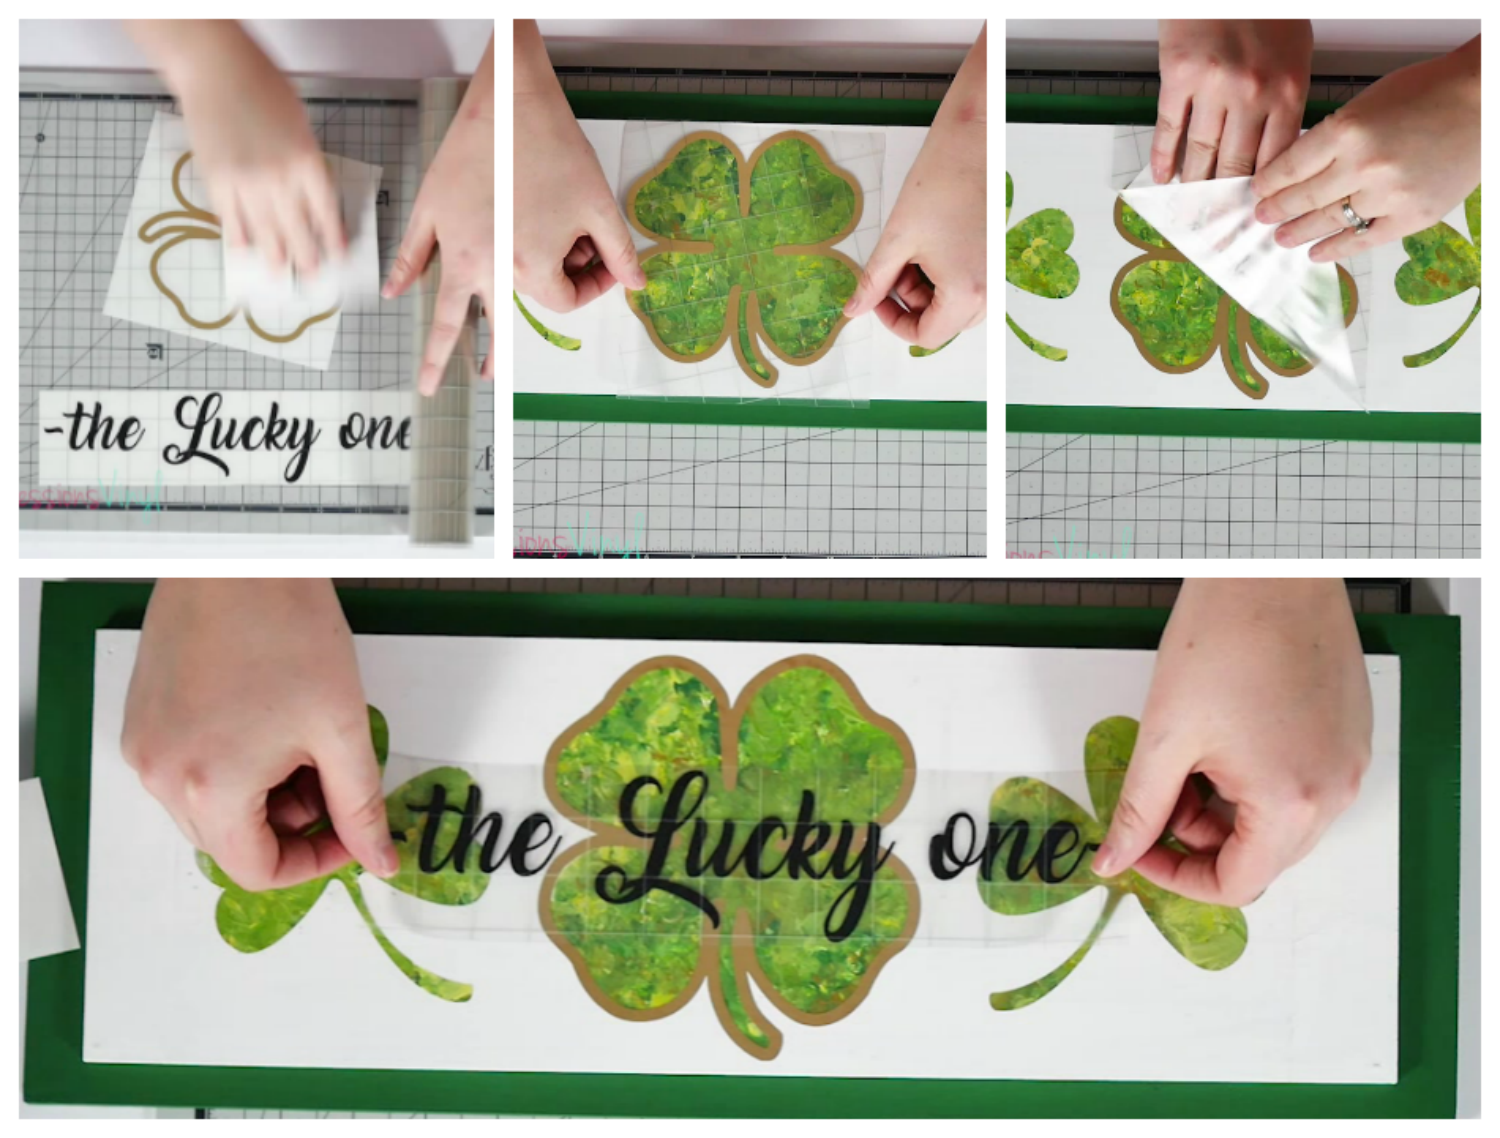
You now have a fun and easy, somewhat messy, kids project all ready to display.

Recent Posts
-
NEW Holographic Eclipse Heat Transfer Vinyl
April 15th, 2024 3 Ways to Use the New Holographic Eclipse Heat Transfer Vinyl from Siser …Apr 29th 2024 -
Hop into Spring with Cute Easter Vinyl Crafts
Do you love our Vinyl? Sign up for Vinyl Club today to get FREE vinyl and save big! …Mar 28th 2024 -

Fixing Wrinkles and Bubbles in Vinyl
How do you get air bubbles out of vinyl? There are a few different ways to ensure a flawless …Mar 26th 2024