
Silhouette Upgrades Designer Edition Part 2
Silhouette Upgrades Designer Edition
Hey Everyone, its Starla with ExpressionsVinyl.com. Todays blog is all about upgrades that Silhouette offers. Not to be mistaken with the Free Software Updates.
I am going to show you the fun features that you will get when you decided to upgrade from the Silhouettes Basic free program to the Designer Edition or Designer Edition Plus.
This turned out to be a very large blog, so we will break it down into 3 parts. This is Part 2.
Lets Start off with Installing the Upgrades, its very simple.
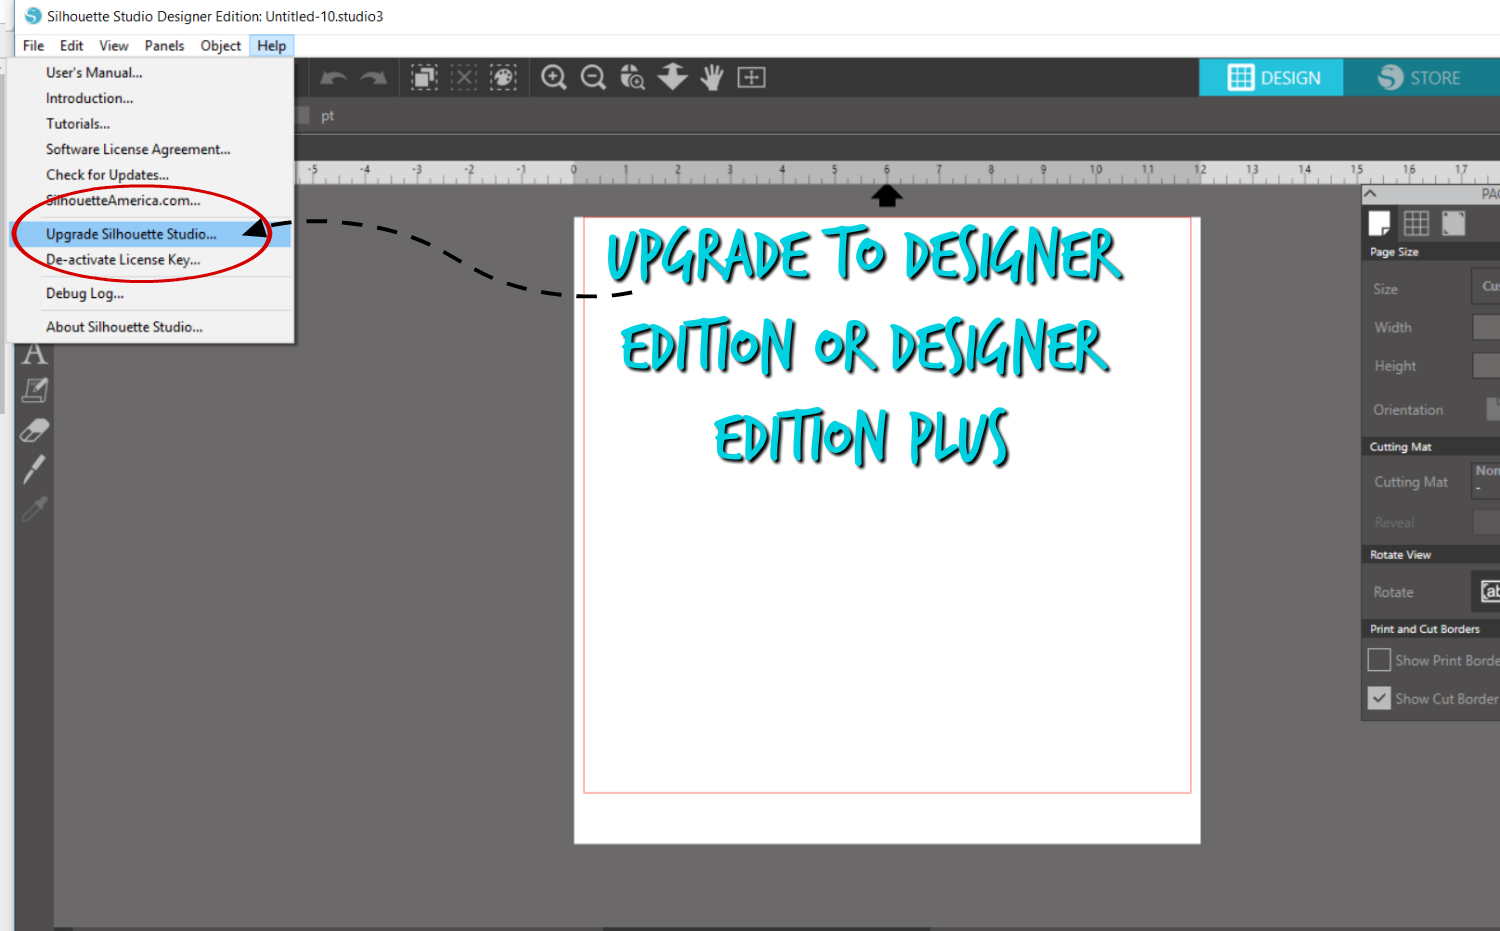
After you have purchased your desired upgrade all you will need to do is open up your current Silhouette Program and in the upper left-hand corner under the Help category and you will select the Upgrade Silhouette Studio
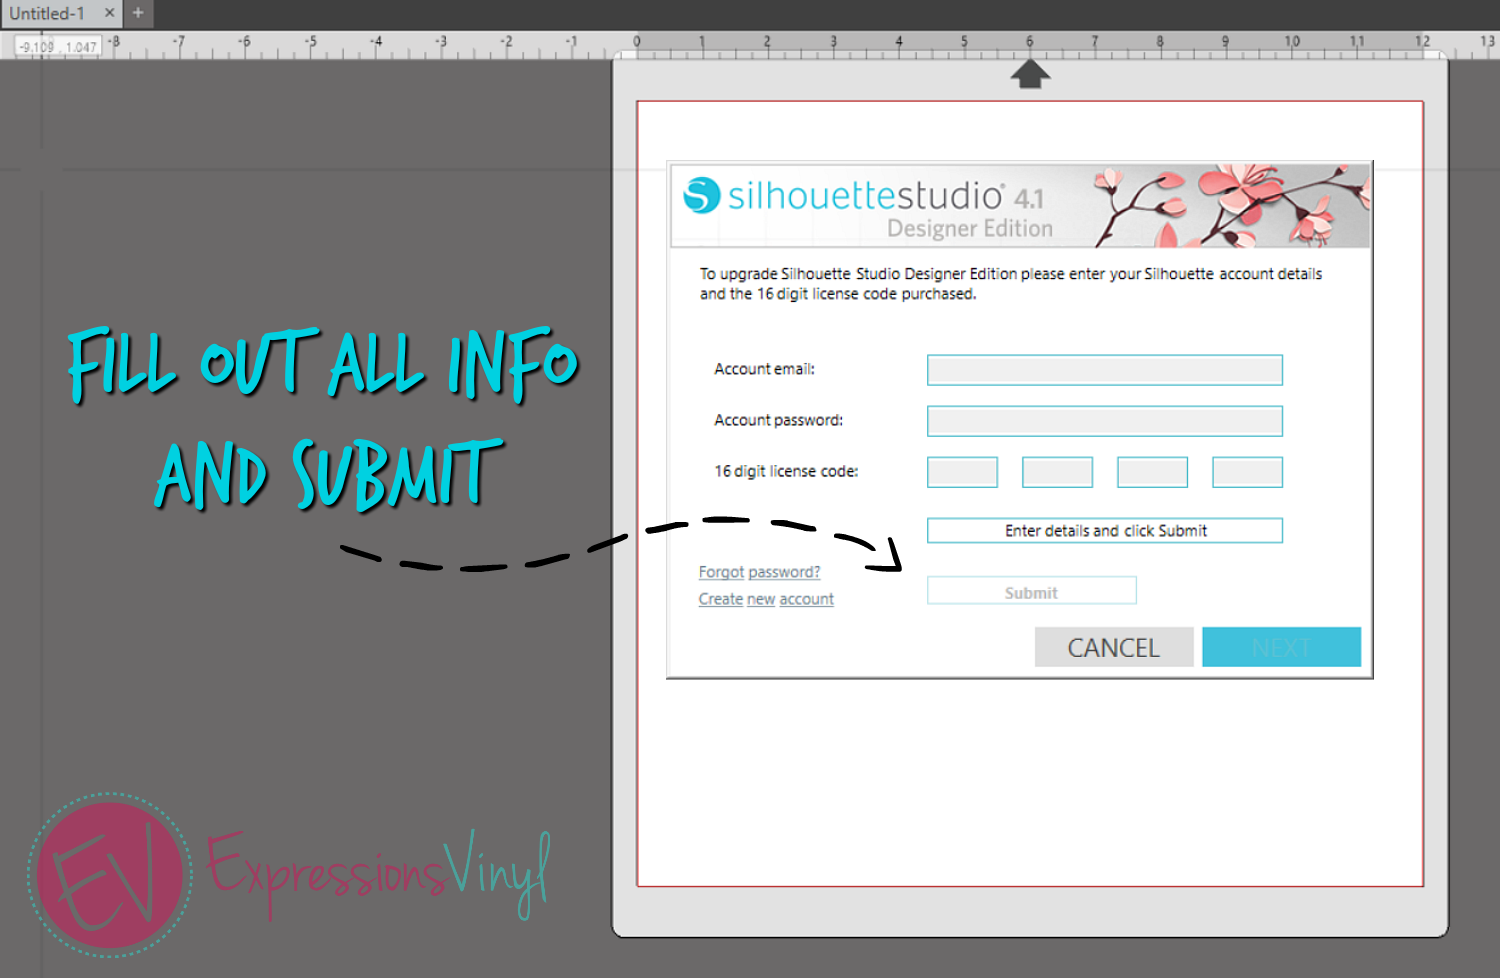
Next you will enter in the 16 digit code that you received via email or card into the boxes shown.
TIP~ Your code for the Designer Edition should start with a SSDE( Silhouette Studio Designer Edtion)
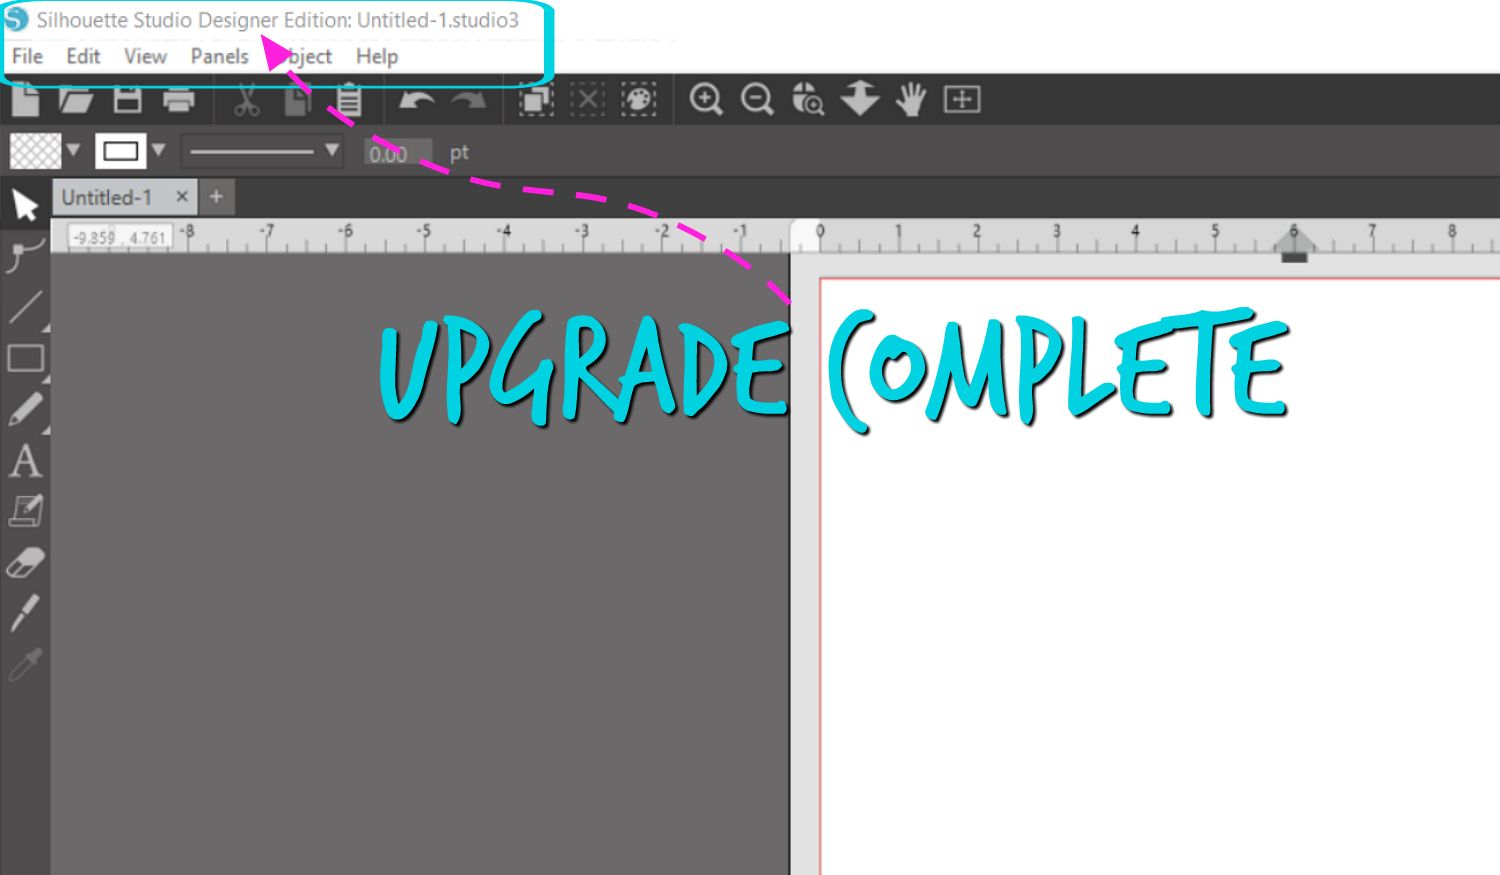
The upgrade will rightaway be applied.
NOTE: If you have had to wipe your computer or completely start over with your program and you have had this edition before, the code will always be under your account info under the STORE option.
The upgrade should show at the top of the screen. Welcome to Designer Edition!
There are quite a few new features in this upgrade from the Basic to the Designer Edition. Such as,
PART1:
PART 2:
PART 3:
- Trace by Color/Magnet Trace
- Rhinestone Conversion
- Glyph Support/Font Managment
- Basic Warp
- Pop-Up Creator (Advanced)
I am going to pin point each of these and why they are so neat to have in your program, we will break it into parts, this is Part 2:
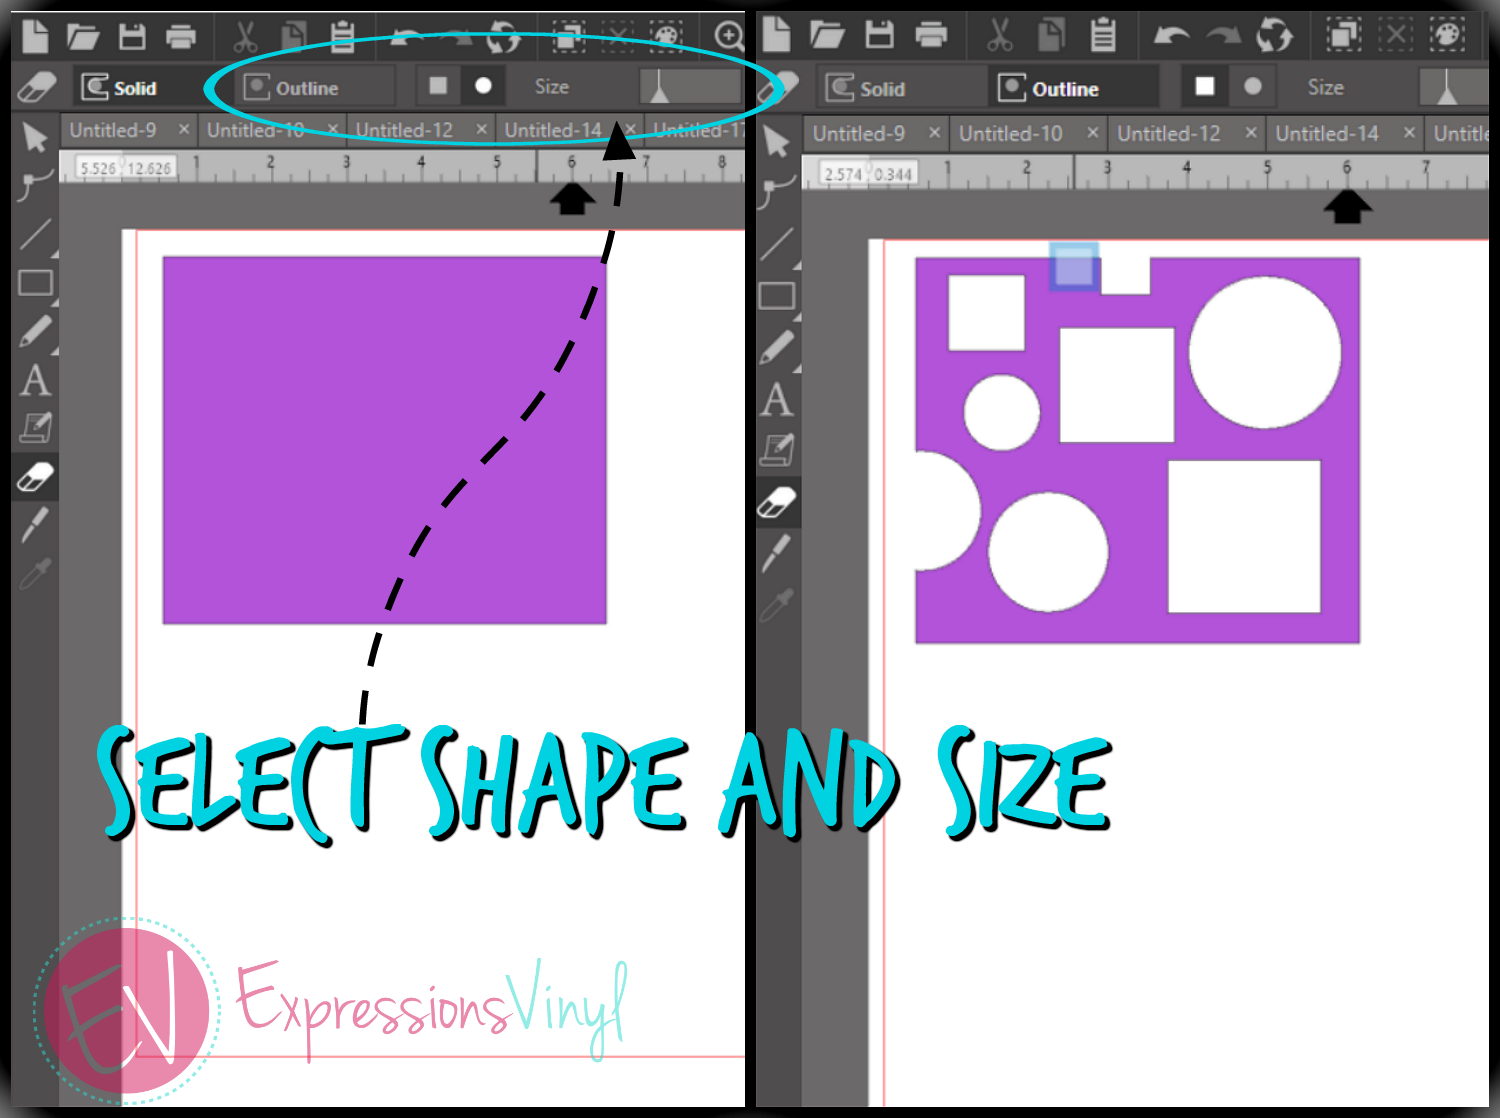
Eraser Set Tools:
The Eraser Set Tool is still pretty basic, the only upgraded part is that you can now adjust teh size and shape of your eraser.
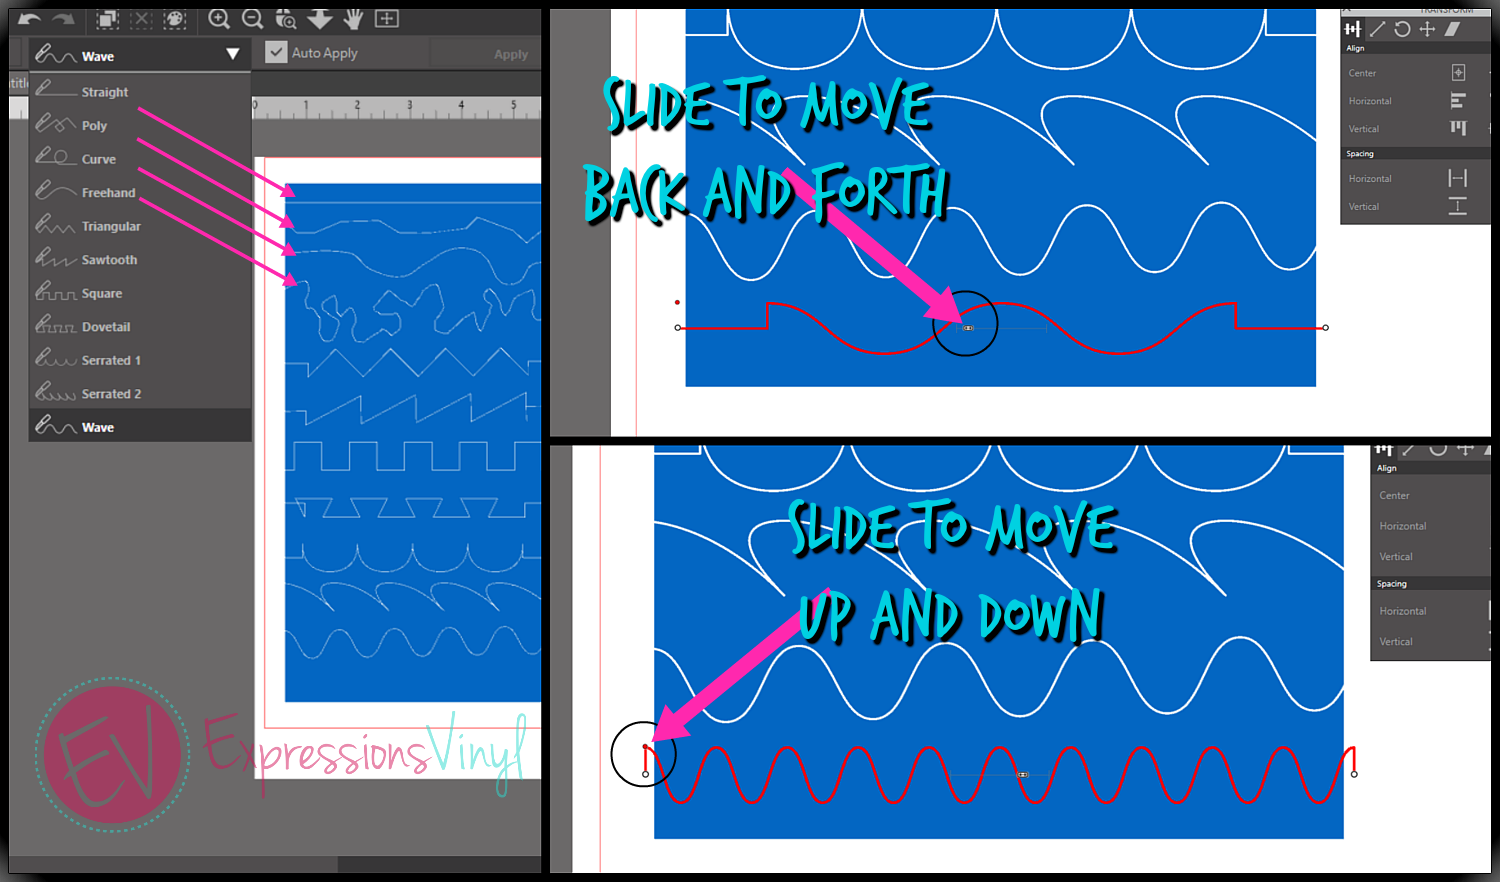
~Knife Set Tools:
In the Basic Edition of Silhouette Studio,you already have some options for the Knife Tool, but when you upgrade to Designer Edition, they add in a few more accessories.
There are more Knife options. These can be adjusted with the middle toggle to go back and forth, or the red side dot to adjust them up and down to make some fun decorative cuts.
~EyeDropper Tool:
The Eye Dropper Tool, is a neat feature if you are needing to transfer attributes such as patterns, colors, or gradients from one iamge to the next. You can even Transfer Fonts with the eye dropper Tool.
To do this, simply select the image you with to tranfer TO and then select the Eye Dropper on the left-hand side column, last Icon, and click on the icon that has the attribues you wish to transfer, so simple and it save a lot of time when working with Print N Cuts.

(Font: Impact, System Font)
~Shear:
With the Shear Tool, you can easily create your own shapes by manipulating the angles and even make regular fonts into Italisized Fonts.
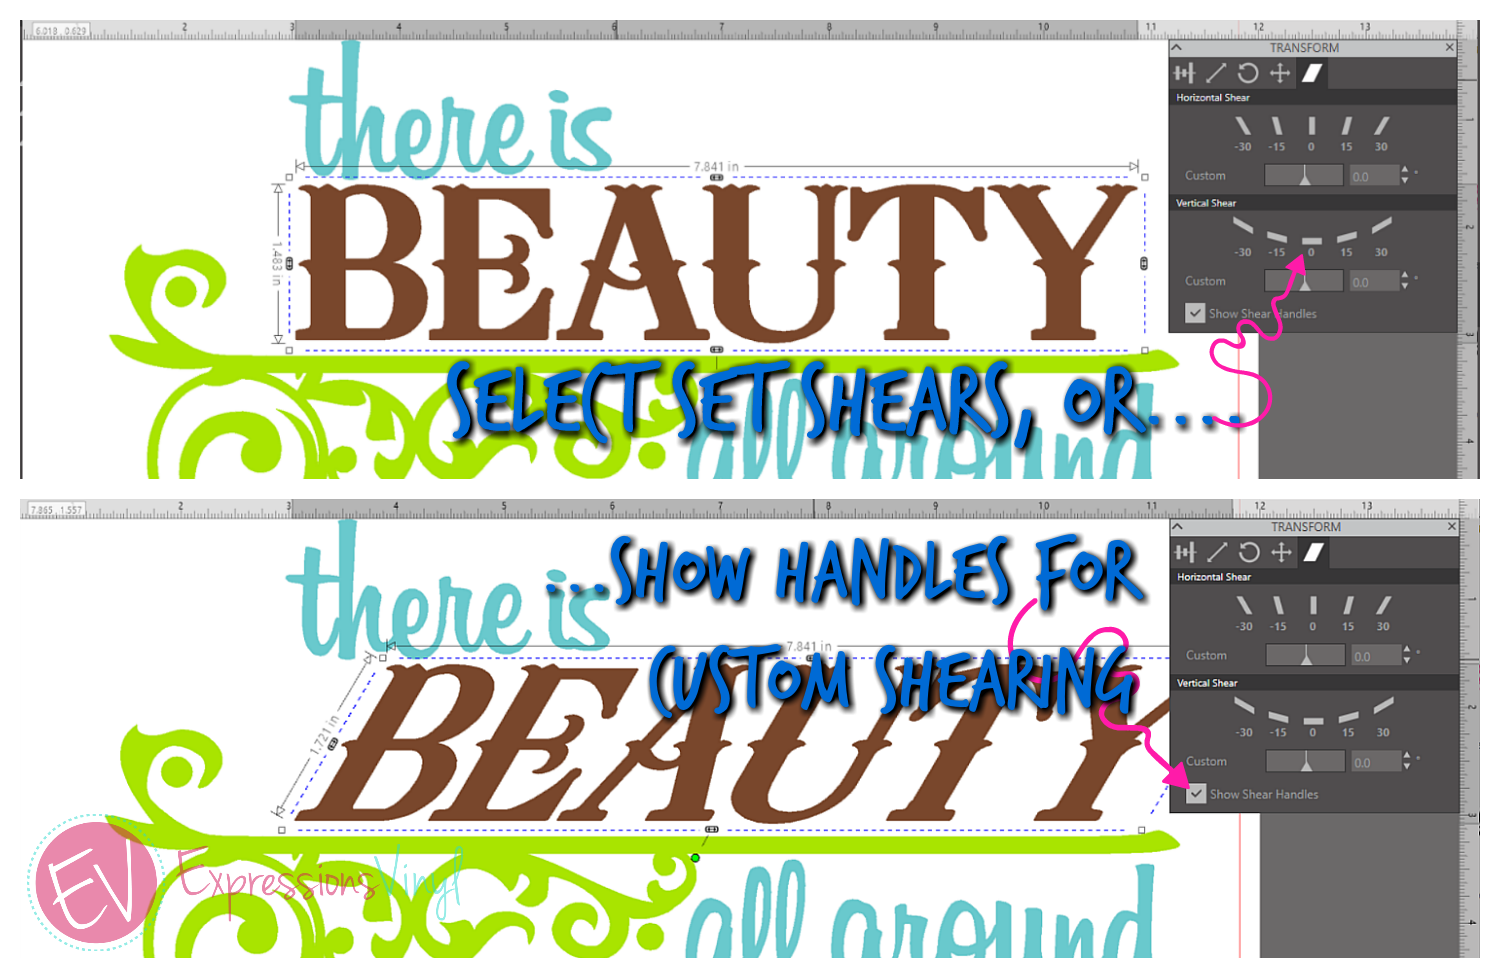
(Image:Phrase: Beauty All Around) By Silhouette
~Sketch Effects:
The Sketch Effects allows you do use your Sketch Pens or Pen Holder with any writing material to fill in and create neat looks and textures.
In Designer Edition you will find an added feature, the Adanced Sketch Option. This will allow you to more thoroughly edit the sketch lines and fills with different components.
NOTE: lines come out more crisp if used on a smooth writing material verses a textured material.
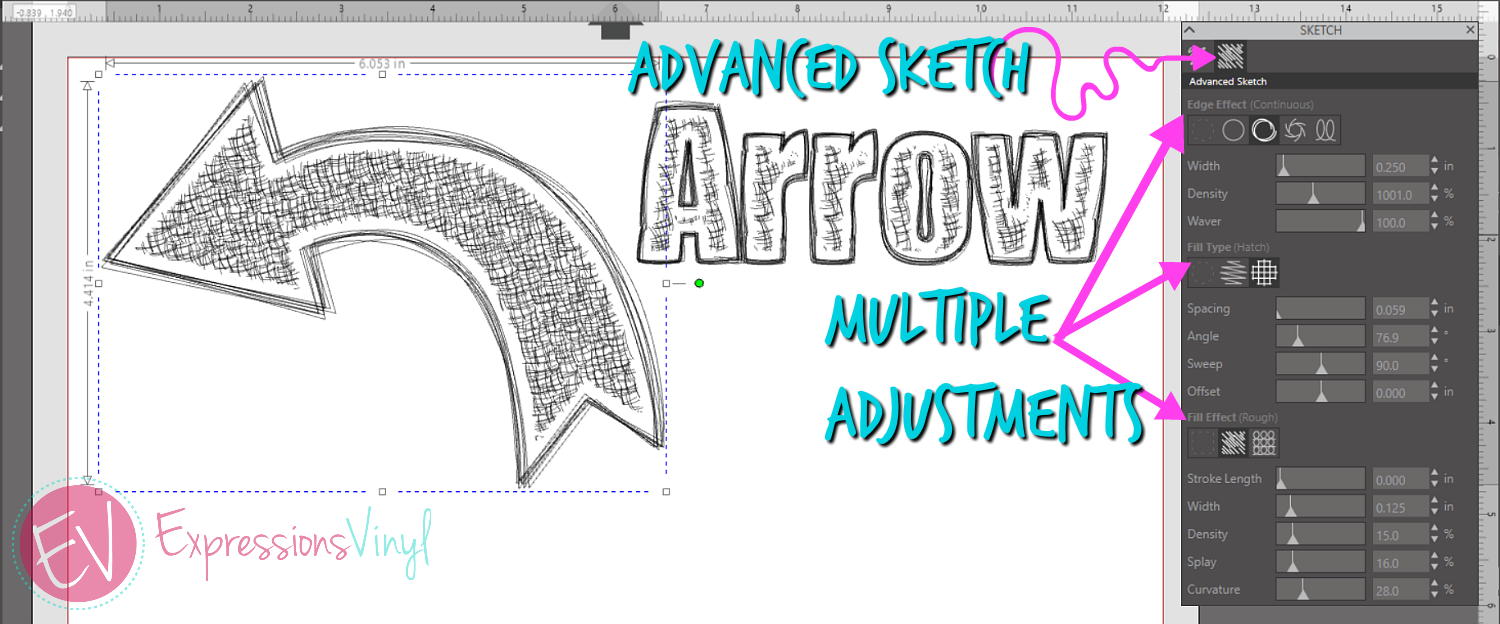
(Image: Patterned Arrows) By: PPbN Designs
This was a quick run down of Part 2 of 3 on the Designer Edition Upgrades. If you need further guidance and would like to see videos on each topic in more depth you can do so my selecting the specific category near the top.

Recent Posts
-
NEW Holographic Eclipse Heat Transfer Vinyl
April 15th, 2024 3 Ways to Use the New Holographic Eclipse Heat Transfer Vinyl from Siser …Apr 29th 2024 -
Hop into Spring with Cute Easter Vinyl Crafts
Do you love our Vinyl? Sign up for Vinyl Club today to get FREE vinyl and save big! …Mar 28th 2024 -

Fixing Wrinkles and Bubbles in Vinyl
How do you get air bubbles out of vinyl? There are a few different ways to ensure a flawless …Mar 26th 2024