
Silhouette Upgrades Designer Edition Part 3
Silhouette Upgrades Designer Edition
Hey Everyone, its Starla with ExpressionsVinyl.com. Todays blog is all about upgrades that Silhouette offers. Not to be mistaken with the Free Software Updates.
I am going to show you the fun features that you will get when you decided to upgrade from the Silhouettes Basic free program to the Designer Edition or Designer Edition Plus.
This turned out to be a very large blog, so we will break it down into 3 parts. This is Part 3.
Lets Start off with Installing the Upgrades, its very simple.
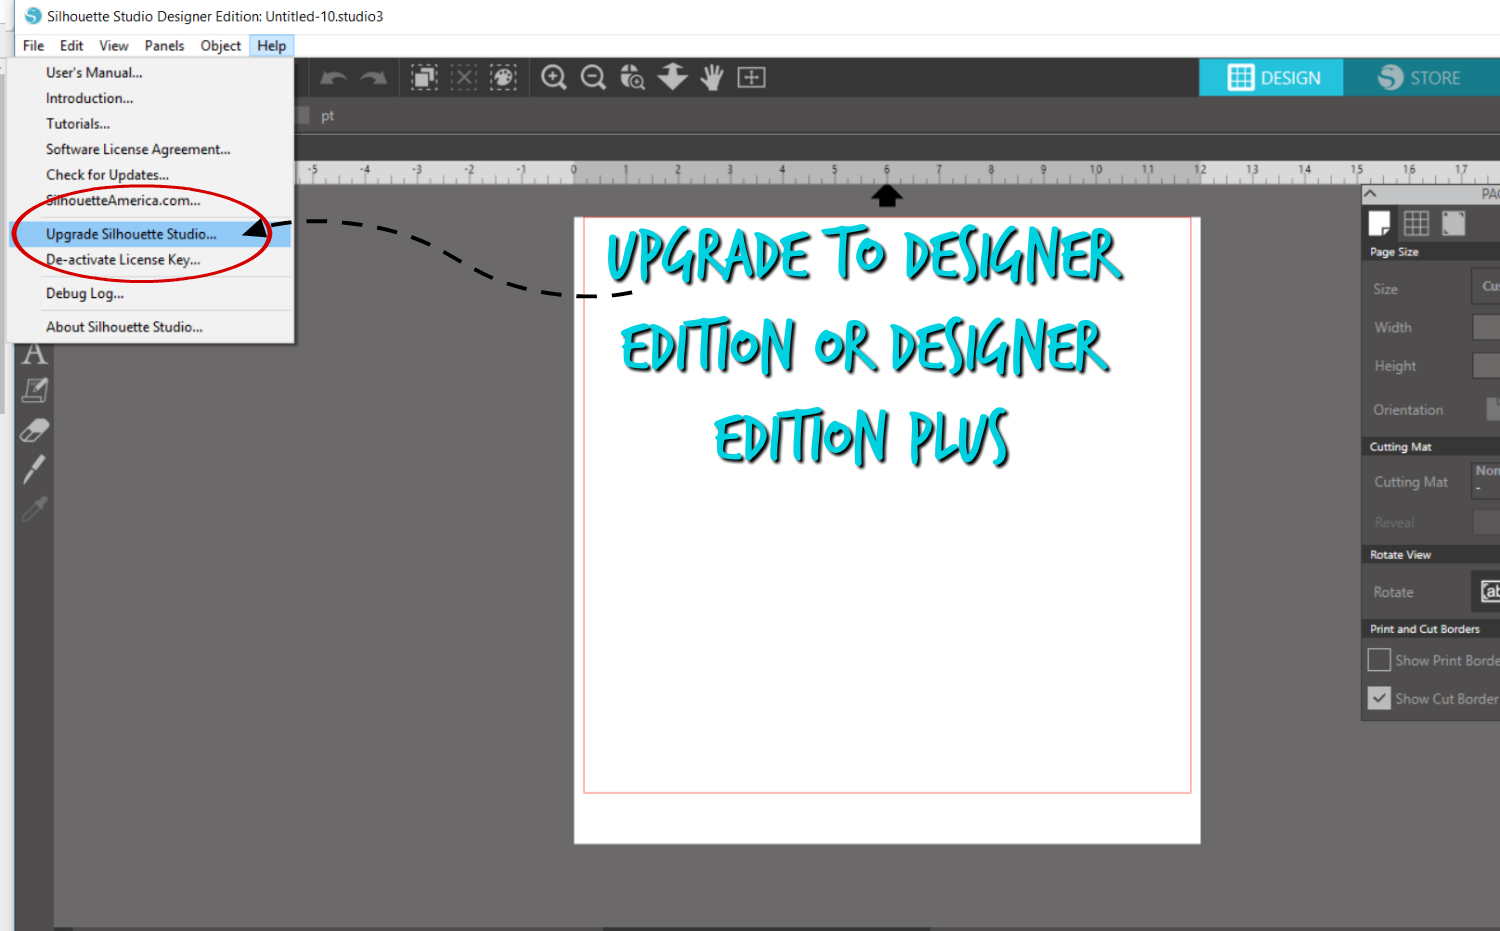
After you have purchased your desired upgrade all you will need to do is open up your current Silhouette Program and in the upper left-hand corner under the Help category and you will select the Upgrade Silhouette Studio
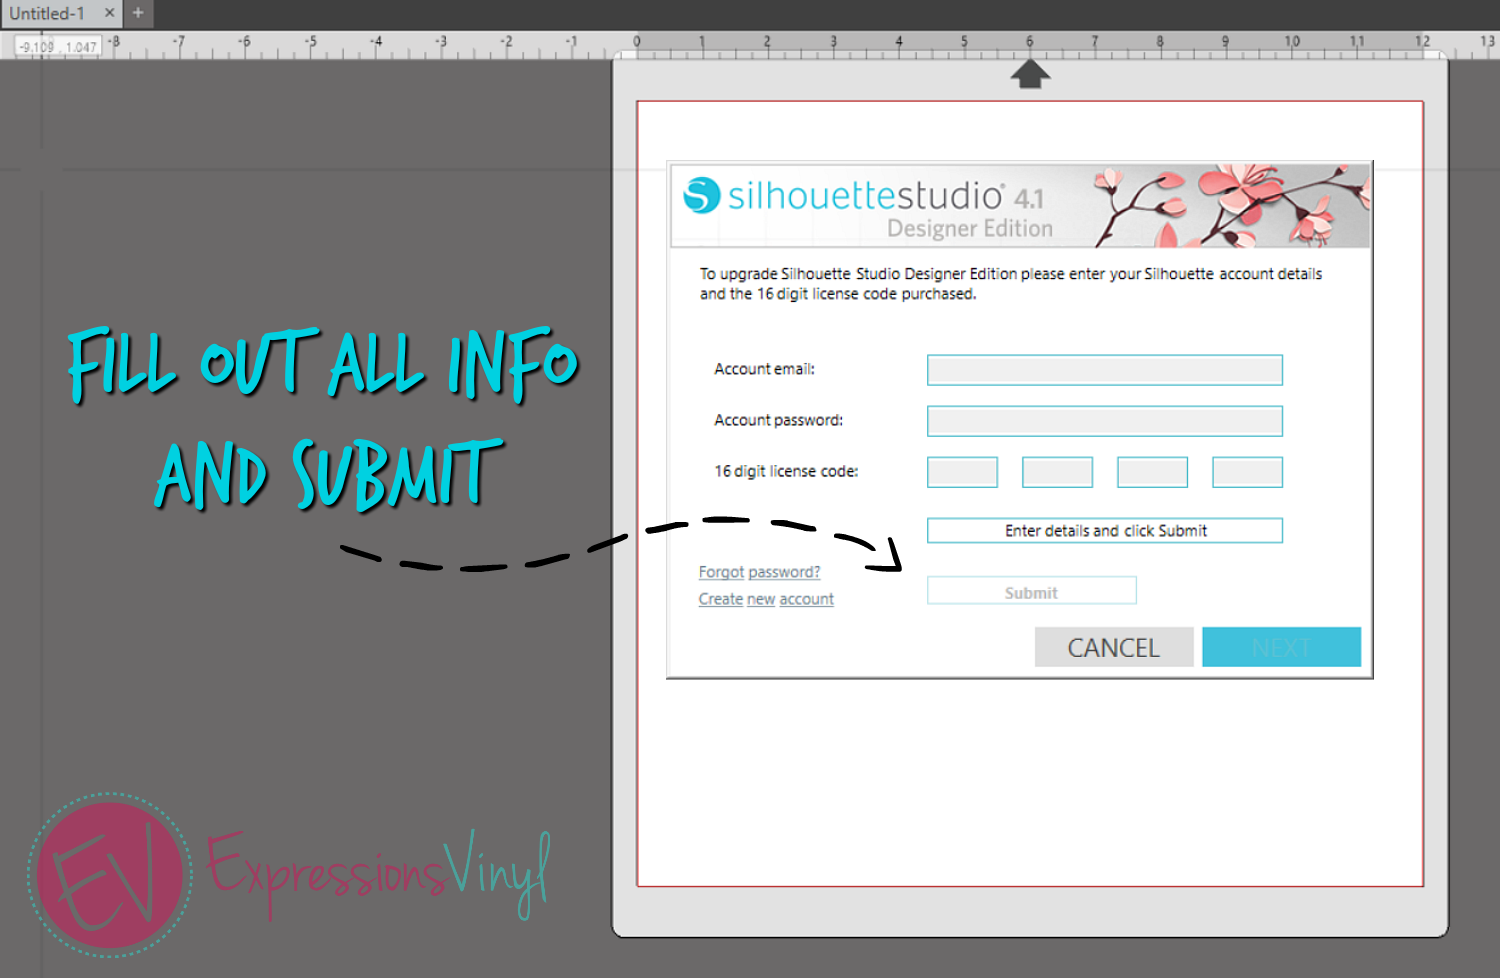
Next you will enter in the 16 digit code that you received via email or card into the boxes shown.
TIP~ Your code for the Designer Edition should start with a SSDE( Silhouette Studio Designer Edtion)
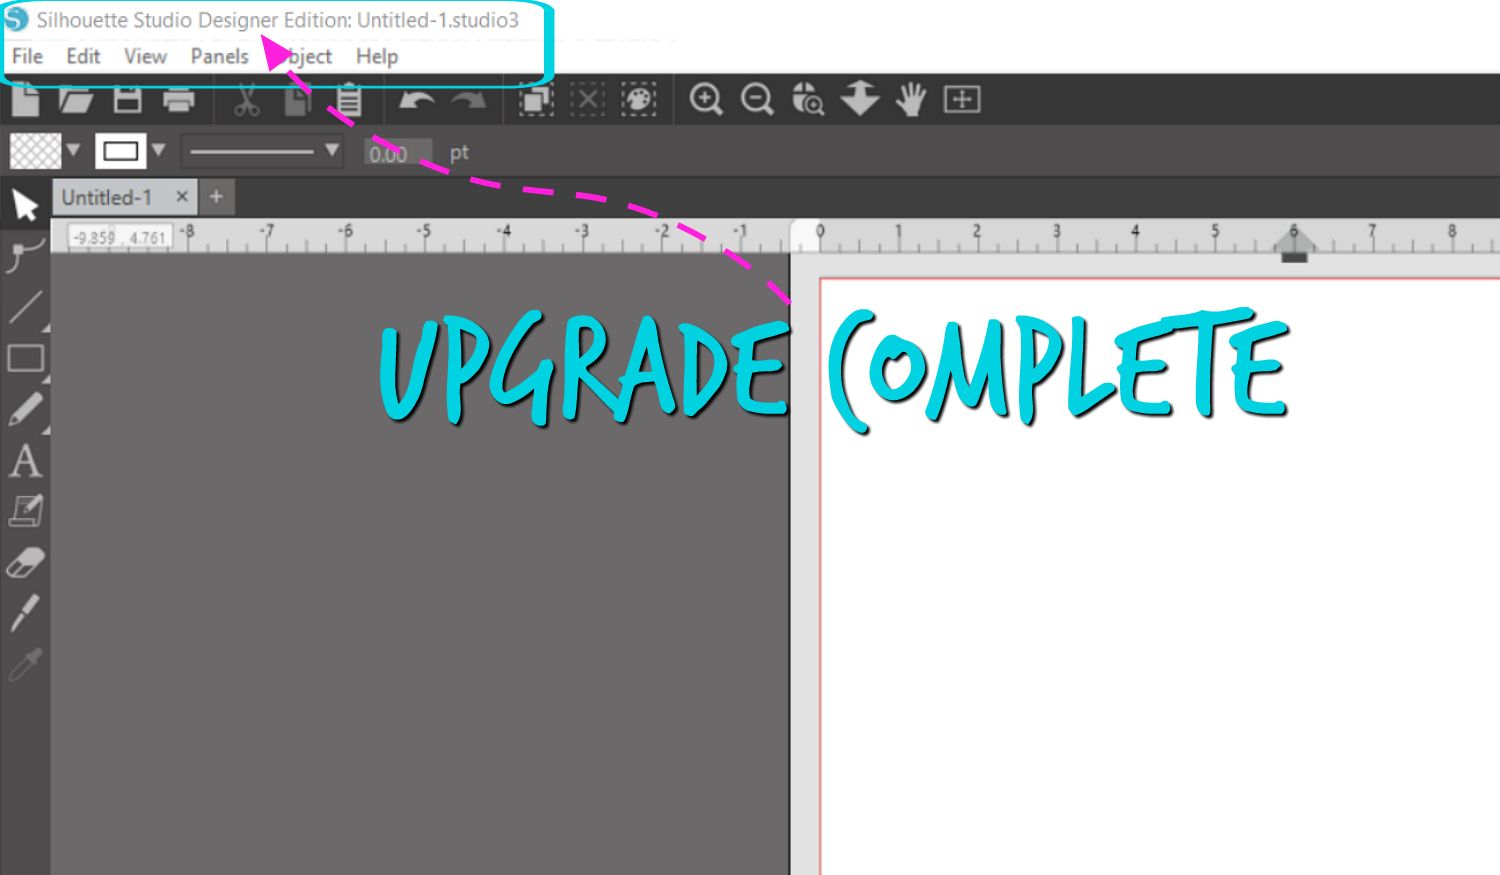
The upgrade will rightaway be applied.
NOTE: If you have had to wipe your computer or completely start over with your program and you have had this edition before, the code will always be under your account info under the STORE option.
The upgrade should show at the top of the screen. Welcome to Designer Edition!
There are quite a few new features in this upgrade from the Basic to the Designer Edition. Such as,
PART1:
PART 2:
PART 3:
- Trace by Color/Magnet Trace
- Rhinestone Conversion
- Glyph Support/Font Managment
- Basic Warp
- Pop-Up Creator (Advanced)
I am going to pin point each of these and why they are so neat to have in your program, we will break it into parts, this section covers Part 3:
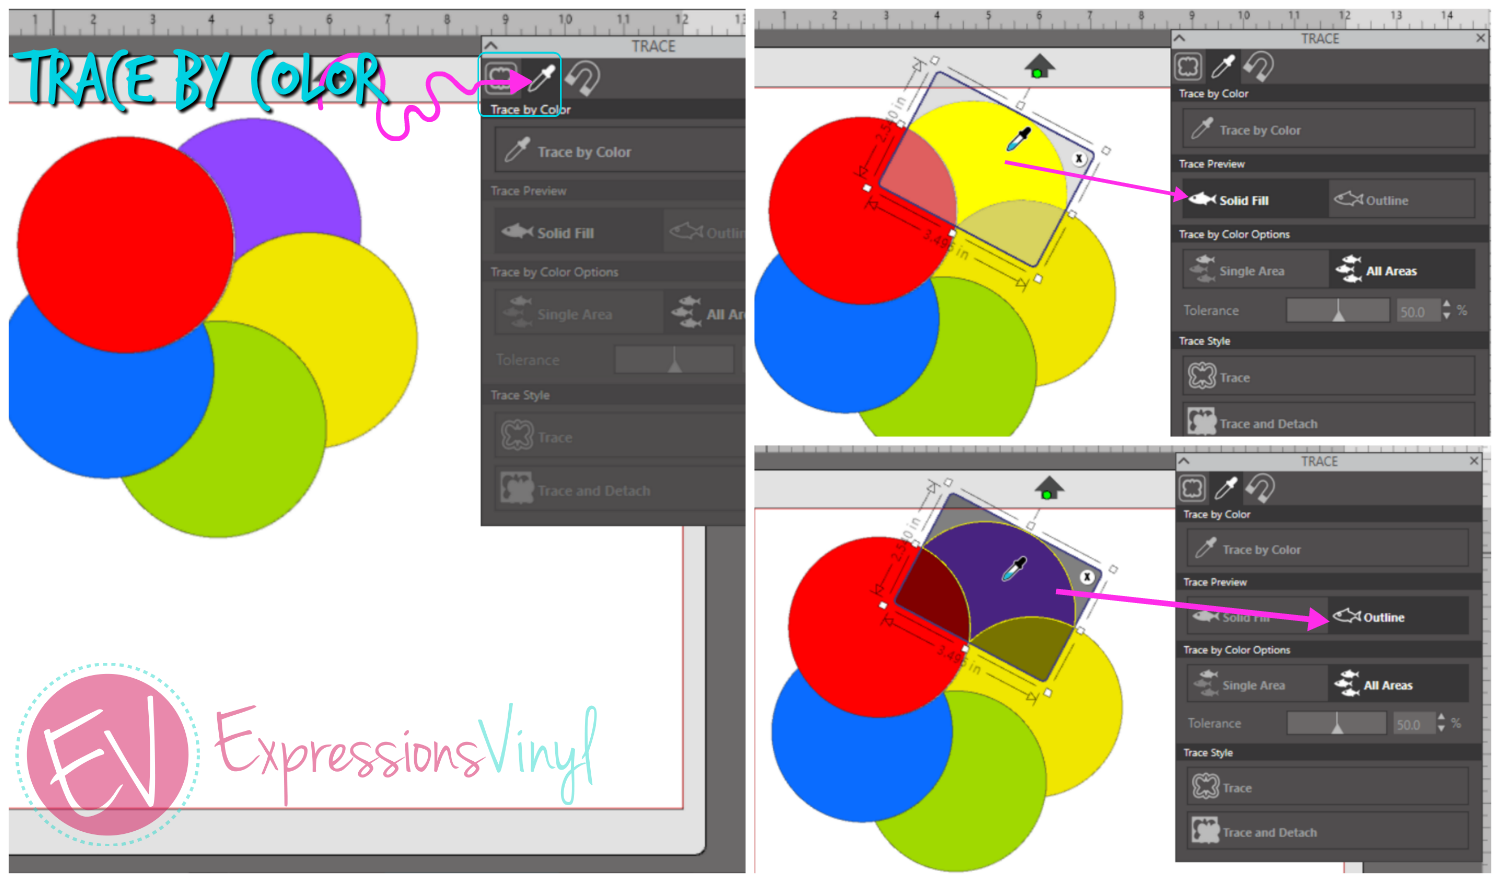
~Trace By Color/Trace by Magnet:
The Trace by Color and Trace by Magnet, makes it much easier to import and turn printable images into cut files. Now with the Trace by Color you can get more detail out of the image, and Trace by Magnet makes it easy to trace any details that would not have been able to be read by the color or regular trace option.
Magnet trace you will actually trace the image with a line that will "magnatize" to your image to create a cut file. For instance if we take this print and cut that does not have a cut line, we can select our Magnet Trace and it will glide along the side and trace it, for edges like on the card, go slow and steady in short edit points to make the trace much smoother.
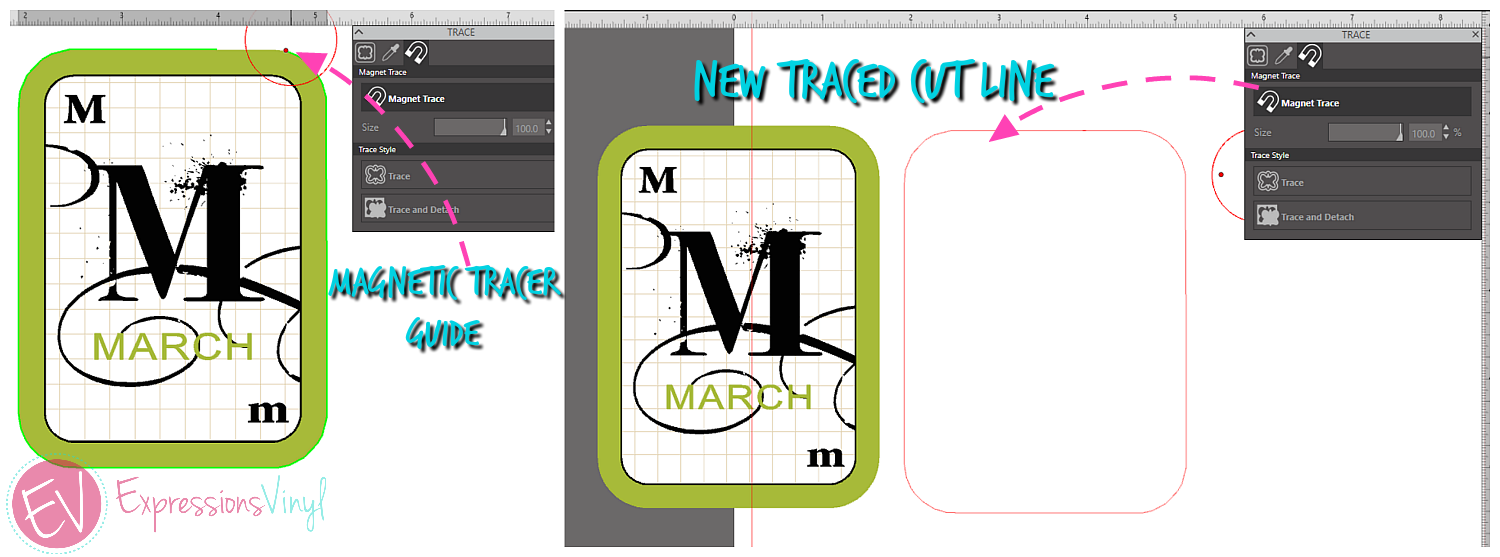
(Image: Flashcard: March) By:Silhouette
~Rhinestone Conversion:
Rhinestone Conversion, makes creating your Rhinestone creations much easier with more fill options, size options and a free-hand motion. You can now take any image from the Silhouette Store or your own imported and make it a Rhinestone file.
You can also release set rhinestones to remove, delete or manipulate the image to your liking.
A Rhinestone Counter all so shows in the bottom of the panel so you know just how many you will need of each particular size.
This effect comes in handy when making non-Rhinestone project such as lace projects and String Art. You an also use our Holographic HTV to create a Faux Rhinestone look.

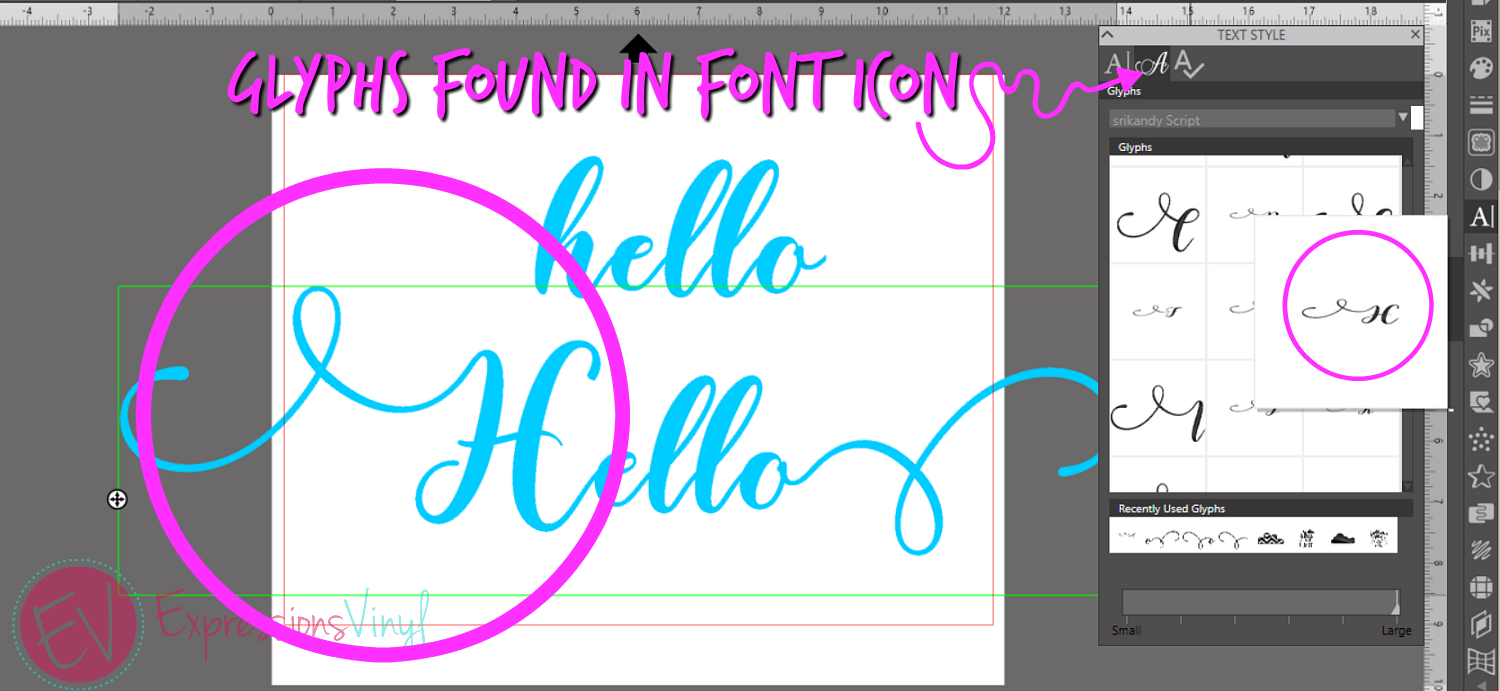
~Glyph Support:
One of my favorite features of the Designer Edition has to be this Glyph Support, you can easily add those fun flourishes that come with many fonts as well as access fonts that have dingbats which can be hard to see.
Here I have added the Glyph version of the fonts H and o, and it add is a fun look. All you need to do is select in the font where to insert the Glyph and then select the one you need. Somethines there are several variations of the same letter so play around until you like the finished look.
This also comes in handy when inserting Dingbats from fonts so instead of figuring out which letter you need for an image, you can simply select the one you need.
You can even adjust the size of the used glyphs for easier viewing.
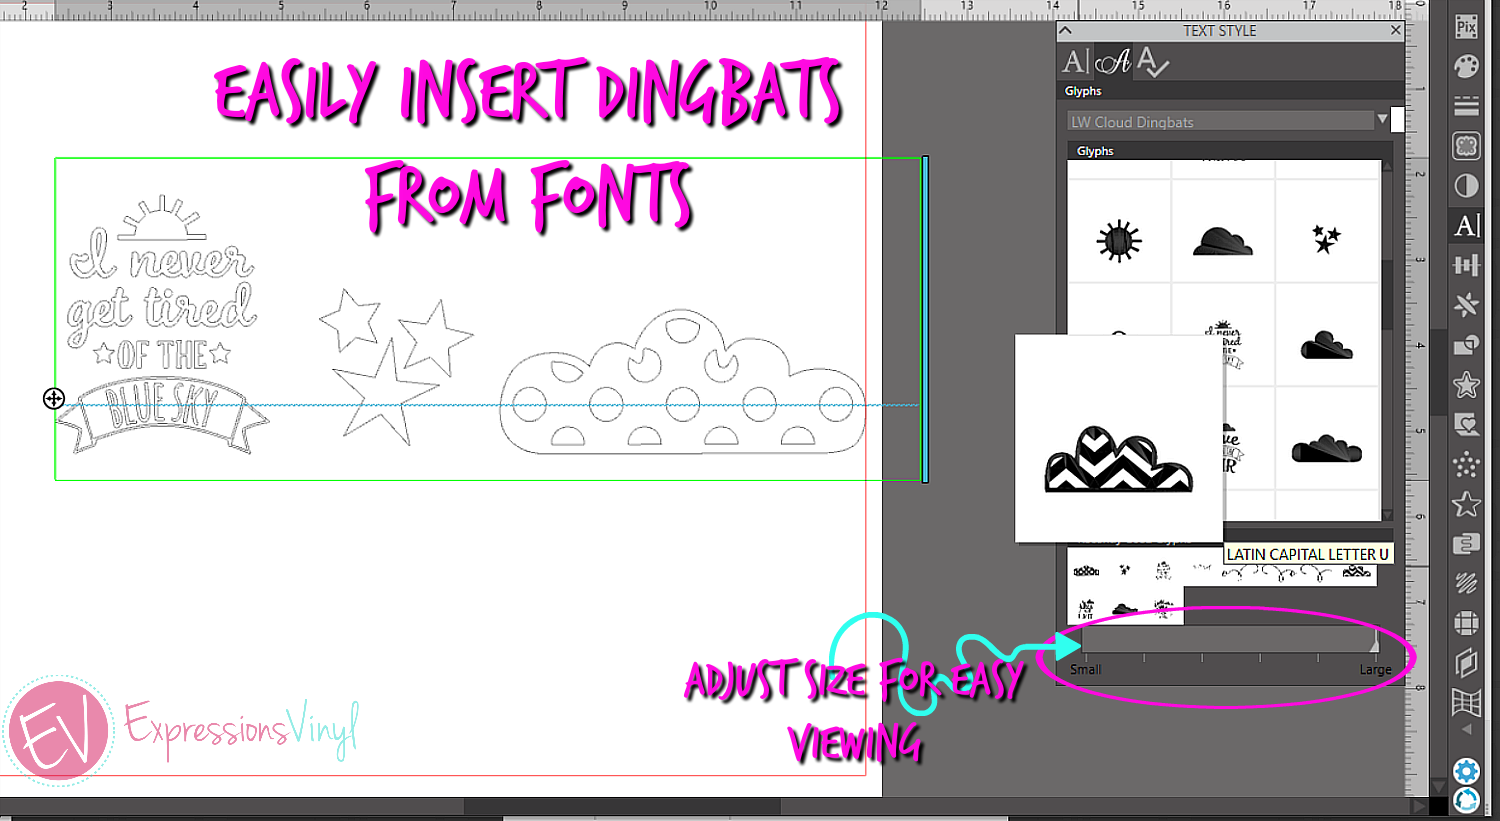
(Font: Srikandy Script) and (LW Cloud Dingbats)
~Font Management:
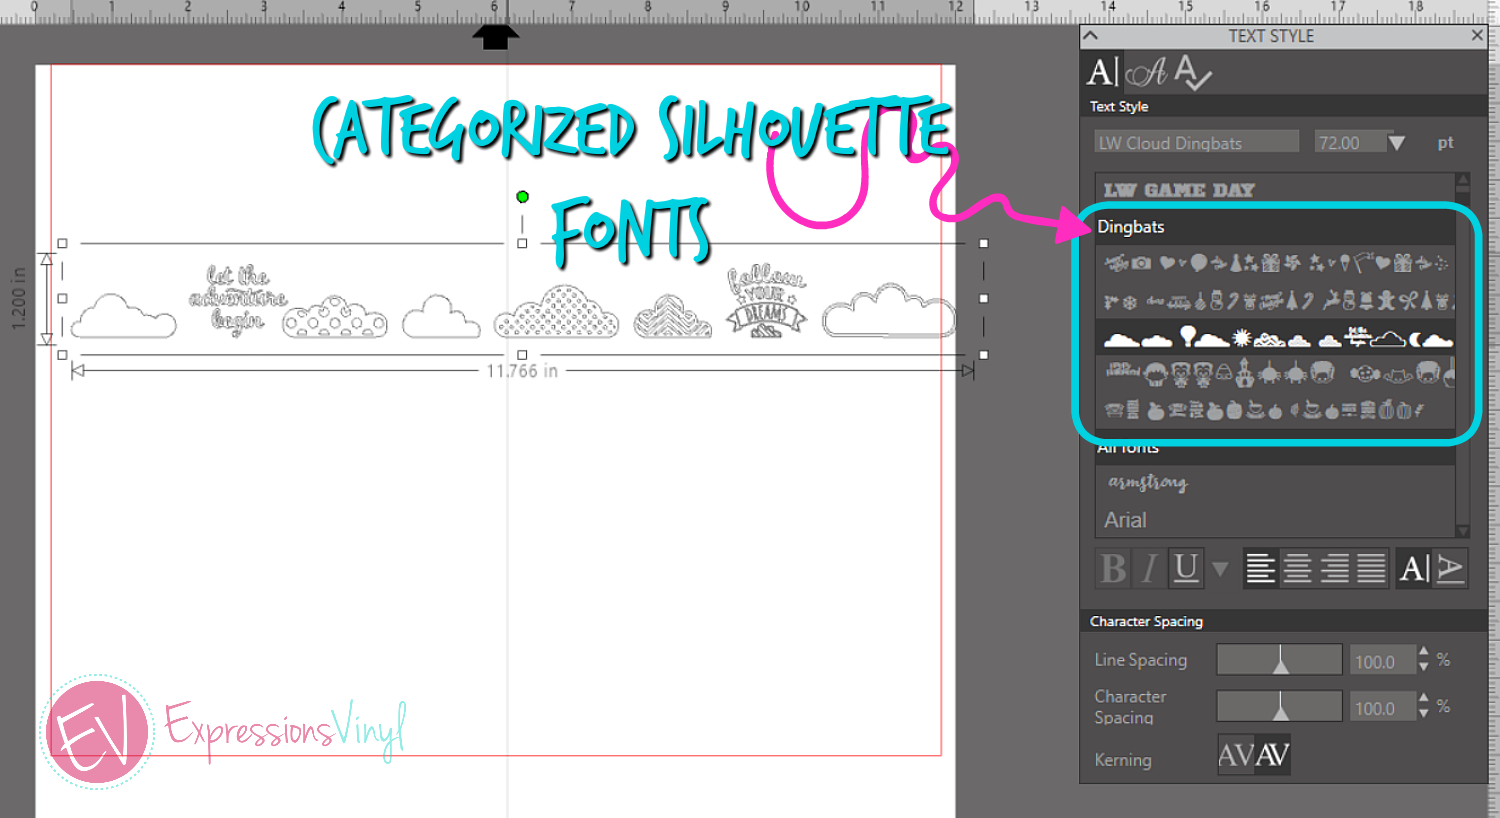
With the basic edition you will see an upgraded font category for frequently used and recently used fonts, but in Designer Edition you will see the option to categorize your Silhouette Fonts by createing subfolders like I have done here with my Silhouette Dingbat fonts, this makes it easy to access them by my own category.
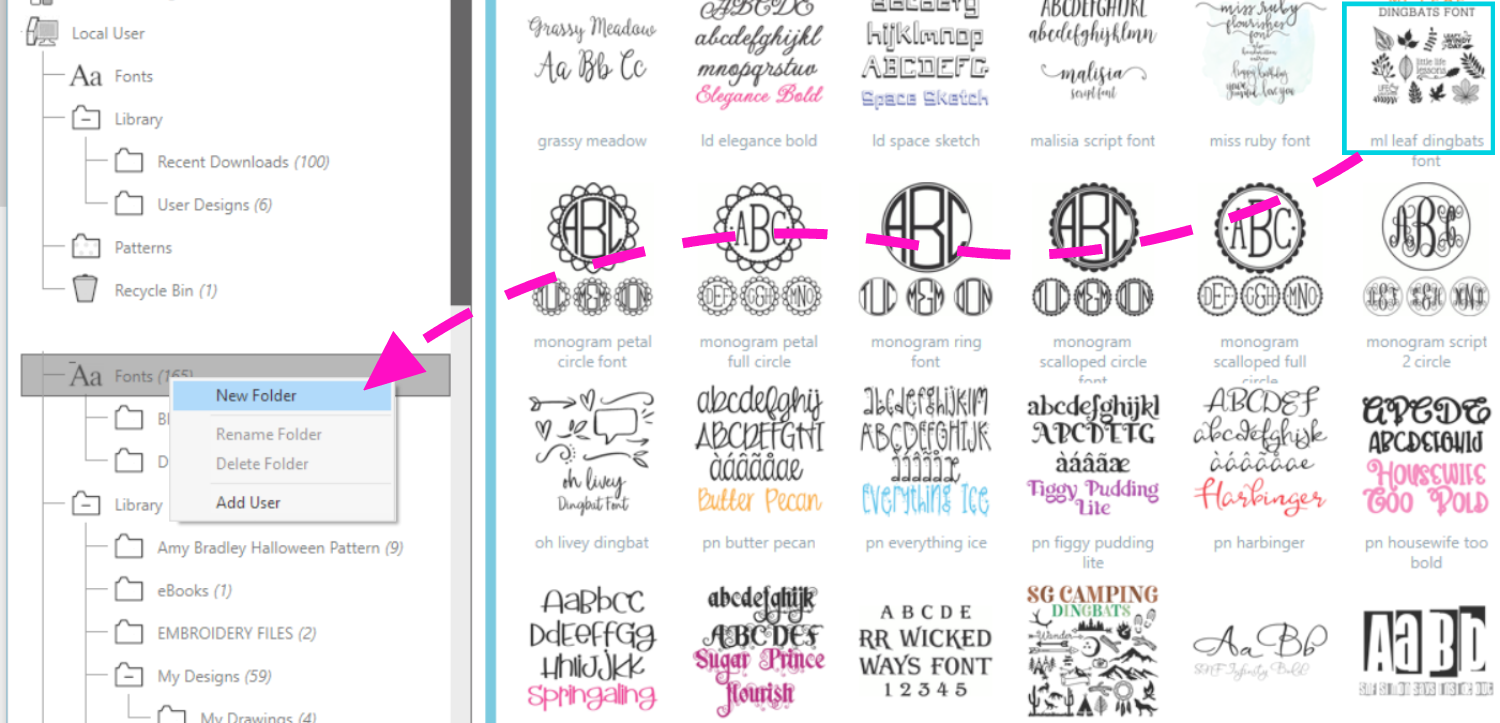
Simply right click your fonts and add a new folder such as script, block, Dingbats,whatever works for you. I have done a dingbat, now when I drag them into the folder they will automatically be organized when viewing from my design area.
~Basic Warp:
With the Basic Warm Feature I makes it easy ti manipulate shapes and words to look different. I can take the same star shape and turn one into a puffy star just by dragging edit points to the corners.
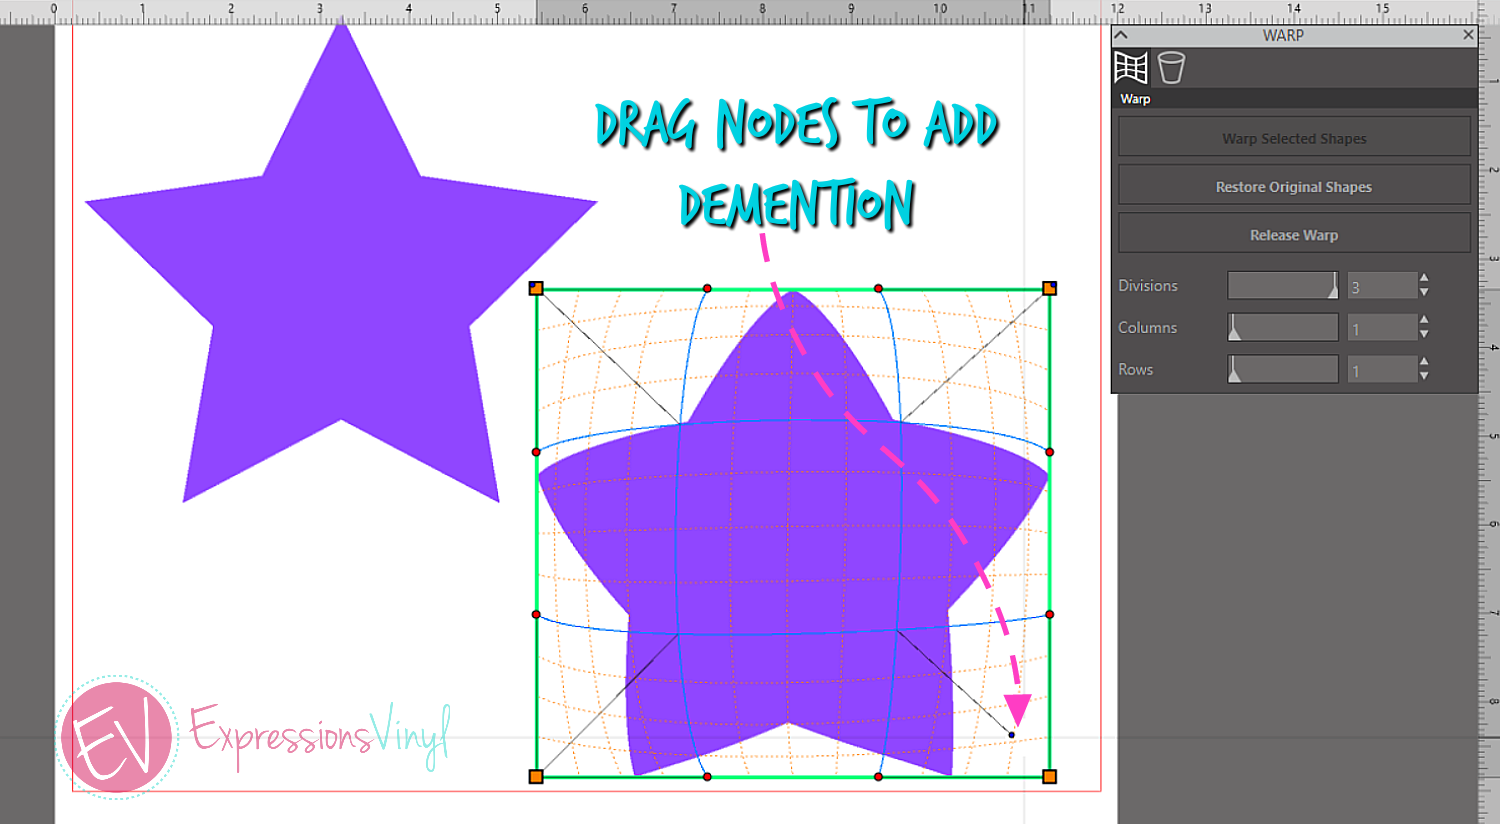
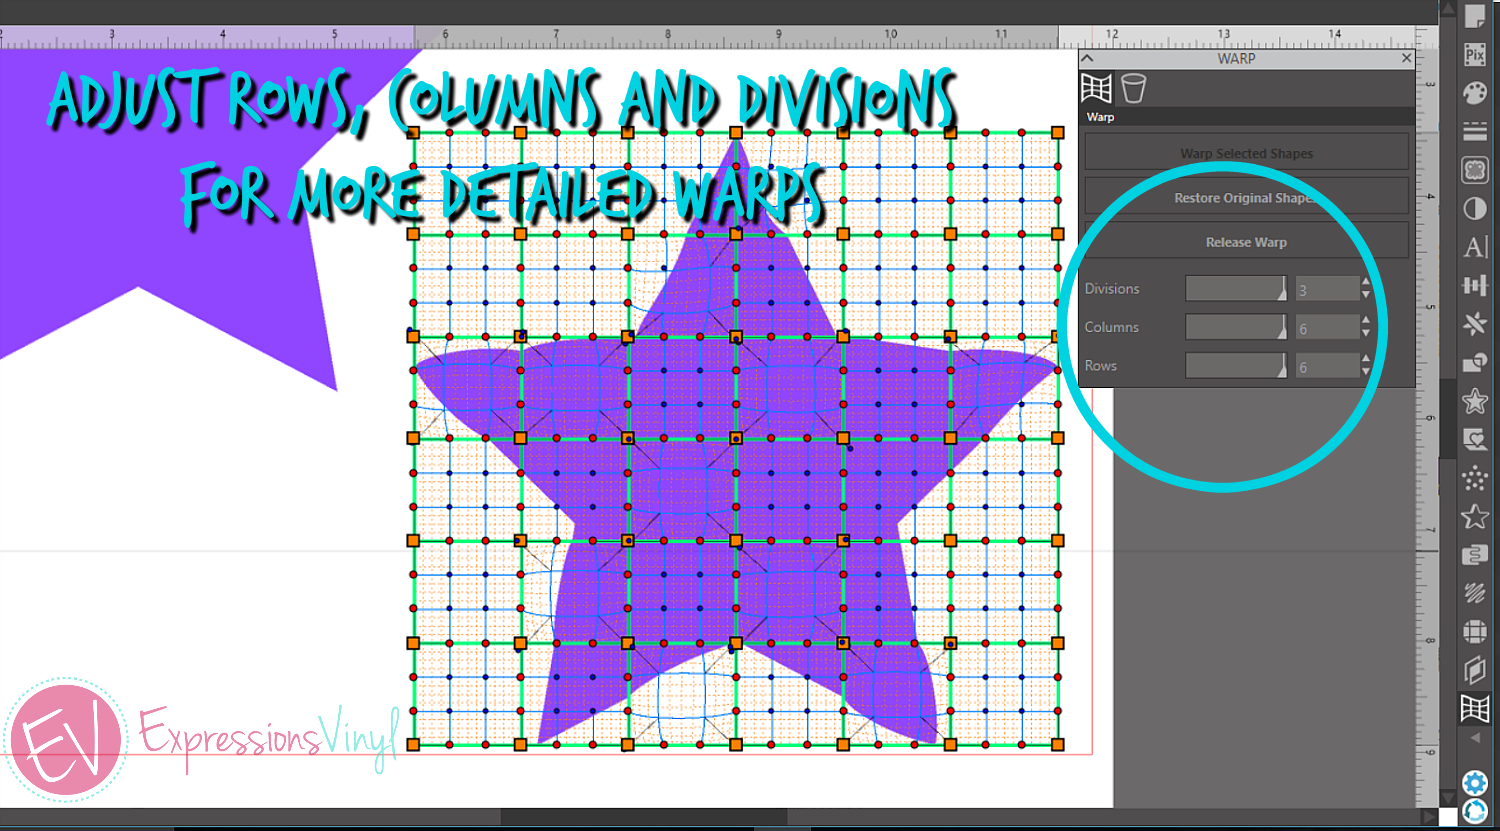
Once its ready and how you like it, simply release the warp and it will be ready to cut. If you want more presision points you can adjust the columns, rows and divisions.
If you want to start over just select Restore Original Shape.
~Pop-Up Creator (Advanced):
This feature is included in the Basic Silhouette Studio, but Designer Edition has more advanced features that makes your pop-up card making much easier.
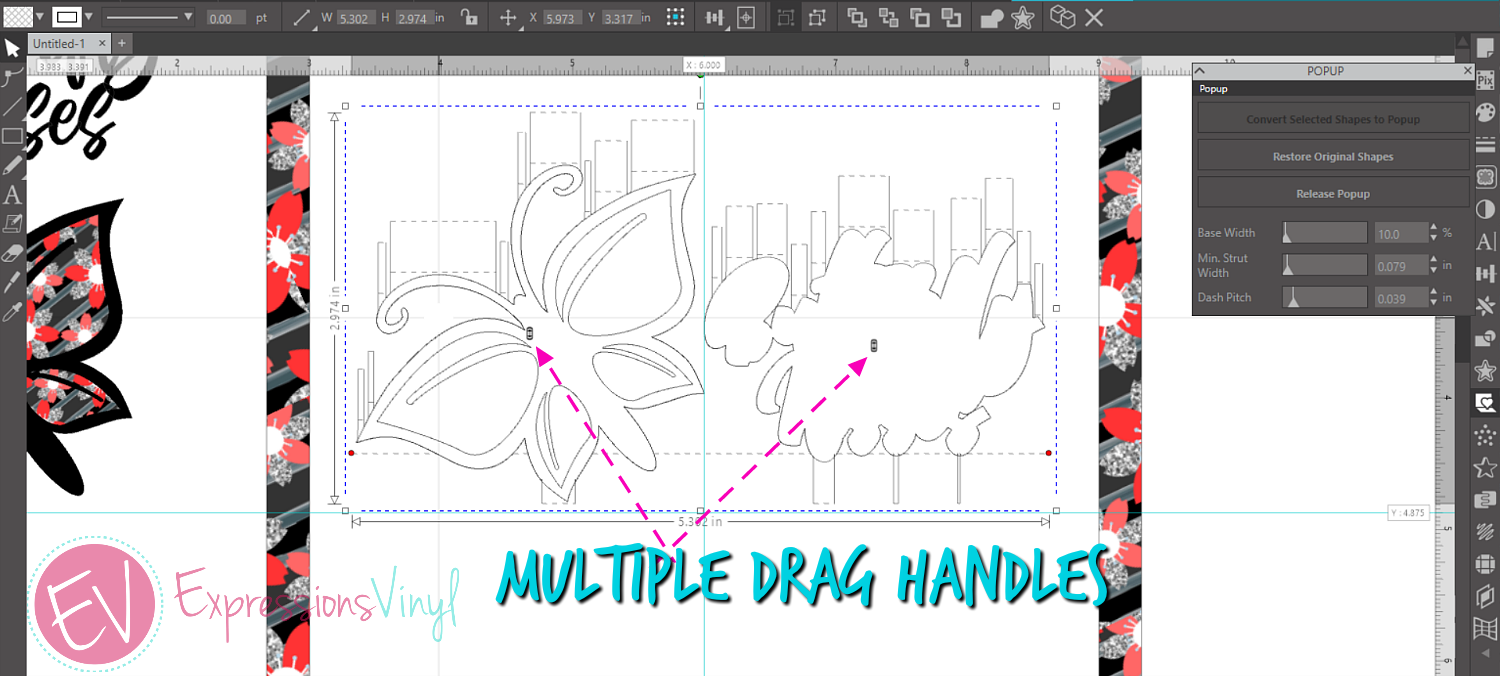
In Designer Editon, you now have the ability to stagger your pop up so you have a drag handle for every image. Be sure not to group your images together for this feature.
NOTE: Your guides will come in very handy for lining images up visually for the points on the fold markers. With the guides it will stay centered with your base paper that will fit inside your card base.
In the Pop-Up feature, there are 3 options for adjustments.
~Base Width: how much of the design is connected to the page
~Min Strut Width: how many and skinny your connections are
~Dash Pitch: How long your dash cut lines are.
These can be adjsted to your liking. You are now ready to cut and add any embelishments to your card.
That was a quick rundown of the Designer Edition Part 3 or 3, if you need further guidance and would like to see videos on each topic in more depth you can do so my selecting the specific category near the top.

Recent Posts
-
NEW Holographic Eclipse Heat Transfer Vinyl
April 15th, 2024 3 Ways to Use the New Holographic Eclipse Heat Transfer Vinyl from Siser …Apr 29th 2024 -
Hop into Spring with Cute Easter Vinyl Crafts
Do you love our Vinyl? Sign up for Vinyl Club today to get FREE vinyl and save big! …Mar 28th 2024 -

Fixing Wrinkles and Bubbles in Vinyl
How do you get air bubbles out of vinyl? There are a few different ways to ensure a flawless …Mar 26th 2024