
Using a Pen to Weed Glitter HTV easily
Hey its Starla with ExpressionsVinyl.com. One of my favorite Heat Transfer Vinyls (or Iron-on) is our Siser Glitter line. 47 different colors all super fun and they add so much texture to your projects. And you can never go wrong with adding some glitter to any little girls t shirt.
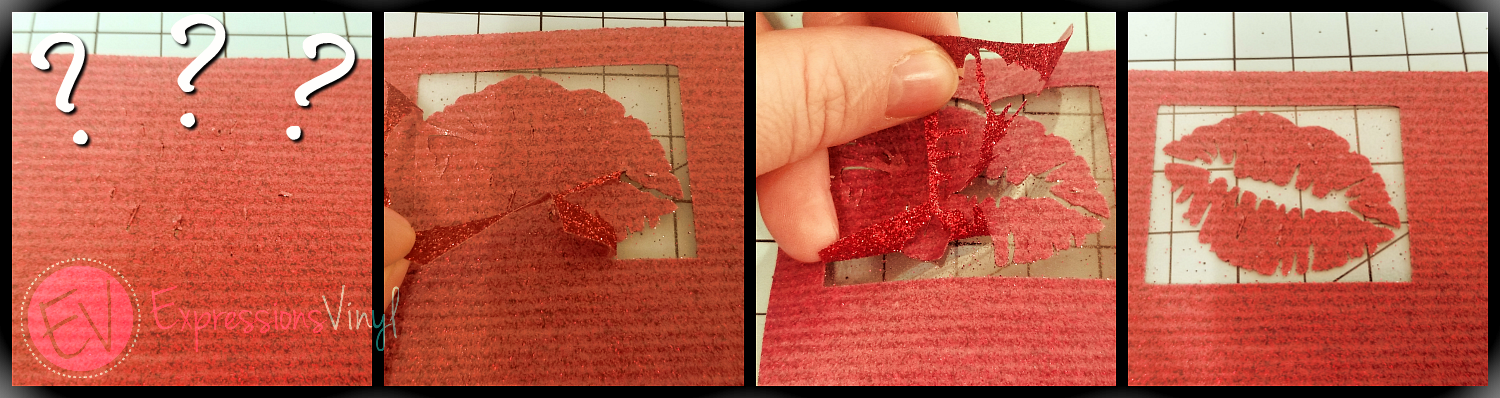
However, when you get into those little details with Glitter HTV, it can sometimes be quite the eye strain to see your cut lines. You know there is a cut there, but where to start? What to weed? I call this blind weeding. Its mostly weeded but those little details??? Forget about it.
Well I have a quick trick for you using our Silhouette Pen Holder Sold Out! (you can use sketch pens as well, but they tend to smear) and a simple Bic Pen. You can use other pens as well, I have jus found the Bic Pen to be my favorite.
Your Pen Holder will come with 3 different sizes: Small (Blue), Medium (White) and Large(Grey) These are for different pens and markers, and you just have to see which fits your pen best.

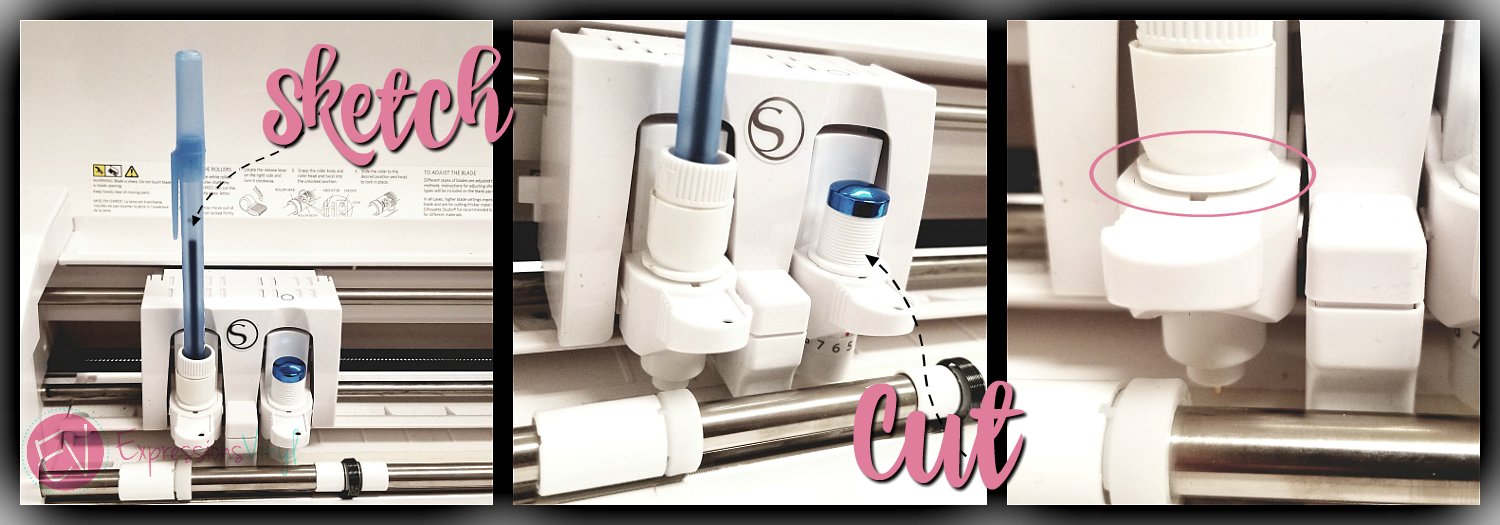
Next take out one of your blades and place the pen in the pen holder into the housing unit.
I changed out my Auto blade to the pen holder and added my Premium Blade since I prefer to use it to cut Glitter HTV.
NOTE: If you do not have a Premium Blade, your Auto Blade will work just fine. But you will have to have your Auto Blade in Tool and and Pen Holder in Tool 2.
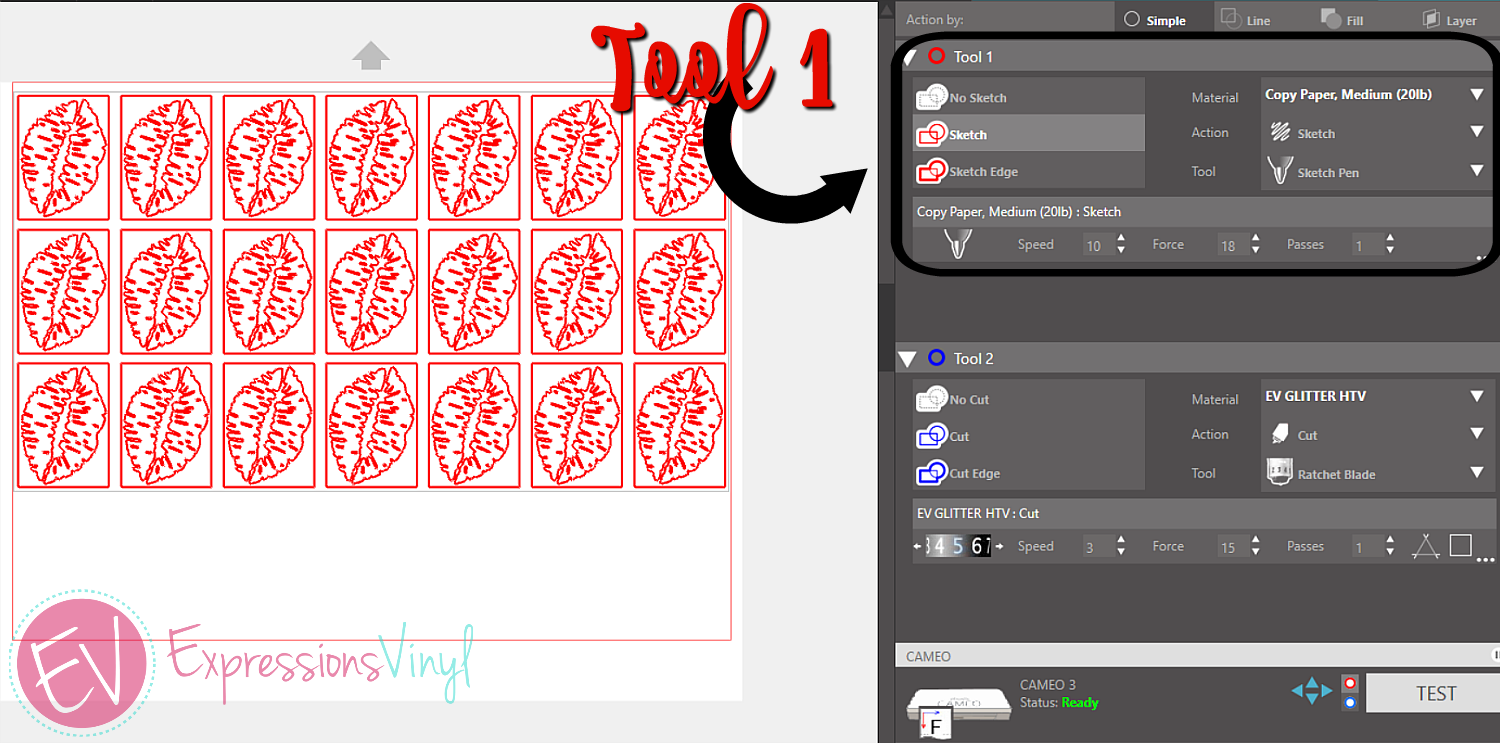
Now you have to assign your Tools so your machine will know what action to perform.
Tool 1 (always Red) since we have our pen in there, I will set my material Copy Paper, Medium and change my action from a cut to a sketch.
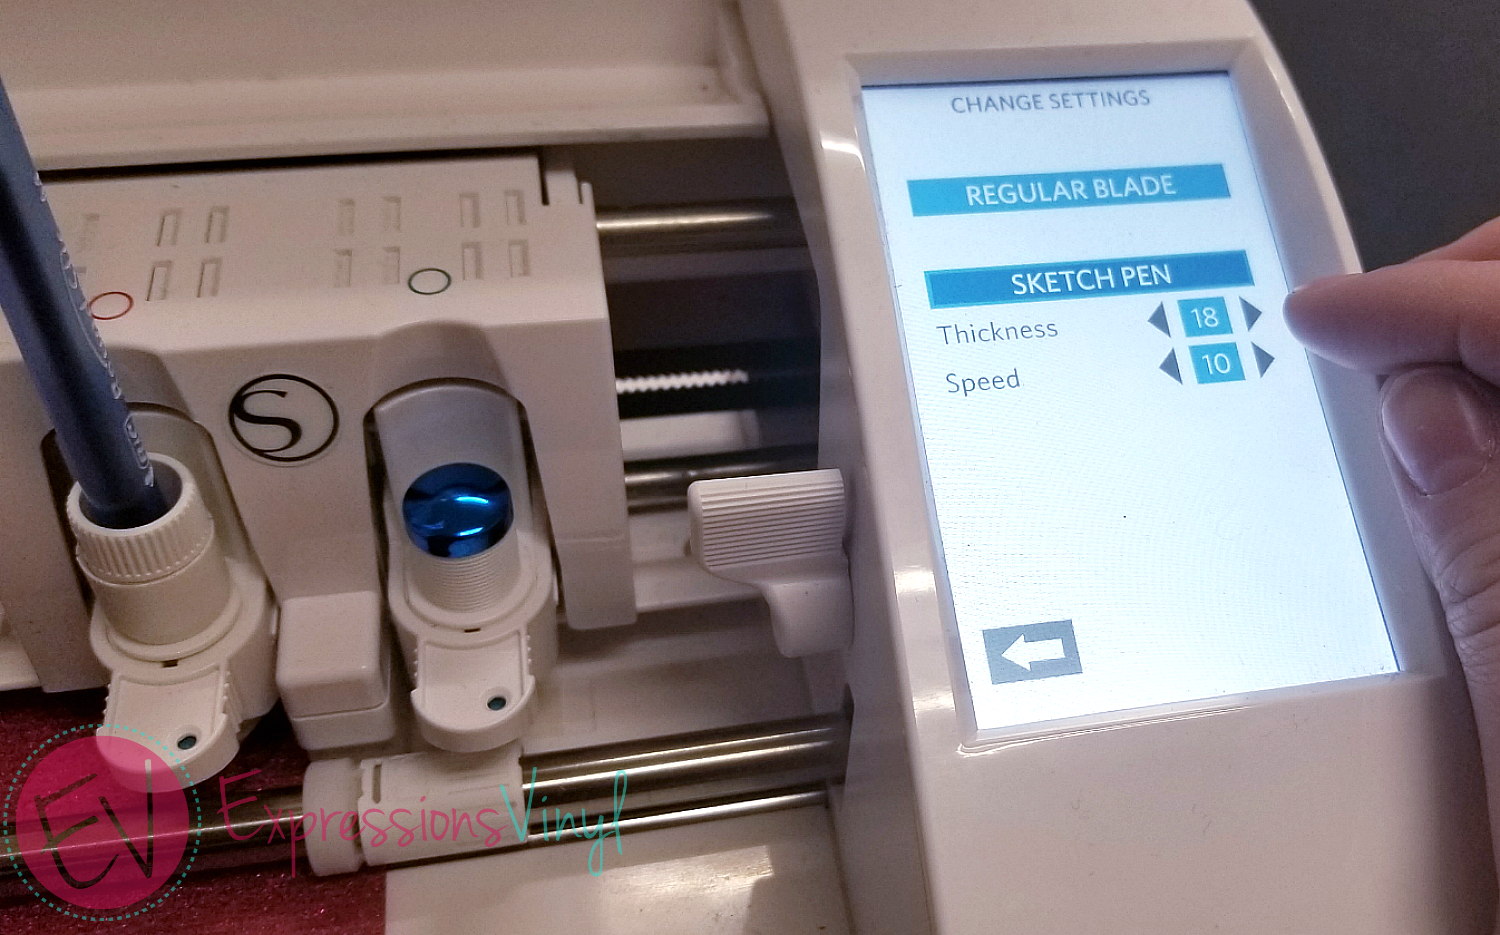
I have found this setting to be perfect, but if it is dragging along the way, you can pause the action and adjust it on your control panel by selecting Change Settings, then adjusting here.
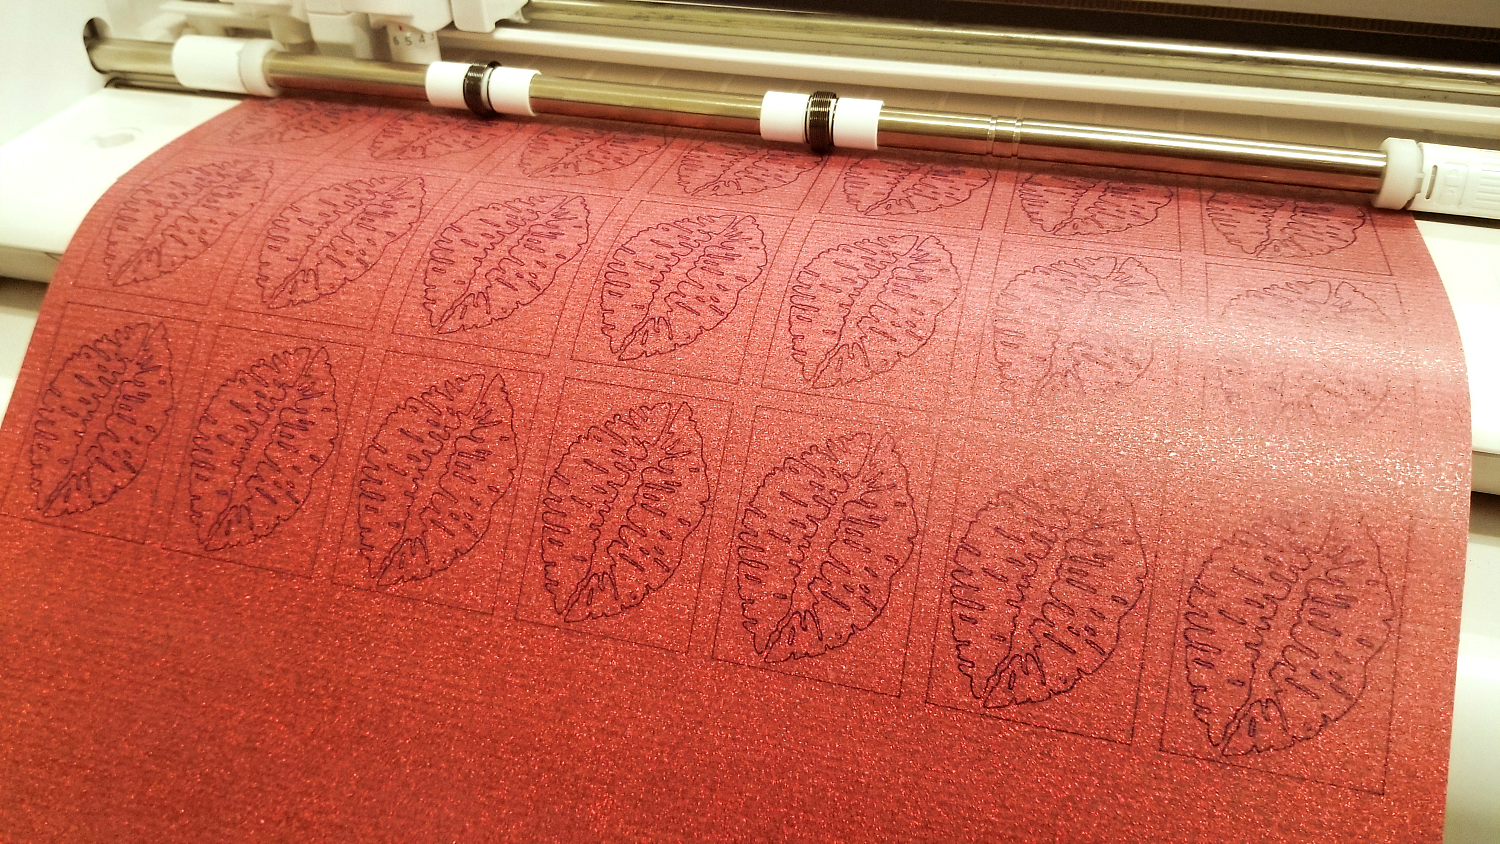
Now you should have some sketched lucious lips, you see where I am going here with sketching first?
The next thing you would want to do is hit Unload right???
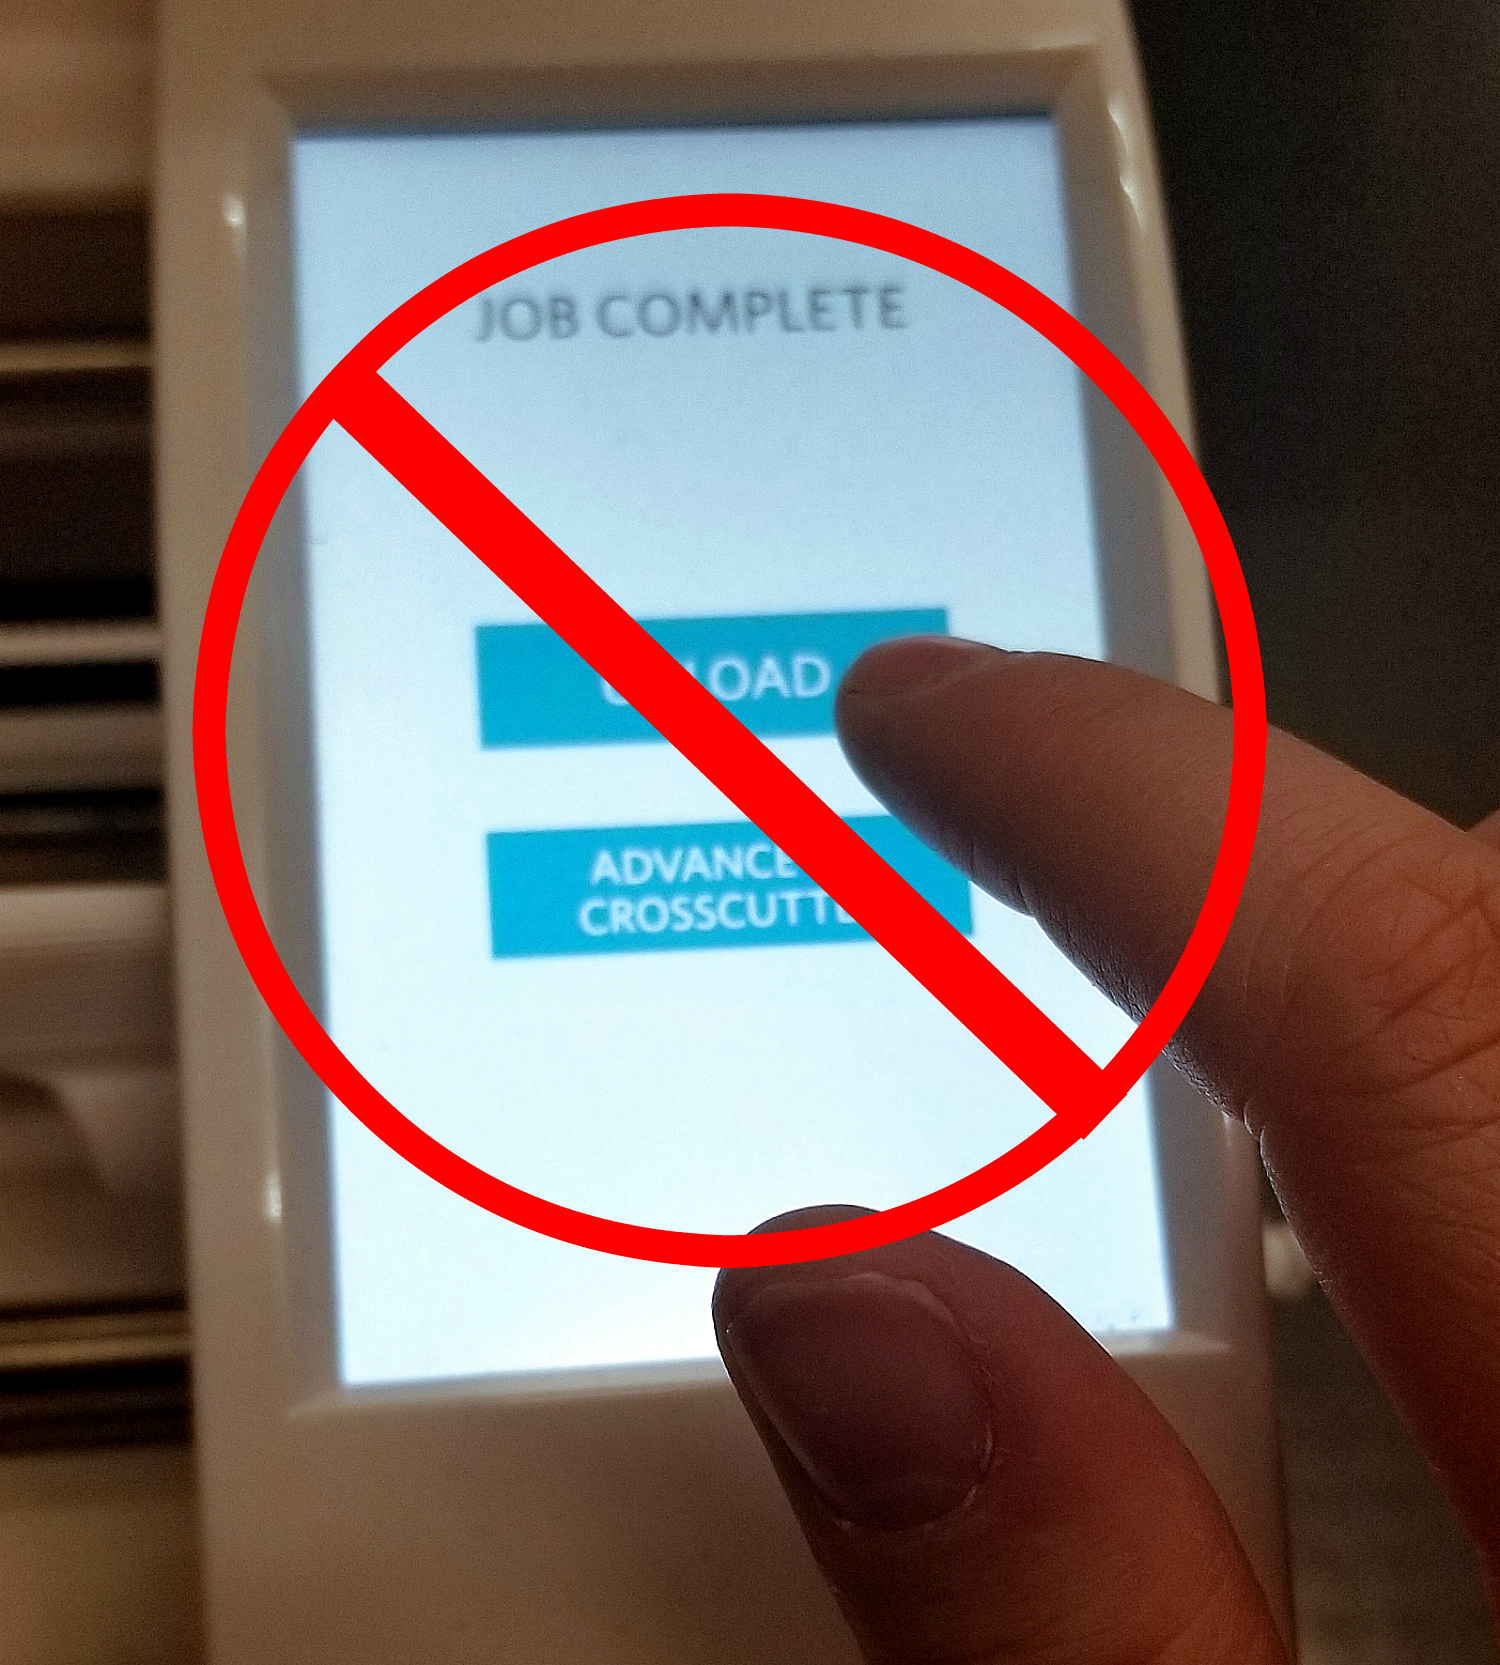
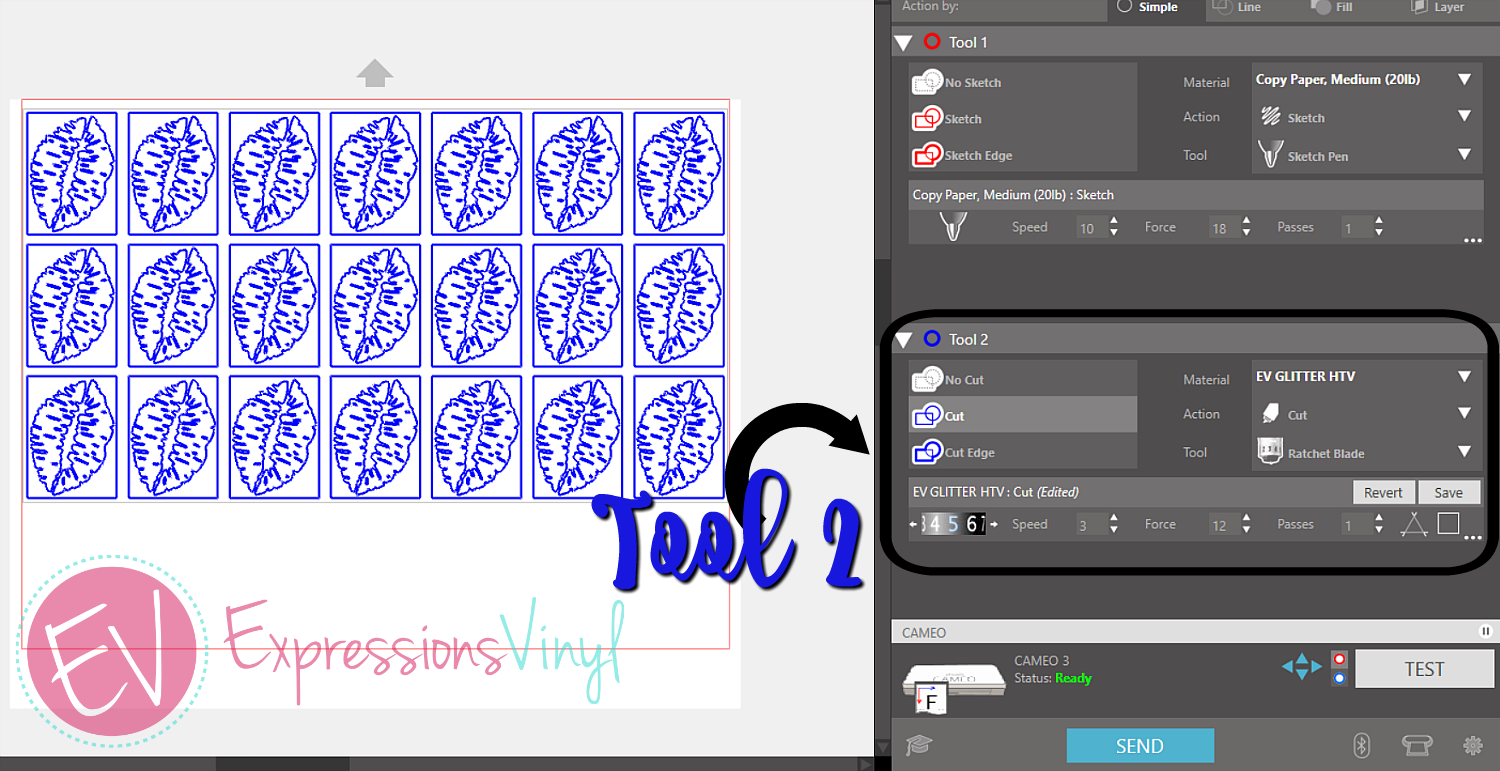
Not quite yet! however,That will be your first instinct, but you still have to cut them. Which is an easy step. In your SIlhouette Send Window, select all your images and then under Tool 2, Select Cut, this will change the cut lines to blue which tells you Silhouette to change blades.
Tool 2~(always Blue) Make sure that your lines are highlighted in Blue, your action is on Cut and you have your Material set.
I recommend cutting Glitter Heat Transfer in the Silhouette,
- Blade~ 5
- Speed~ 3-5
- Force~12
NOTE: You will have to manually change your blade to the 5 if you are used to the Auto, just a heads up
When you have everything adjusted, go ahead and SEND it.
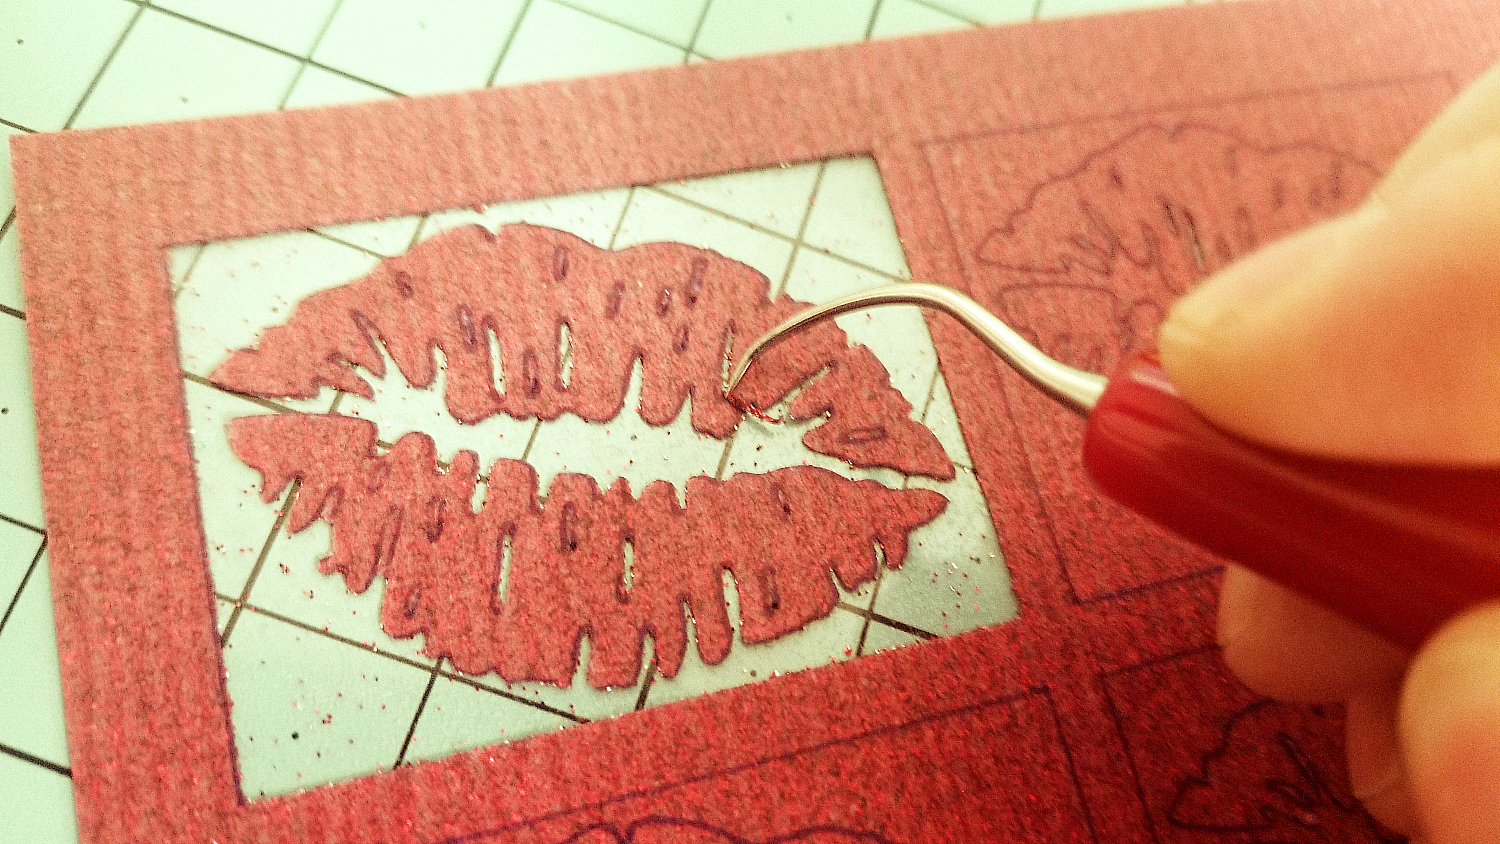
Once you have it dont cutting you will see that weeding those little details is so much easier than blindly guessing.

Recent Posts
-
NEW Holographic Eclipse Heat Transfer Vinyl
April 15th, 2024 3 Ways to Use the New Holographic Eclipse Heat Transfer Vinyl from Siser …Apr 29th 2024 -
Hop into Spring with Cute Easter Vinyl Crafts
Do you love our Vinyl? Sign up for Vinyl Club today to get FREE vinyl and save big! …Mar 28th 2024 -

Fixing Wrinkles and Bubbles in Vinyl
How do you get air bubbles out of vinyl? There are a few different ways to ensure a flawless …Mar 26th 2024