
Valentine'S Day Subway Art
I am already getting excited for Valentine's Day and this year I wanted to add a little Valentine's Day Subway Art to my home.
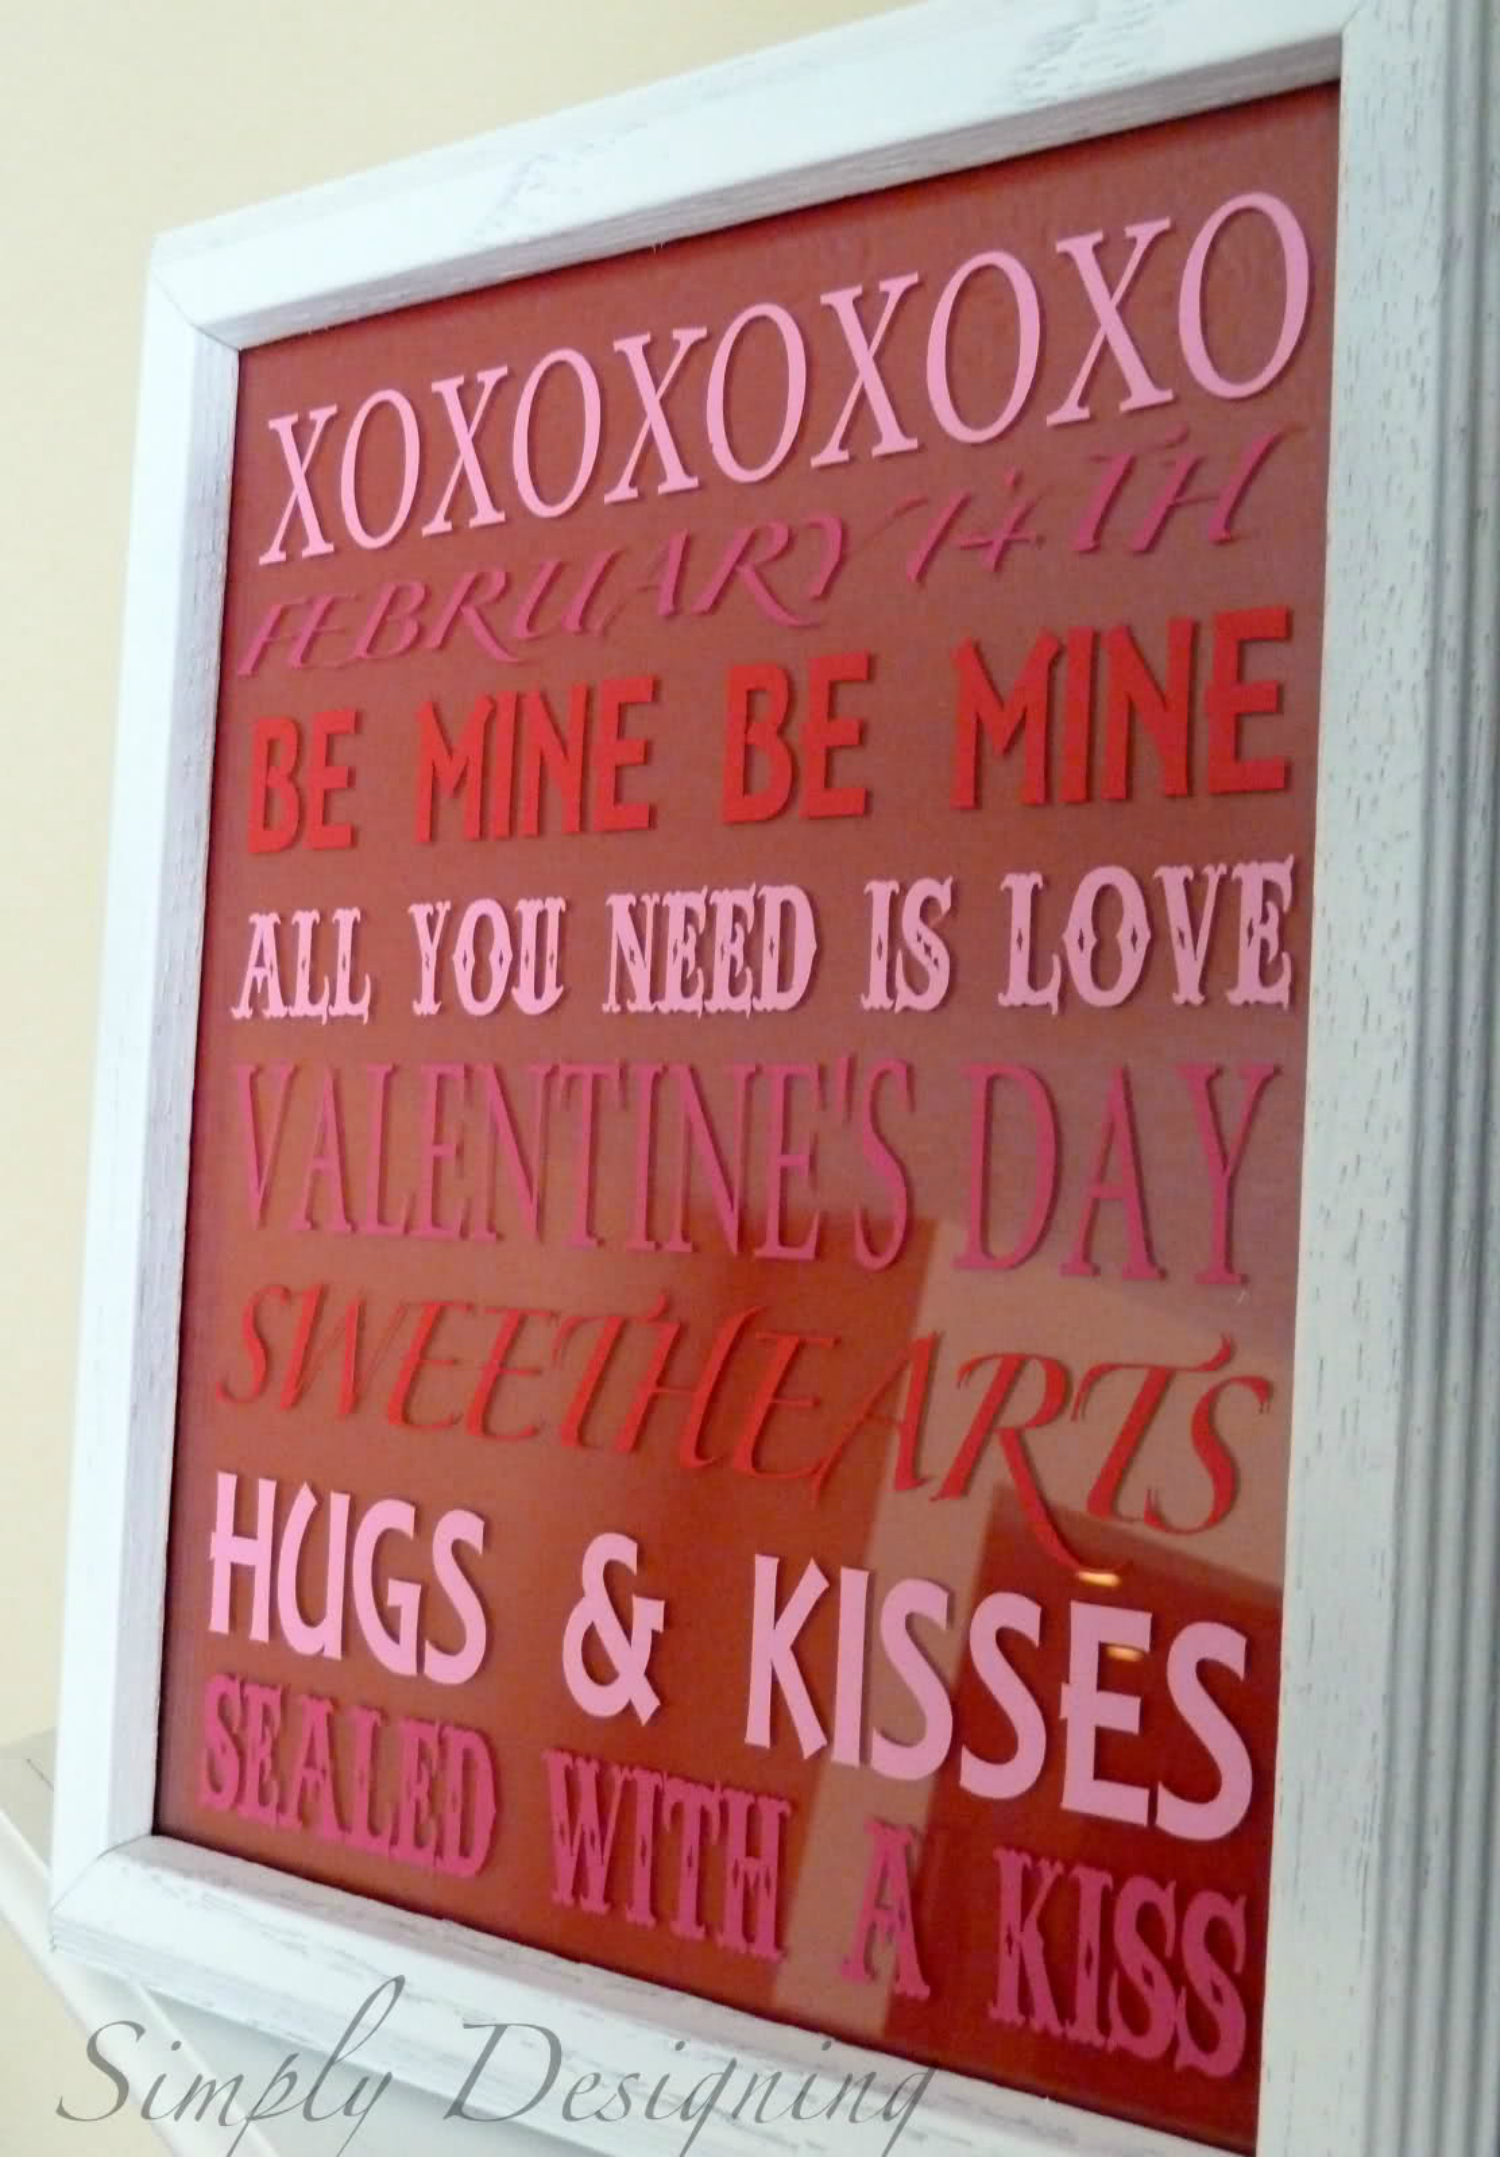
So with a couple different colors of fab vinyl from Expressions Vinyl, and a spare frame, I was able to come up with this cute subway art:
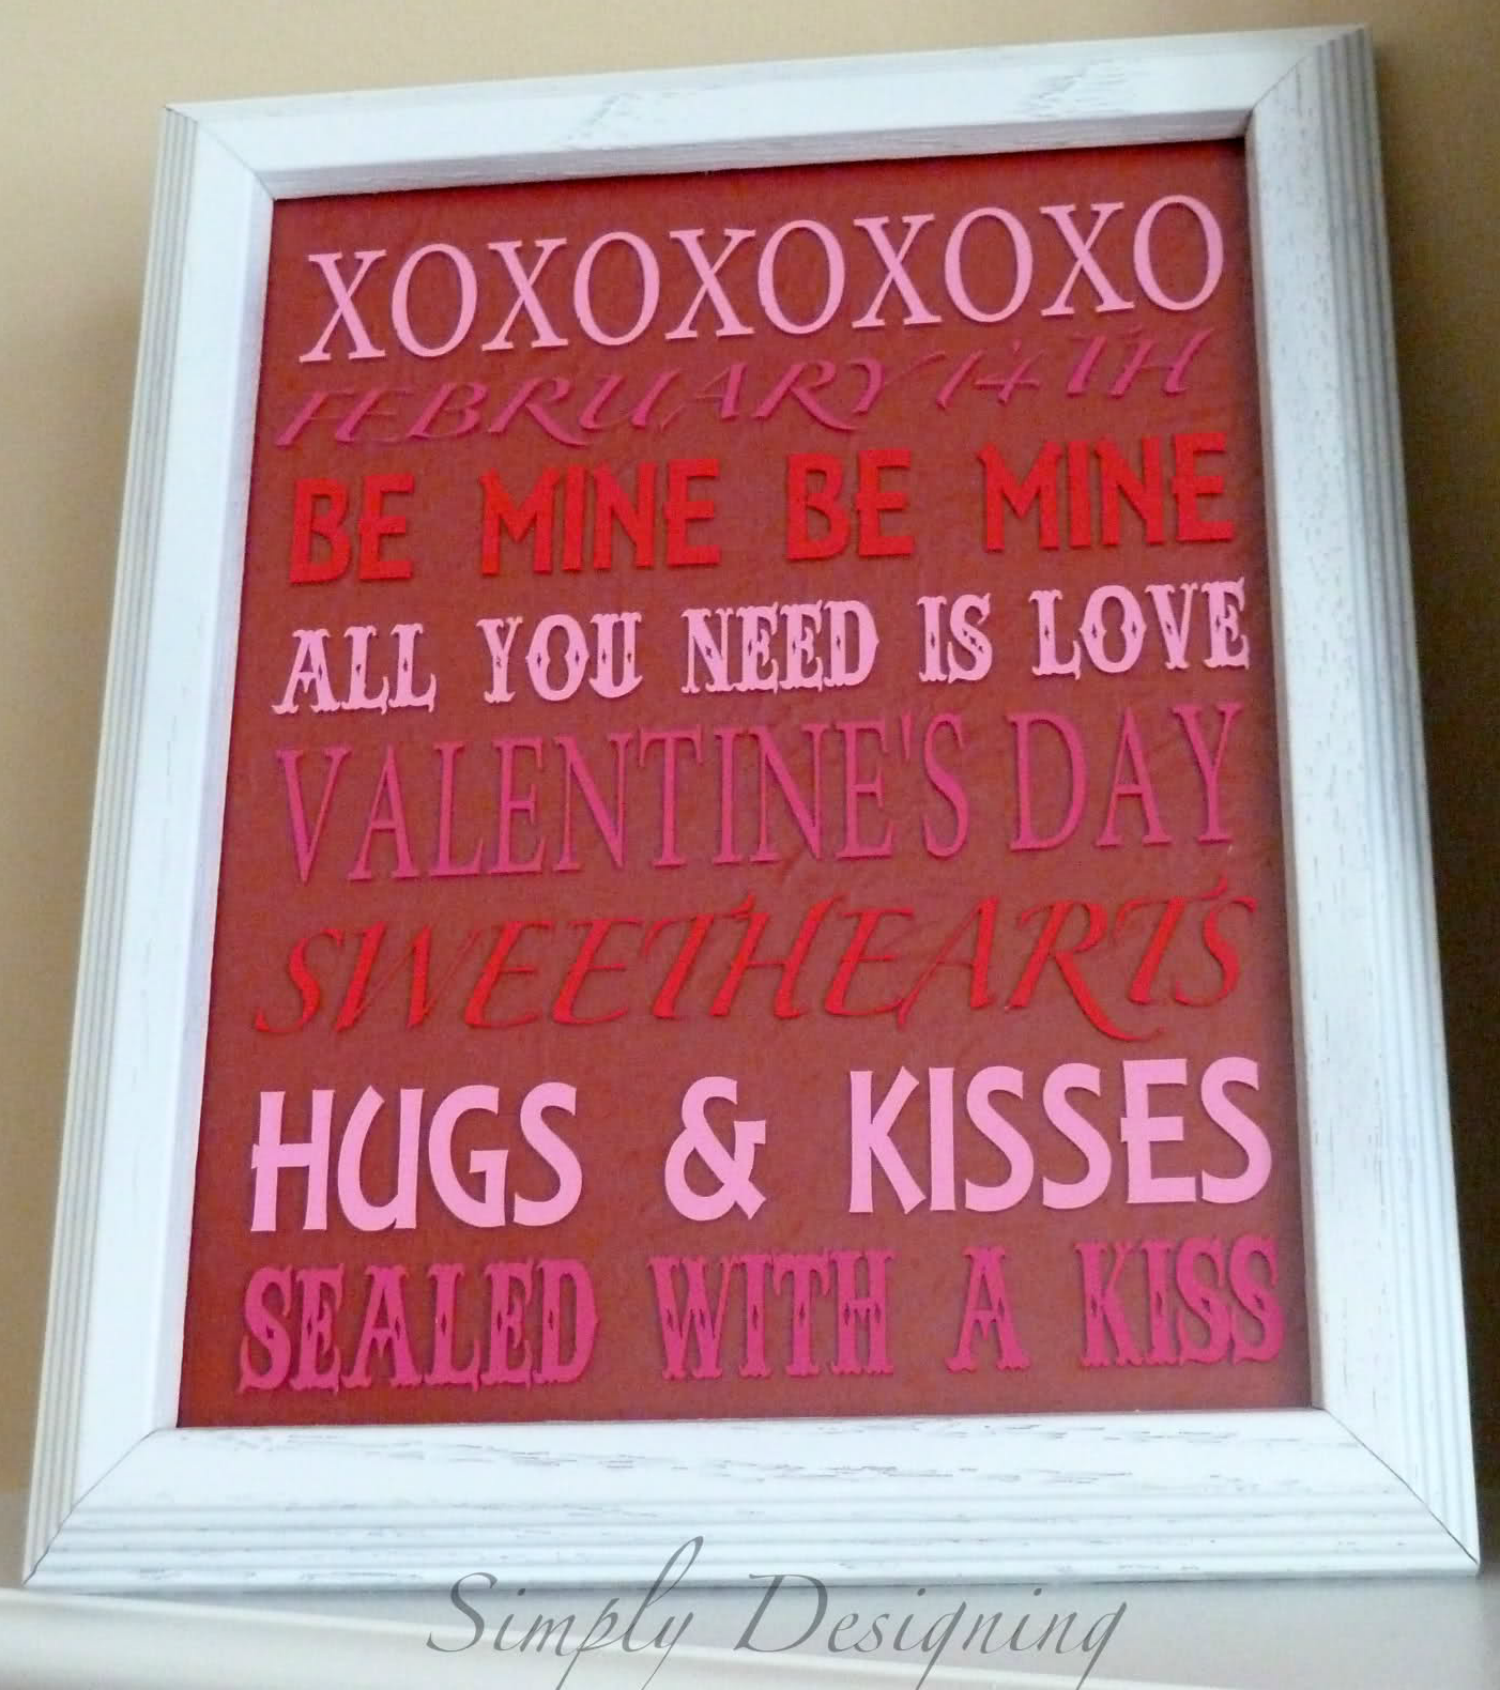
When I showed my husband he said "How did you get that 3D look with the vinyl?" He was on the other side of the room. :)
For this project I actually adhered my vinyl directly to the glass in the photo frame and put plain scrapbook paper behind the glass in the frame. Because the vinyl is on the glass, you actually get small shadow effect on the scrapbook paper which makes it kind of fun and different!
There are of course many different ways to do this, I took the least vinyl-conserving method to do this, however, in this instance I felt like getting the spacing correct was more important, so I'll show you how I made this so that the spacing is very accurate!
First I created an 8x10 piece of "paper" in my Silhouette software program.
Next I wrote all the text I wanted in my subway art, laid it out, chose the fonts and sized it correctly.
If you want to use different colors of vinyl like I did, you will want to be sure to make each line of text as a different "text box."
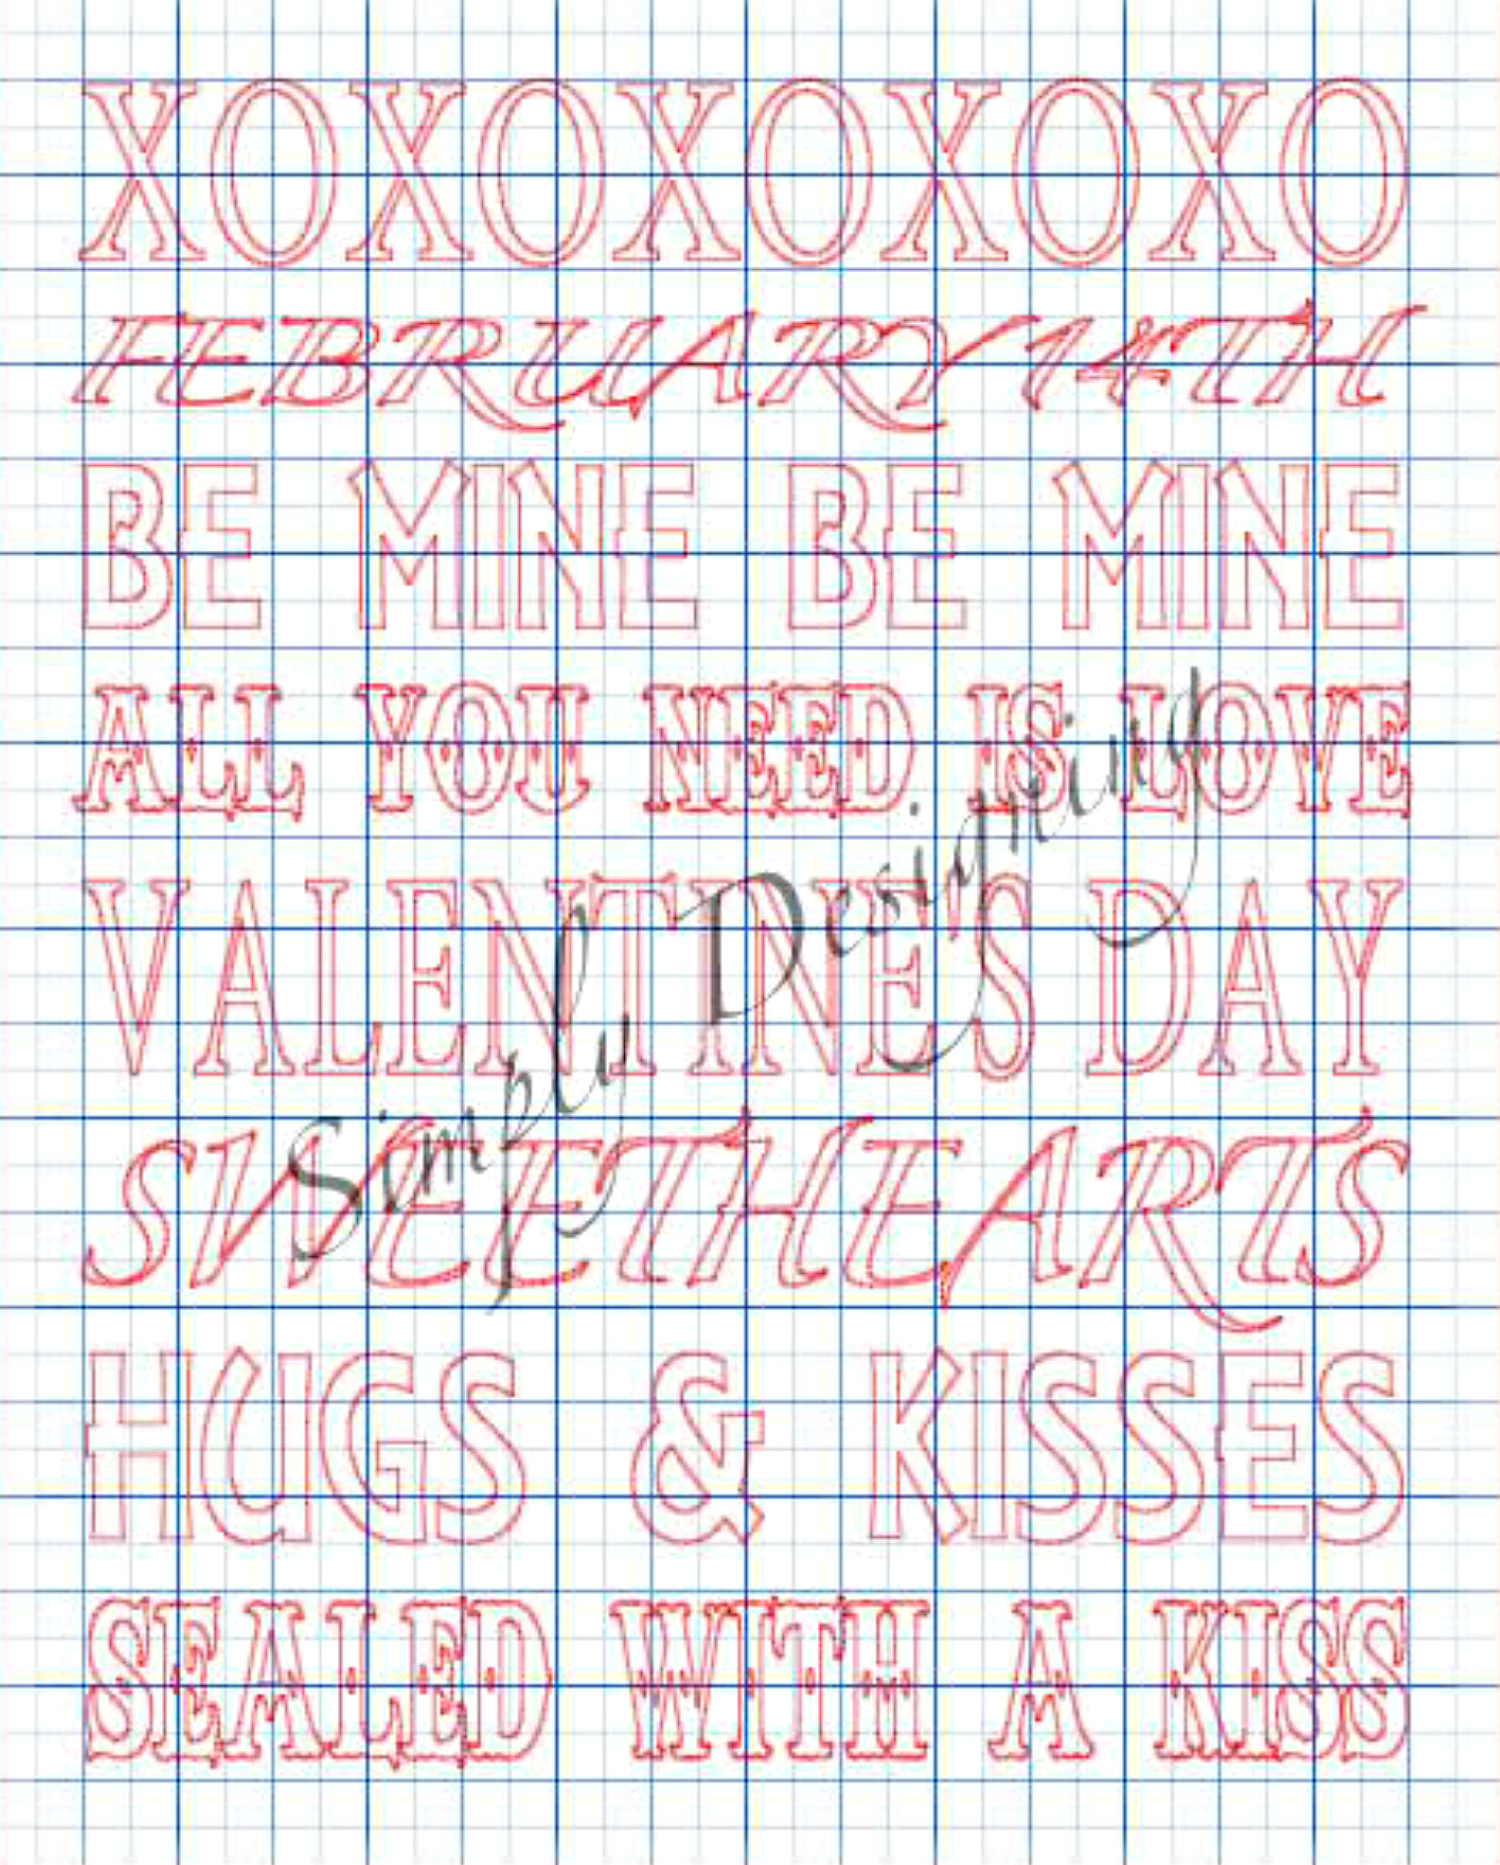
After you have your subway art laid out just as you like it, group all lines together that you want cut out of the same color of vinyl.
You will do this by holding down the shift button while clicking on the lines that you want to select. Then right-click and select "group." Do this until all your lines have been grouped together by color. (I used three colors of vinyl so I grouped together lines (1,4,7), (2, 5, 8) and (3, 6).)
Be sure to save your creation at this point!
Next you will create three new documents all with 8x10 sized pages.
You will select the first "group" from your original document and copy it (ctrl+c). Go to a new 8x10 document and paste (ctrl+v). Your text will automatically show up centered and in the correct position if you do this just like that! :) Love that!
Select the second "group", copy and paste it into a new 8x10 document. And do the same with your third "group."
You should have three files that look basically like this:
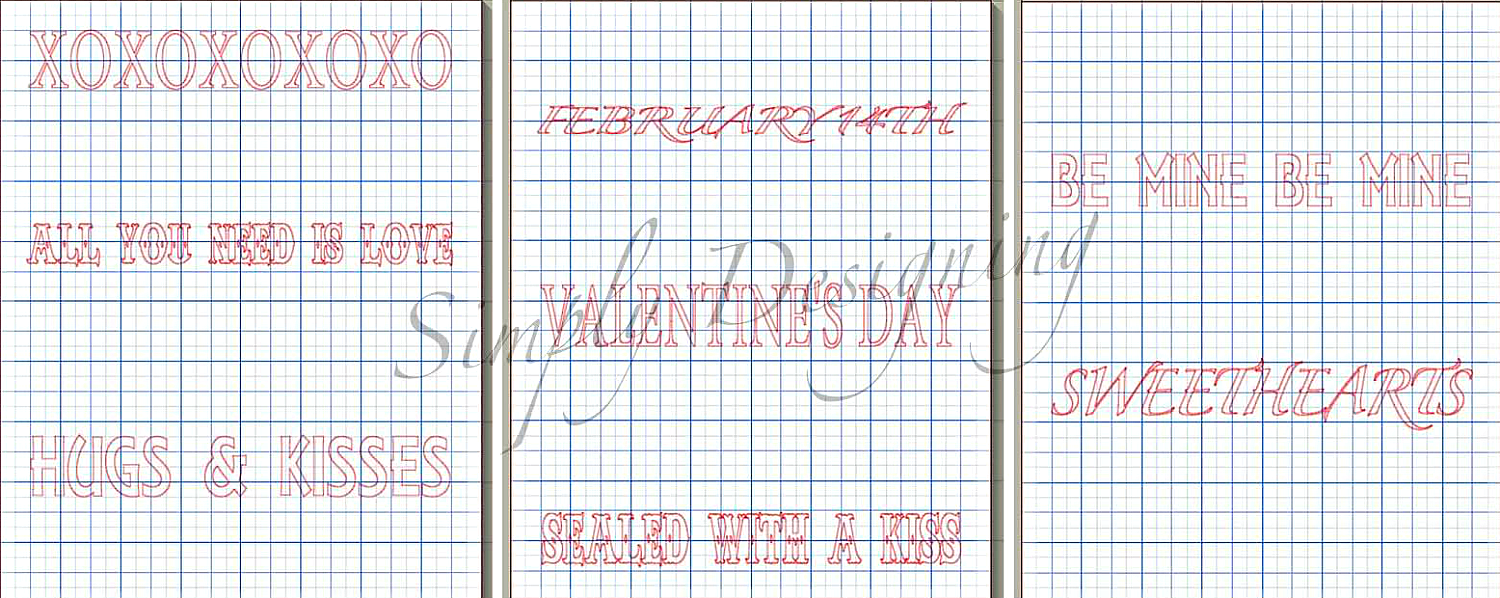
Be sure to save each file!
I used these Oracal 631 colors from ExpressionsVinyl.com
- Dahlia Red
- Pink
- Soft Pink
Cut your vinyl sheets down to an 8x10 piece for each color and place, one color at a time, the vinyl onto your cutting mat, and cut each subway art file out.
Once all three colors are cut out, weed away the excess vinyl.
Now if you really want to be sure your vinyl spacing stays as designed, you will want to follow this next step carefully.
Take one piece of your transfer paper and place carefully on the first "group" of vinyl lettering. Trim any excess transfer paper away and then carefully take the backing paper off so that all letters are on your transfer paper. Lay the transfer paper down, sticky side up.
Next, you will carefully line up your second "group" of vinyl lettering in the same transfer paper. If you flip your transfer paper/vinyl over at this point, you will see two different colors of vinyl through the transfer tape like this:
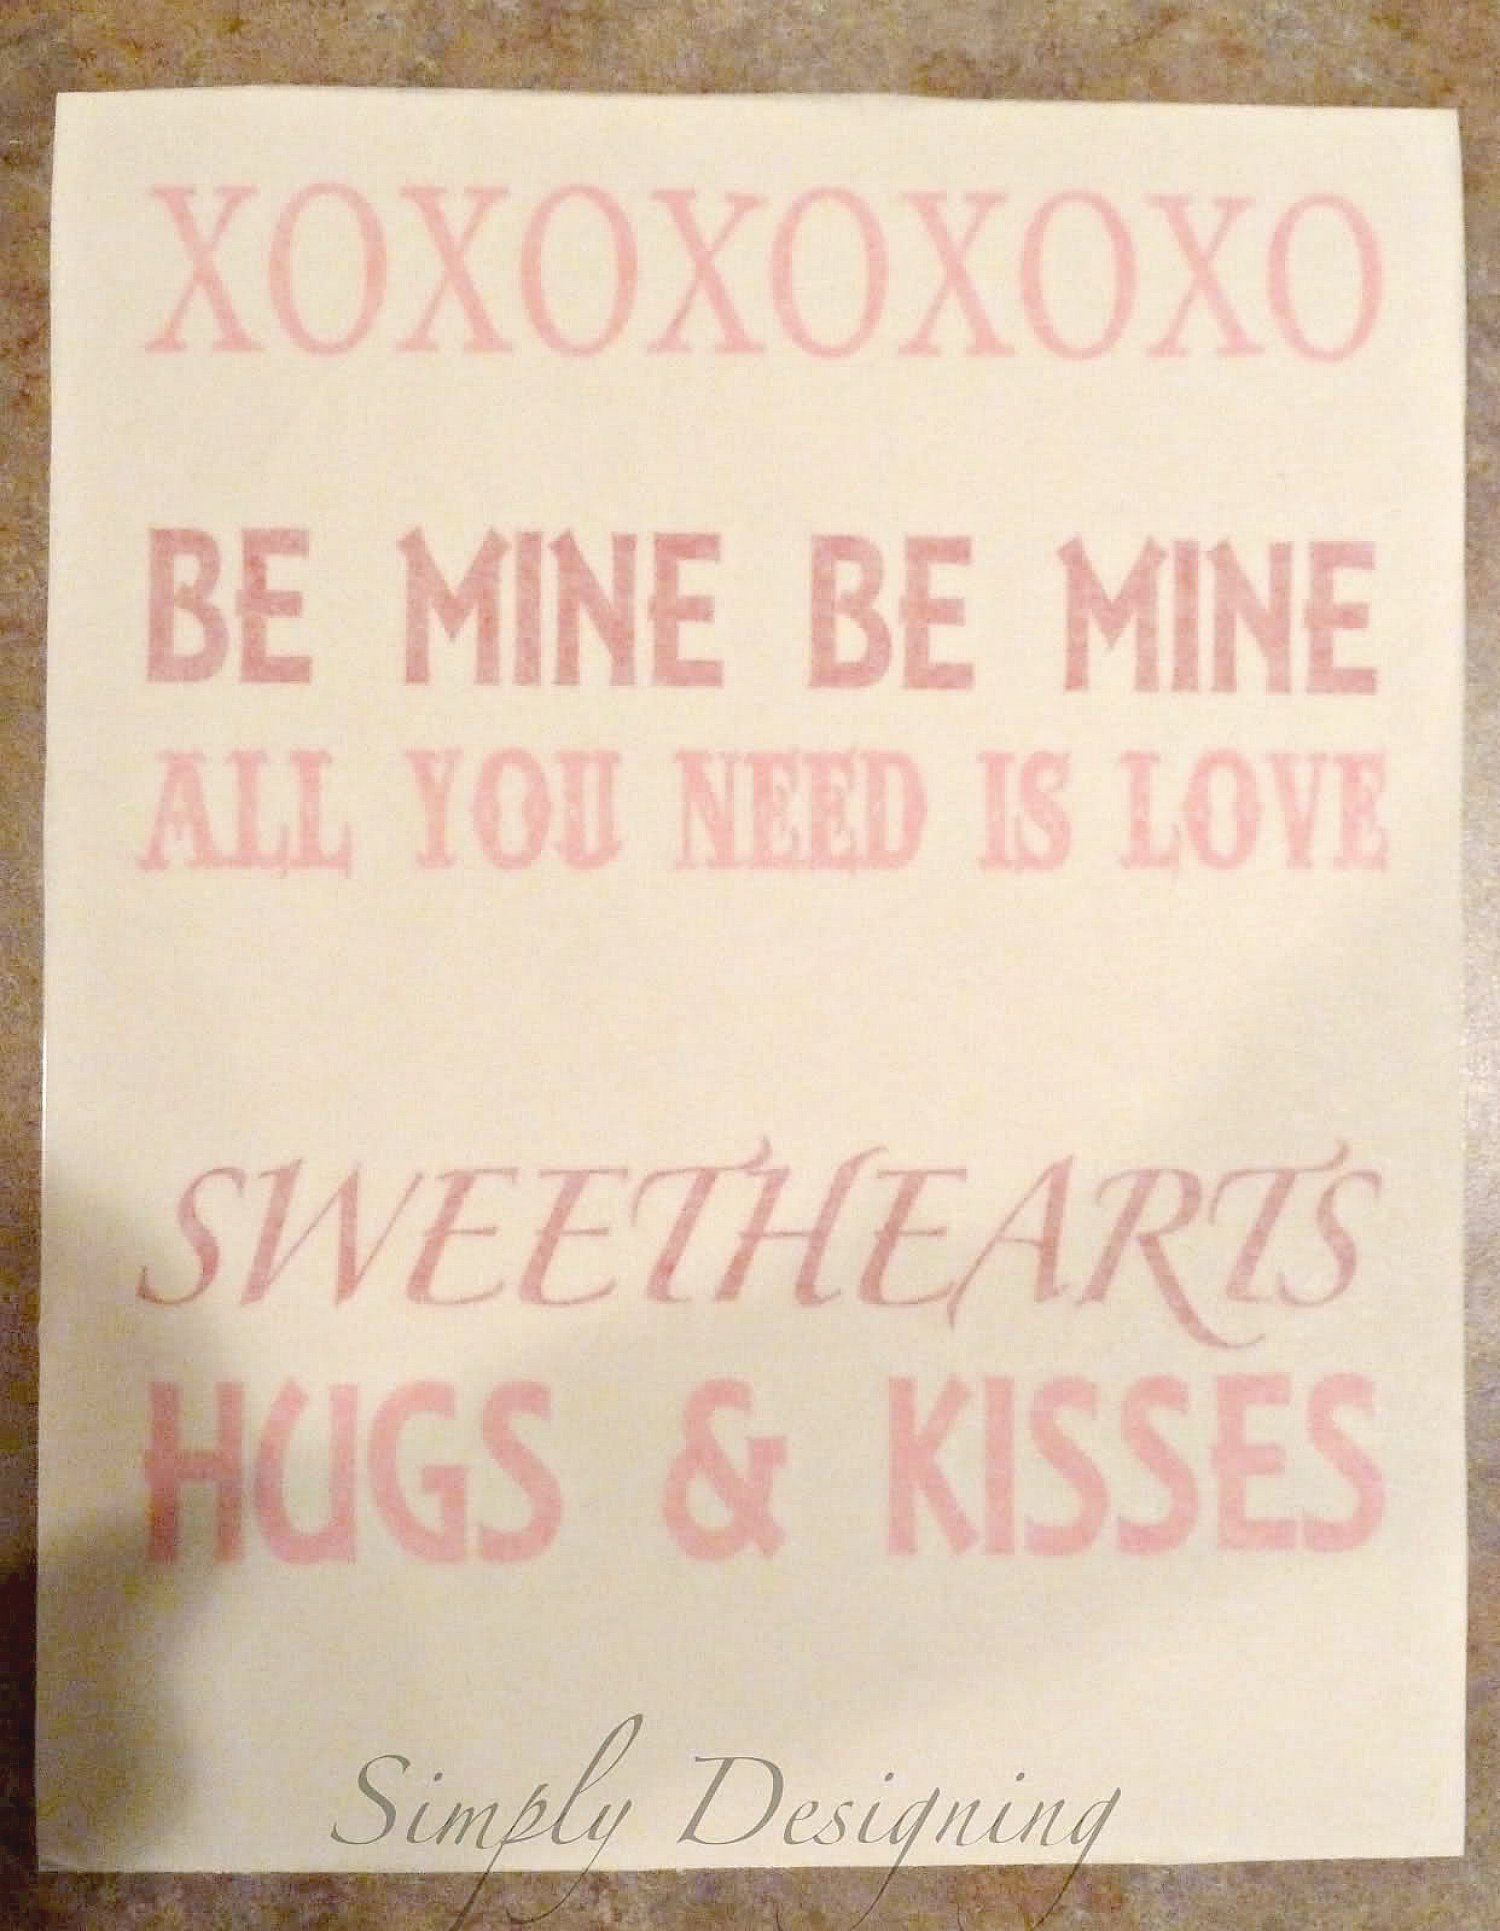
Carefully take the backing paper off of the transfer tape making sure that all vinyl letters stay securely on the transfer tape. Lay the transfer tape sticky side up.
Finally, line up the third "group" of vinyl on the transfer tape and adhere the final group of subway art onto the transfer tape.
At this point, you will have three different colors of words all lined up and attached to one piece of transfer tape. (I really hope this makes sense to you, it is a bit tricky to explain, sorry.)
Then, taking your single piece of transfer tape, adhere the vinyl subway art onto your piece of glass. It should look something like this...
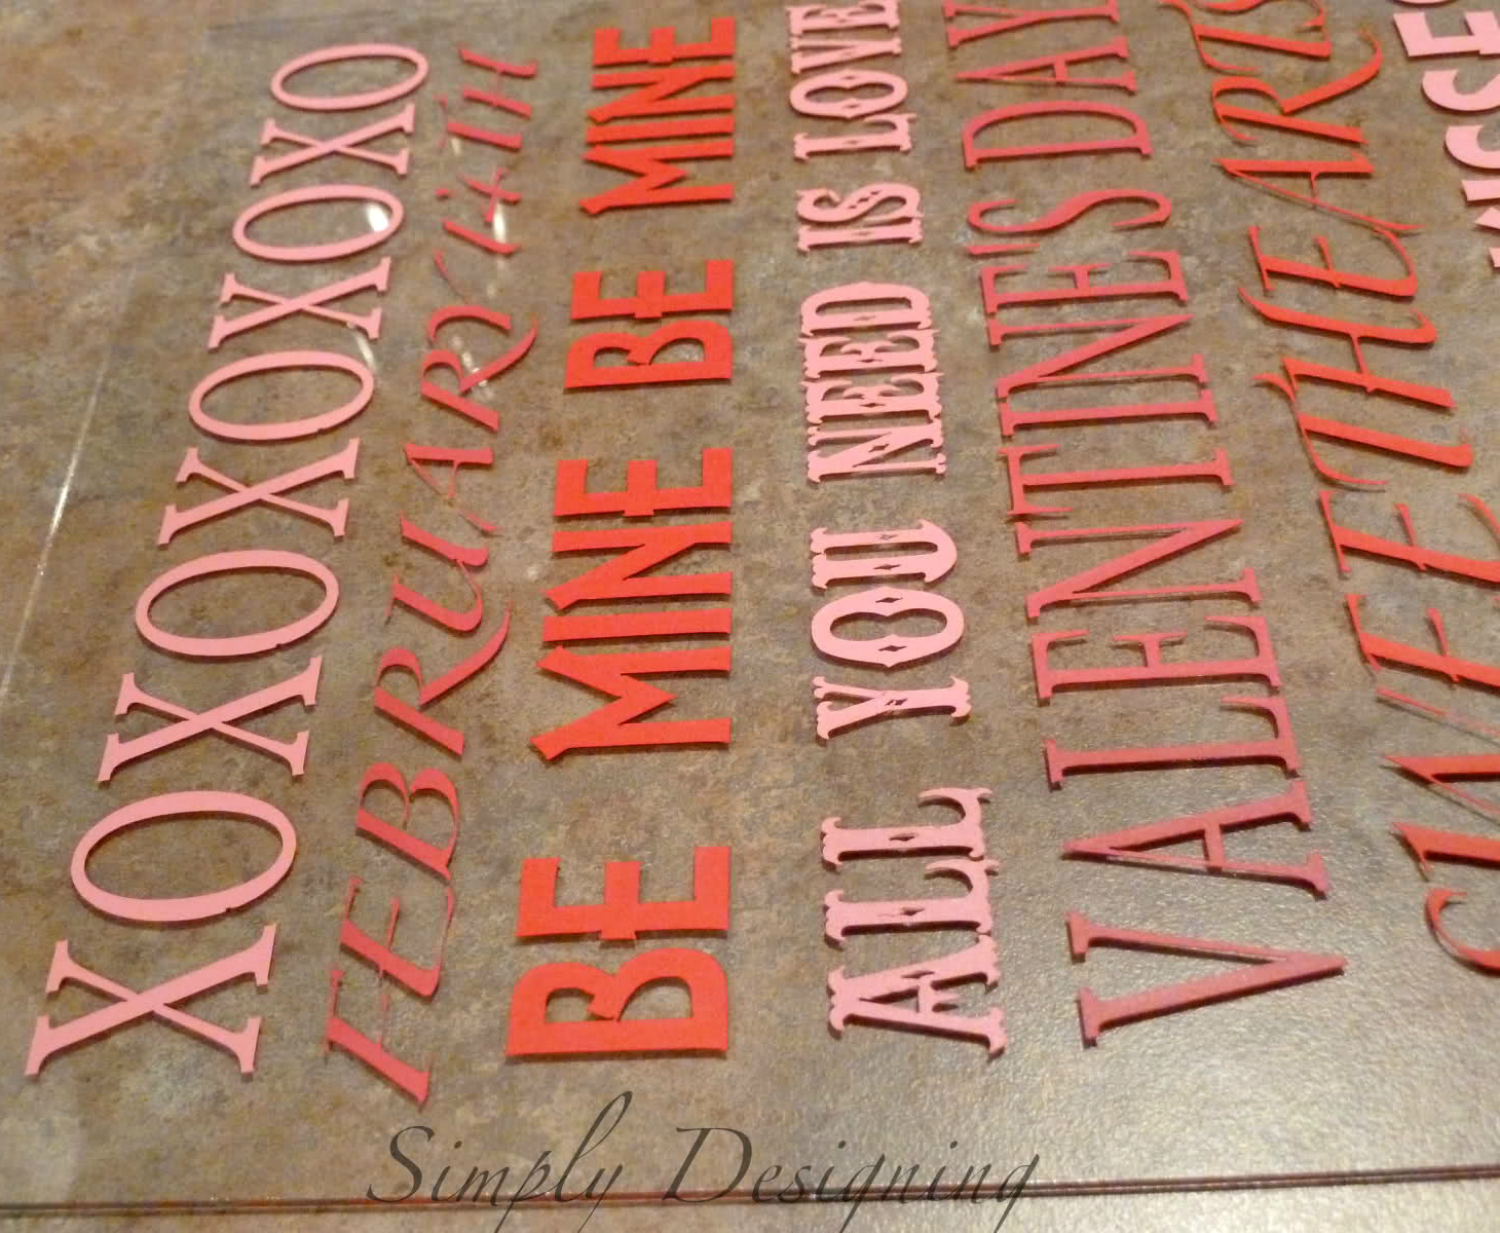
Insert a piece of scrap book paper into the frame and voila! You have your super cute, perfectly lined up Valentine's Day Subway Art!
Recent Posts
-
NEW Holographic Eclipse Heat Transfer Vinyl
April 15th, 2024 3 Ways to Use the New Holographic Eclipse Heat Transfer Vinyl from Siser …Apr 29th 2024 -
Hop into Spring with Cute Easter Vinyl Crafts
Do you love our Vinyl? Sign up for Vinyl Club today to get FREE vinyl and save big! …Mar 28th 2024 -

Fixing Wrinkles and Bubbles in Vinyl
How do you get air bubbles out of vinyl? There are a few different ways to ensure a flawless …Mar 26th 2024