
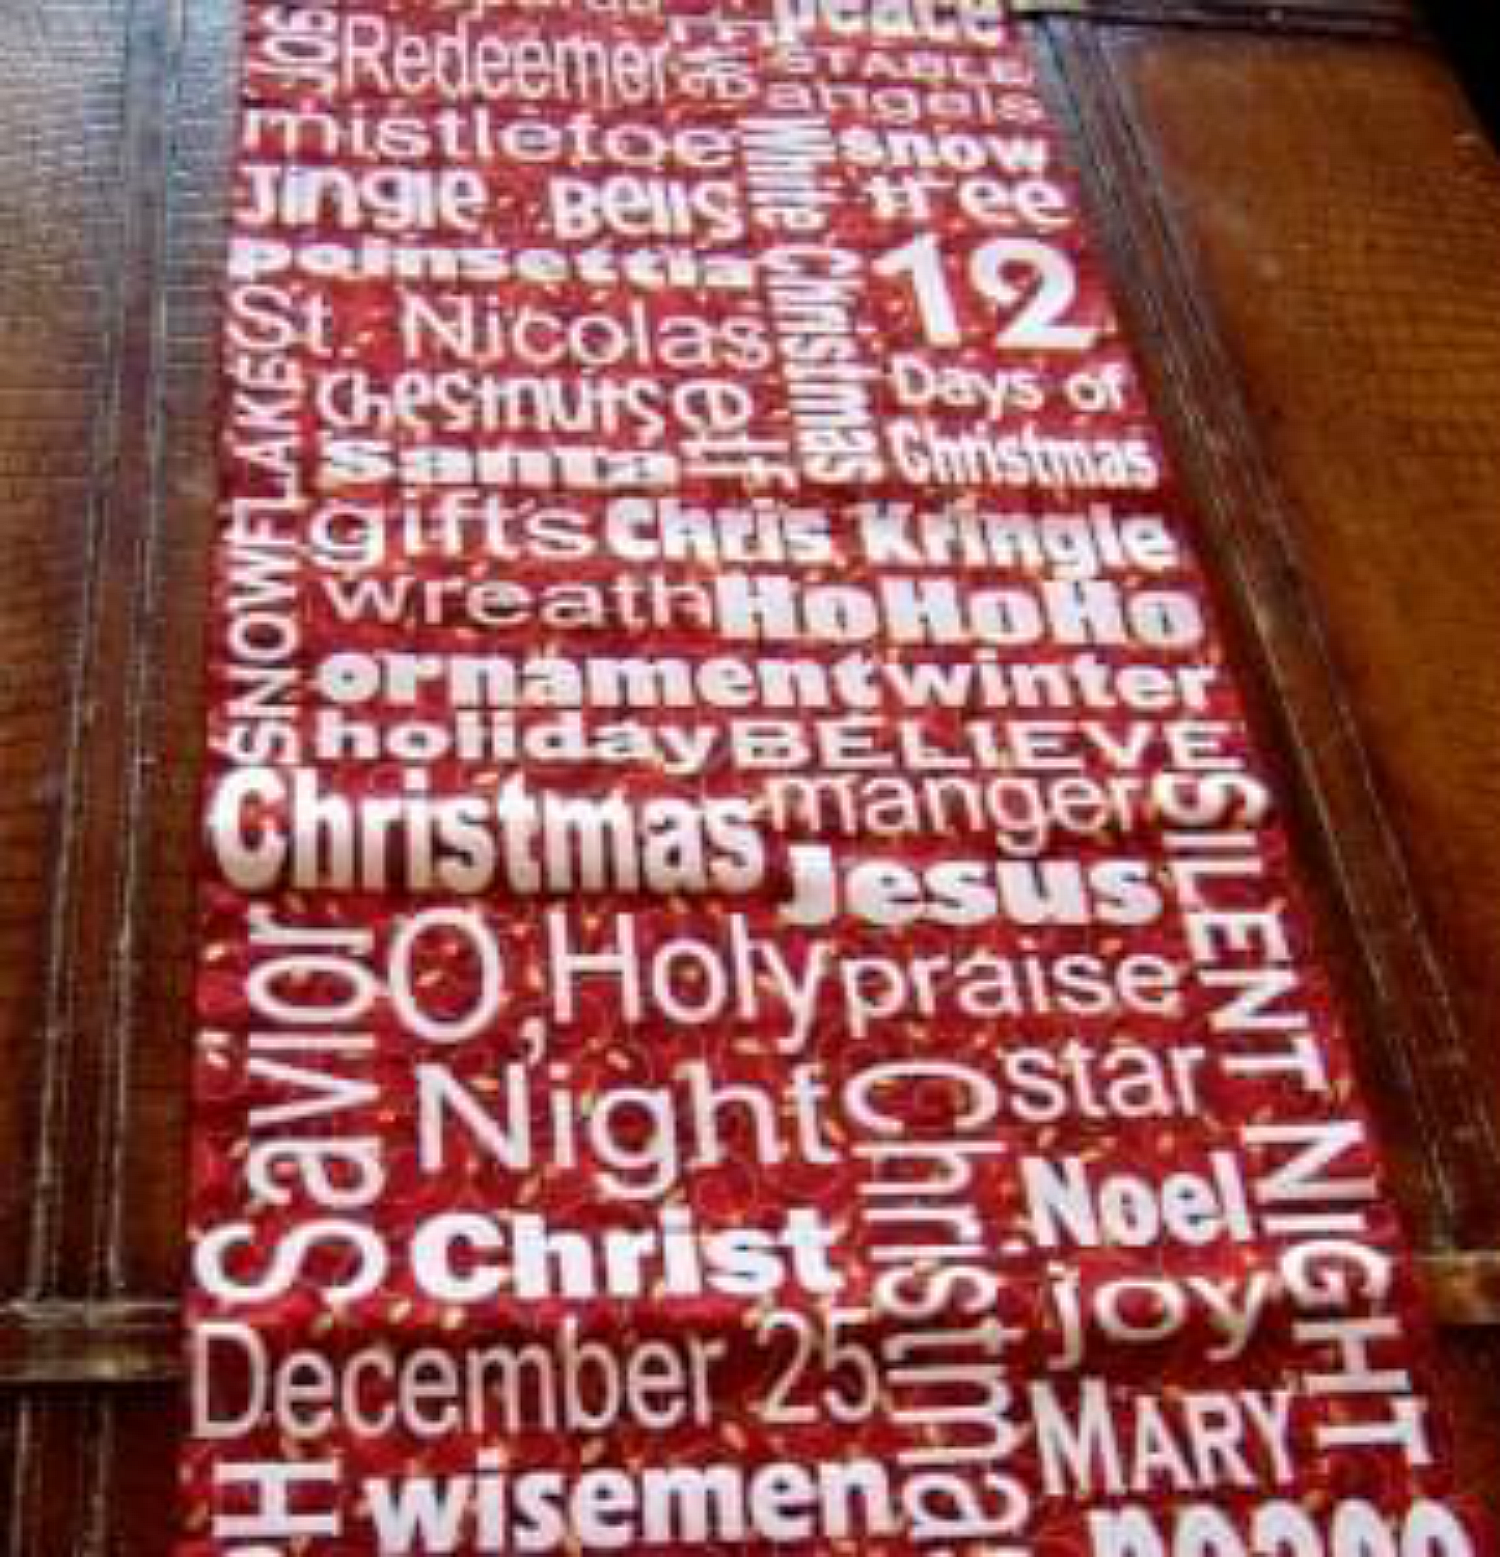
Christmas Subway Art Table Runner
Hey! McKenzie from Girl Loves Glam here! This is officially my favorite Christmas decoration at my house! It is so easy to make and could make a fabulous gift too! Here is what you need to make your Christmas table runner...
Fabric (length that you need for the table you are using. Mine is just over a yard)
Flocked iron on vinyl from Expressions Vinyl (length of table runner. I used two white 12x24 sheets)
Multi Use Paper Sheet from Expressions Vinyl
iron
Silhouette or Cricut Expression using Sure Cuts a Lot 2
sewing machine
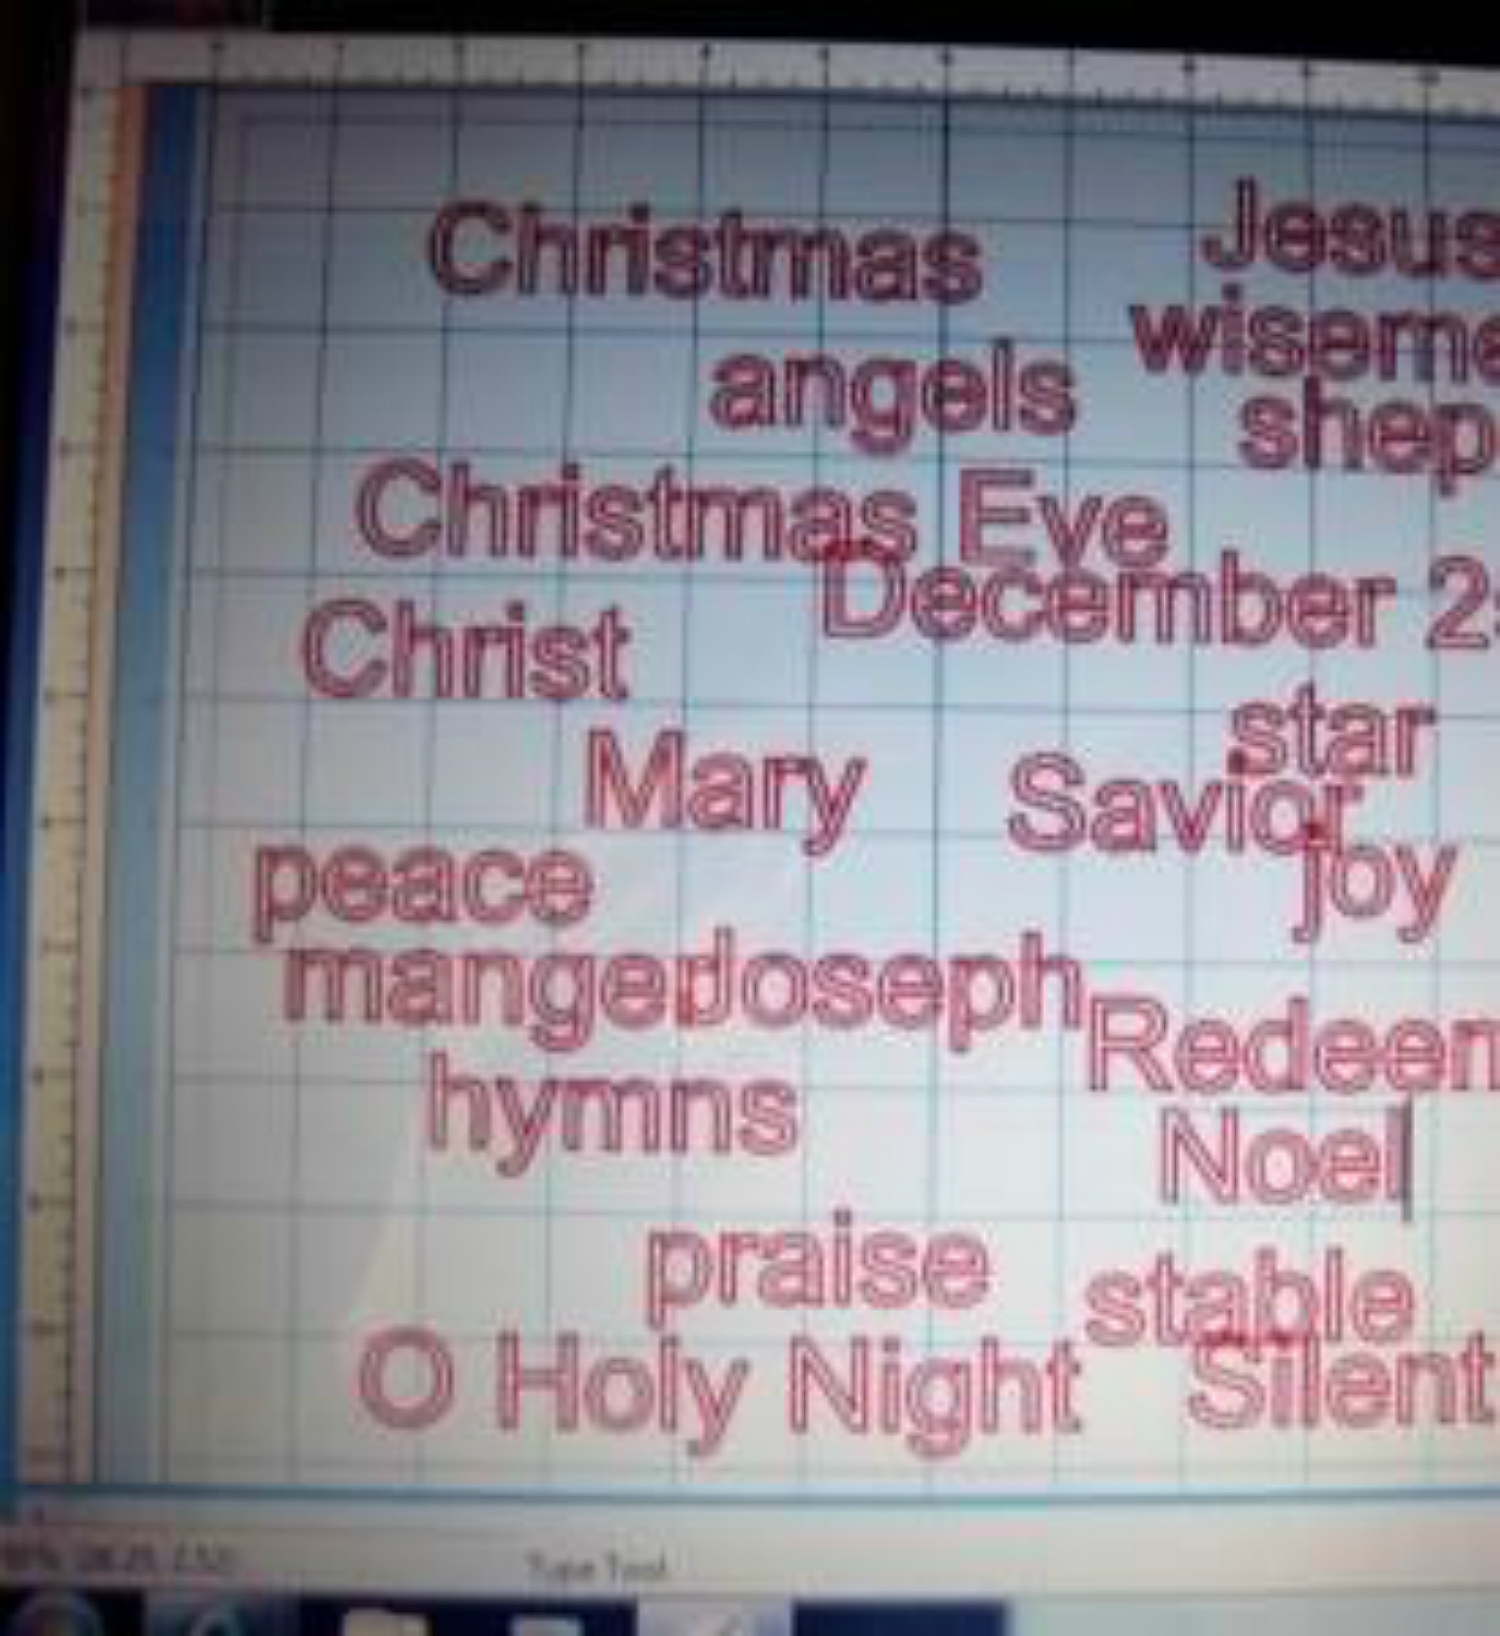
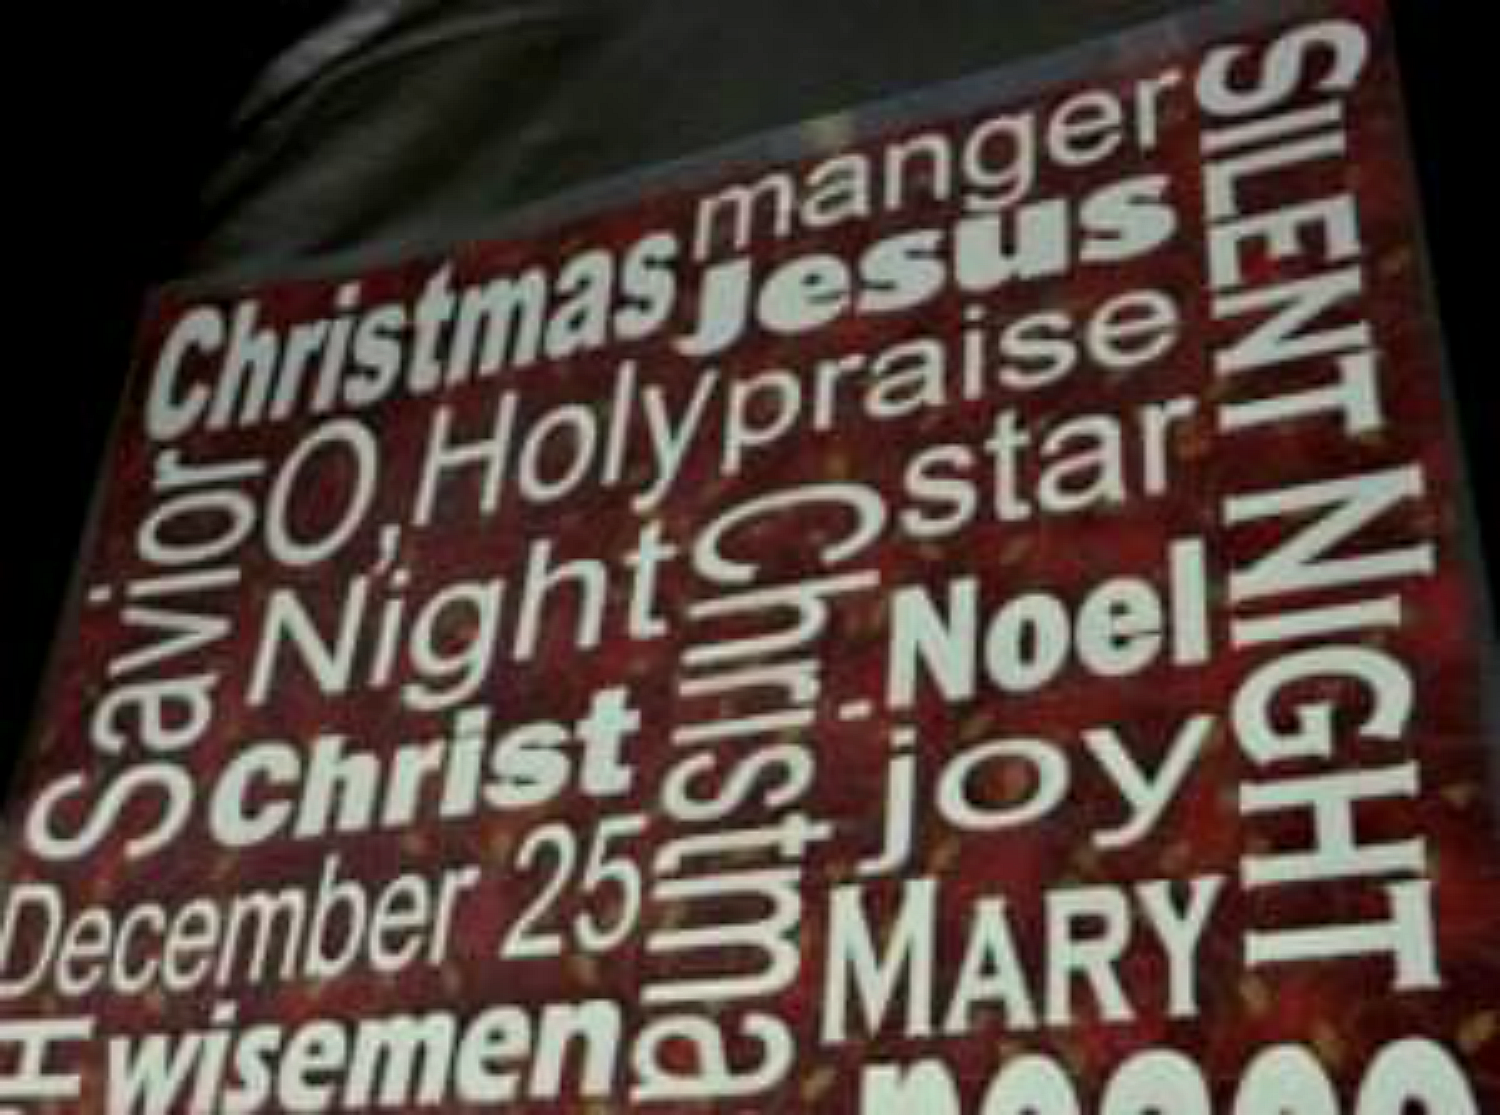
First, you need to create your subway art. I used Sure Cuts a Lot 2. A tip for making subway art, type the words you want to use, then change the font of a few of your words, turn some horizontal and some vertical. Start from the top left corner and work your way over and down the page fitting the words like a puzzle.
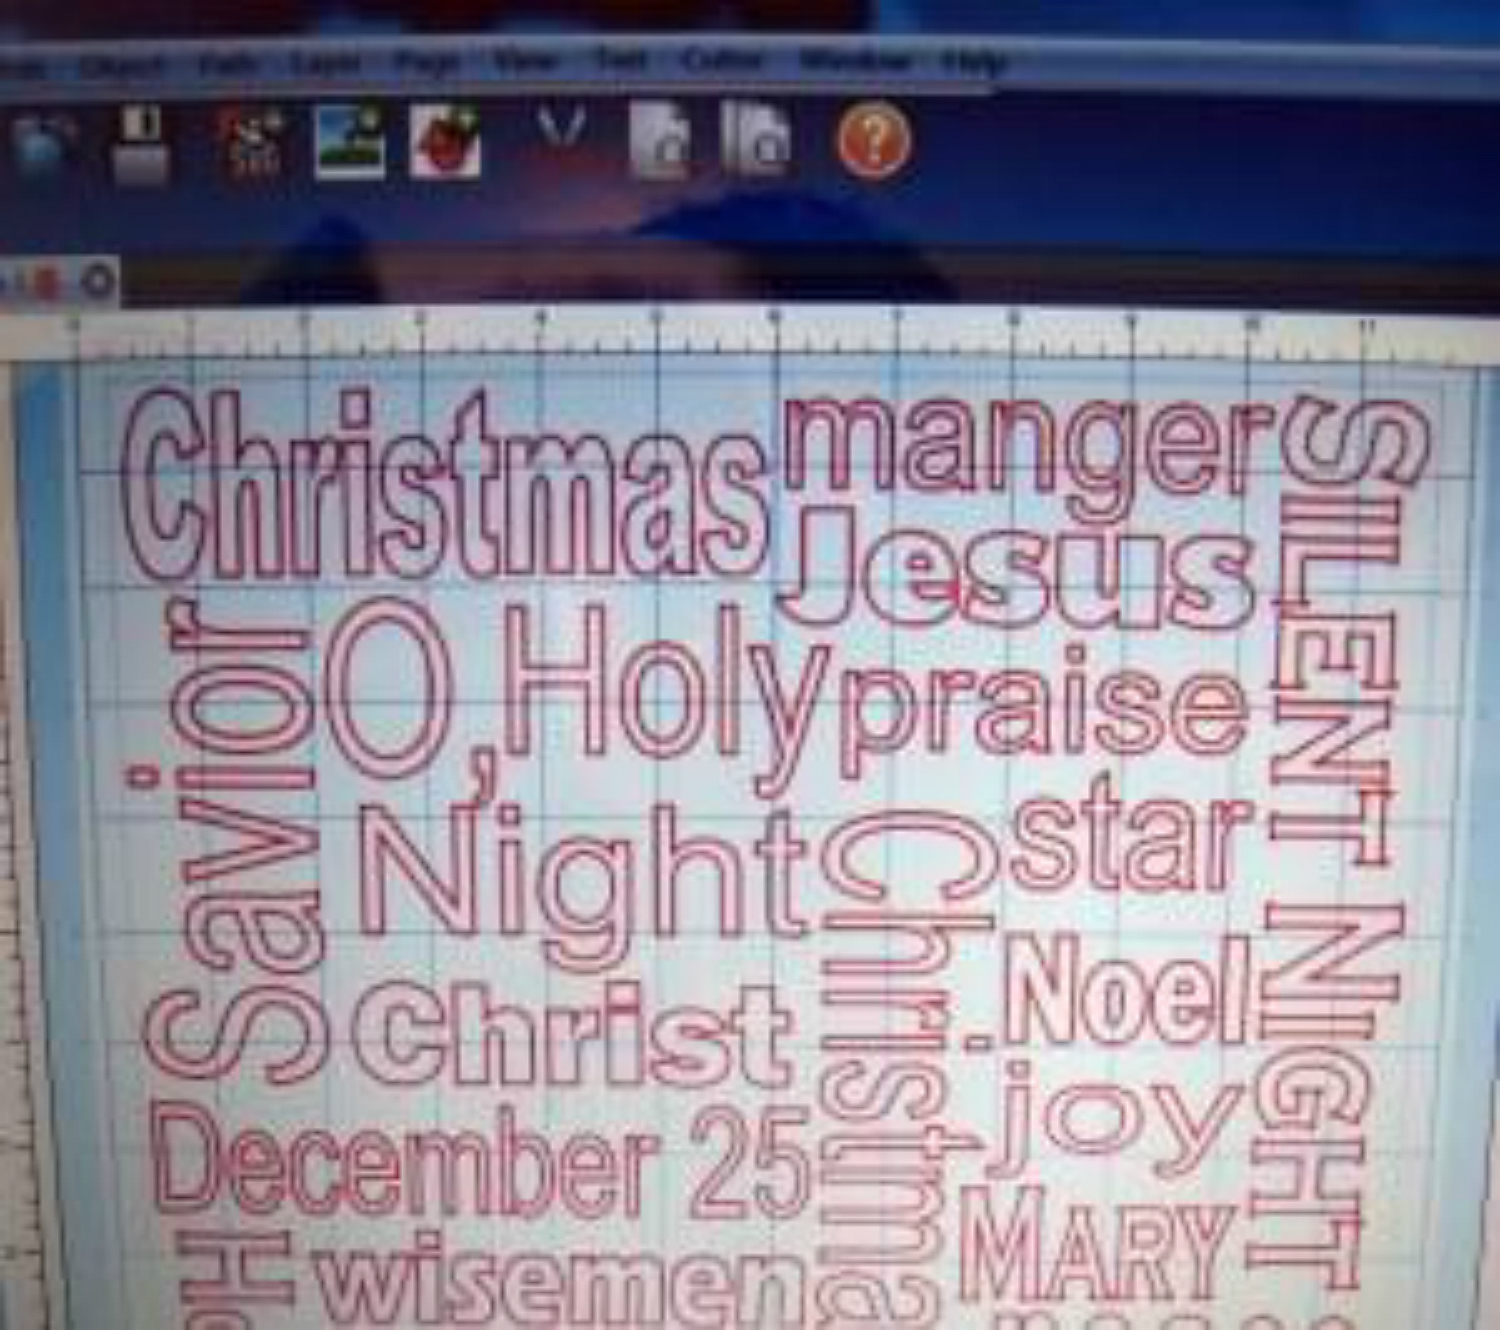
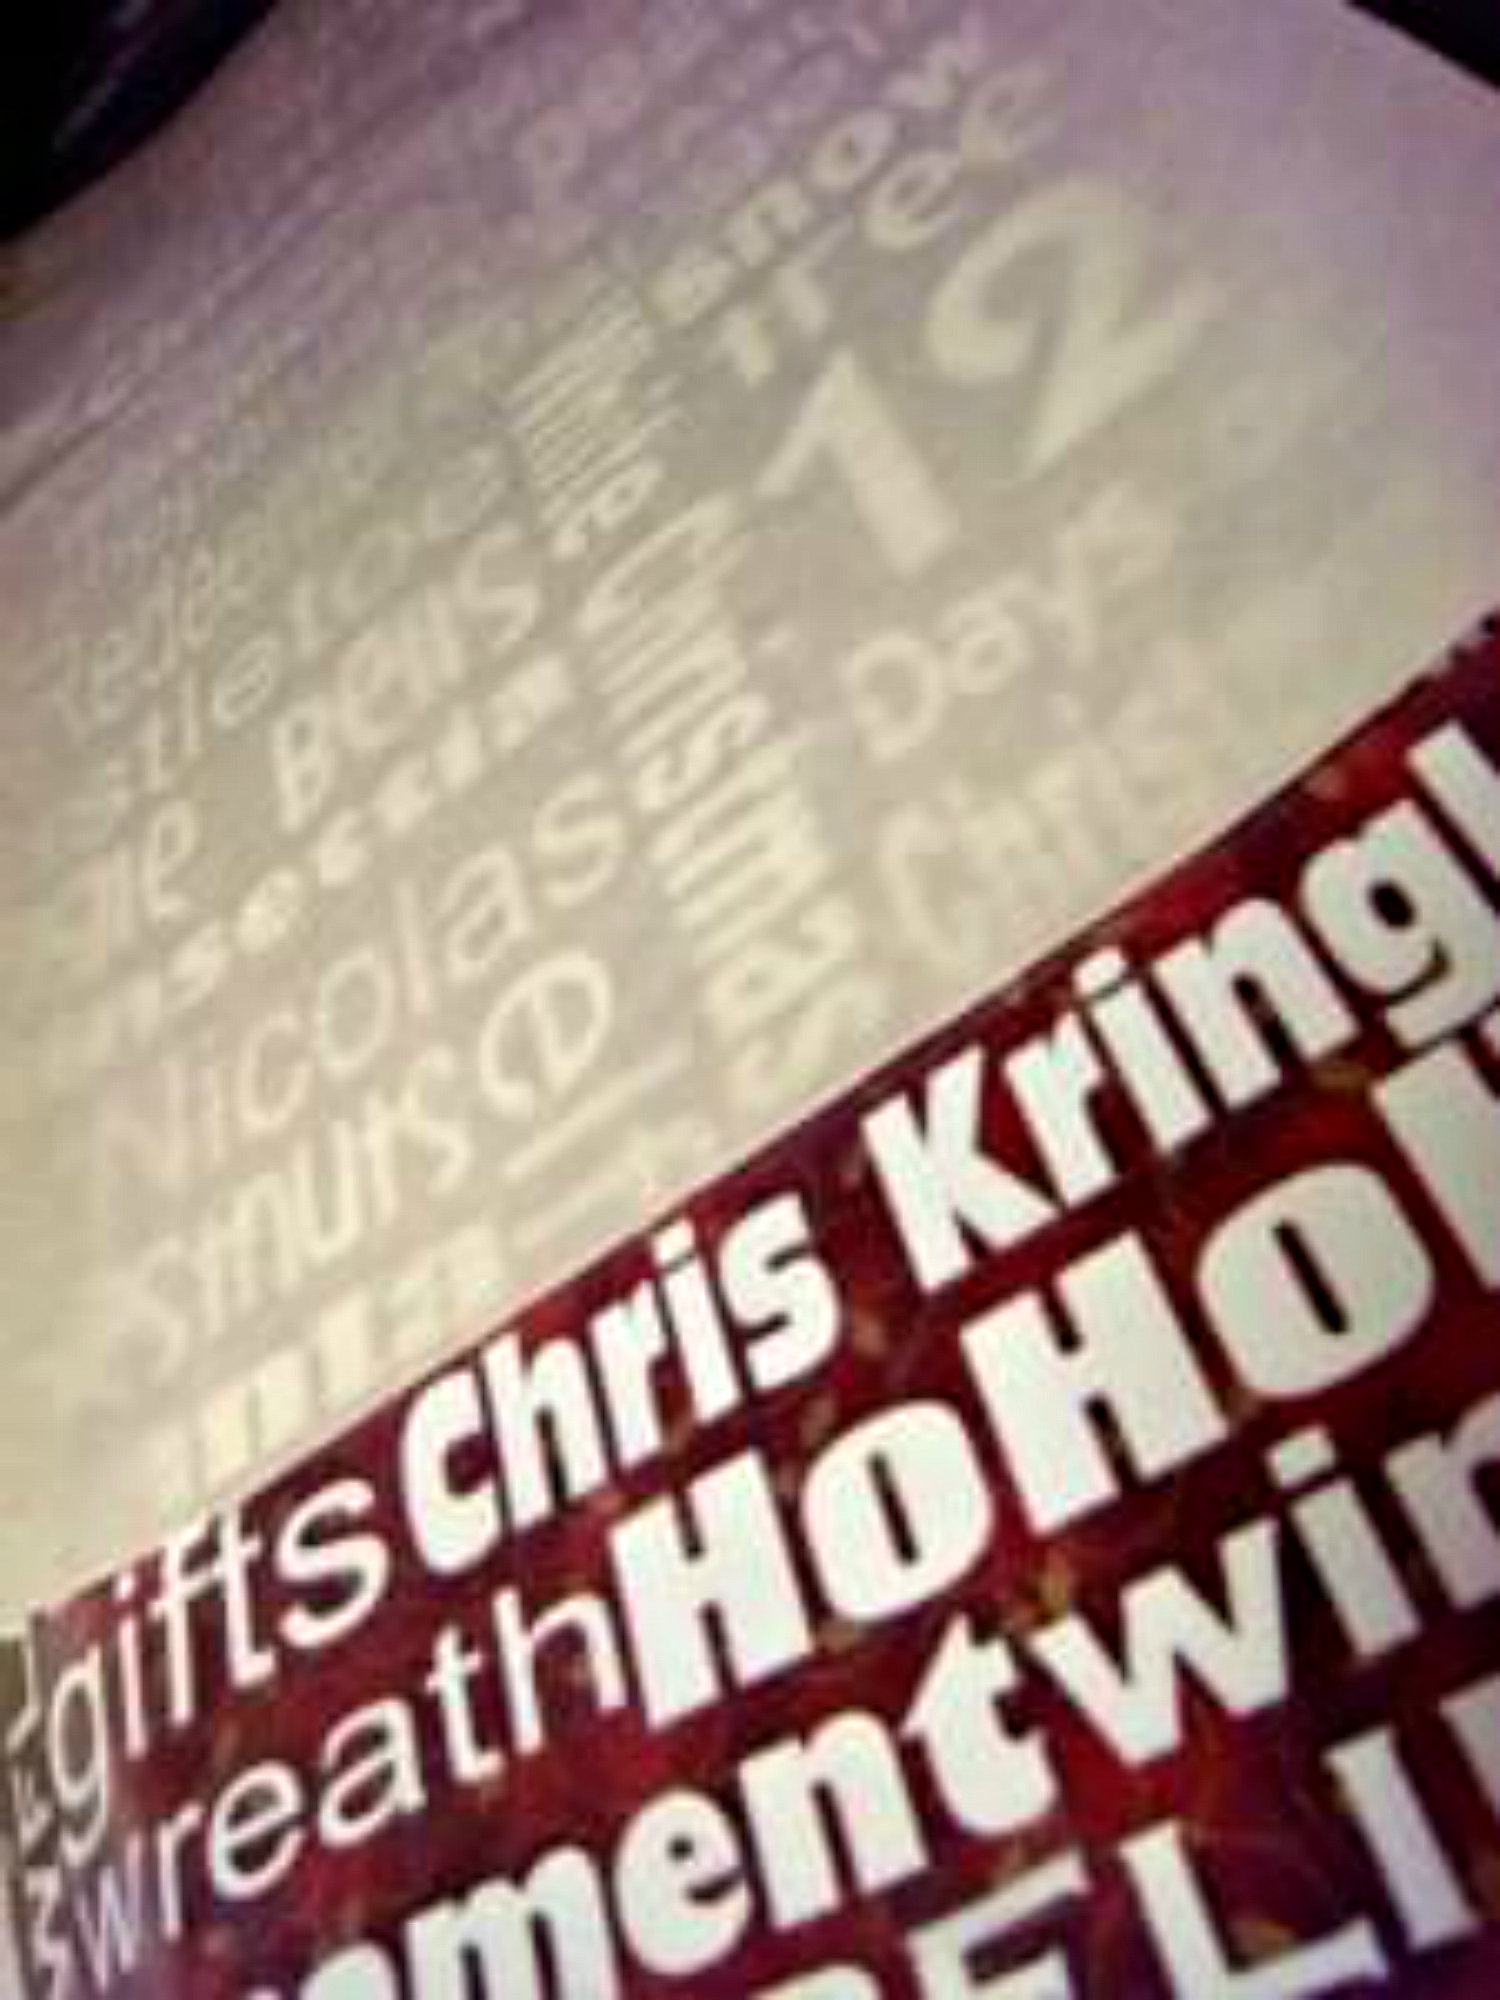
With mine, I did 12 inches at a time. The first 12 inches are religious Christmas words, and the second 12 inches are festive Christmas words.
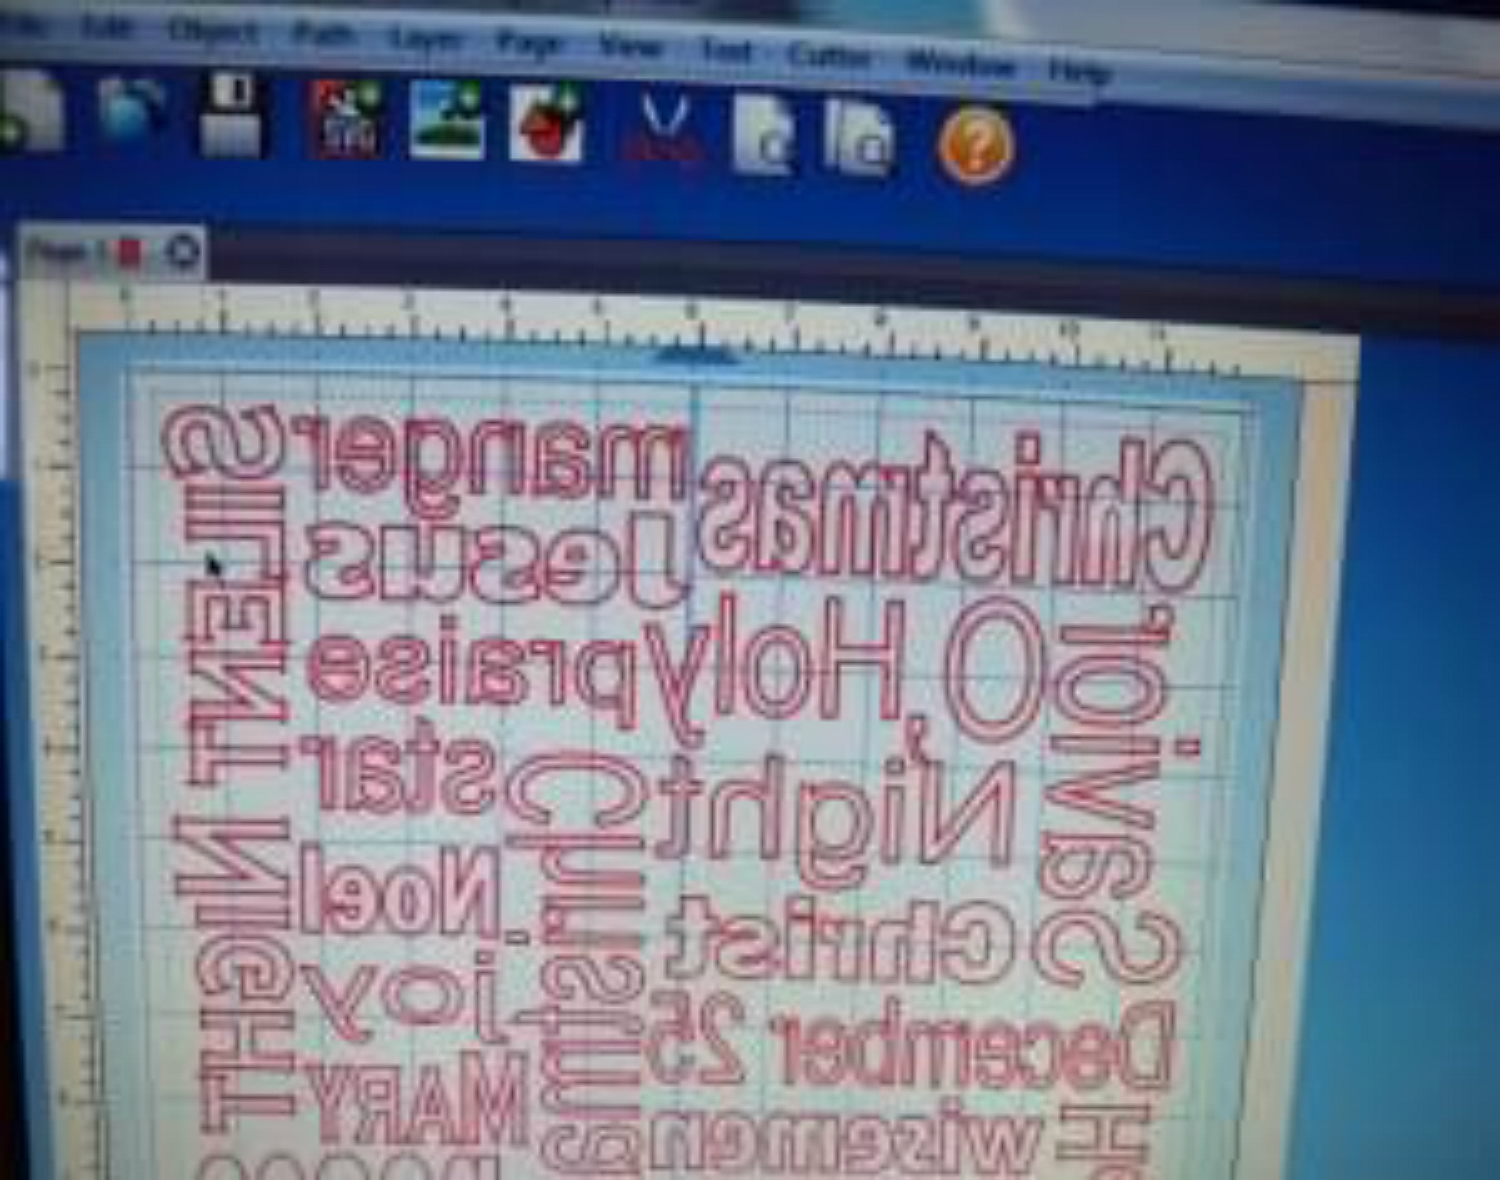
With iron on vinyl, you want to flip your images so that they end up showing on the right side. When using Sure Cuts a Lot 2, you can highlight all of your words, group them together, then flip the entire image.

Next, you need to cut your vinyl. When you cut it, put the shiny side down so that they actual vinyl gets cut. The shiny side will work as your "transfer paper". After the vinyl is cut, peel off the excess vinyl, leaving the words behind, sticking to the shiny "transfer paper". I found that it was easiest to peel a little off at a time, cutting off the excess vinyl as I went.
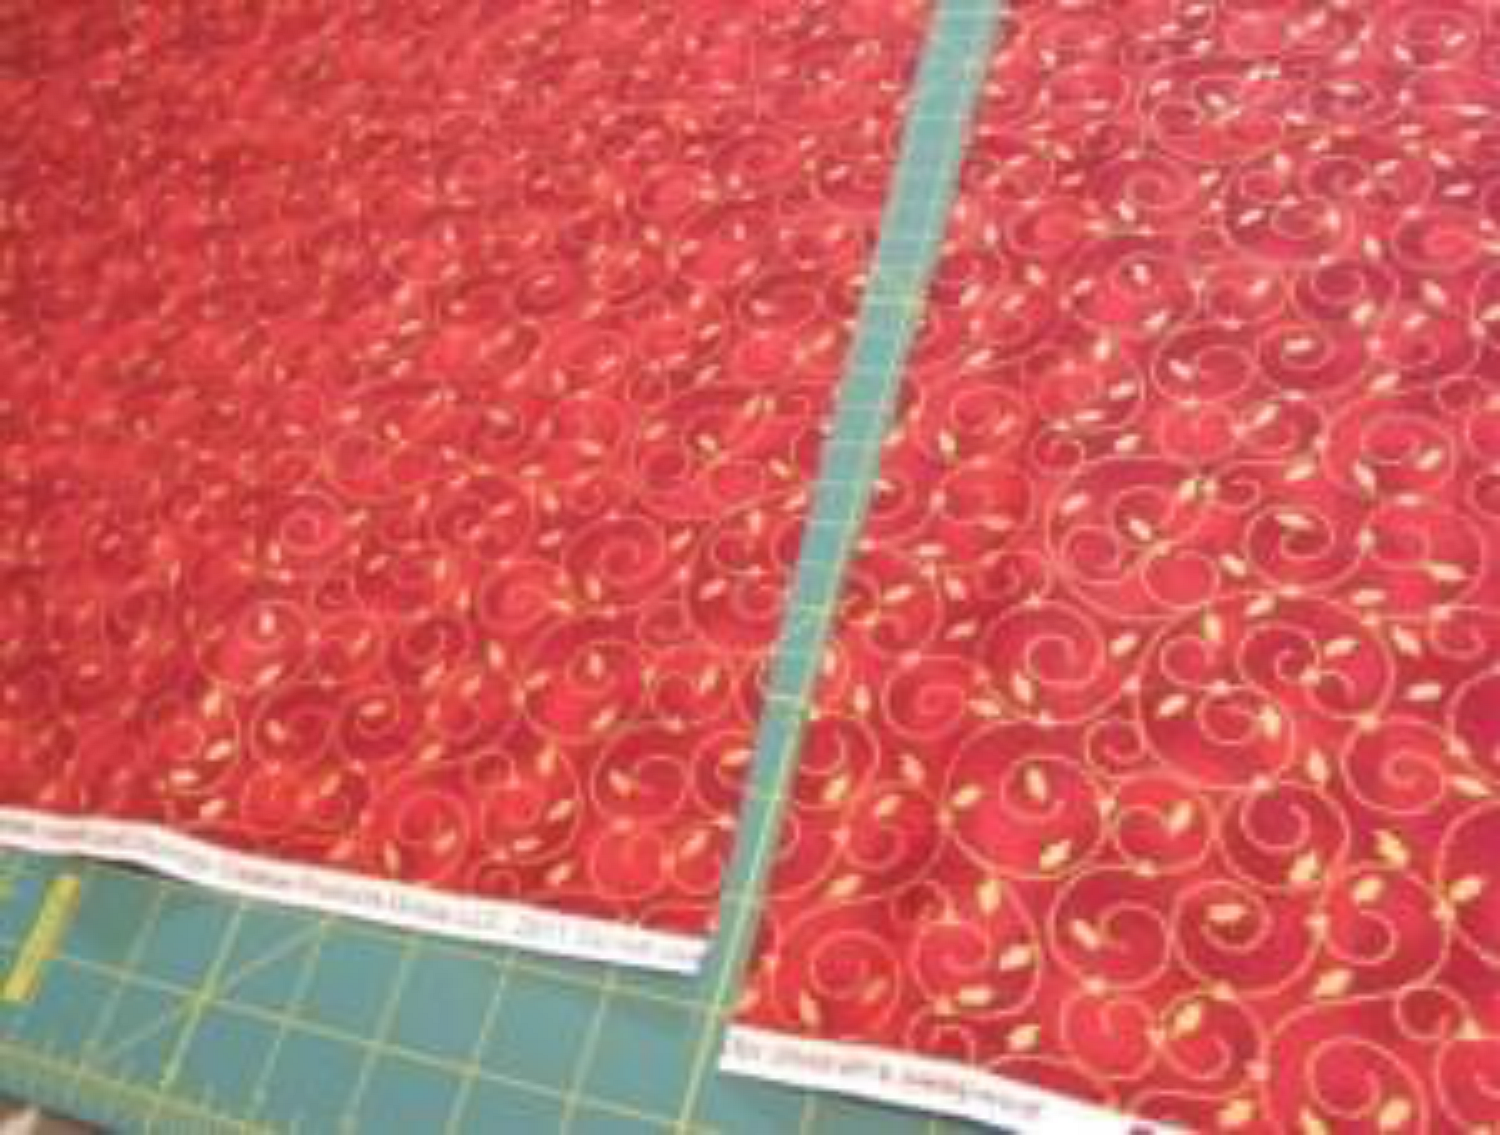
For the table runner itself, cut the fabric to the length you need and cut the width to about 25-26 inches. Wash and dry the fabric. Don't use fabric softeners though. The vinyl sticks best when the fabric has been washed, but won't stick well when fabric softeners are used.
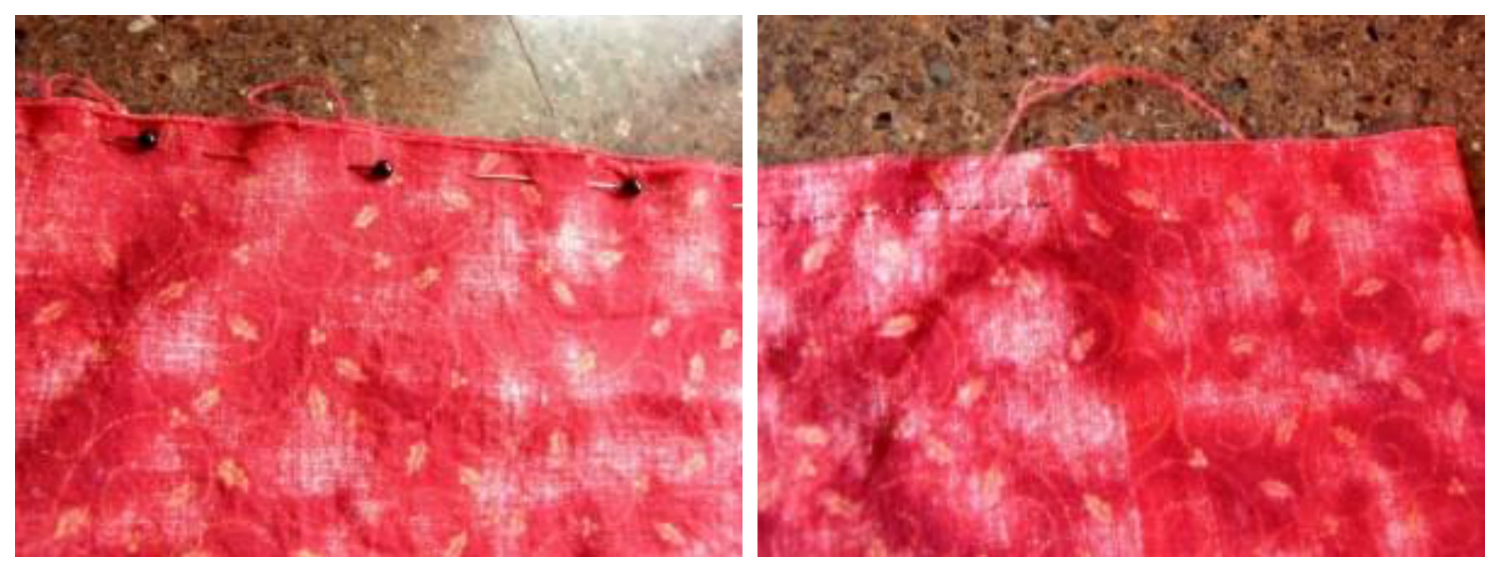
With right sides together, sew edges of fabric together. Don't sew the last 5 inches of one corner. You will use this to flip the runner in the right direction.

Flip your fabric right side out. Iron your runner, especially the corners and edges. Handstitch the corner that was left open.
Place your vinyl on your runner, with the shiny side facing up. Be sure it is straight!
Place the multi use paper on top of the vinyl. Put your iron on the "cotton" setting and iron on top of your multi use paper. Use a lot of pressure and get the heat on all of the vinyl for about 15 seconds. After the vinyl has cooled down, peel off shiny transfer paper. If it starts peeling off the letter, put multi use paper back on top of it and iron again. This will get it to stick eventually! The multi use paper is used to protect the vinyl, especially after you have peeled off the transfer paper on the vinyl around where you are ironing.

After you have ironed on your first sheet, line up your next sheet of vinyl and repeat! When I got to the bottom of my runner, I was going to have to cut some of the words in half. I just cut the words off, and used some of the excess vinyl that was too long for the runner. I just did a little cutting and pasting and you can't even tell!
Now you are done! You will get so many compliments on this unique decoration.
Now go get creating! Merry Christmas!
Recent Posts
-
NEW Holographic Eclipse Heat Transfer Vinyl
April 15th, 2024 3 Ways to Use the New Holographic Eclipse Heat Transfer Vinyl from Siser …Apr 29th 2024 -
Hop into Spring with Cute Easter Vinyl Crafts
Do you love our Vinyl? Sign up for Vinyl Club today to get FREE vinyl and save big! …Mar 28th 2024 -

Fixing Wrinkles and Bubbles in Vinyl
How do you get air bubbles out of vinyl? There are a few different ways to ensure a flawless …Mar 26th 2024