
Using Stripflock for Faux Embroidery
Hey everyone, its that time of year where everyone want to start something new, well you will want to put this on your list. Using Siser Stripflock to make faux embroidery on projects.
If you are like me and just don't dont have the time or patience to embroidery your applique pieces, you will love this quick trick.
Stripflock is a fuzzy/Velvety Iron on Vinyl that is a fun soft alternative to some of the "plastic" feeling iron on vinyls out there. It adds a suddle soft texture to any project.
What you will need for this fun Winter Tea Towel is:
- Teatowel or floursack towel
- Cotton Fabric of your choice
- Heat and Bond/Fabric interfacing
- Rotary Blade
- Ruler
- Iron
- Vinyl
- Silhouette Images:
- Fonts:
Let get started designing our project by choosing a bold blocky font which will make cutting your fabric out much easier.
I like the way that Silhouette's Font LD HANG TEN looked.
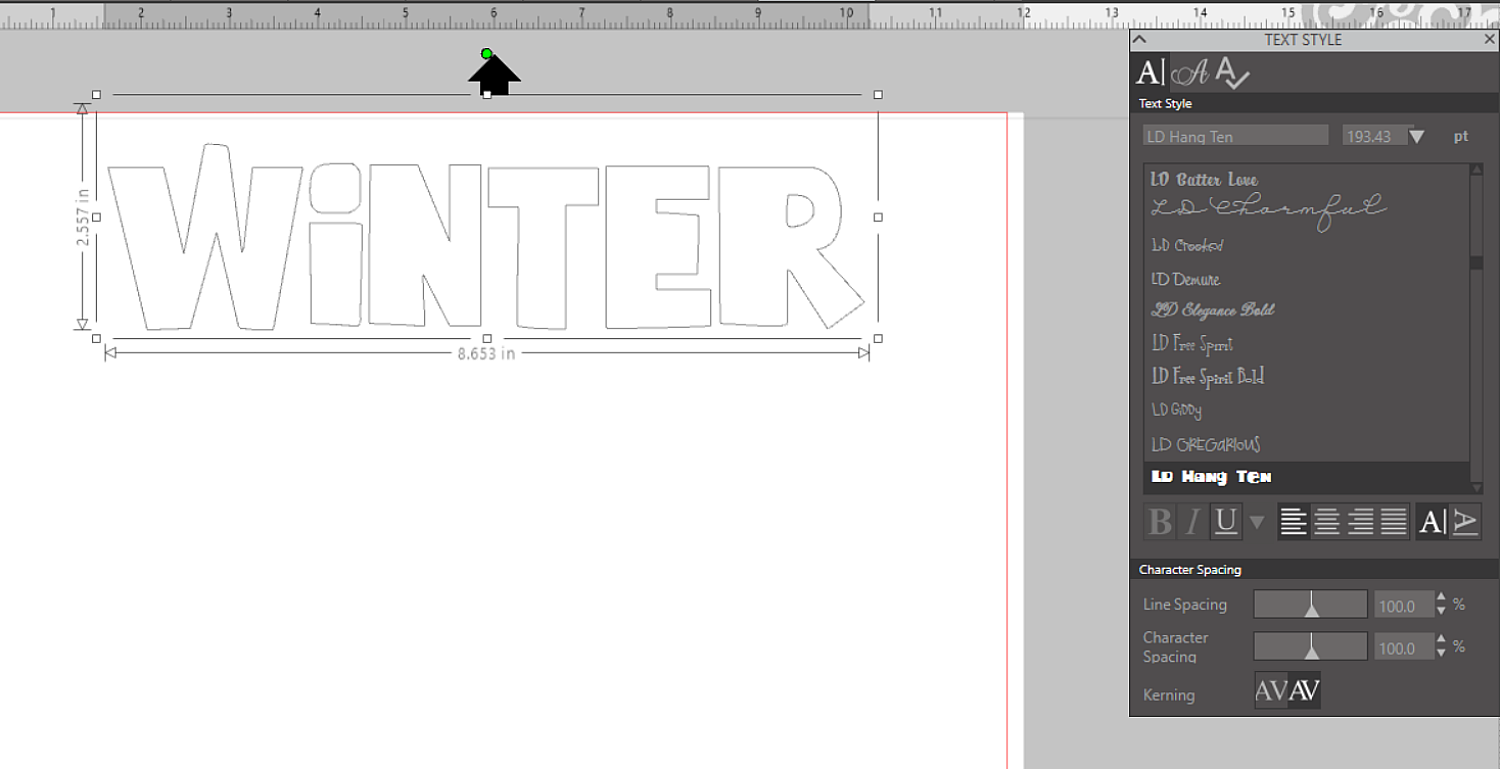
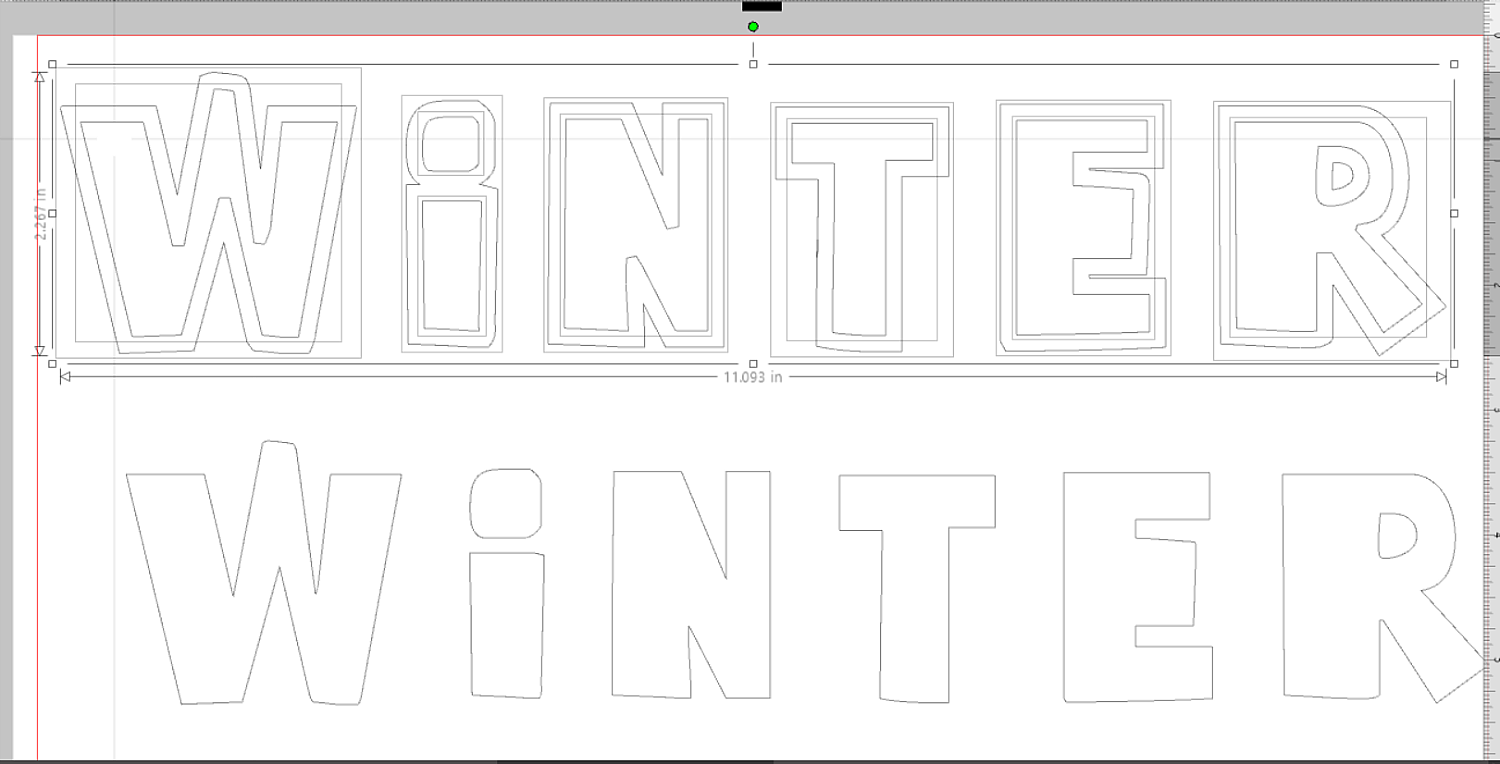
You will want to first space the letters out using the Character Spacing Tool in your Text Style, so we can make and easy offset and internal offset.
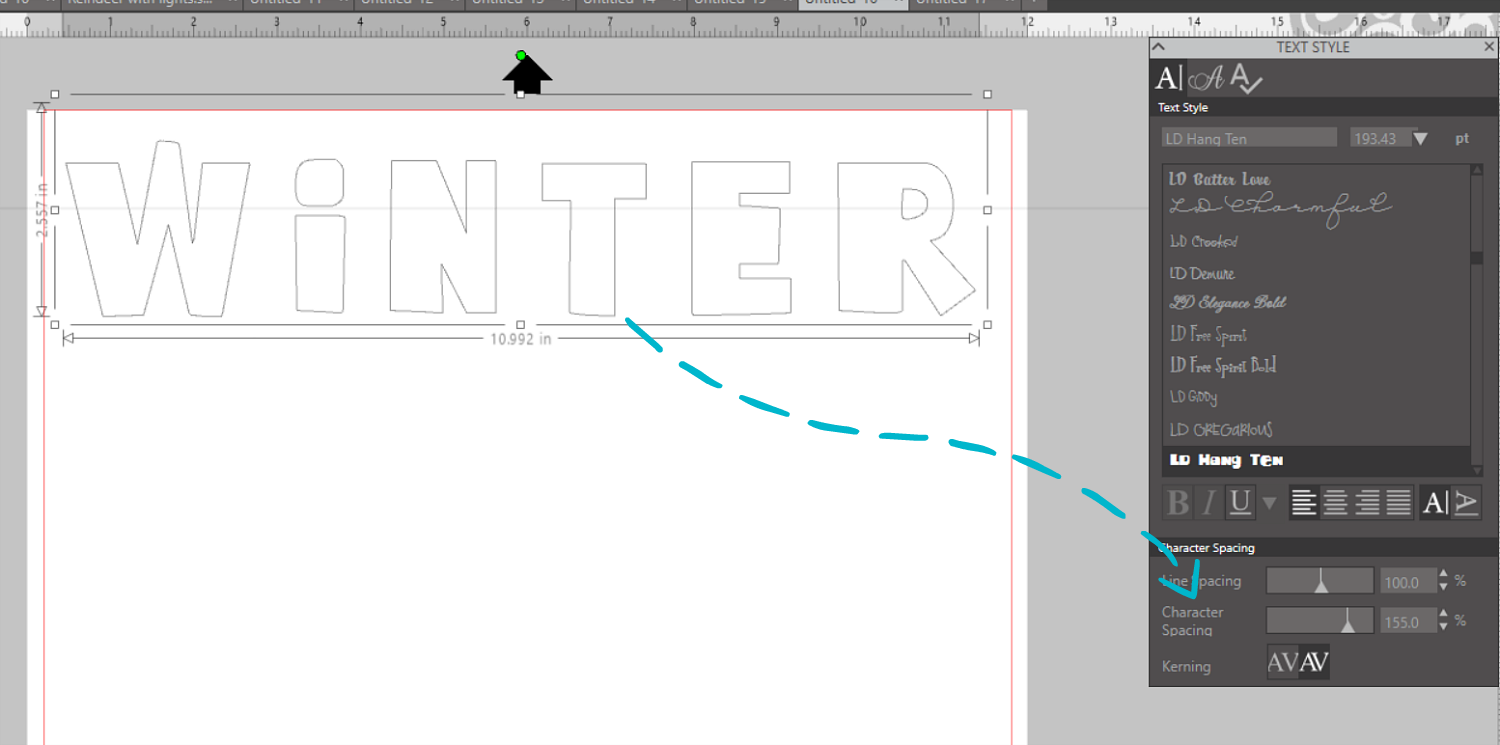
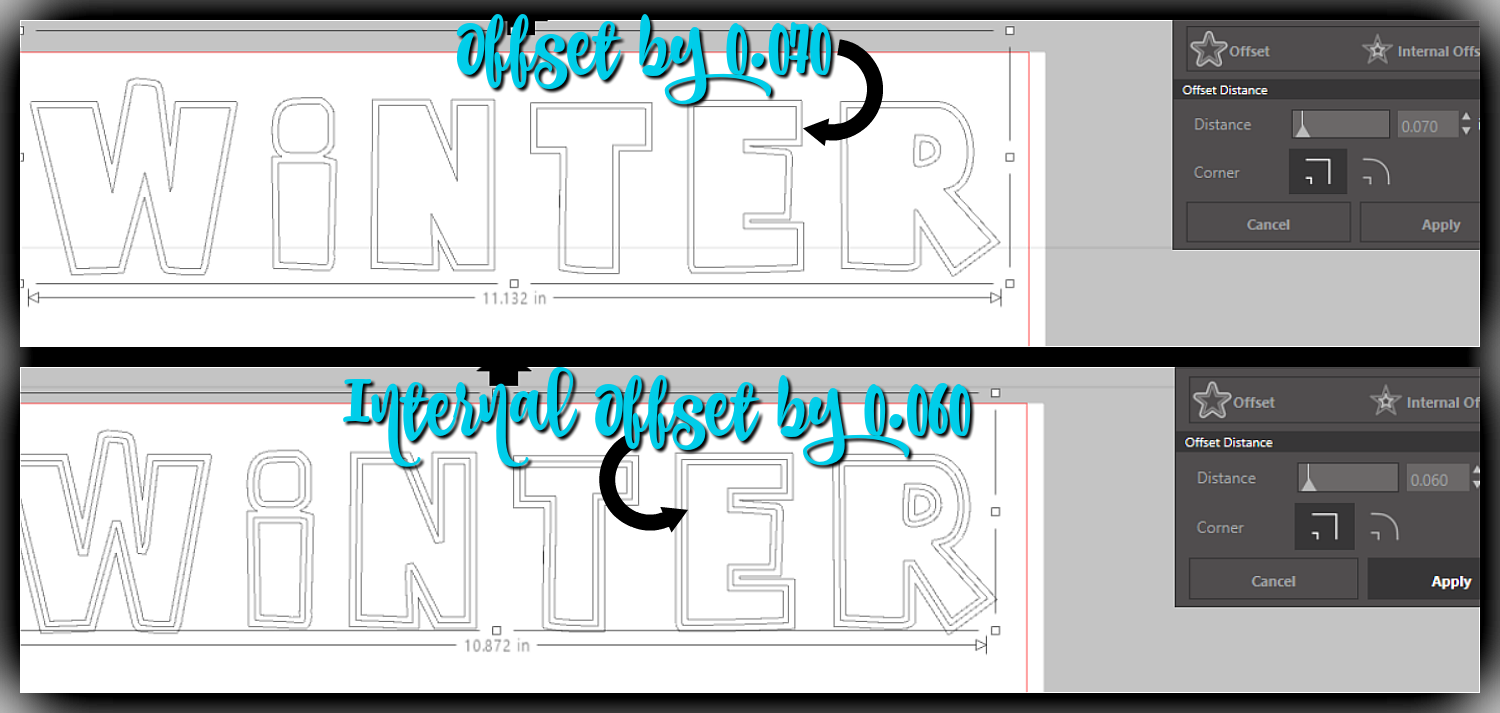
Now going into your Offset feature which will be found at the top portion of the progam and show a Star Symbol, Take the image and offset how far you wish with or without a corner offset then save. I did mine at 0.070.
Repeat the same effect only using the Internal offset, I set that one to a bit smaller at a 0.060.
Creating this offset will make an image that will enclose and secure the edges of your fabric.
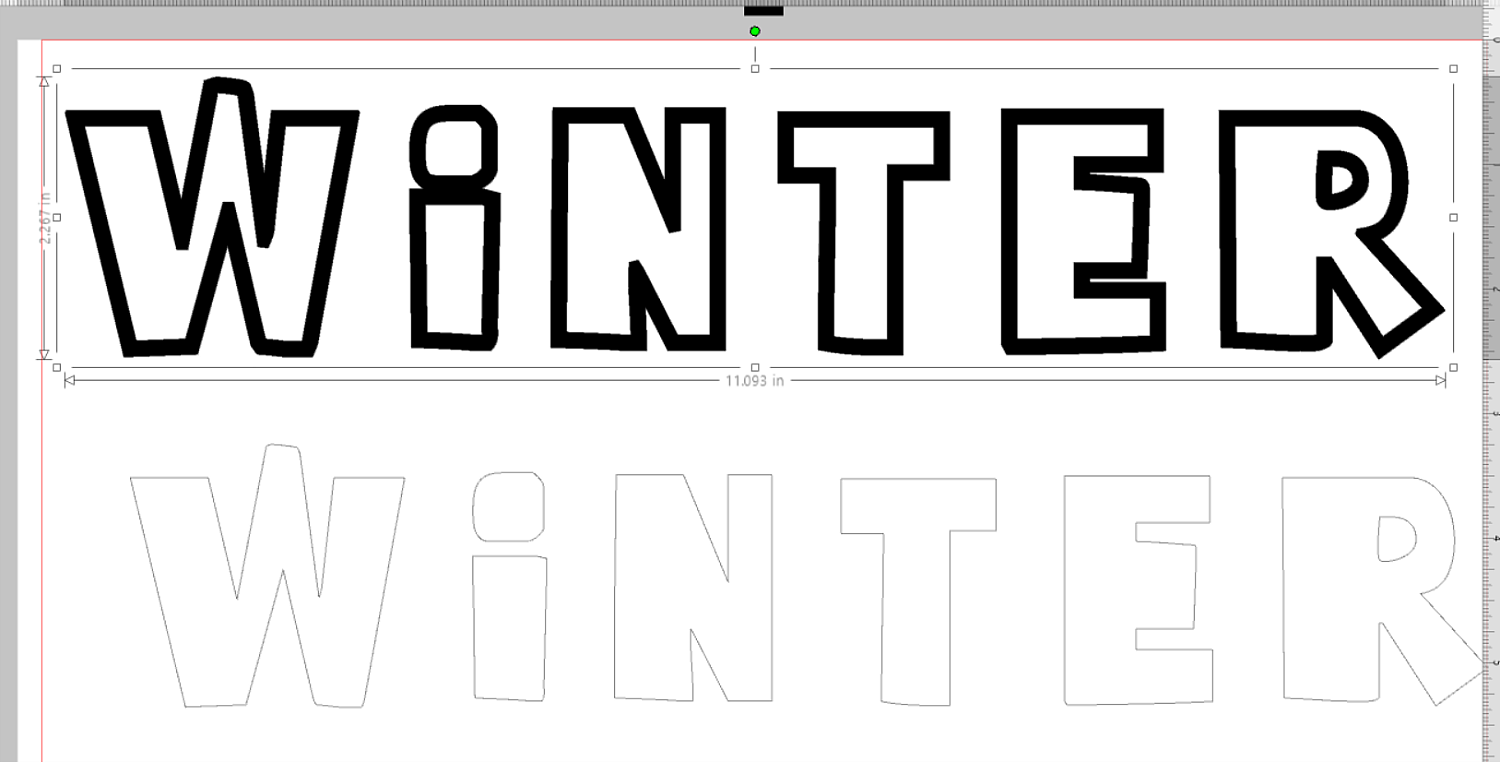
Next you will need to make your new lines into a solid image, the easiest way to do this is to remove the original since it is still grouped together.
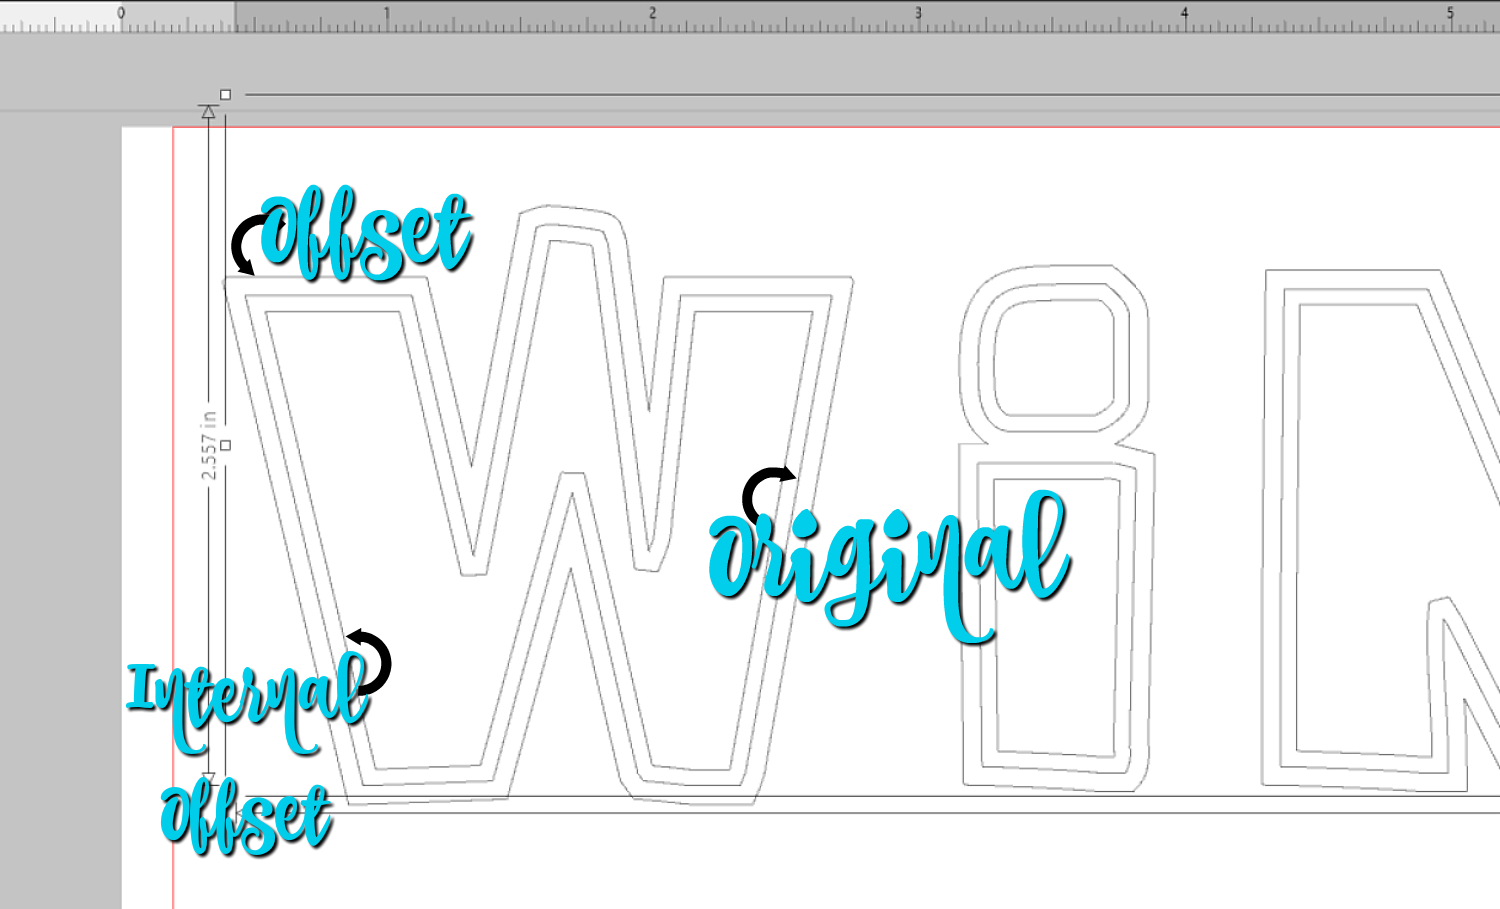
Dont worry you will be able to re-center it. Once you have that removed you should have an image that looks like this.
Create the offset and Internal offset in to a solid image by making it a compound path, I like to fill it in with color after words so that I have an easier time visualizing the image. This will be your Stripflock and the orginal your frabric.
Then adjust the Stripflock lettters so where you woul like them to be. This is what I did by sizing the W larger and moving some letters up and down.
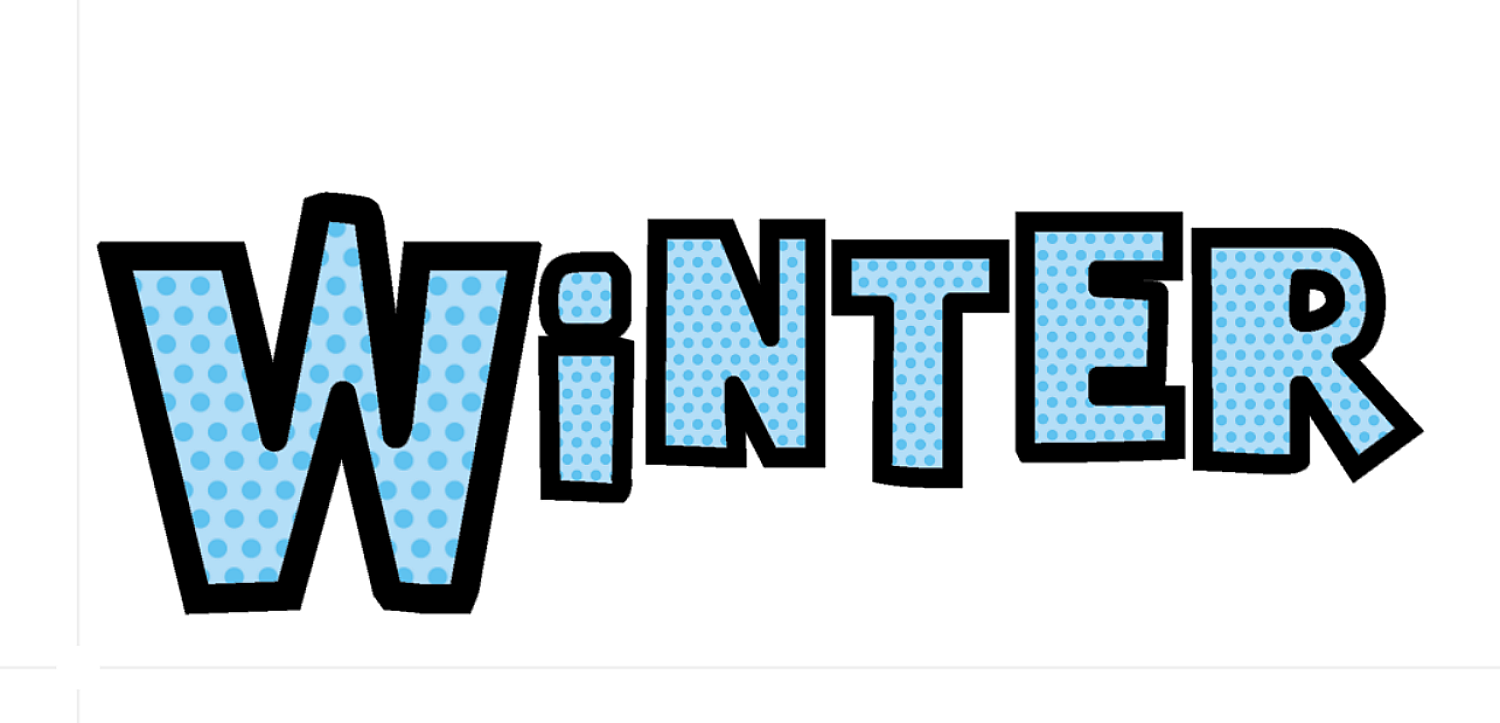
Then I added some other fun images to add a little extra detail to my teatowel.
The

But wait! We need to get rid of all the cute swirlies behind our W. This is easy, just a few steps.
1~ Select both images making sure they are their own grouped image, so you should have 2 boxes.
2~ In the Modify Icon Select Subtract All, this will look like nothing has been done, but it has seperated all the overlaping images.
3~Remove all swirls inside the 'W'
4~ Weld everything together.
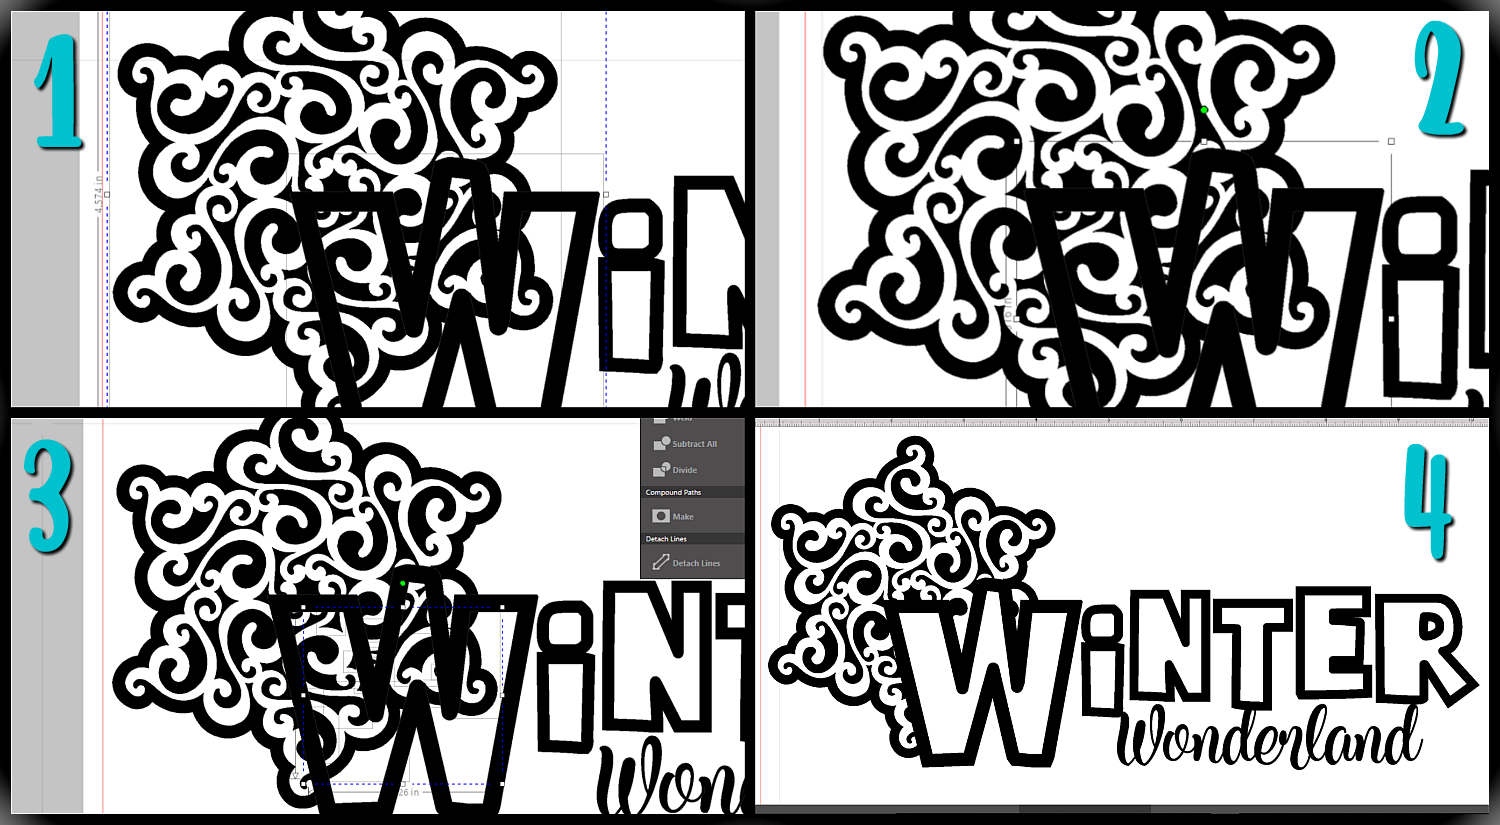
See how easy that was to create your own image. You can alwasy double checking by acting like you are ready to cut and seeing where the cut lines are. Looks like we are good.
Dont forget to mirror this since we are working with HTV.
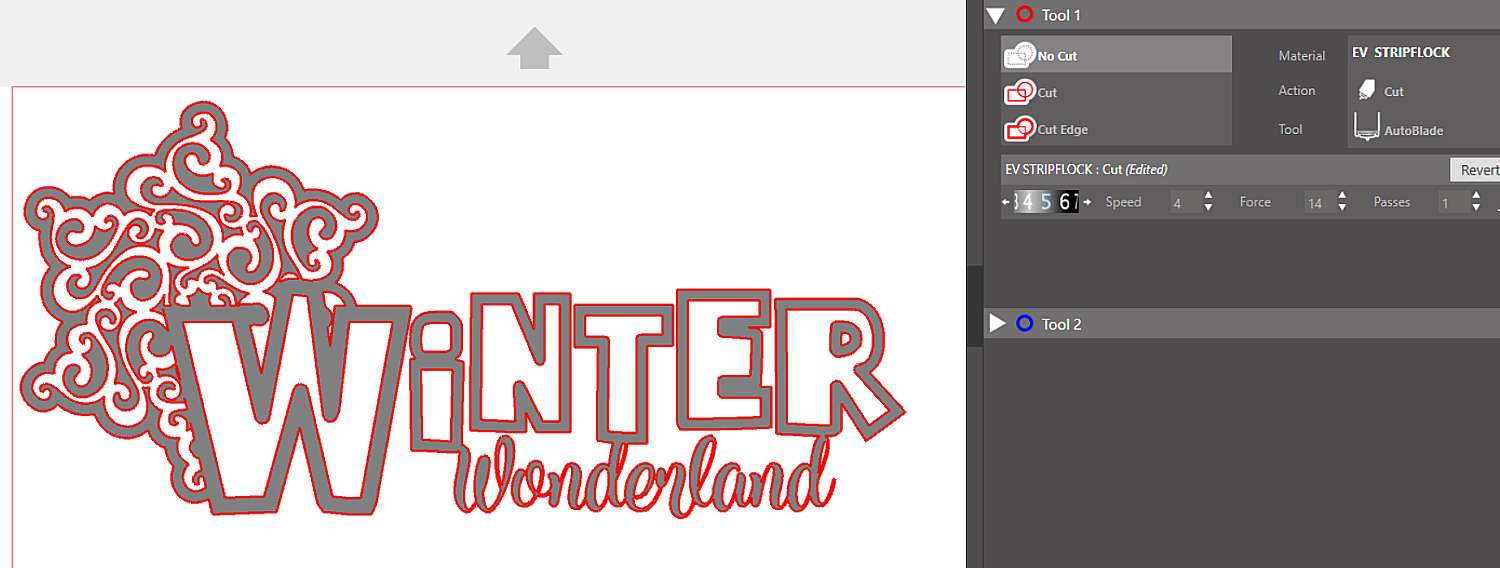
Recommended cut settings for Stripflock HTV on the Silhouette are.
- Blade~5
- Speed~3-5 (I slowed mine down just a tad for the fancy snowflake)
- Thickness~ 15

Look at how fun that looks to weed and the lines are so easy to see.

Once you have your stripflock done and weeded you can move onto cutting your fabric.
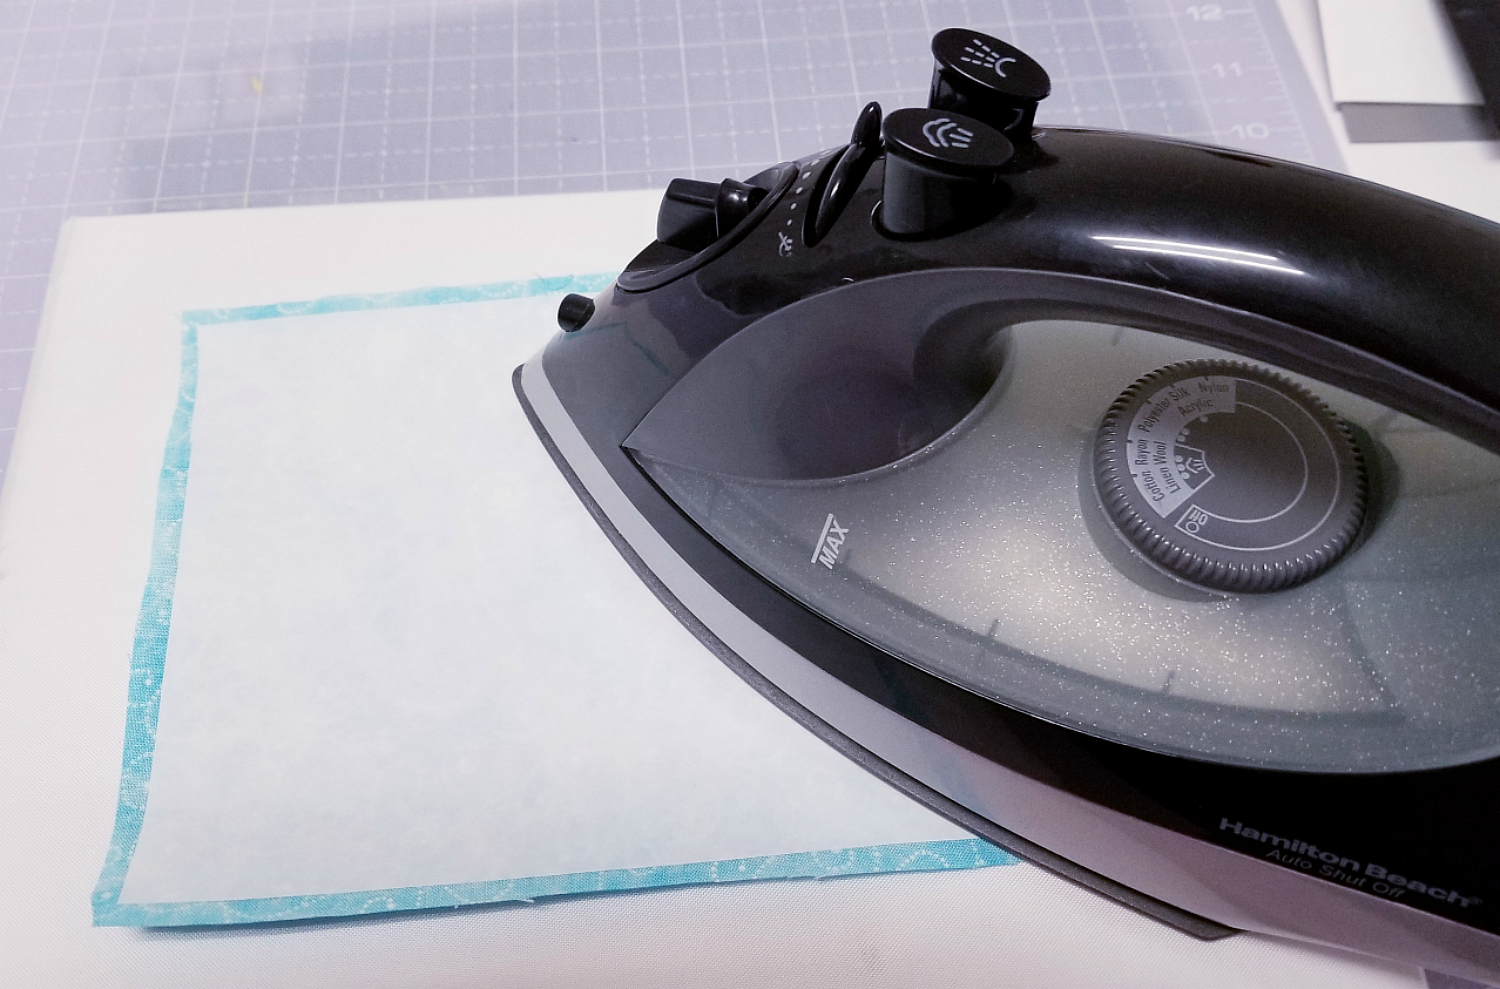
Cut your fabric to the desired size. Then cut your interfacing slightly smaller than the fabric like so,
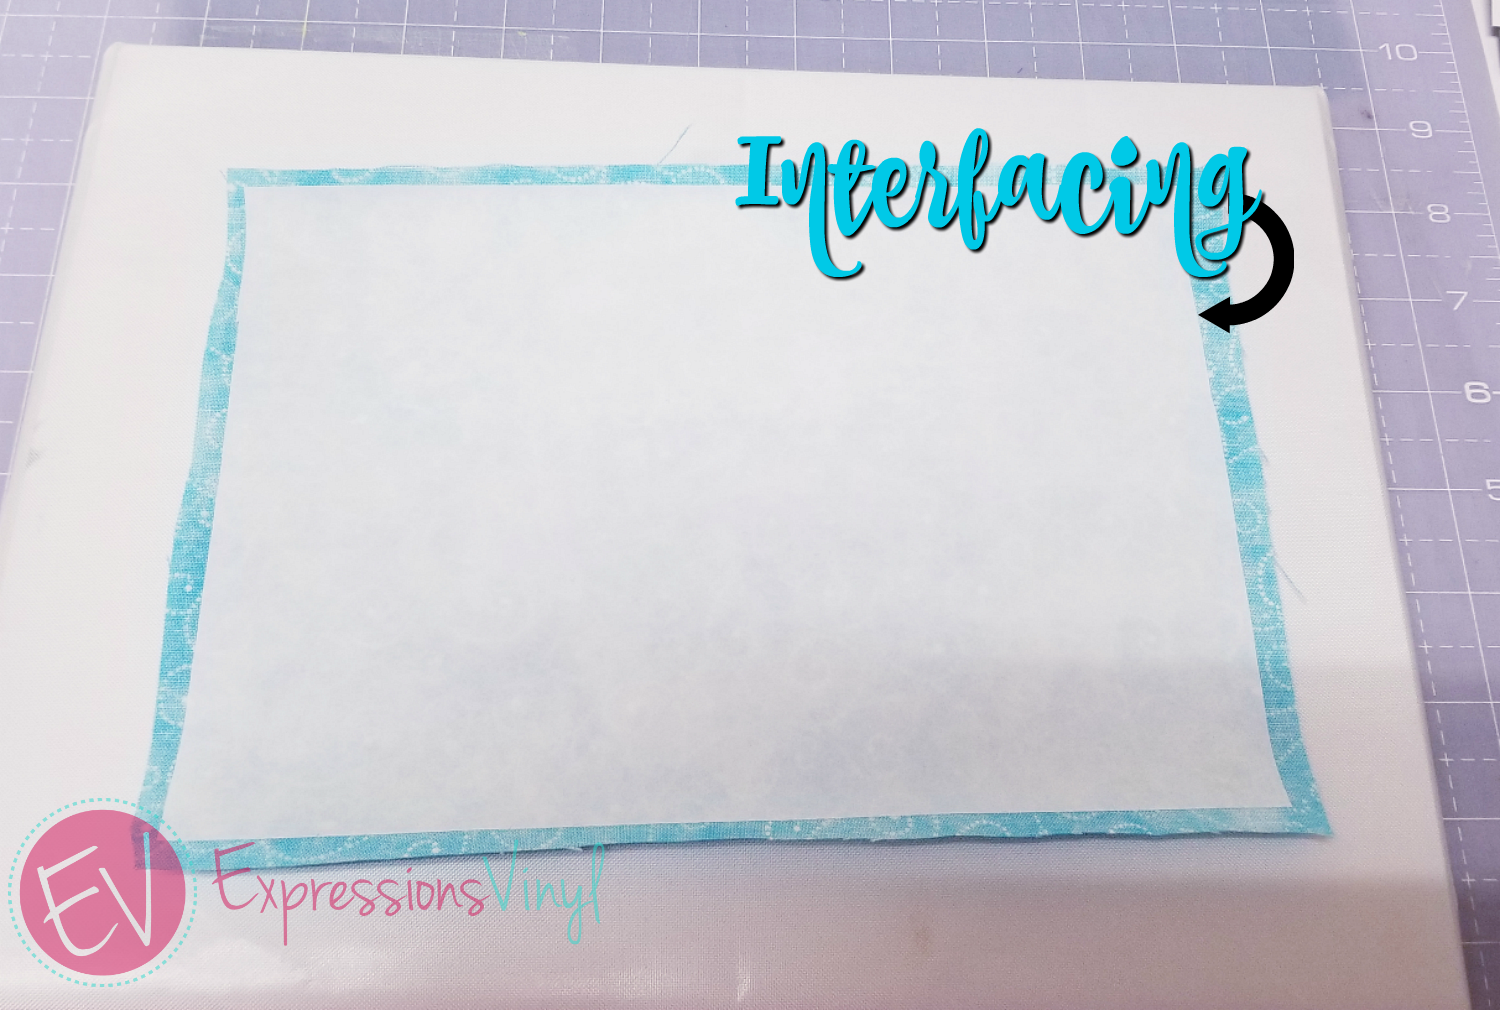
Then all you need to do is iron the interfacing to the fabric,until it is completely flat on about the cotton setting of your iron, then let it cool for a bit.
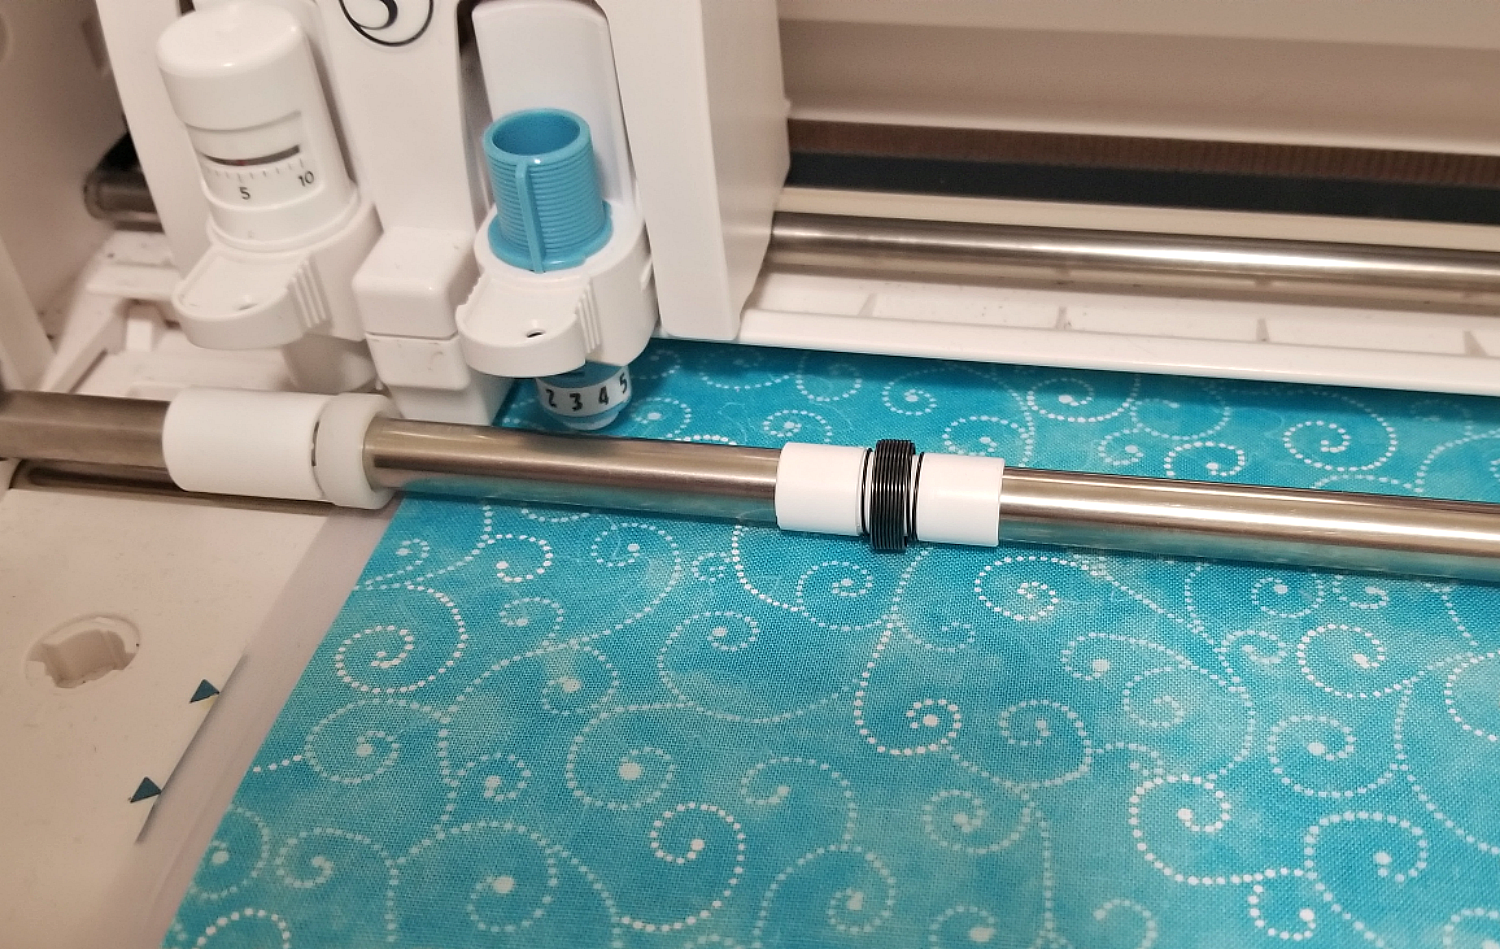
I have found that triming the fabric and taking the interfacings paper backing off before applying to the mat, the fabric will cut much easier. Make sure to use a fairly clean mat so that it will get a good hold.
When it comes to cutting fabric, there is an actual Fabric Blade which is similar to the black rachet, but it is manufactured blue so you can know to use only that one on fabric. I also slow my speed down and thickenss and perform a double pass cut.
Here are my recommended settings for a higher grade Cotton Fabric:
Fabric Blade:
- Blade~3
- Speed~5
- Force(Thickness)~ 18
- Passes~2
For fabric I would STRONGLY recommend using the "Line Segment Overcut", this feature cuts the lines slightly further than the edge of t he intended cut.
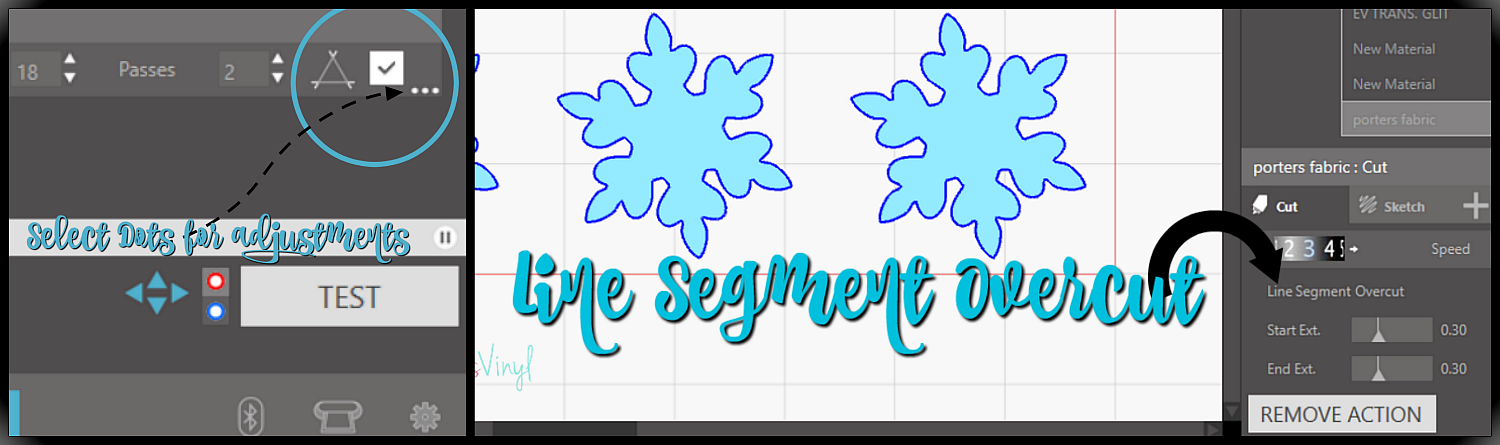

Looks at how cleanly this cut.
Next we will apply the fabric and the Stripflock at the same times.
NOTE: Any images seprated and not as a whole like the Winter phrase you will have to manually line up. And always do a test cut since fabric can vary.
Now its time to apply the fabric and Stripflock to our surface. A quick tip to help the Stripflock stay in place while posistioning the fabric is to press of the vinyl that will not come in contact with the fabric like the snoflake here.
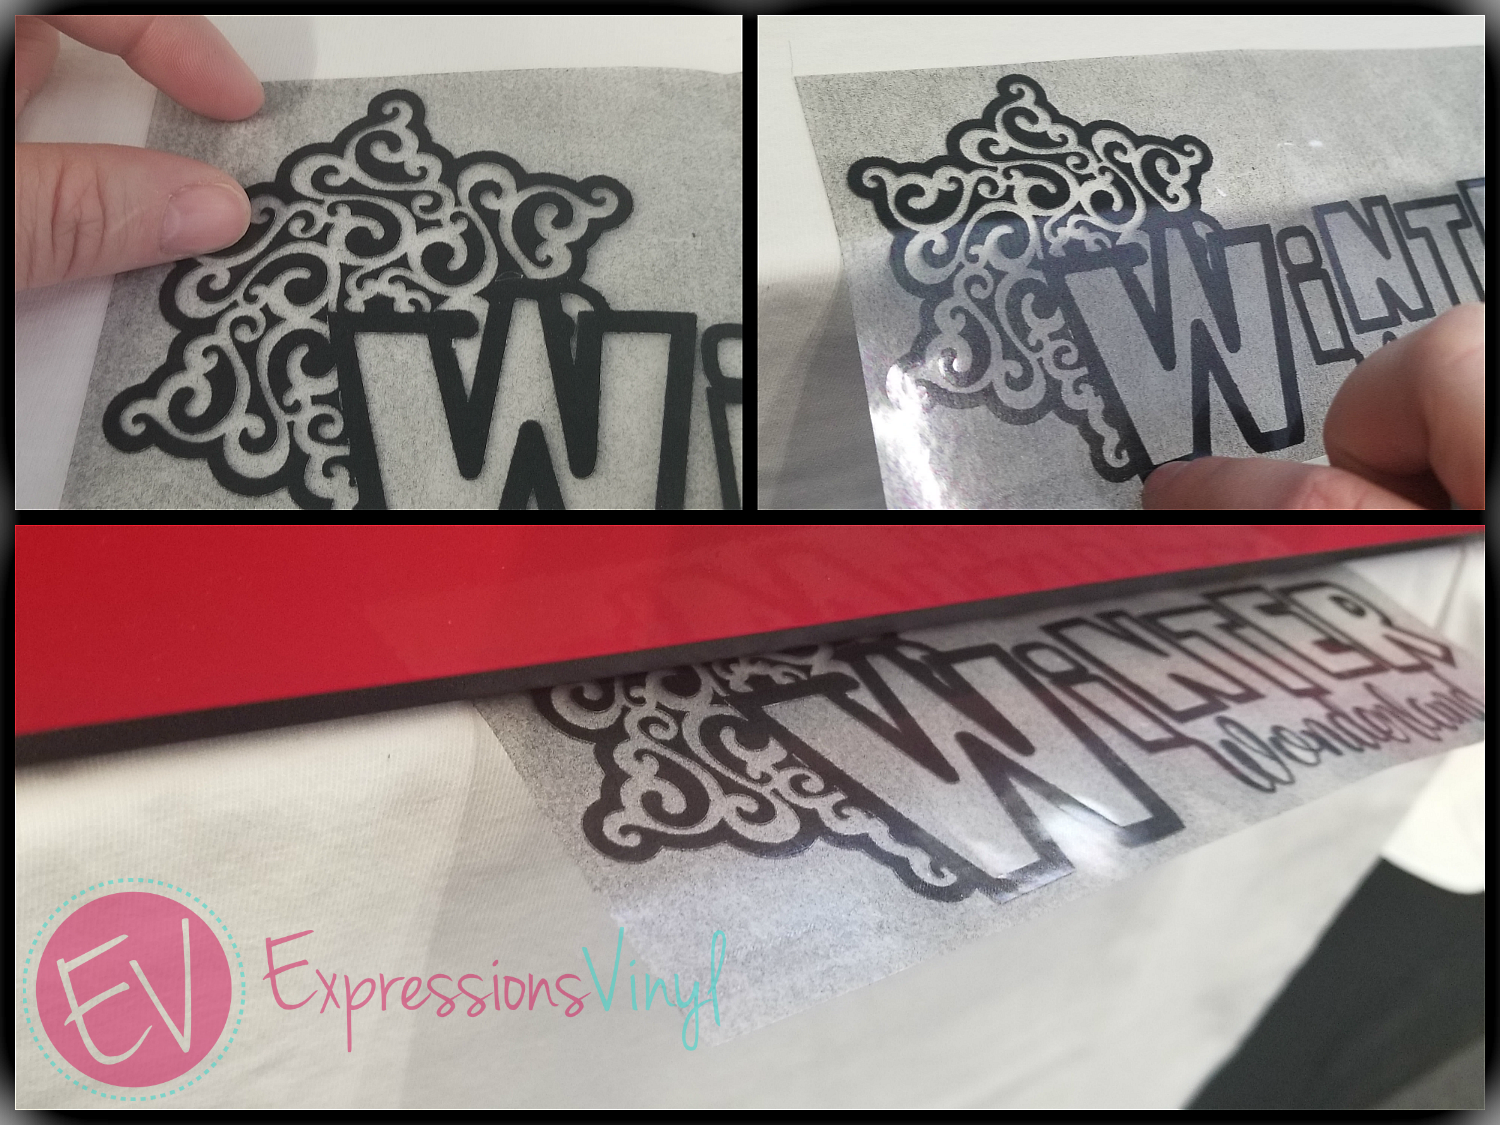
Then all you have to do next is to insert the fabric under the stripflock, letters will be more difficult, but solid shapes you could do the fabric then the stripflock.
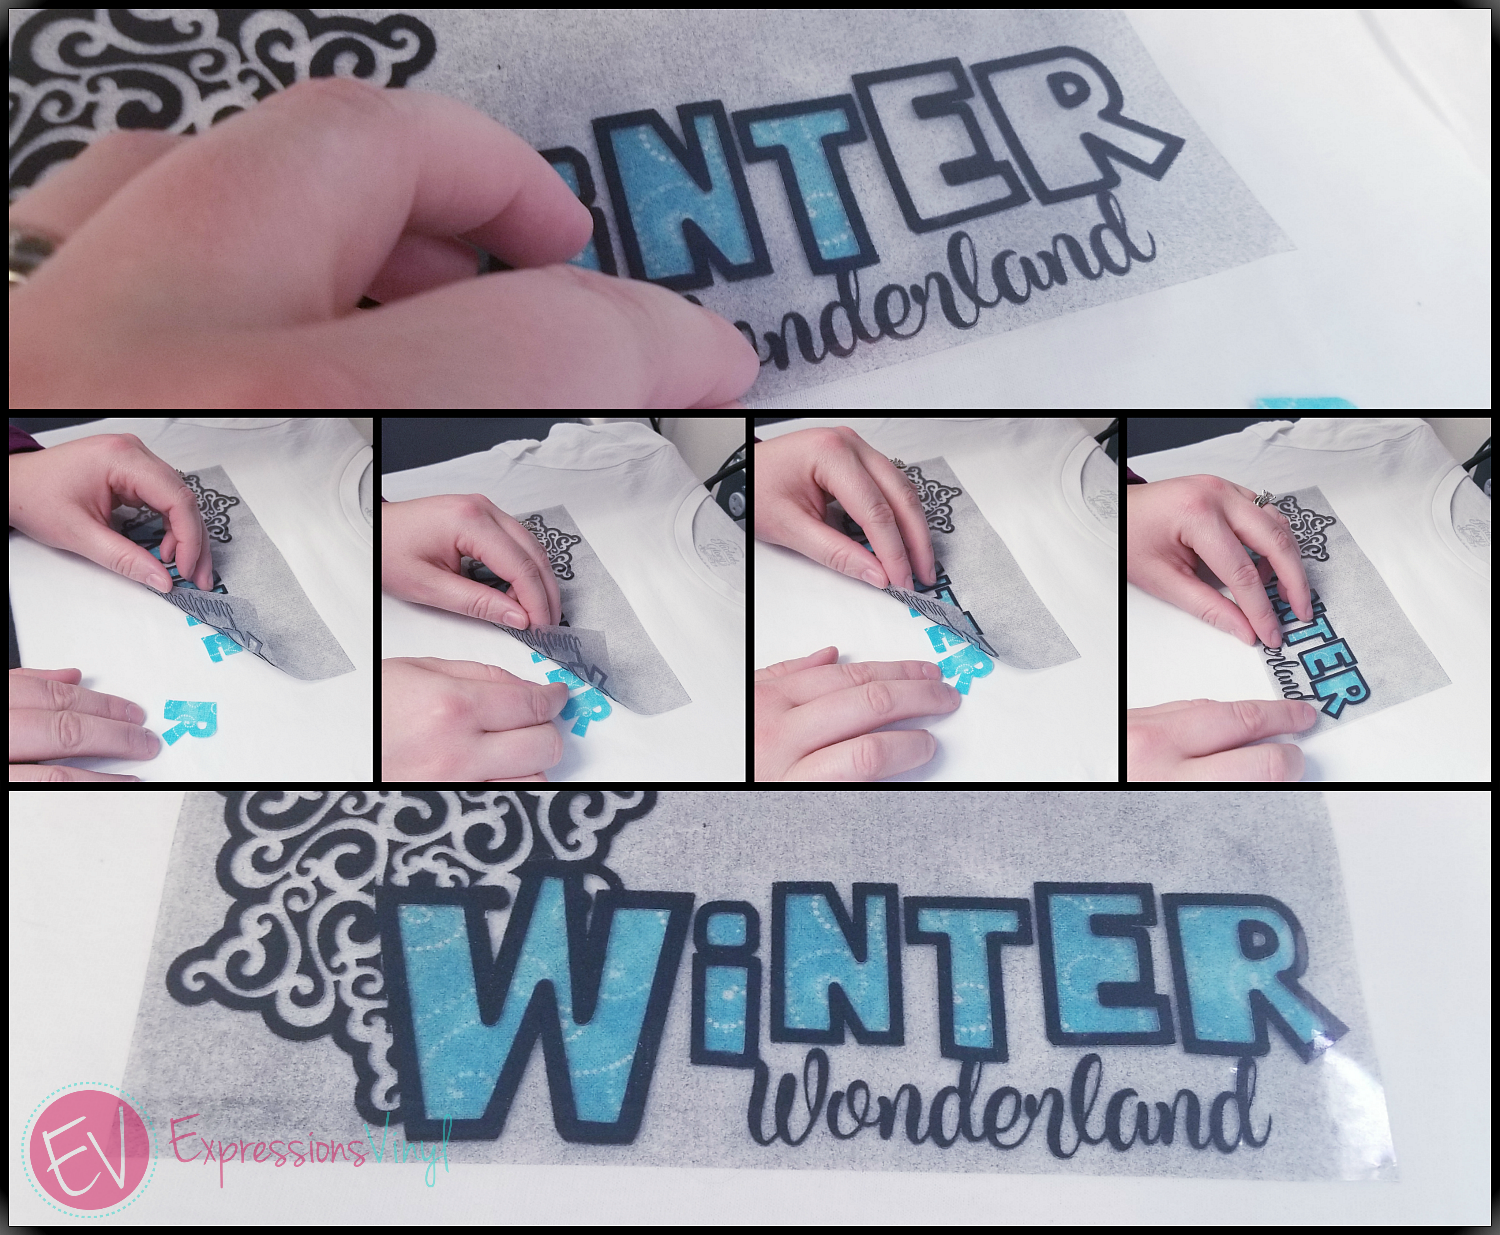
Stripflock has a press time of 15-20 seconds and a temperature of 320 degrees and dont forget to let it cool.
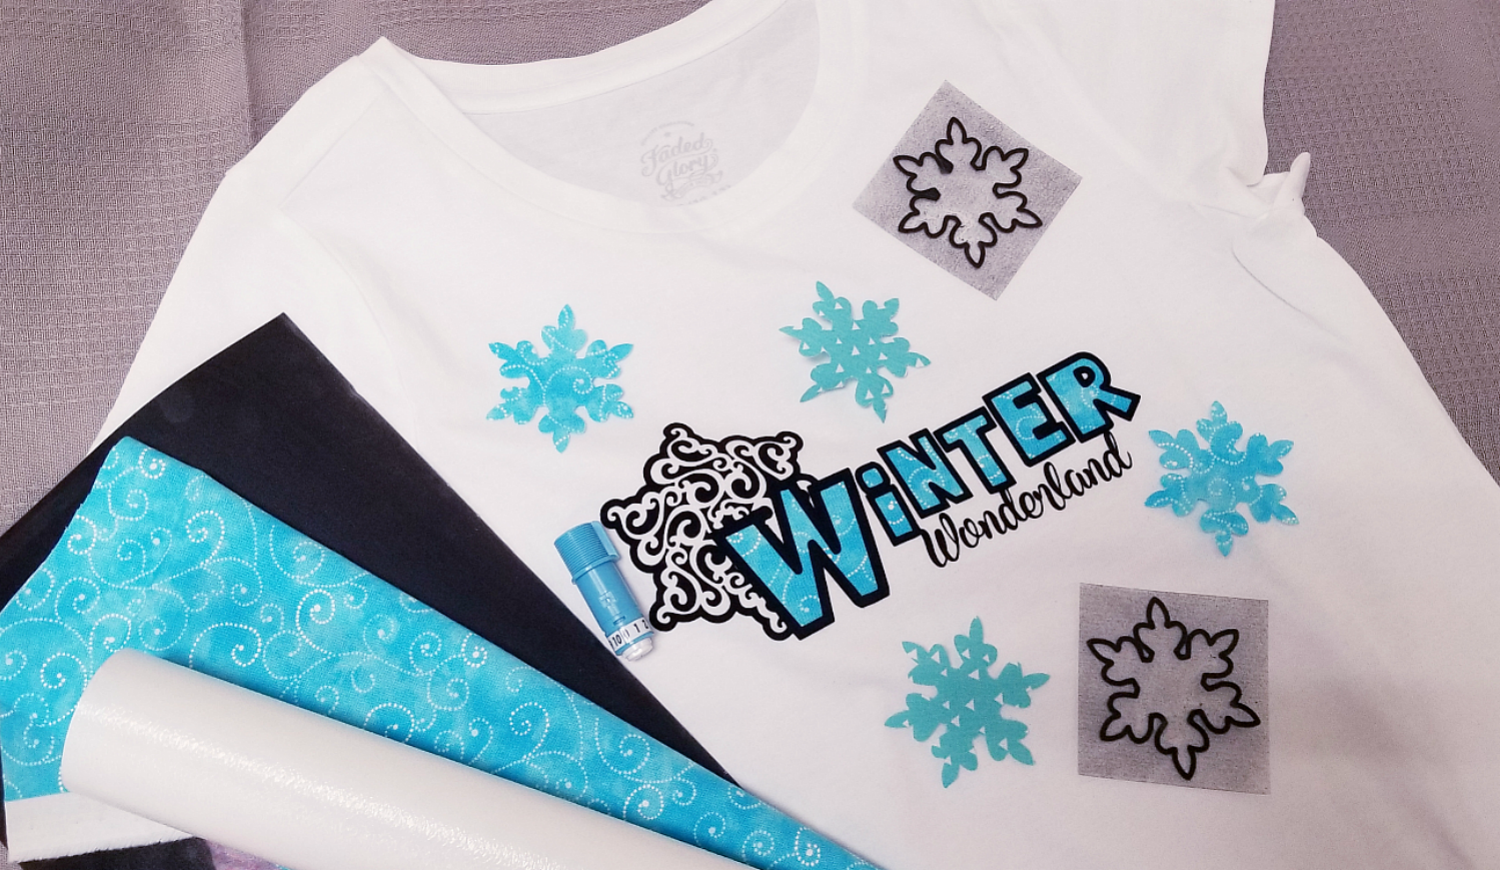
Go try it out next time you get an itch to quilt, make some tea towels or just some simple shirts.

Recent Posts
-
NEW Holographic Eclipse Heat Transfer Vinyl
April 15th, 2024 3 Ways to Use the New Holographic Eclipse Heat Transfer Vinyl from Siser …Apr 29th 2024 -
Hop into Spring with Cute Easter Vinyl Crafts
Do you love our Vinyl? Sign up for Vinyl Club today to get FREE vinyl and save big! …Mar 28th 2024 -

Fixing Wrinkles and Bubbles in Vinyl
How do you get air bubbles out of vinyl? There are a few different ways to ensure a flawless …Mar 26th 2024