
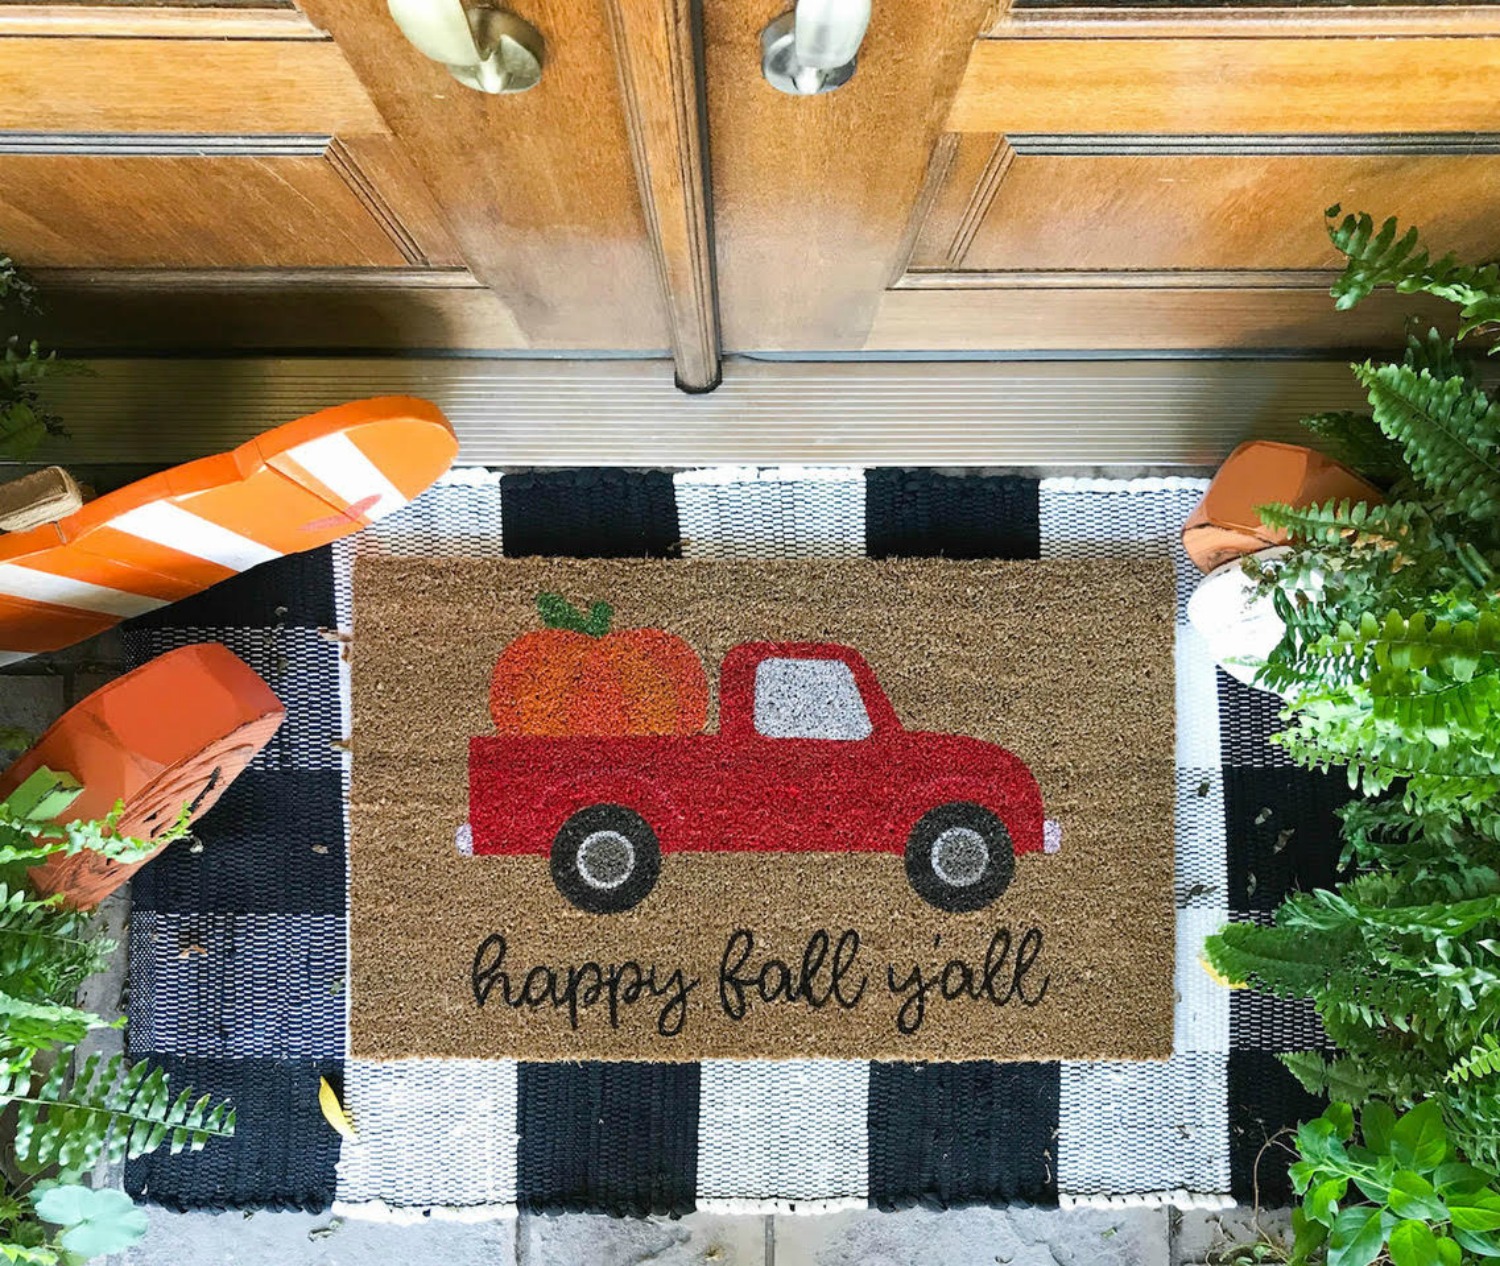
Oramask Stencil to Create a Door Mat
Hey crafty friends! Kayla here today to talk to you about the wonder that is Oramask. Oramask is a translucent stencil film. It's a little thicker then standard vinyl and holds up nicely on most surfaces. Today, I'm showing you how to use it to DIY your own doormat.
Set Up Design
I started by setting up and sizing my design. A standard doormat is 18x30 and the largest cutting mat is 12x24. Keep that in mind when you're creating your own doormat design.
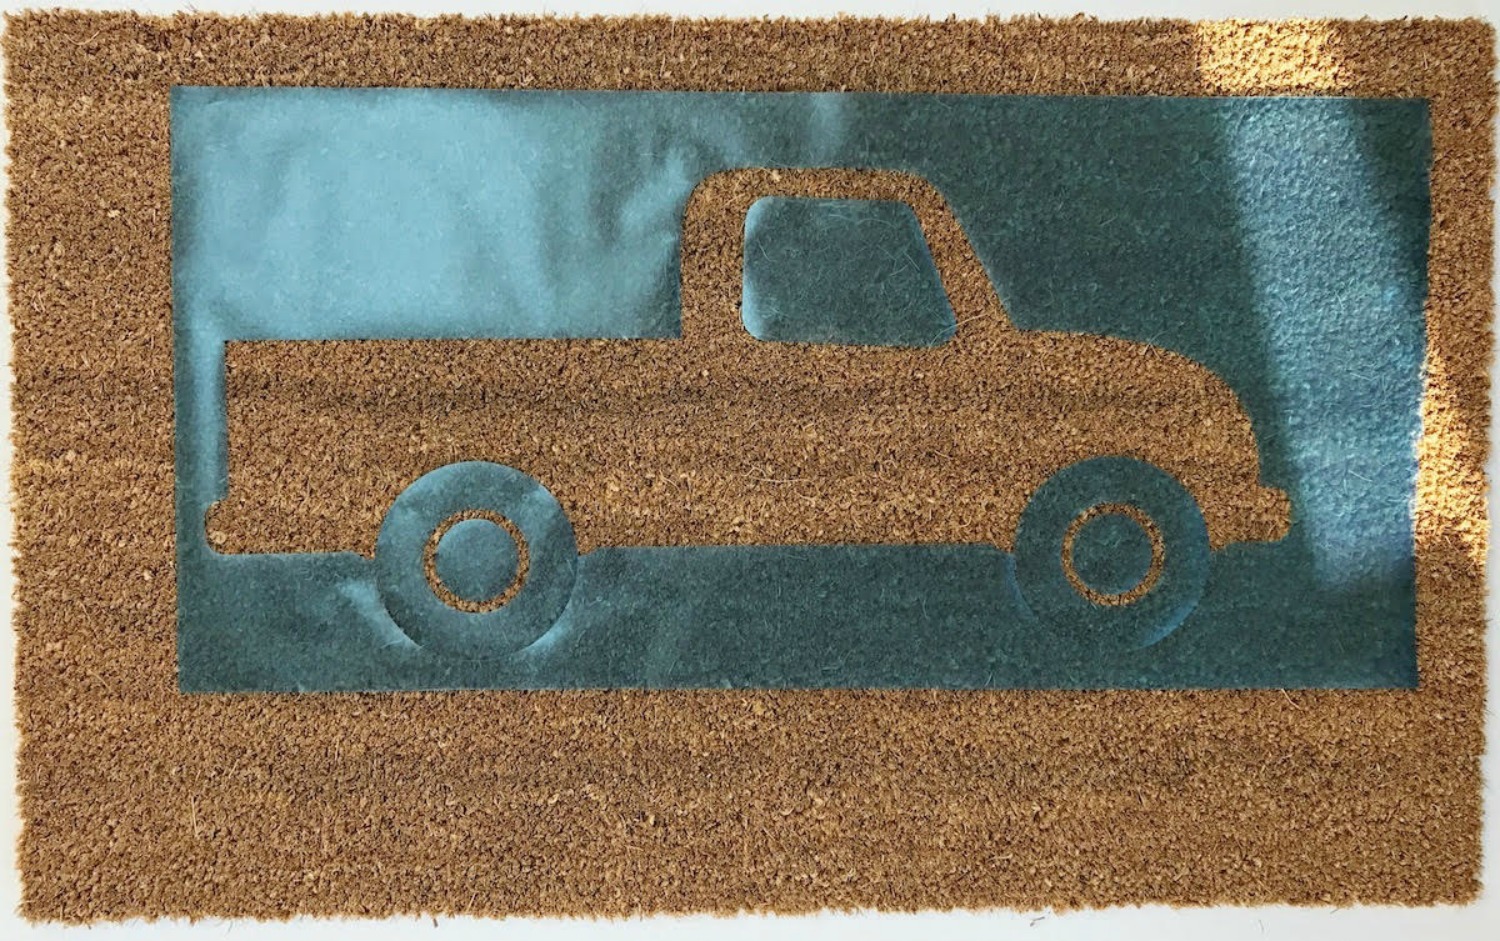
Cut Stencils But Do Not Weed
Next I cut out all of the different parts of my design. The truck, pumpkin and words were all cut separately. Don't weed your designs though because you're going to need both the positive and negative pieces.
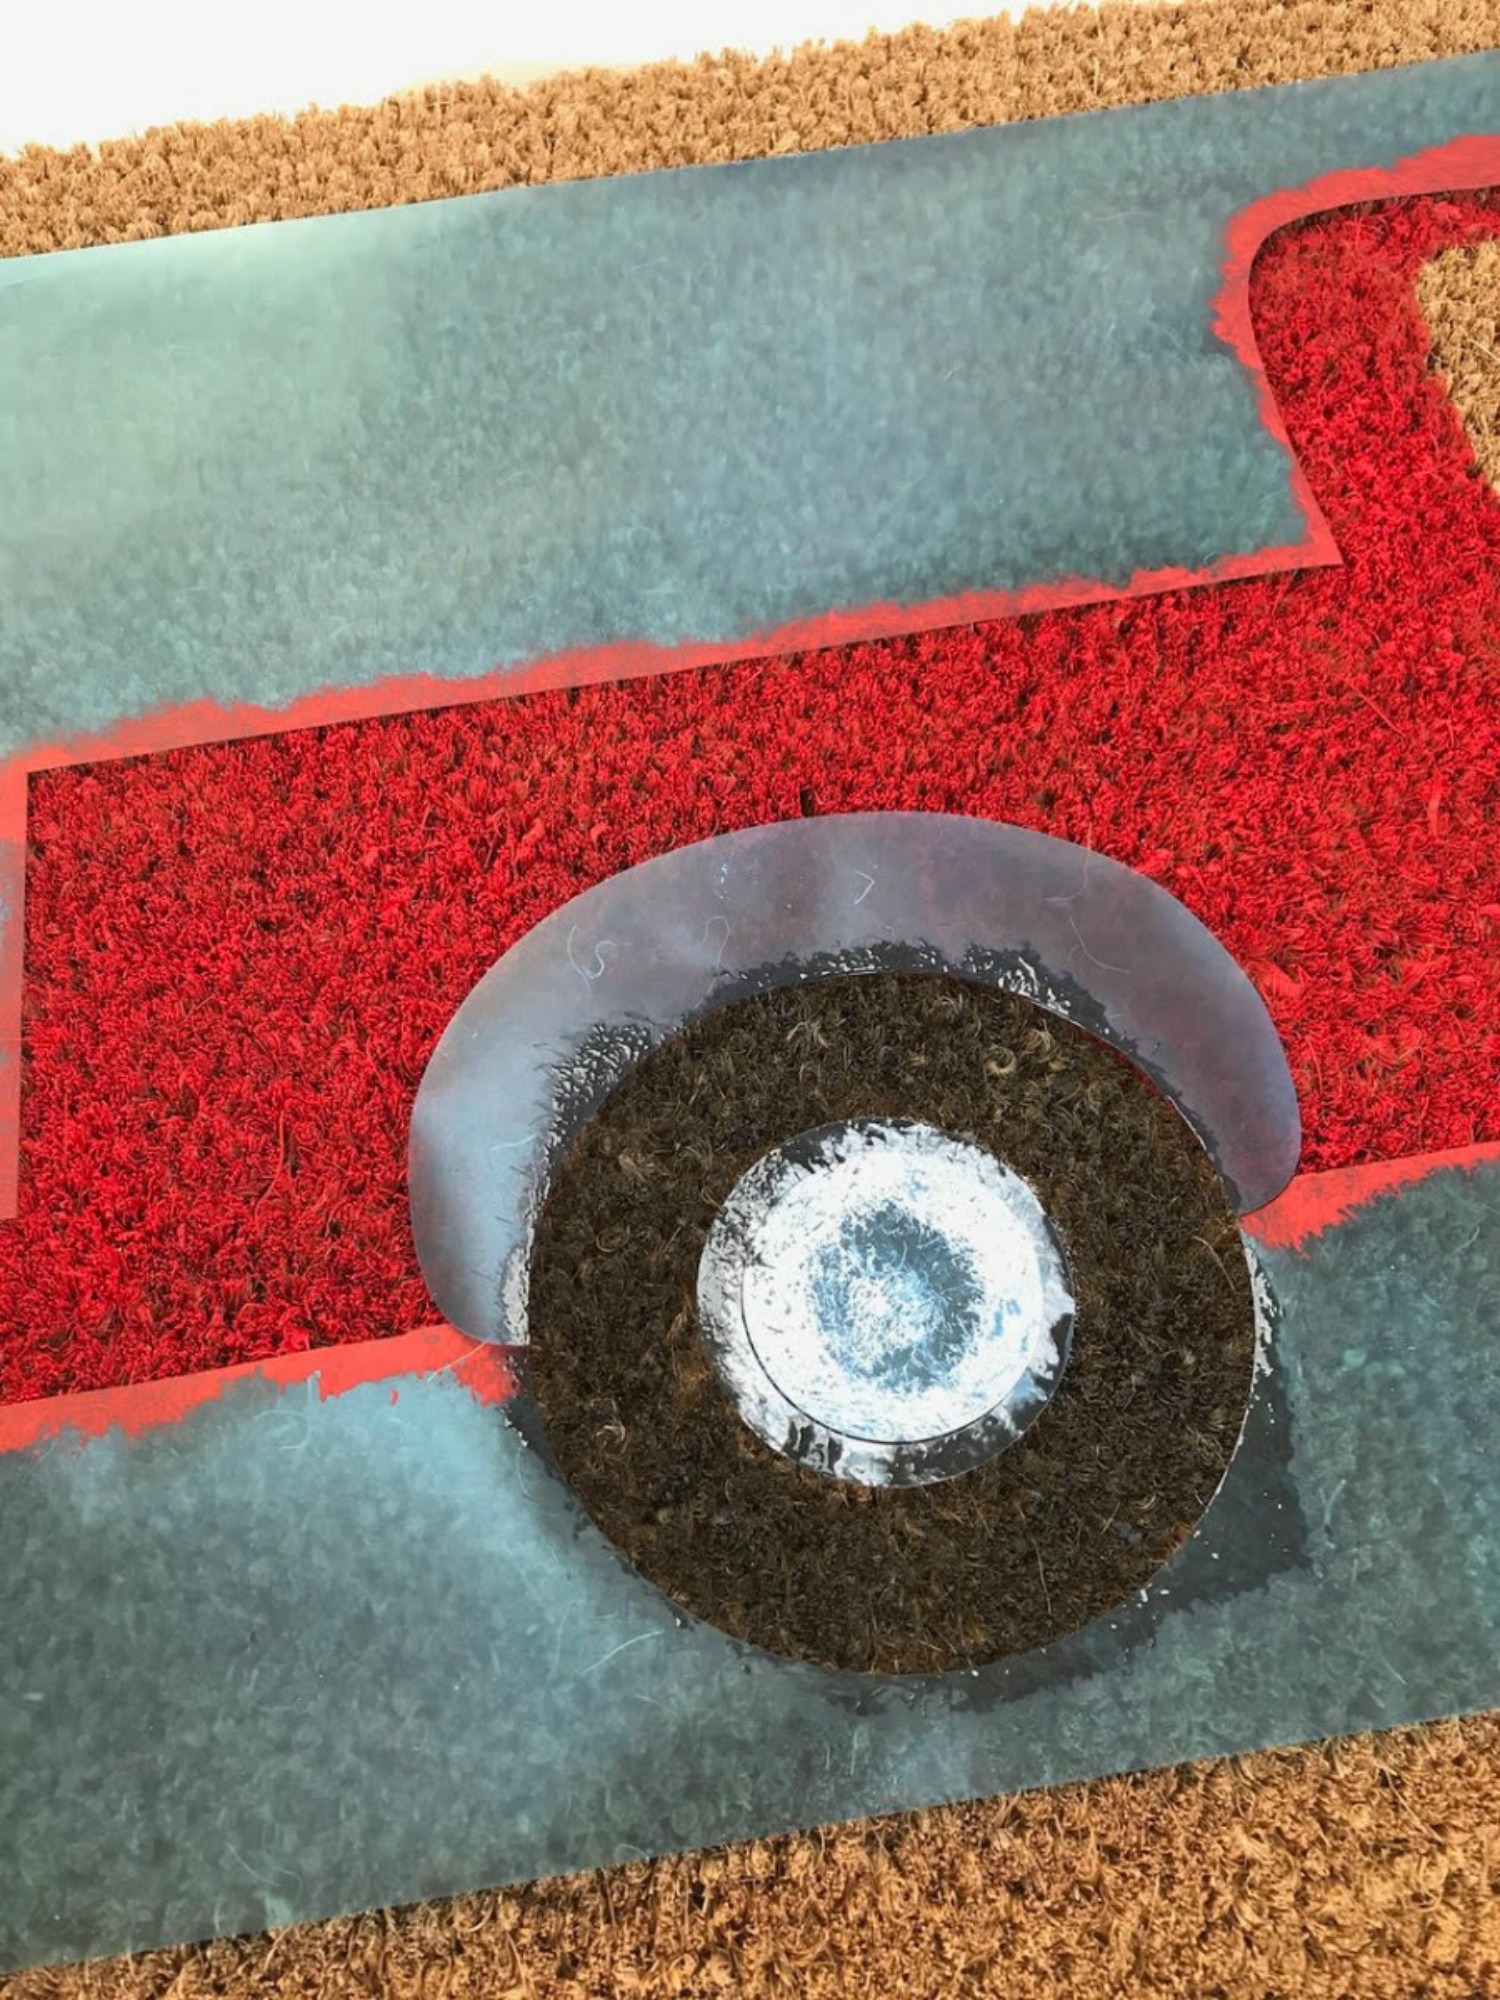
Carefully Apply Stencil
Starting with the truck, peel away the negative space (or the stencil) part of the design and carefully center it on the doormat. Add in the pieces that you do not want to be painted red, like the tires and window.
Paint
Using a pouncing or dabbing motion, add the first layer of paint to the mat. Try not to use regular brush strokes because you'll end up pushing paint under the stencil.
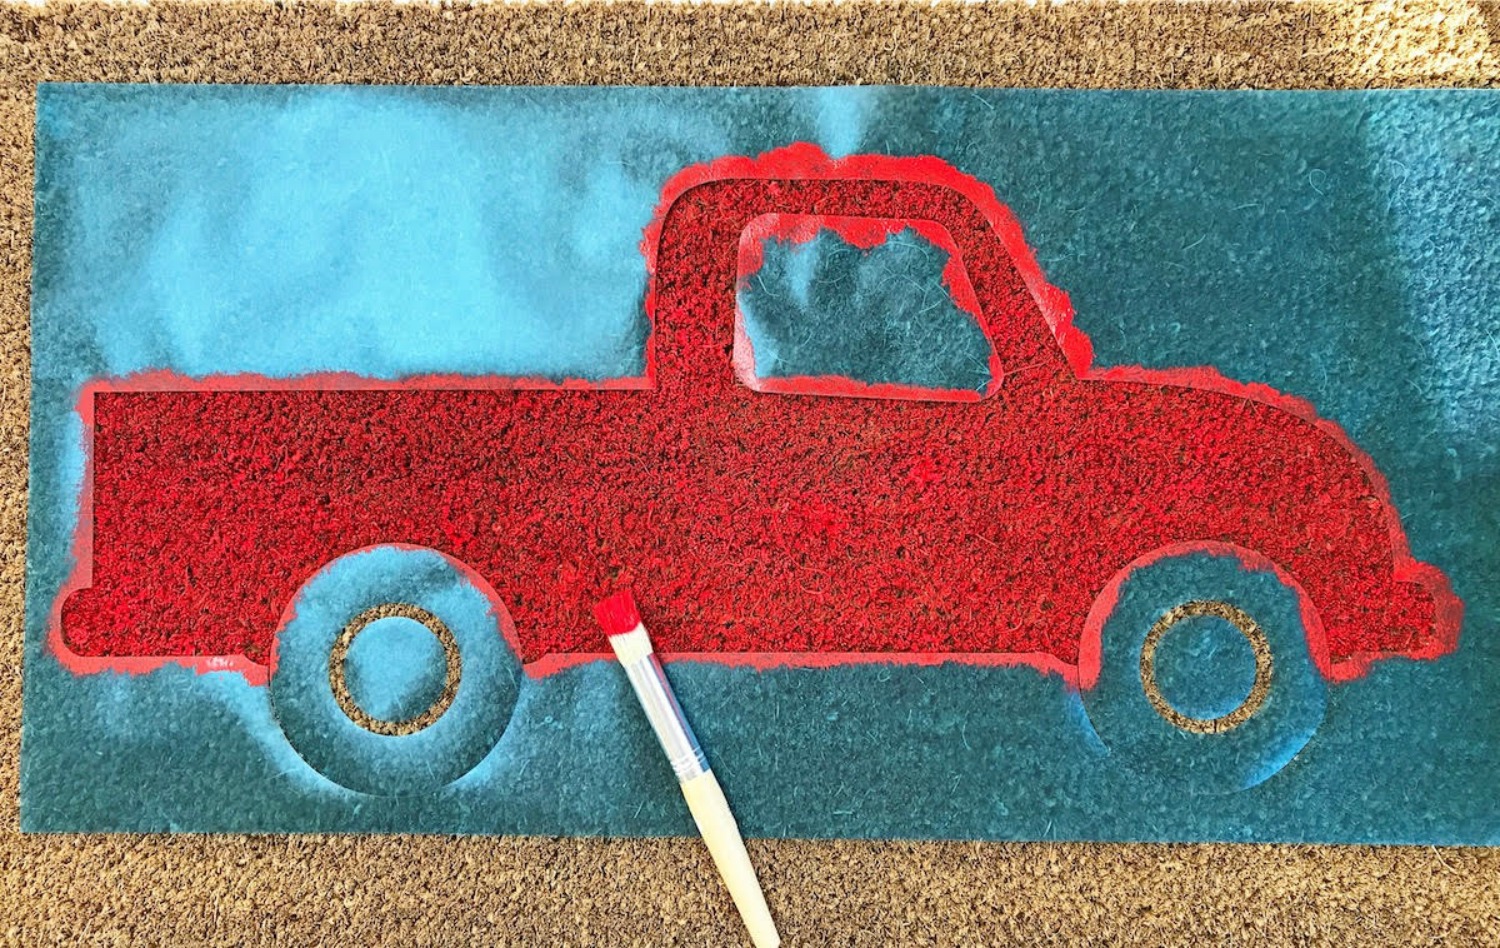
Mask Off Painted Areas
In order to keep everything nice and clean I use the positive pieces of my design to "mask" off the already painted sections. That sounds super confusing but check out the photo below and you'll see what I mean.
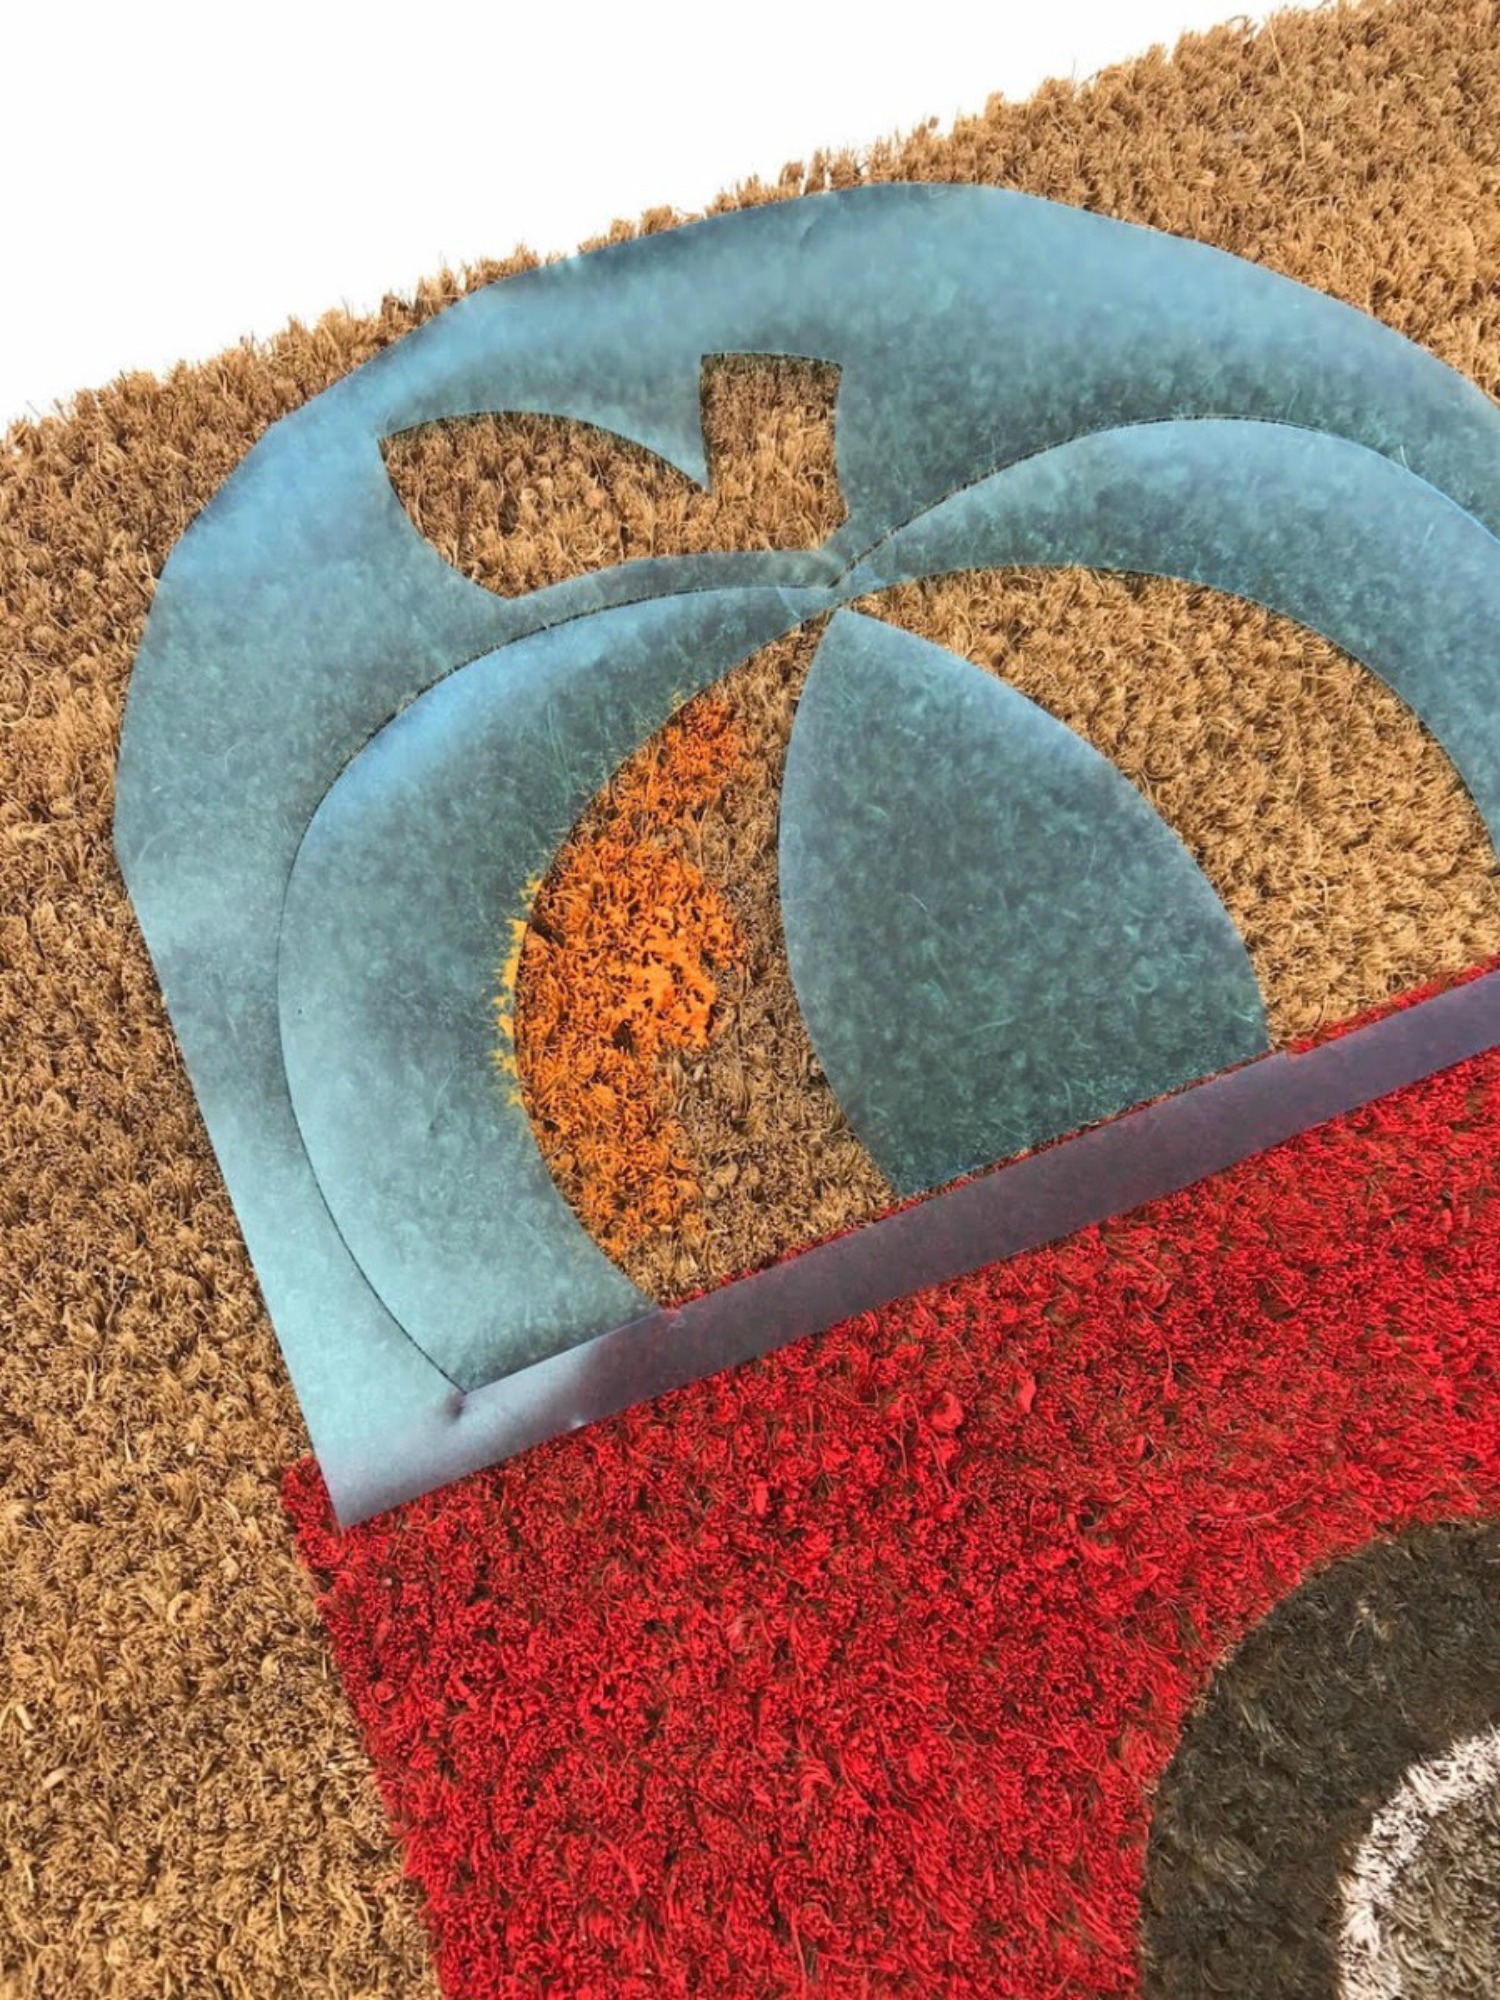
Repeat Process For Pumpkin
For the pumpkin you'll do the exact same thing, apply the stencil by hand and paint the base color then mask off the painted areas and add in the secondary colors.
Add Wording
Up to this point the mat has taken me around 20 minutes to make. This is the hard part, but don't give up! Just carefully peel the stencil part away from the backing and lay it on your mat, you'll have to adjust it here and there but the vinyl is thick enough to not warp to badly. Once it's in place you can add in the centers of your letters that were left behind on the paper backing.
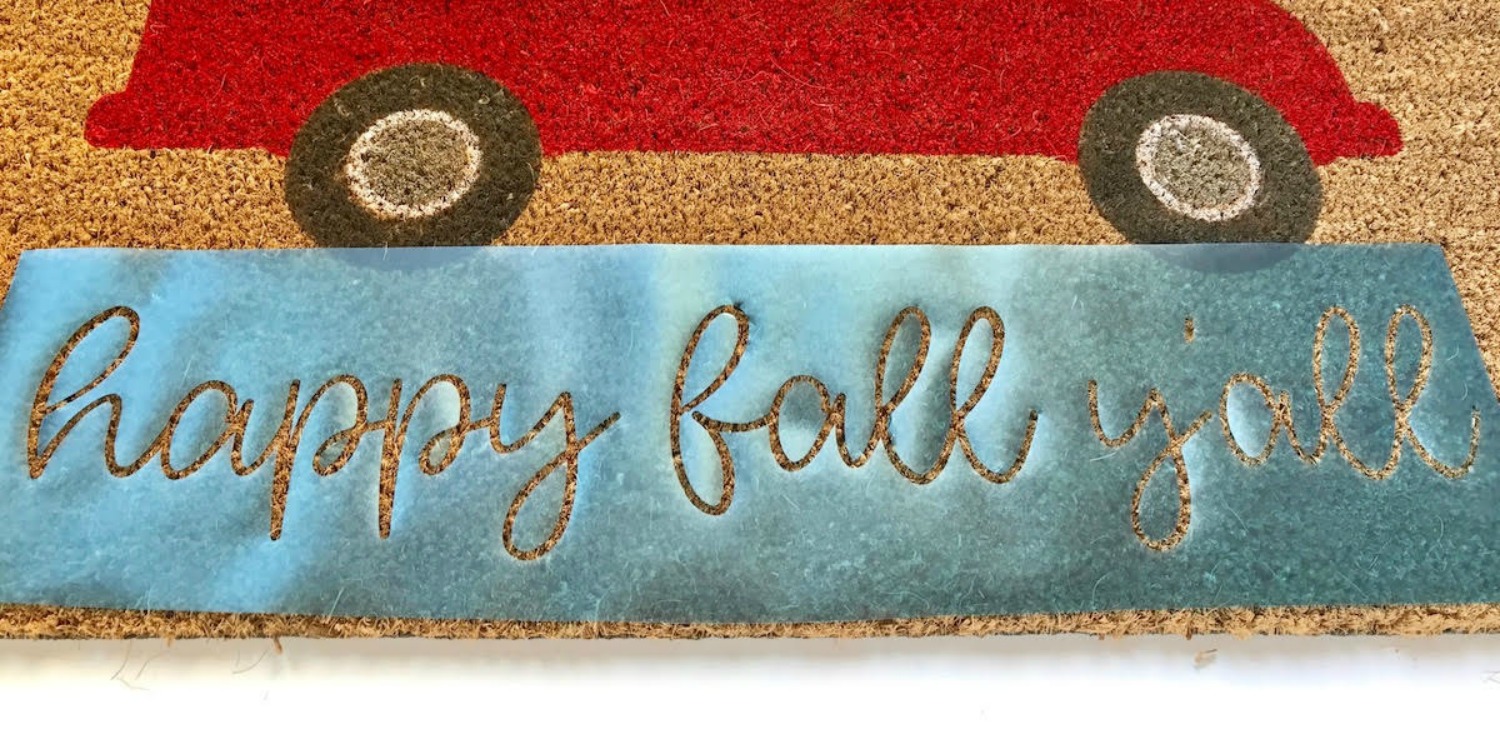
Paint Wording and Let Dry
Follow the painting steps above to add the black wording to your mat and allow it to dry completely before use. I recommend using an outdoor acrylic paint, which can be found at most craft stores.
While it may be to early to start decorating for fall, it's never to early to start preparing! I won't be putting this cute mat out until October but it's nice to know that when cooler weather finally rolls around, I'll be ready.
Head over to my blog or visit me on Instagram to see my other DIY'd doormats.
Happy crafting!
Kayla
Recent Posts
-
NEW Holographic Eclipse Heat Transfer Vinyl
April 15th, 2024 3 Ways to Use the New Holographic Eclipse Heat Transfer Vinyl from Siser …Apr 29th 2024 -
Hop into Spring with Cute Easter Vinyl Crafts
Do you love our Vinyl? Sign up for Vinyl Club today to get FREE vinyl and save big! …Mar 28th 2024 -

Fixing Wrinkles and Bubbles in Vinyl
How do you get air bubbles out of vinyl? There are a few different ways to ensure a flawless …Mar 26th 2024