")
Silhouette: Svg Files (How To Import And Use Them)
One of my favorite things about my Silhouette Cameo / SD is the ability to use my true type fonts, the ability to customize and create my own designs, and the ability to so easily use designs created by others.
I love that I am not limited with my creations!
Silhouette provides their own resource for downloading individual designs that I have found to be fairly extensive and inexpensive and I can usually either create my own design or find one of their's to purchase.
There are a few cases however when I neither want to create my own design (because it was too complicated) nor could I find what I needed from the Silhouette store.
So what's a girl (or guy) to do?? Search the internet or course!
Did you know that you can download and use SVG files in your Designer Edition upgrade of your Silhouette software!? How amazing is that!! (Go here to purchase your Designer Edition software).
And did you also know that there are a plethora of great, FREE SVG file resources out there?!? Seriously.
If you do just a bit of searching, you can come up with a few reliable, stylish, fabulous, free resources out there for your SVG files.
But. What do you do after you found your SVG file? It's pretty simple really, but unless you've done it before, you might feel lost. So I'm going to walk you through the process, step by step.
First off, you will want to download your design from the website and save the file in a spot that you will be able to find it again. :) (Be sure that you only download files from trusted resources and I always advise to keep your virus software up to date too.)
Depending on the source, you will probably need to UnZip / Extract the file.
After you've made the file accessible, go ahead and open up your Silhouette Software.

Click on your drop-down "File" menu. Select "Import to My Library."
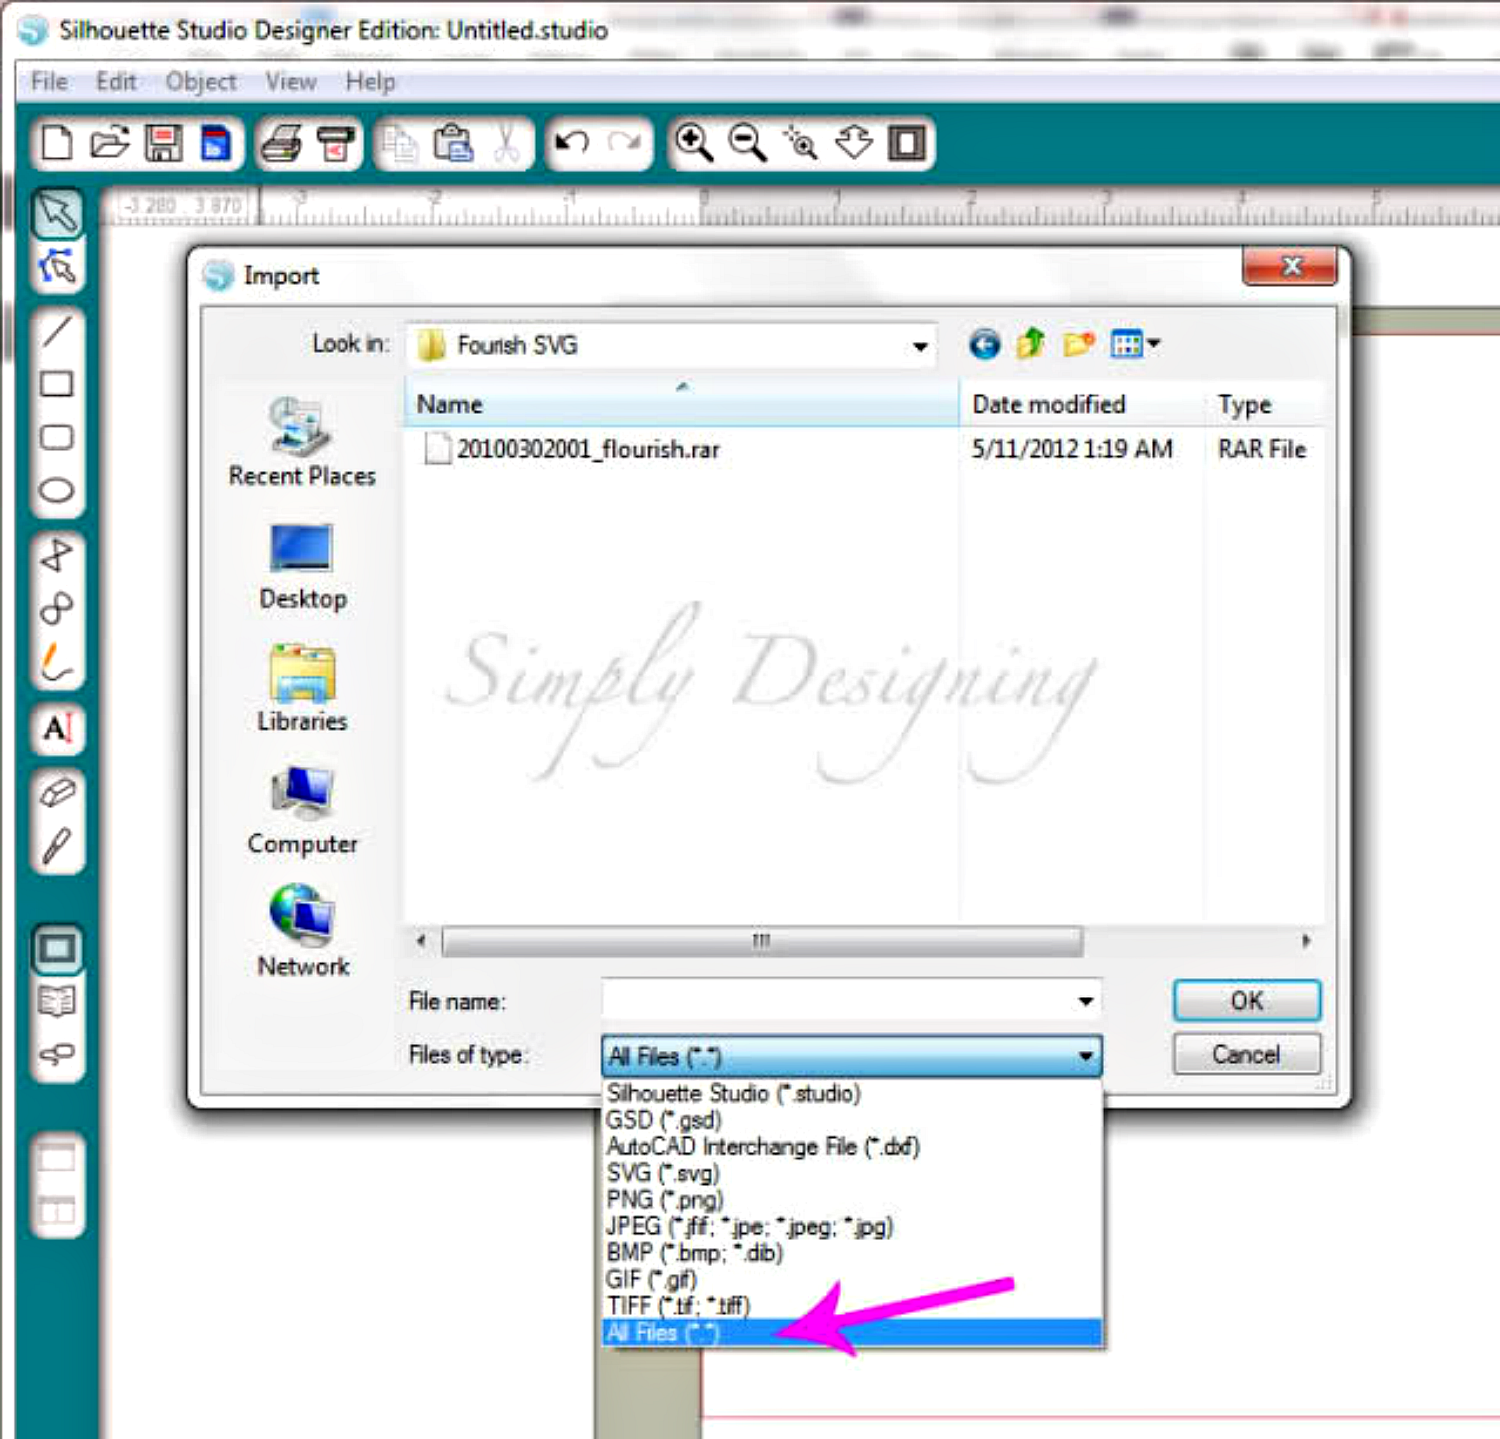
Next, you will want to select your file from the pop-up window. You might need to change your File Type to "All Files" in order for your file to show up. Once you see it, select it and click "ok."

A new window will pop open. Go ahead and type in an appropriate Name and select Ok.

When you want to use the SVG file(s) you imported, click the "My Library" left side-bar button. Then select "My Own Designs." Double click the design and it will automatically appear on your cutting mat.
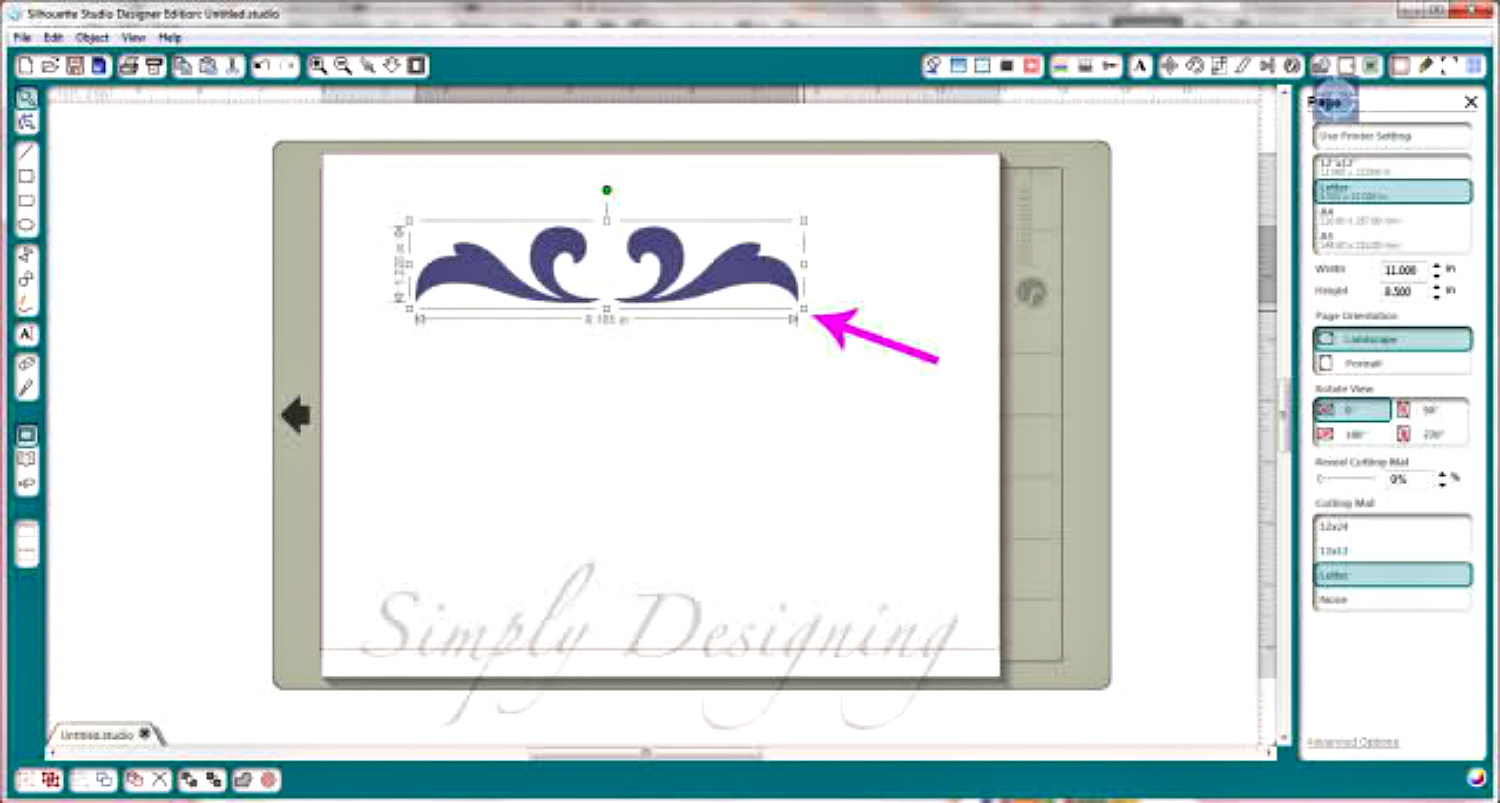
You can size your image as large or as small as you want it.
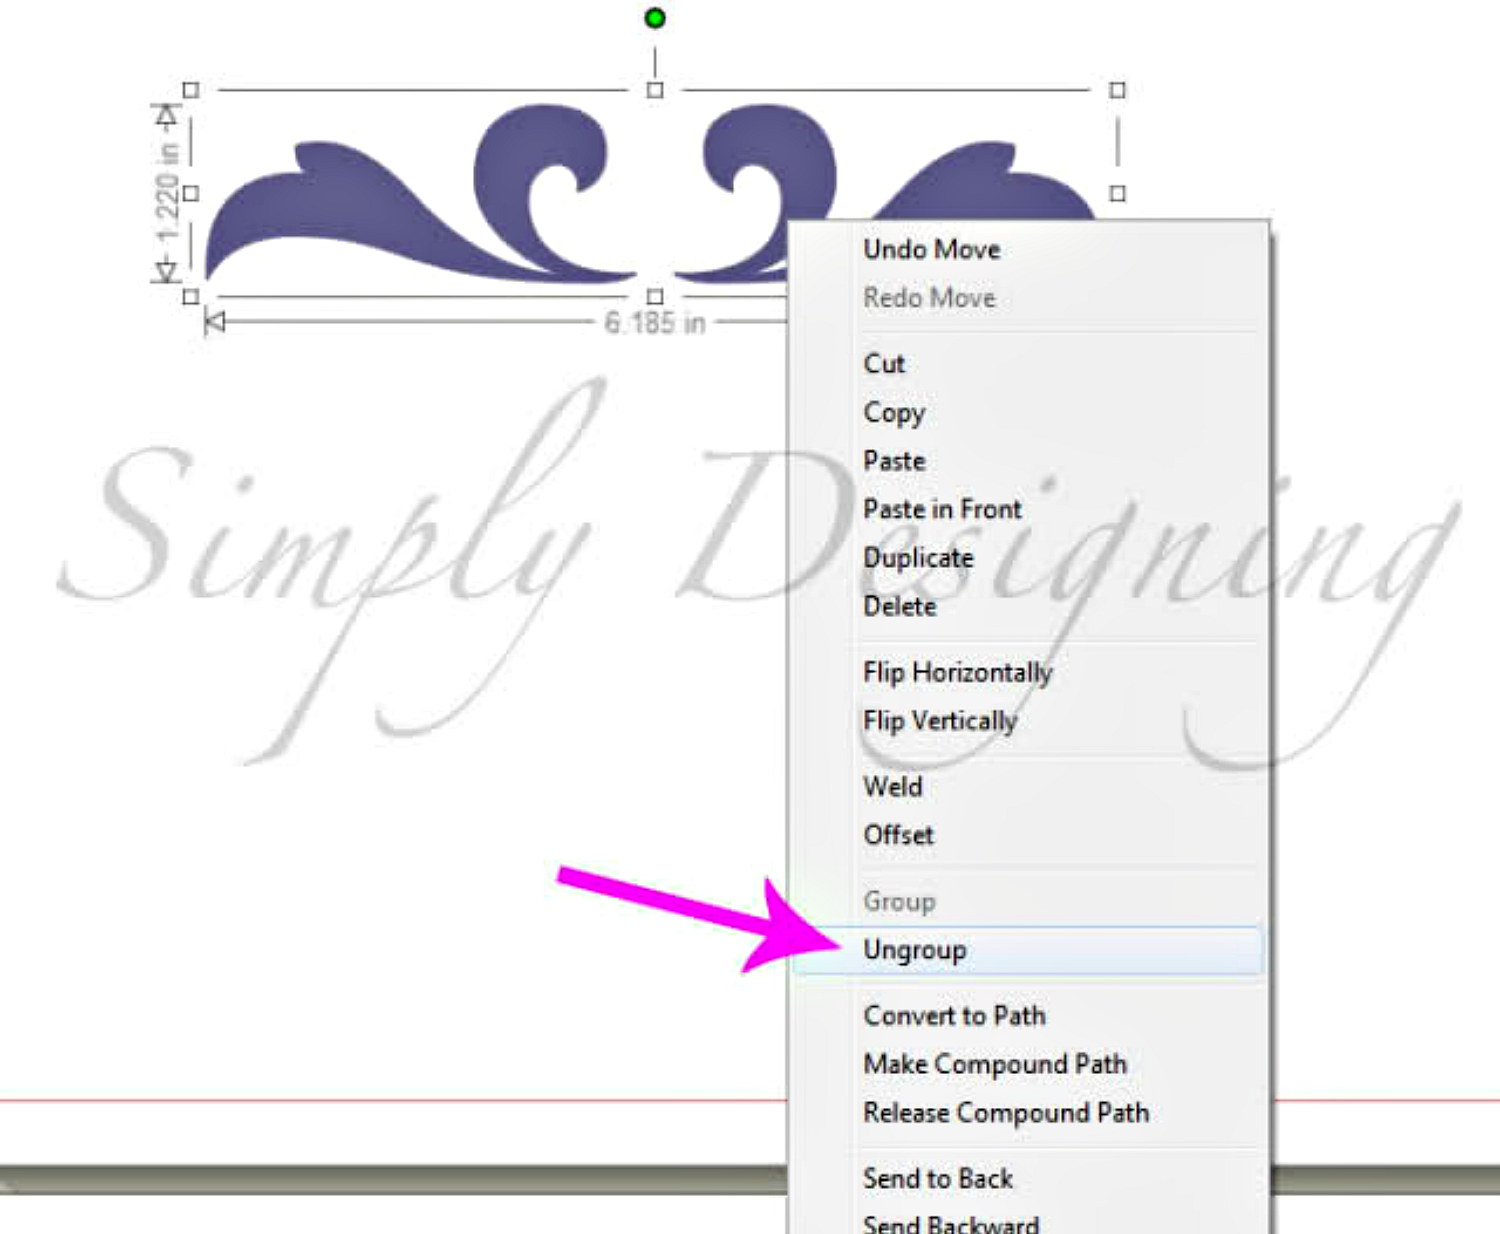
If you need to modify it further, right-click the design and select "Ungroup."
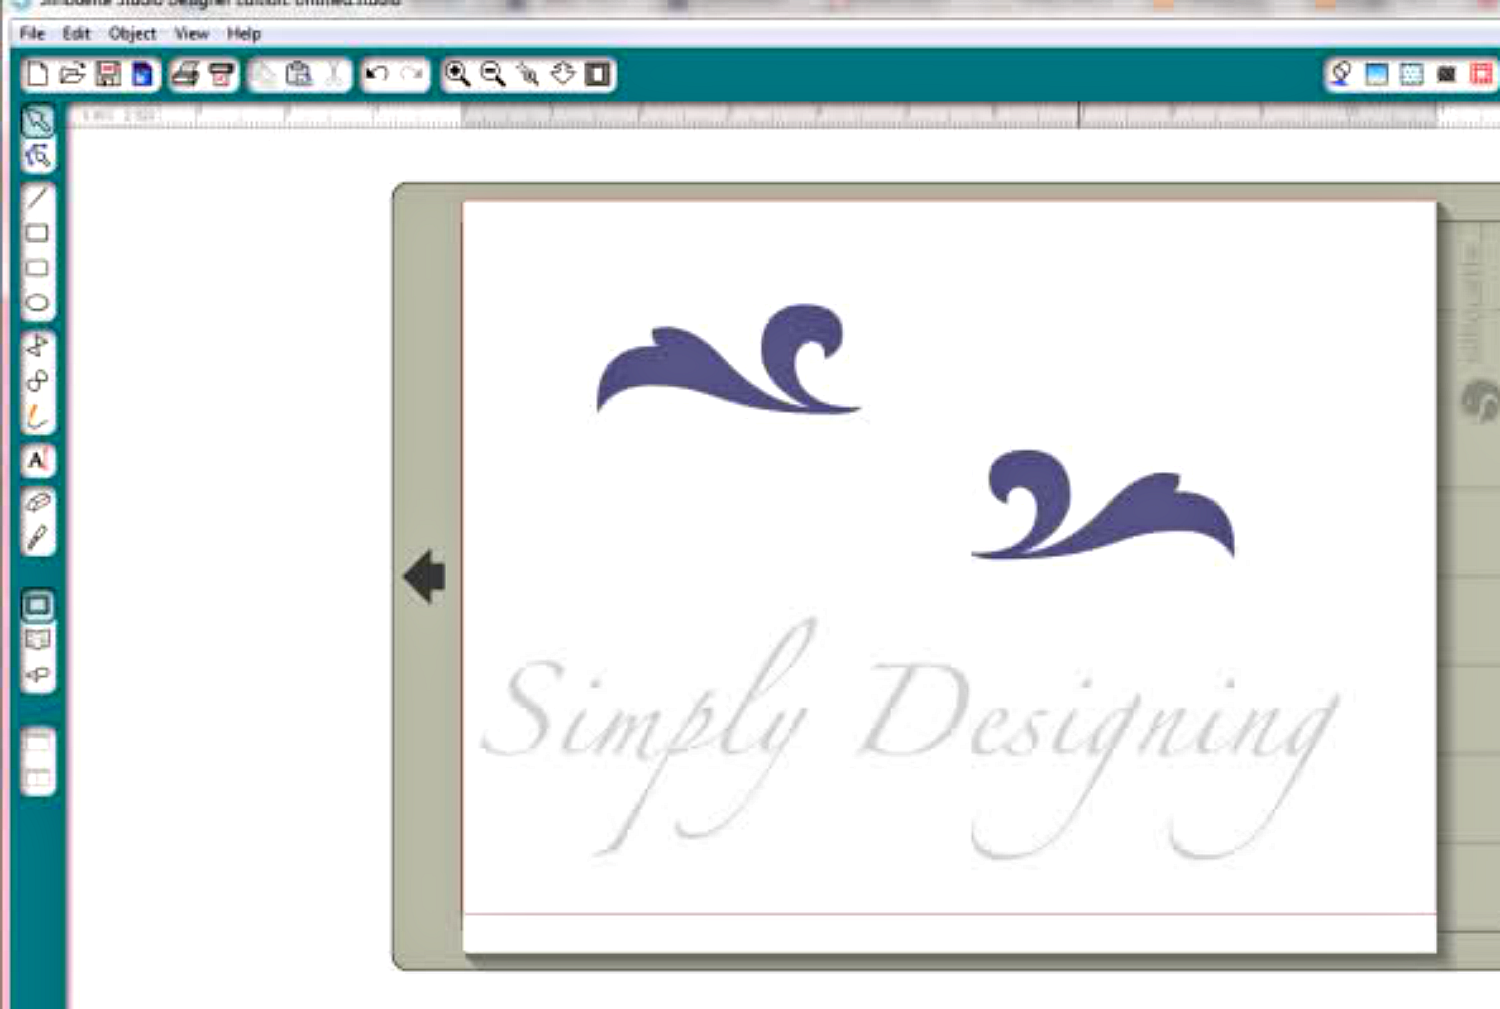
Depending on the design of the file, you could be able to move part of your design or modify further.
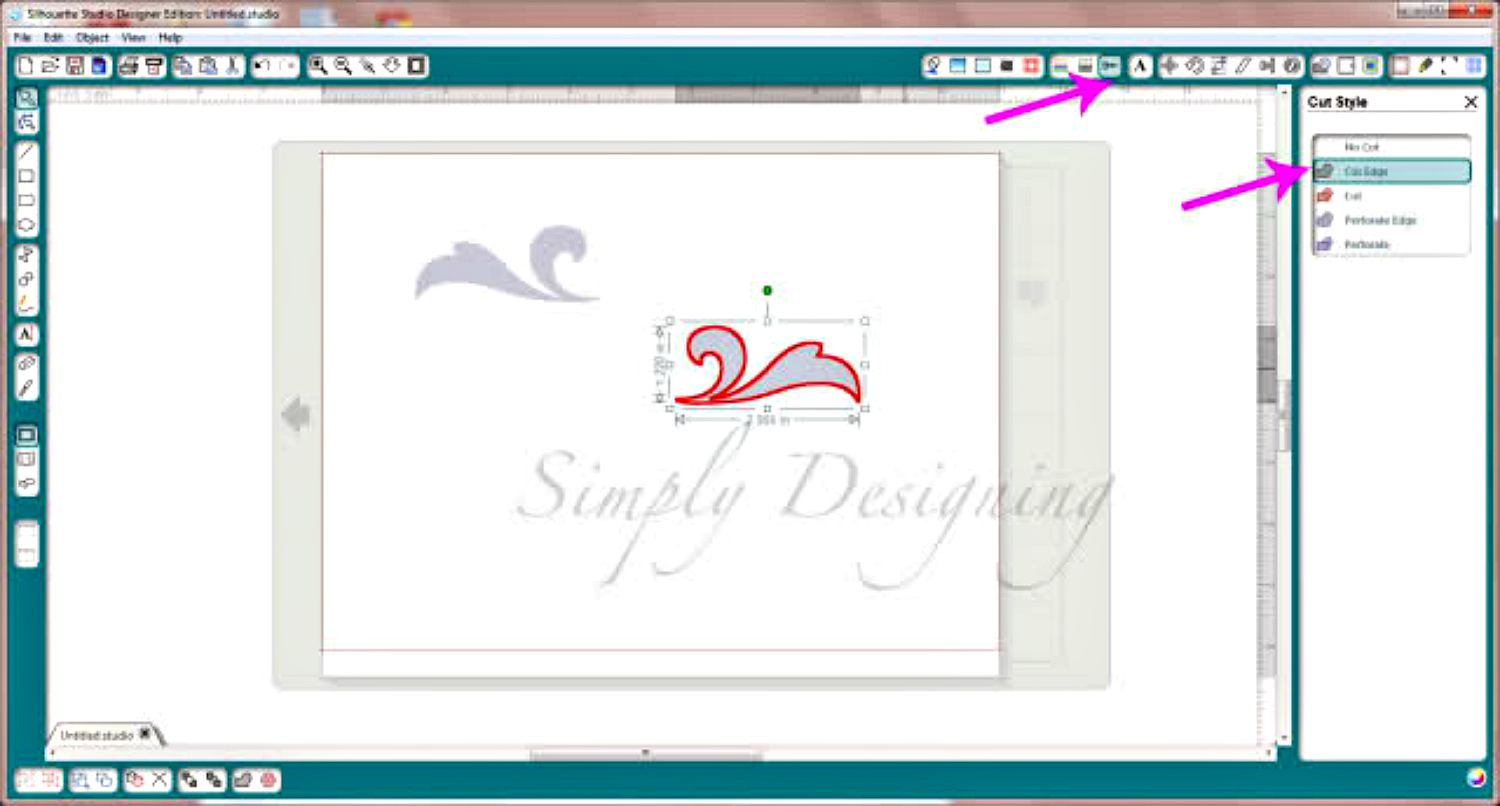
One last tip...be sure to check that the file is set as a cut file. Select the "Cut Style" button on the top bar, select your image and be sure that "Cut Edge" is selected.
Now your image is ready to cut!! With fabulous Expressions Vinyl vinyl of course :)
(You can also Print and Cut depending on the image as well. Go here to find out more about how to Print and Cut.)
(Go here to purchase your Designer Edition software if you don't have it already!)
The more I use my Silhouette Cameo, the more I love love LOVE it!

Recent Posts
-
NEW Holographic Eclipse Heat Transfer Vinyl
April 15th, 2024 3 Ways to Use the New Holographic Eclipse Heat Transfer Vinyl from Siser …Apr 29th 2024 -
Hop into Spring with Cute Easter Vinyl Crafts
Do you love our Vinyl? Sign up for Vinyl Club today to get FREE vinyl and save big! …Mar 28th 2024 -

Fixing Wrinkles and Bubbles in Vinyl
How do you get air bubbles out of vinyl? There are a few different ways to ensure a flawless …Mar 26th 2024