
Make your Shirt "Flash" this New Years
Hey its Starla with ExpressionsVinyl.com and one of my favorite vinyls that ExpressionsVinyl.com carries is the Siser EasyReflecitive, you can add it to running clothes, bike clothes anything you really want to stand out. And let me tell ya this stuff reflects so well.
In todays blog post I am going to show you how to use it with our famous Knock-Out technique that is used most often with HTV that is not recommended for layering or if you simply do not what bulky layers.
But for this fun project, we are going to hide our image within other vinyl. Lets get started...
What you will need:
Vinyl:
- Siser EasyReflective Heat Transfer Vinyl
- Siser Easyweed Grey
- Siser Easyweed Gold Foil
- Siser Glitter Silver Confetti
Fonts/Images:
- Font~ Impact (words)
- Font~ H&B Sketch Demo (2018)
- Image Silhouette~ Design ID #143213 Firework Blast
- Image Silhouette~ Design ID #53298 Wine Glasses
- Image Silhouette~ Design ID #173095 Eye Glasses
- Image Silhouette~ Design ID #53935 Fany Swirl
- Image Silhouette~ Design ID #5321 Kiss:Lips
- Image Silhouette~ Design ID #15755
Tools:
- Heatpress, Easy Press or and Iron
- Weeding Tool
- Shirt or amy materialk you wish to use on this project
I had a hard time deciding what to do with this cool trick and New Years so I thought it would be fun to do different lanugages saying "Happy New Years". I used Spanish, French, German and English of course, since it is a worldwide celebration. I also thought using the icon in New Years Song "Auld Lang Syne" would be fun to throw in there, did you know it meant ( Old Long Since) makes sence and it has a Scot origin so I thought that was fun.
Here is the run down:
Spanish~ Feliz ano Nuevo
French~ Bonne Annee
German~ Frohes Neues Jahr
English~ Happy New Years
So using the Font Impact, type them all up and size them all to the same length, the height difference will not matter because that is what makes it fun.
Make sure to start off with your words centered and make them skootch in close so the image will be easier to work with. I moved mine from 100 to 92.0
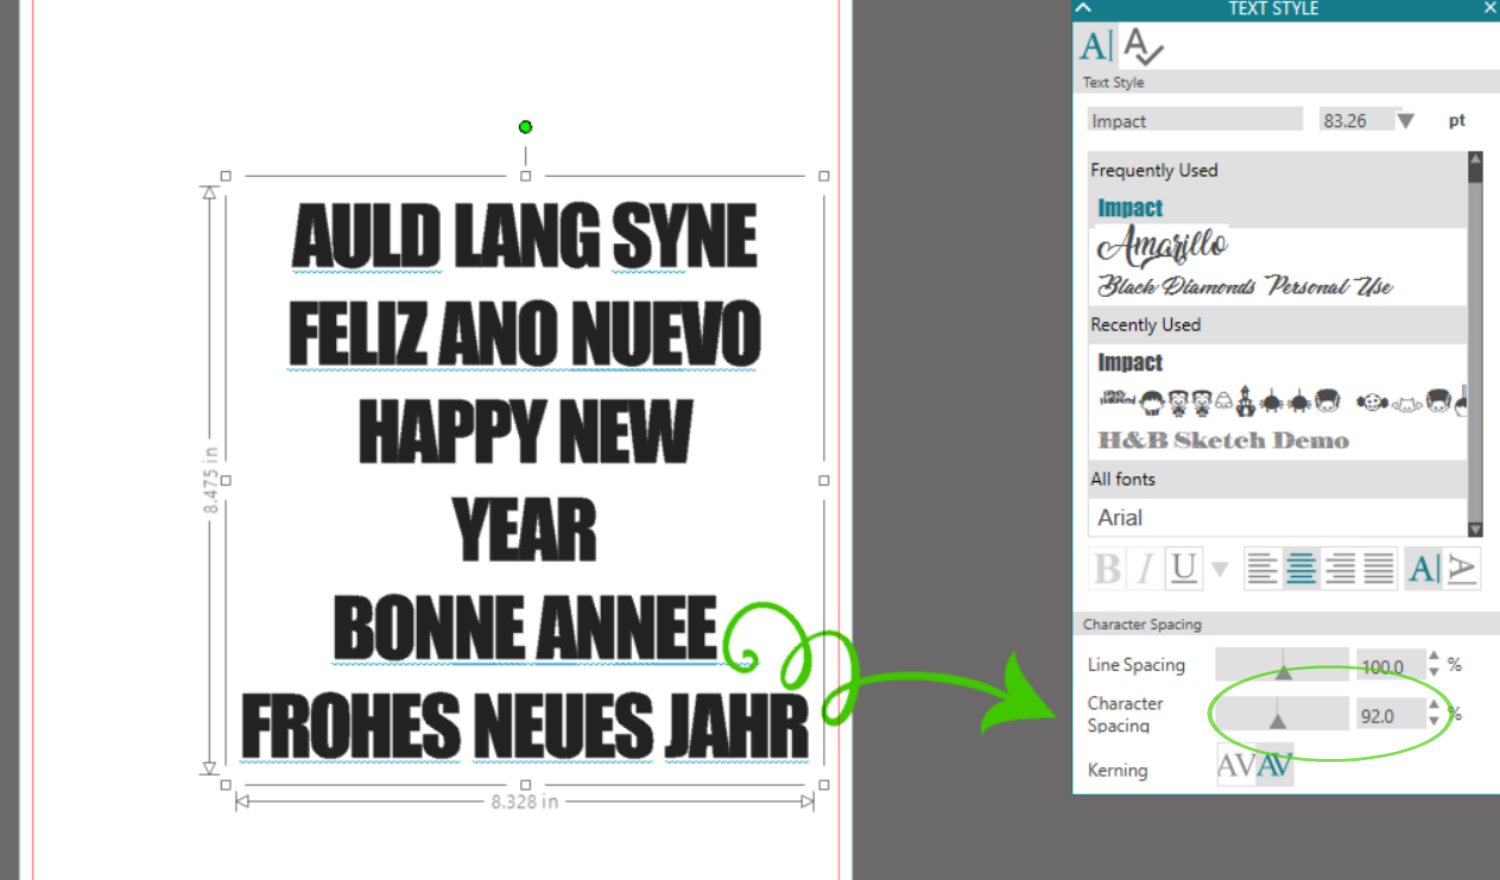
Once you have them how you like, ungroup.
Also dont forget those special marks (unsure of what they are called lol) (`~) for the French and Spanish
After you have regrouped the phrases seperatly, use the Transform icon and select the center horizontal to line them all back together and then size the length to same on all, making sure that your scale is locked
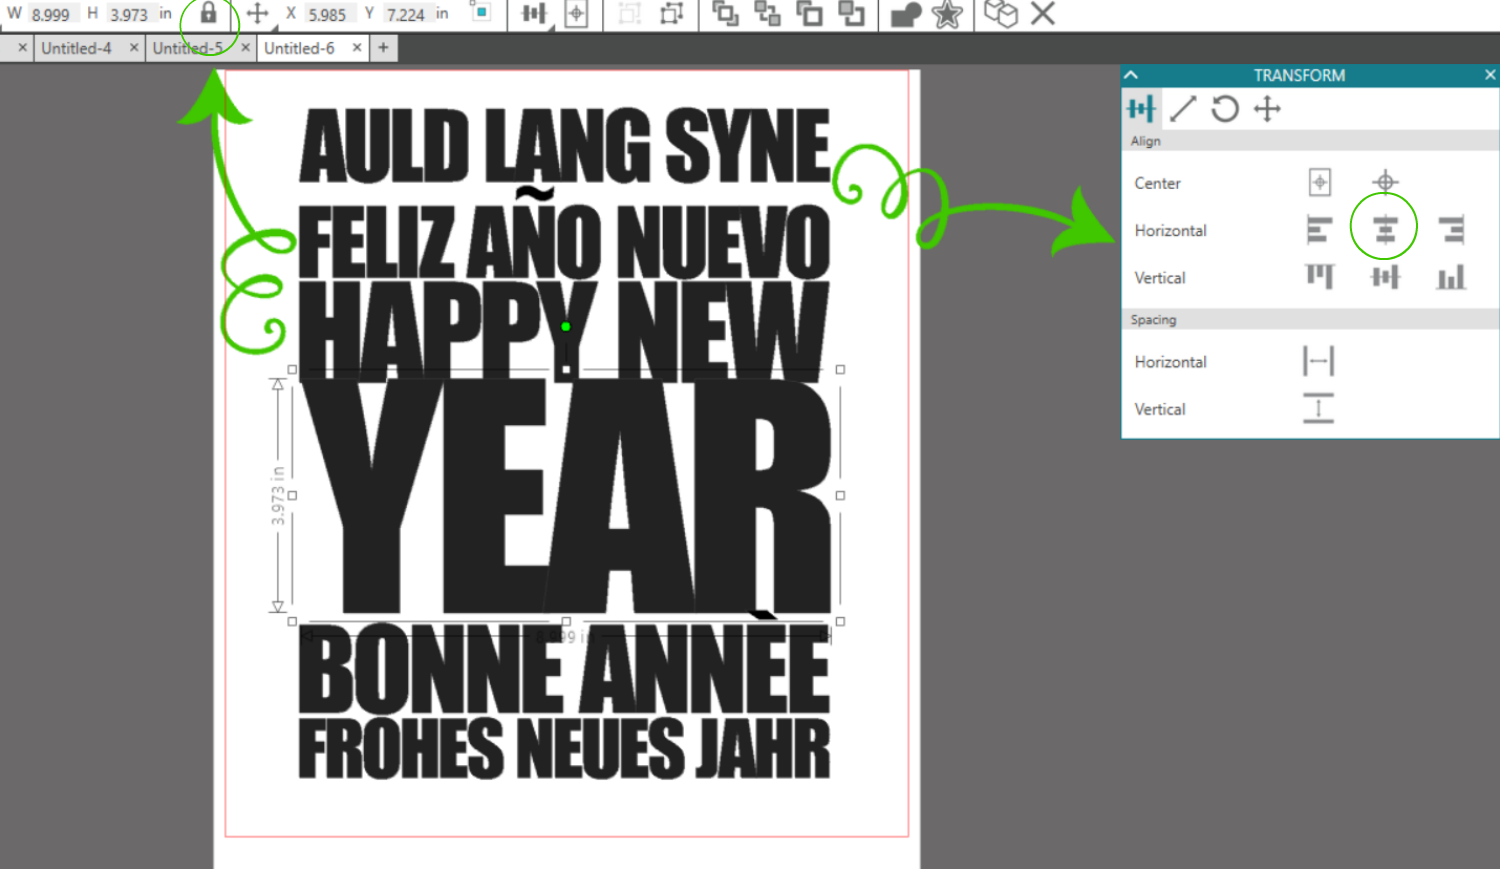
I like to have some of them touch and some not, but that is totally your preference.
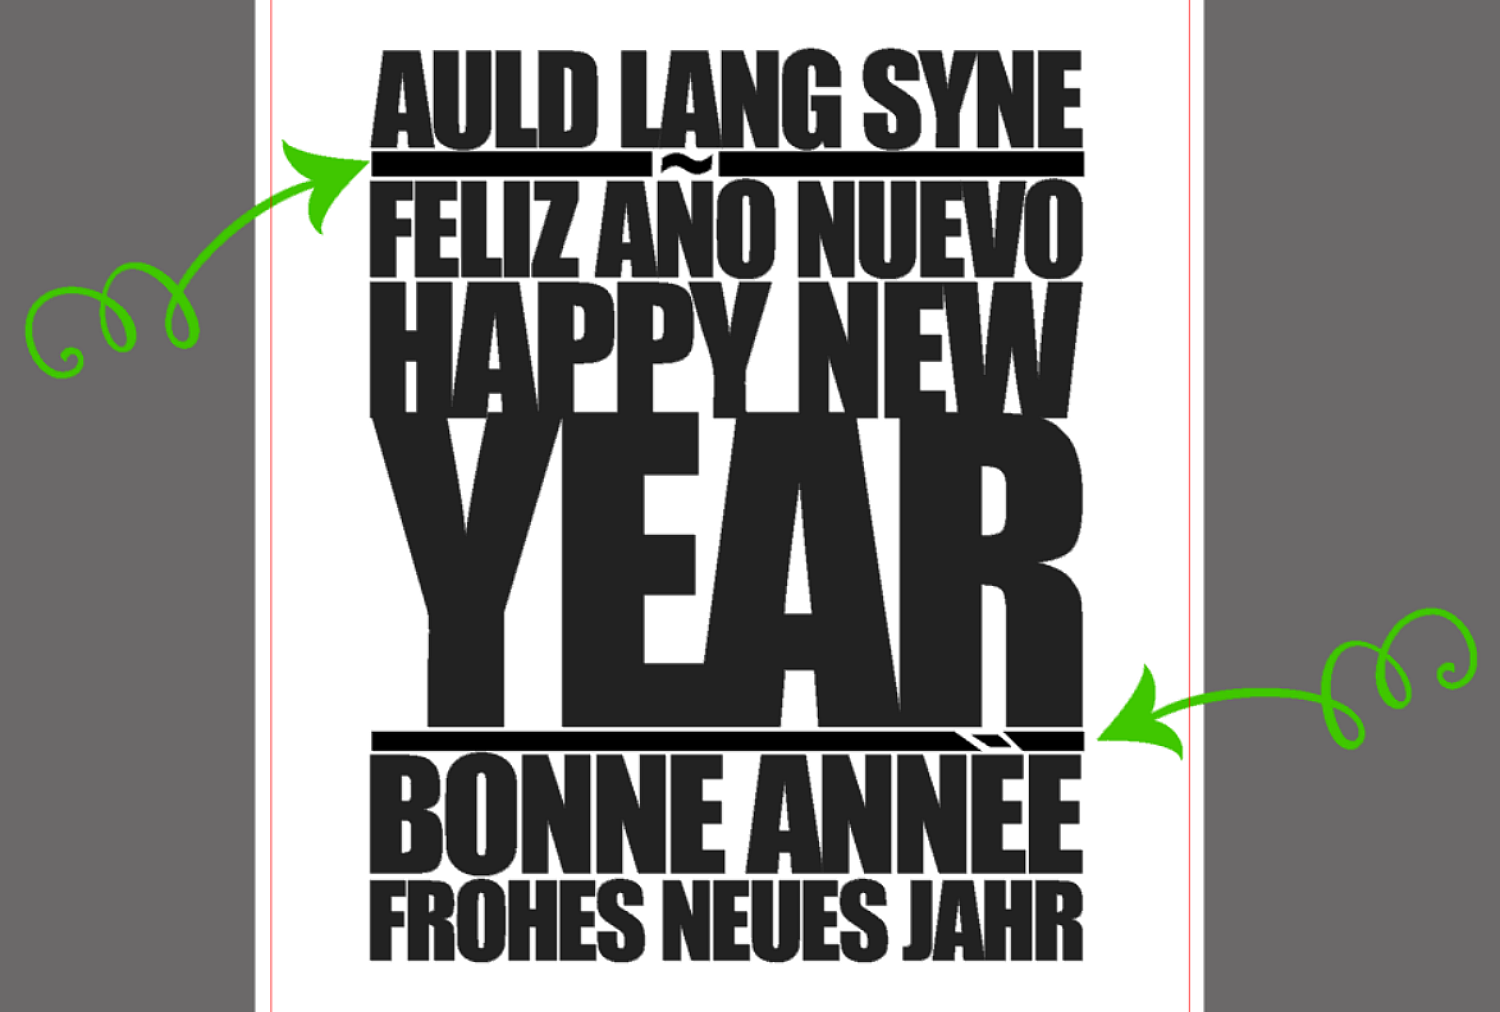
I also do not like gaps for this knock out so add some fillers if needs be. I just created some skinny boxes then sliced around my accent marks. If you want to make angles before cutting just de-select the auto apply and you can manually adjust it before giving the program the go-ahead.
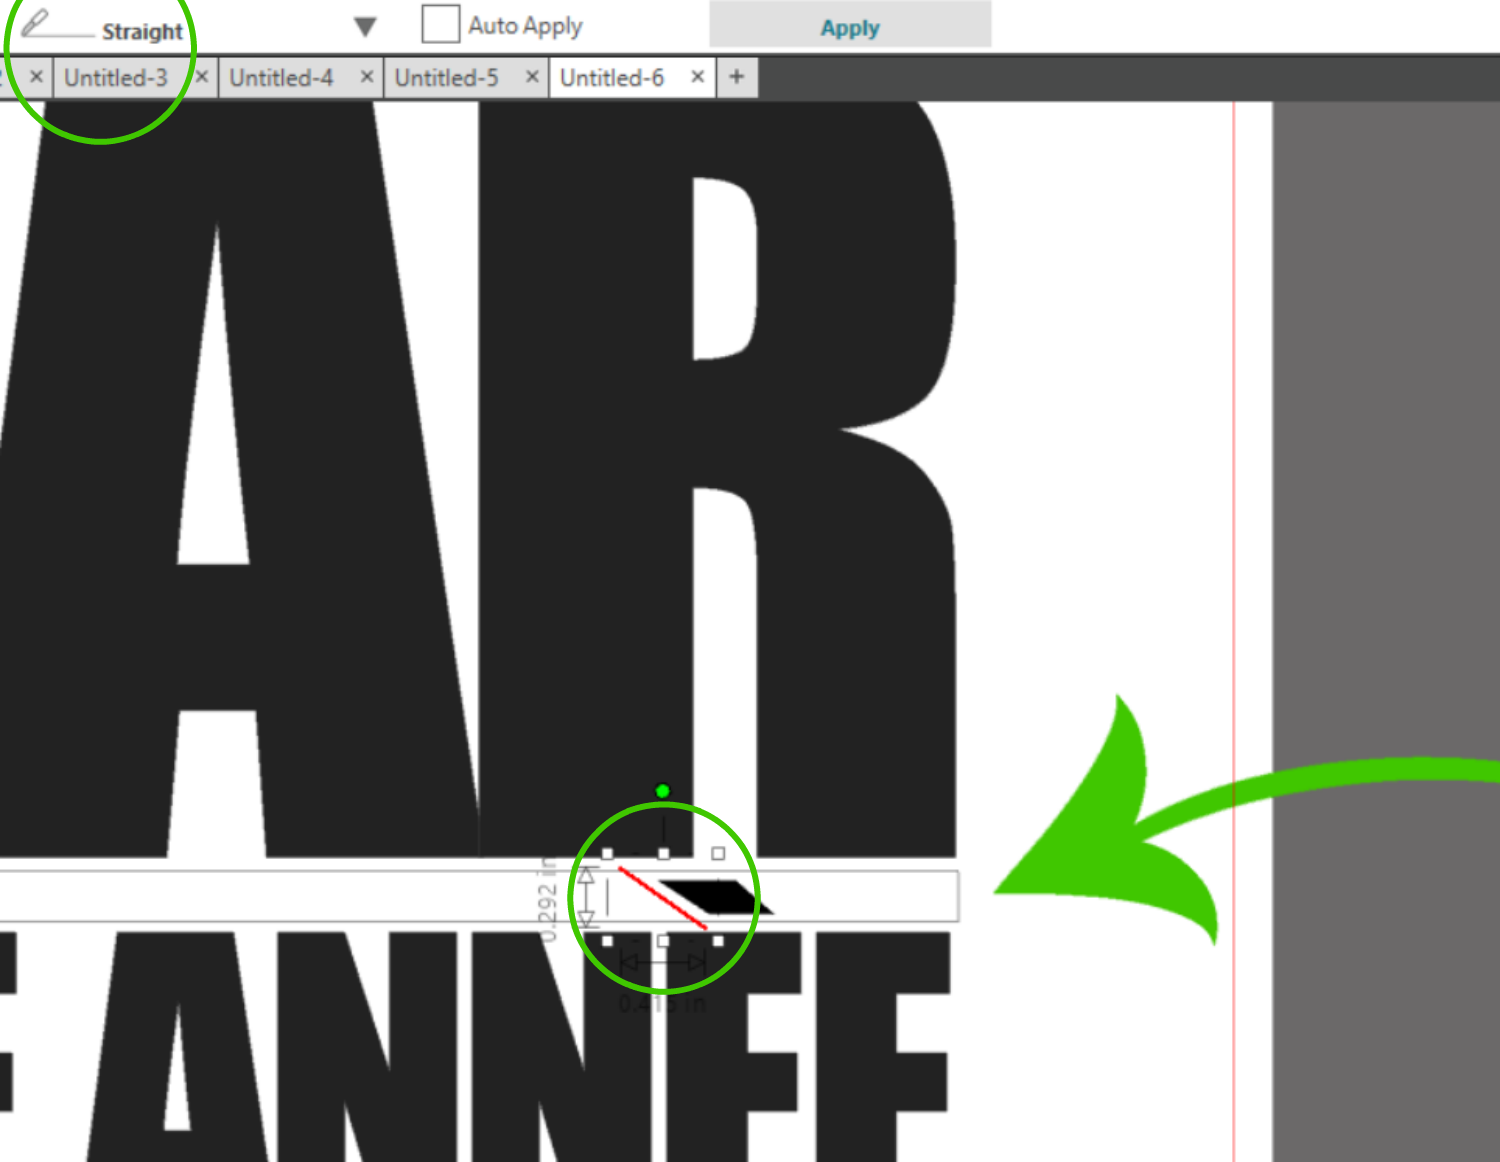
Something like this, give it a little extra look too. I still do not like the gap the Y makes but we will add in some fun later.
Now the fun part, this is where we get to play around with shapes until they work for us.
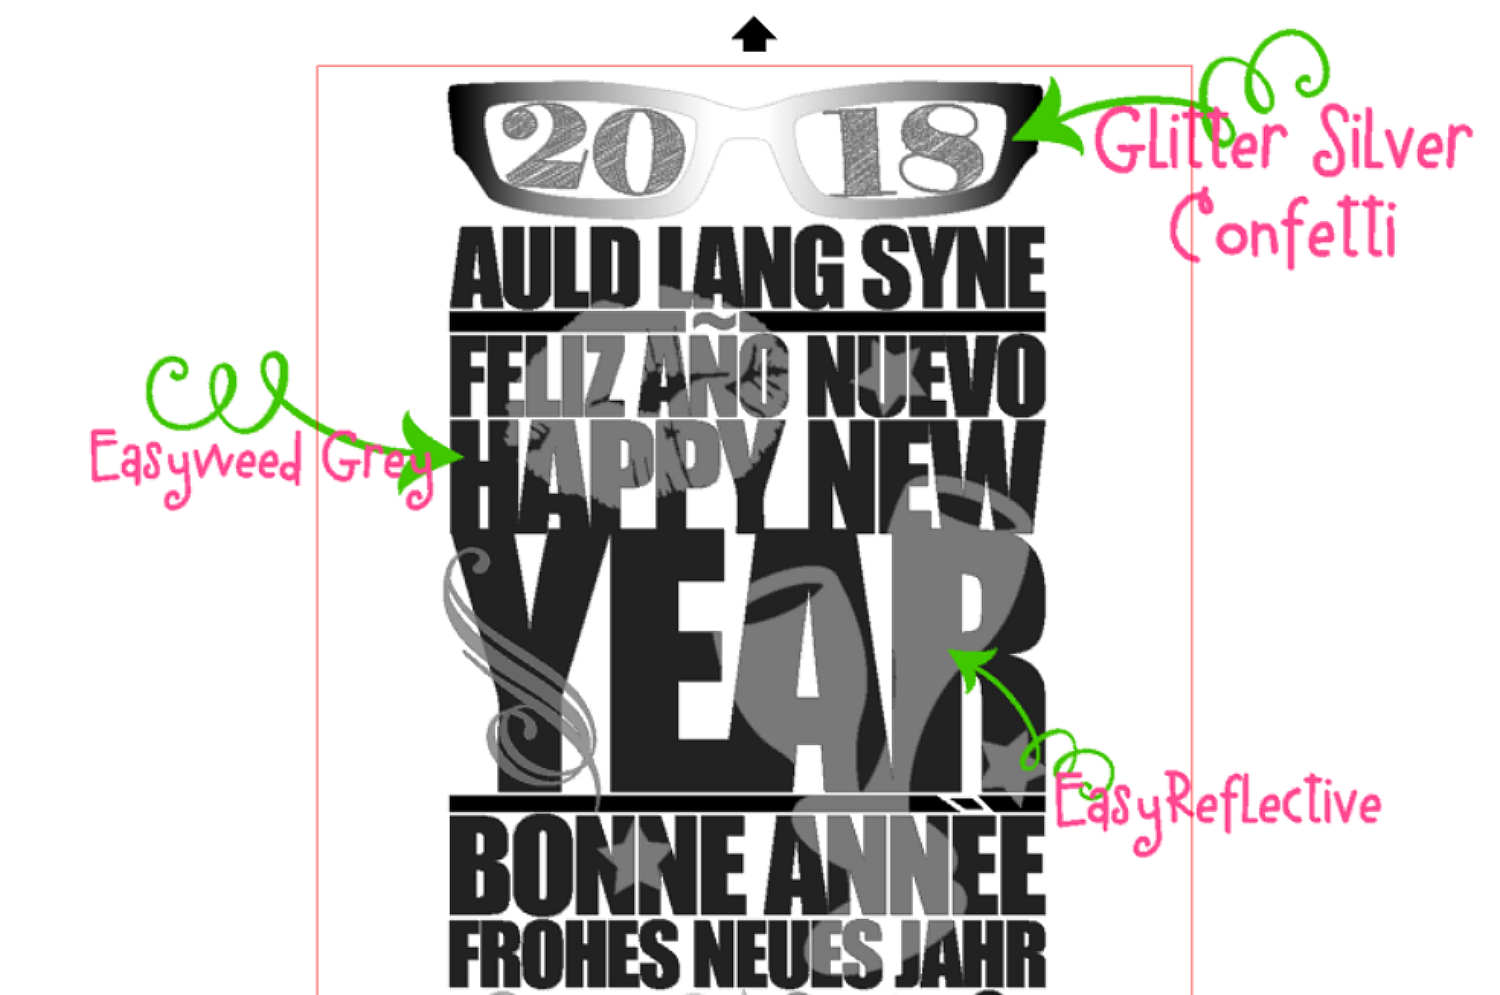
I have added in my glasses, wine glass, swirl (See we added something special there),our 2018 year and some fireworks. The fire works are just for some background fun.
The whole pharse will be cut with our Siser Easyweed Grey, but my Eye glasses we are going to bling up some with some Silver Confetti Glitter Heat Transfer.
What I want to focus on however, is the Knock Out technique we are going going to use with out Lips, our party glasses and swirl.
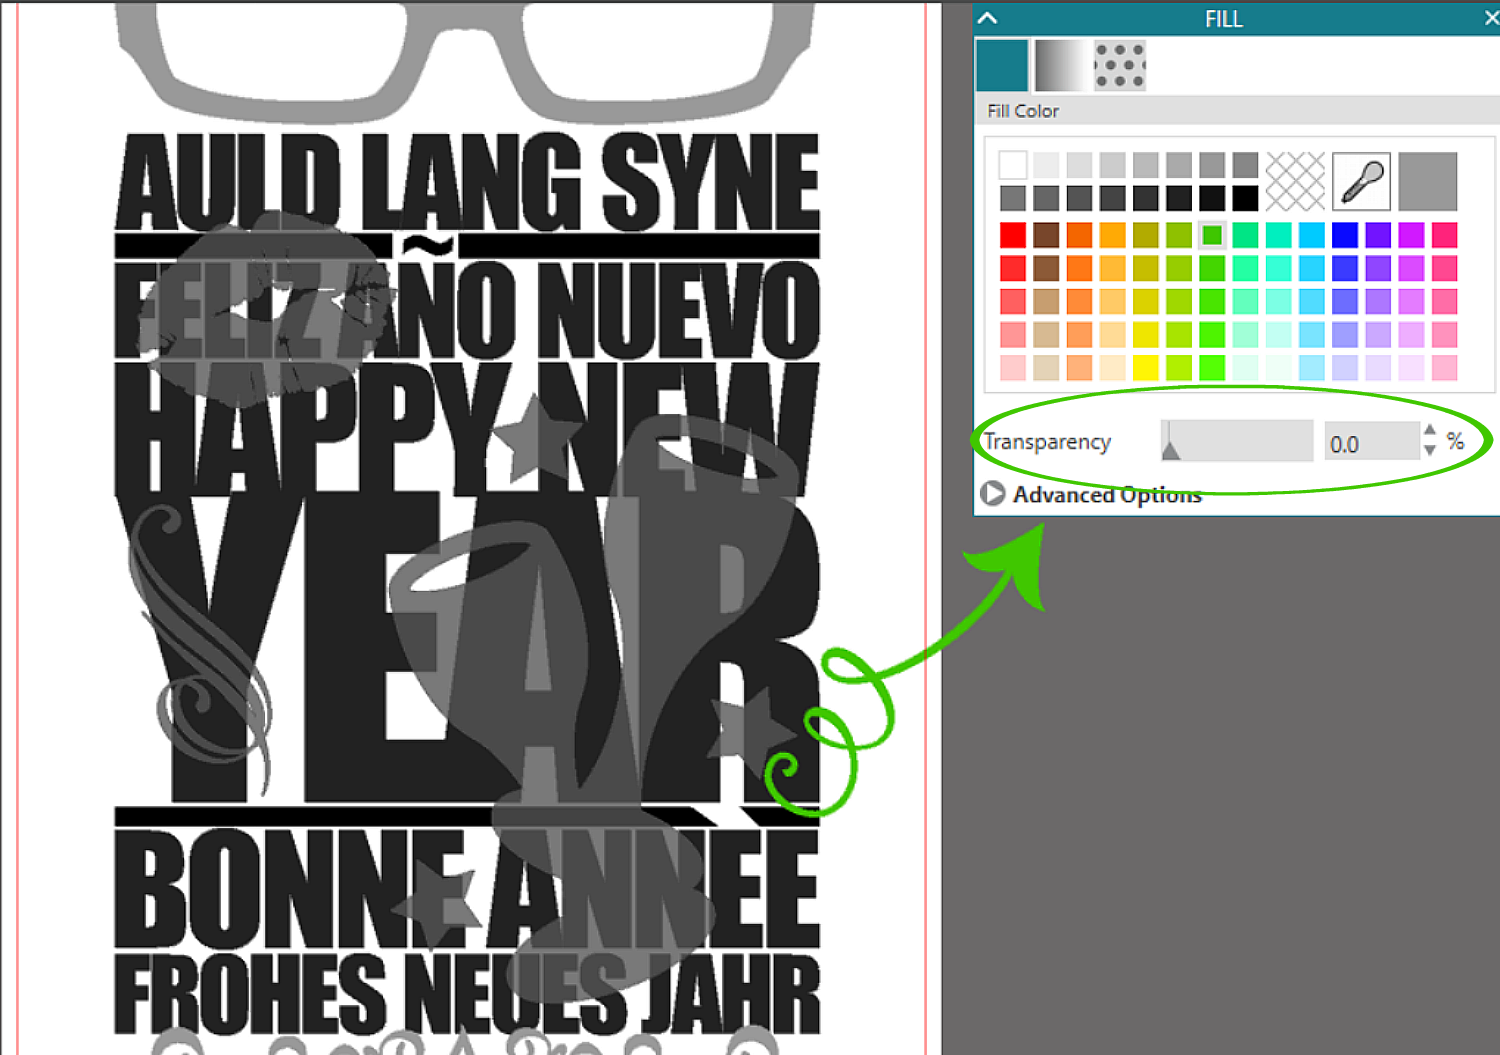
One of the easiest ways to do this technique is to adjust the Transparency, I adjusted mine to about 20.
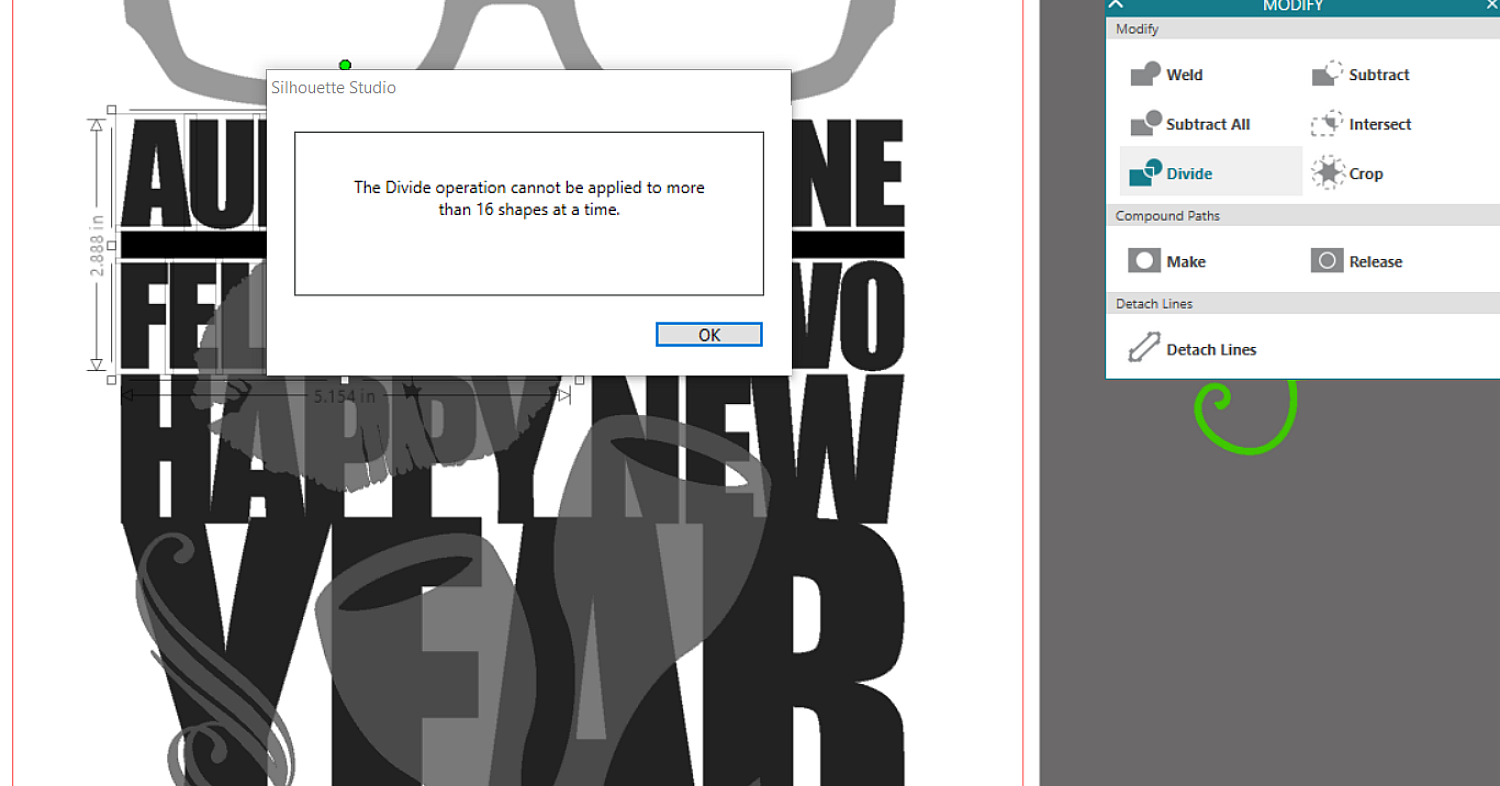
Next, you will need to ungroup all the images. Since this can stall your program if to many images are attempted to be divided at once, this pop up will show if you select anything over 16 shapes.
NOTE: Make sure to make a Duplicate of the whole image(s) before so you have a back up just in case you make a mistake or done like how it turns out.
To aviod this I simply grab the shape and the letters that are touching to grab the least amout at a time. You may have to do this a few times to get every image divided. This will depend upon the project.
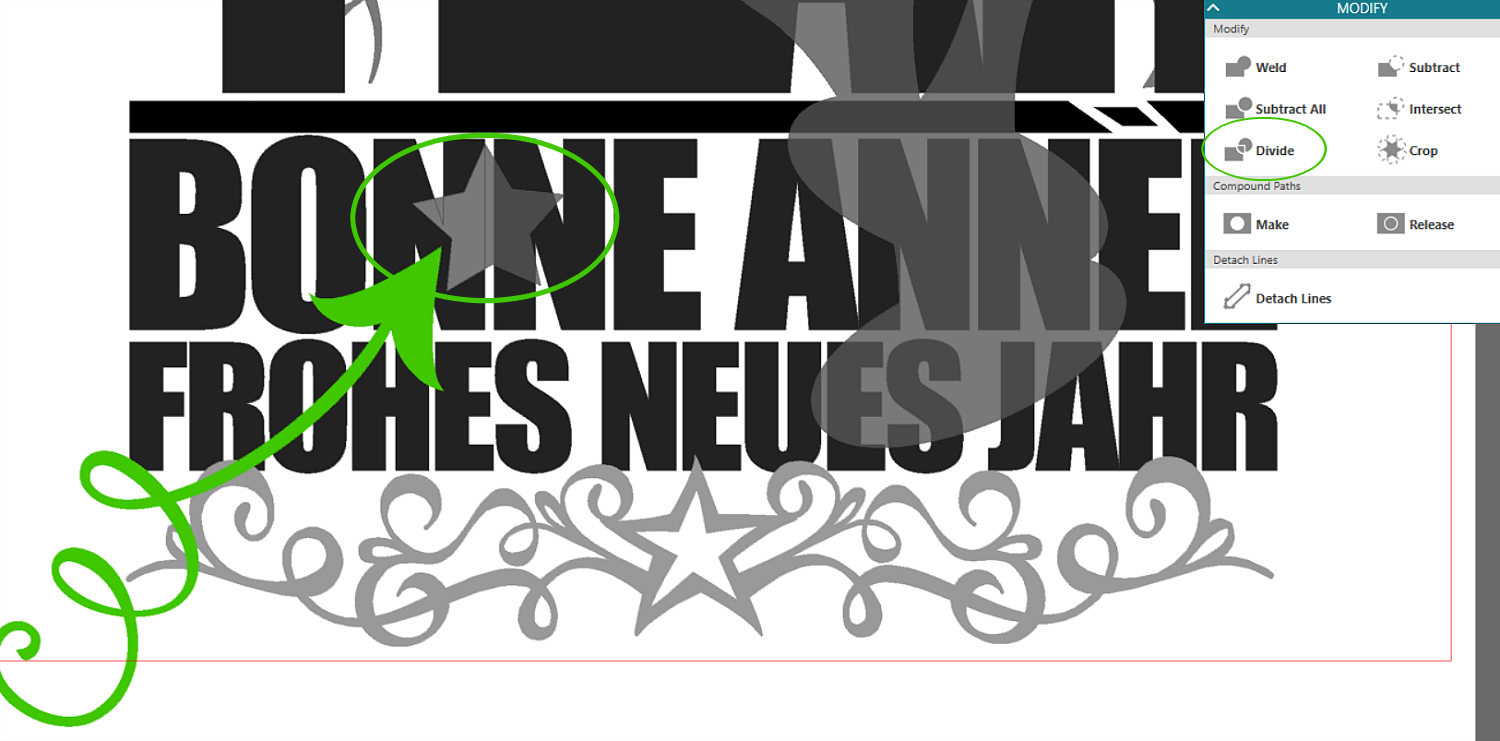
For example, the first N and the half of the star that are a lighter grey are divided while the other N and half of the star are not divided yet. Th program will change the colors some so you can tell.
Your image should look something like this.
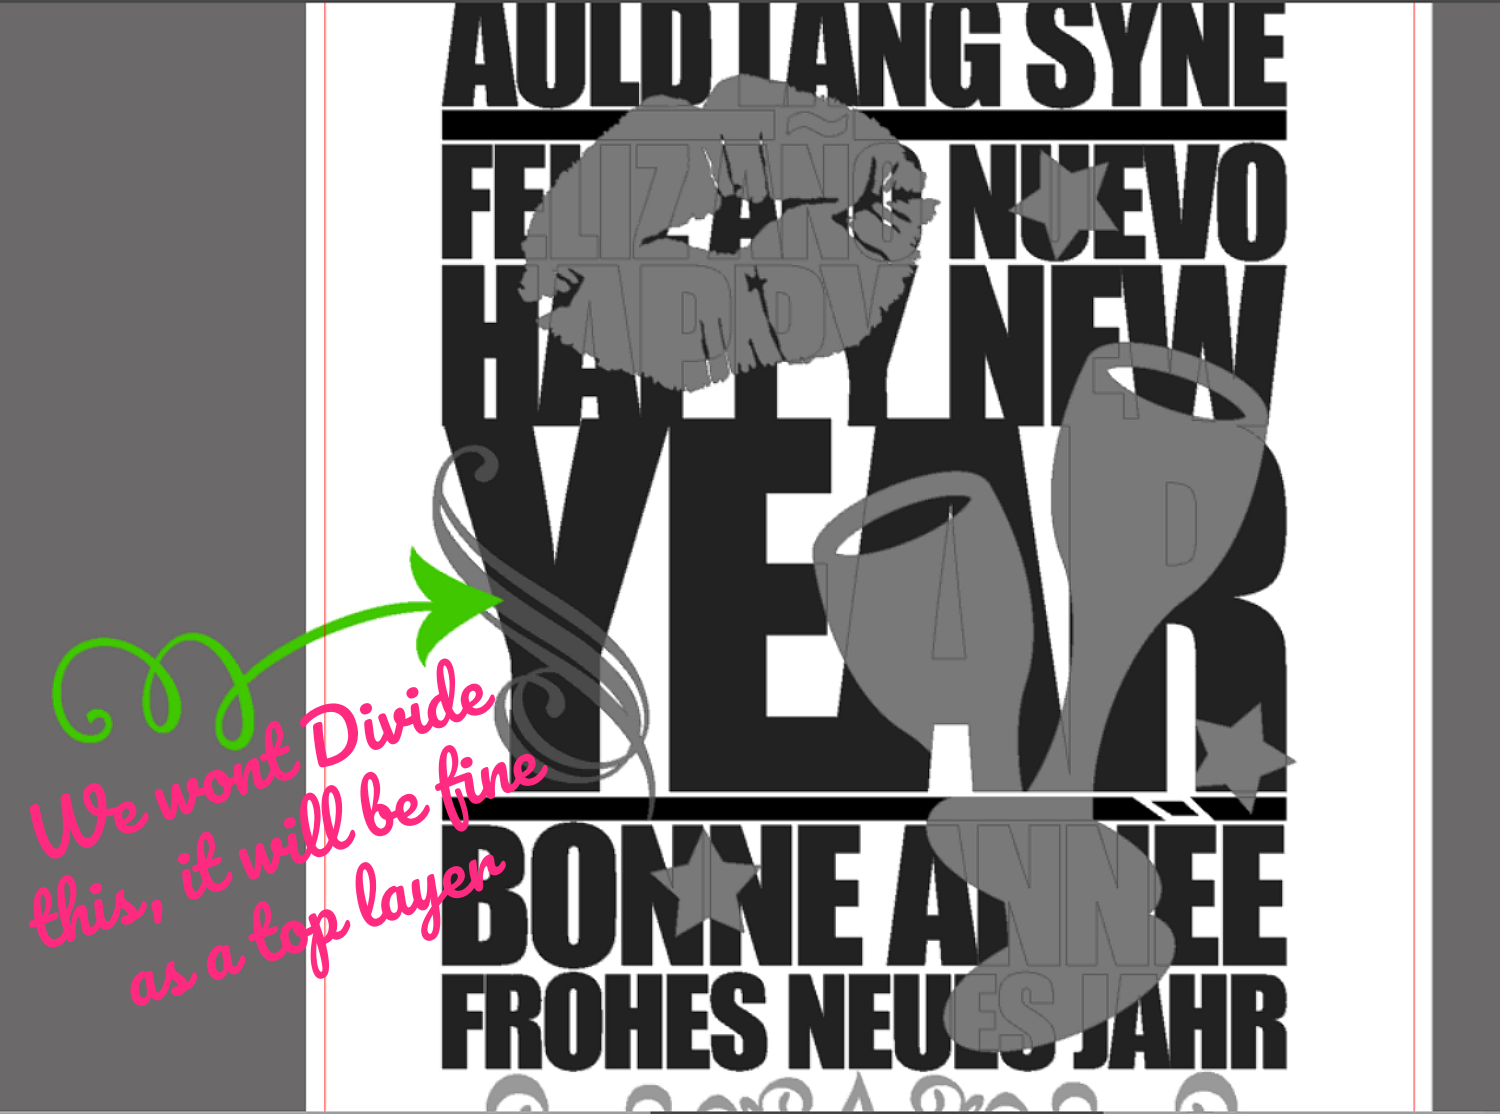
Our little flourish I will leave as a top layer just for fun and so we have the full image.
Next, we want to get rid of any of the light grey colored spots that are NOT on a letter, so all the grey touching white.
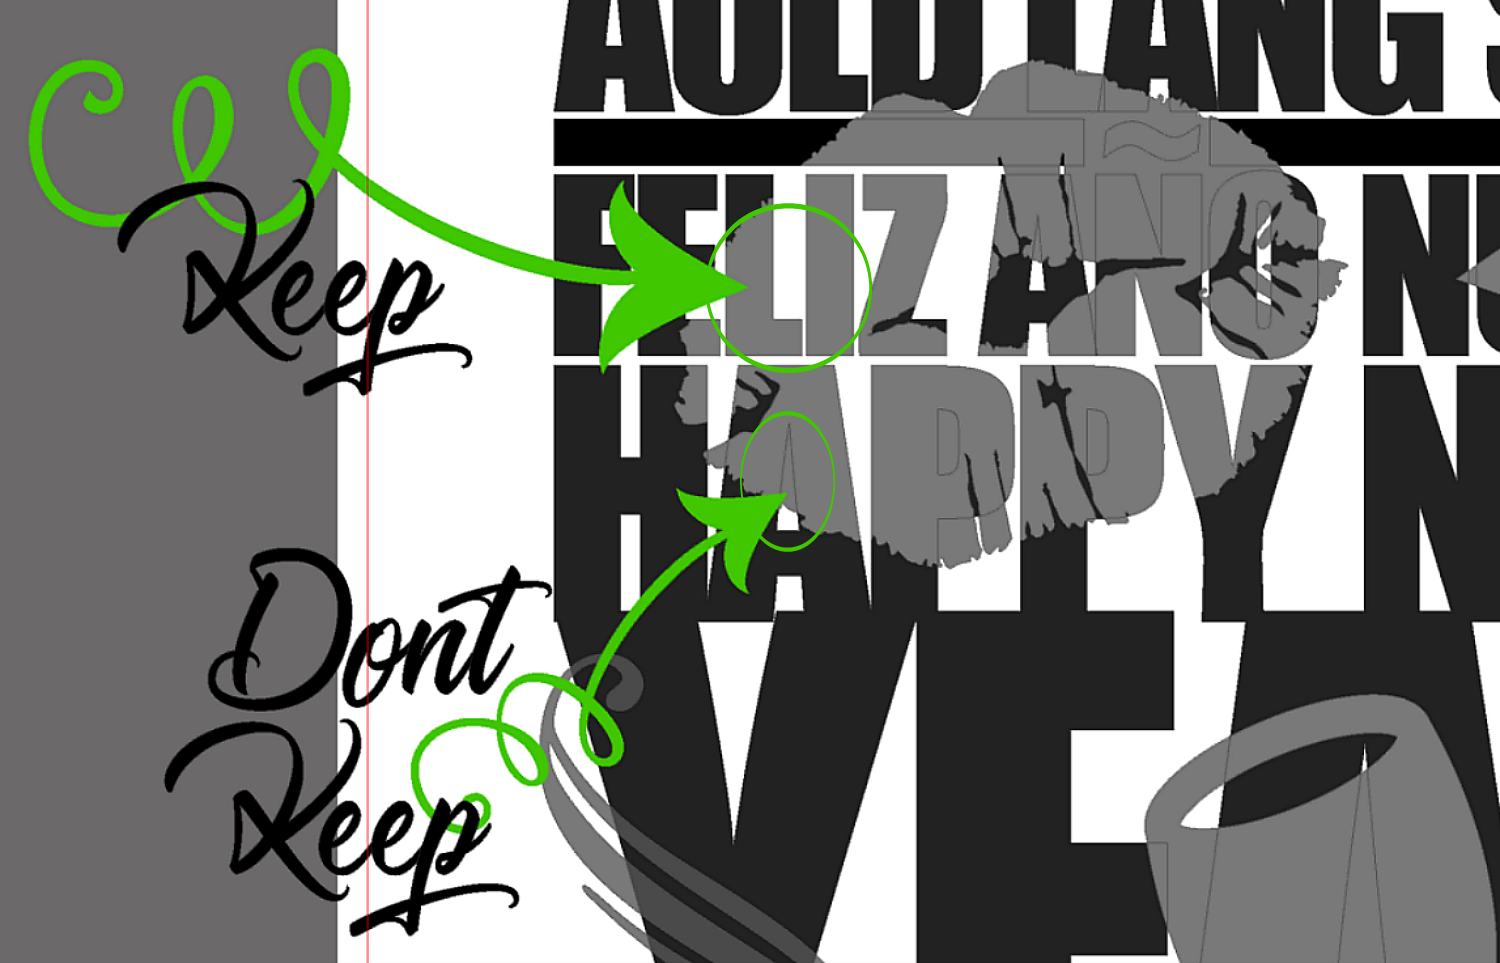
After that you should have some funny looking images that have been chopped up, this is what will show when the vinyl reflects.
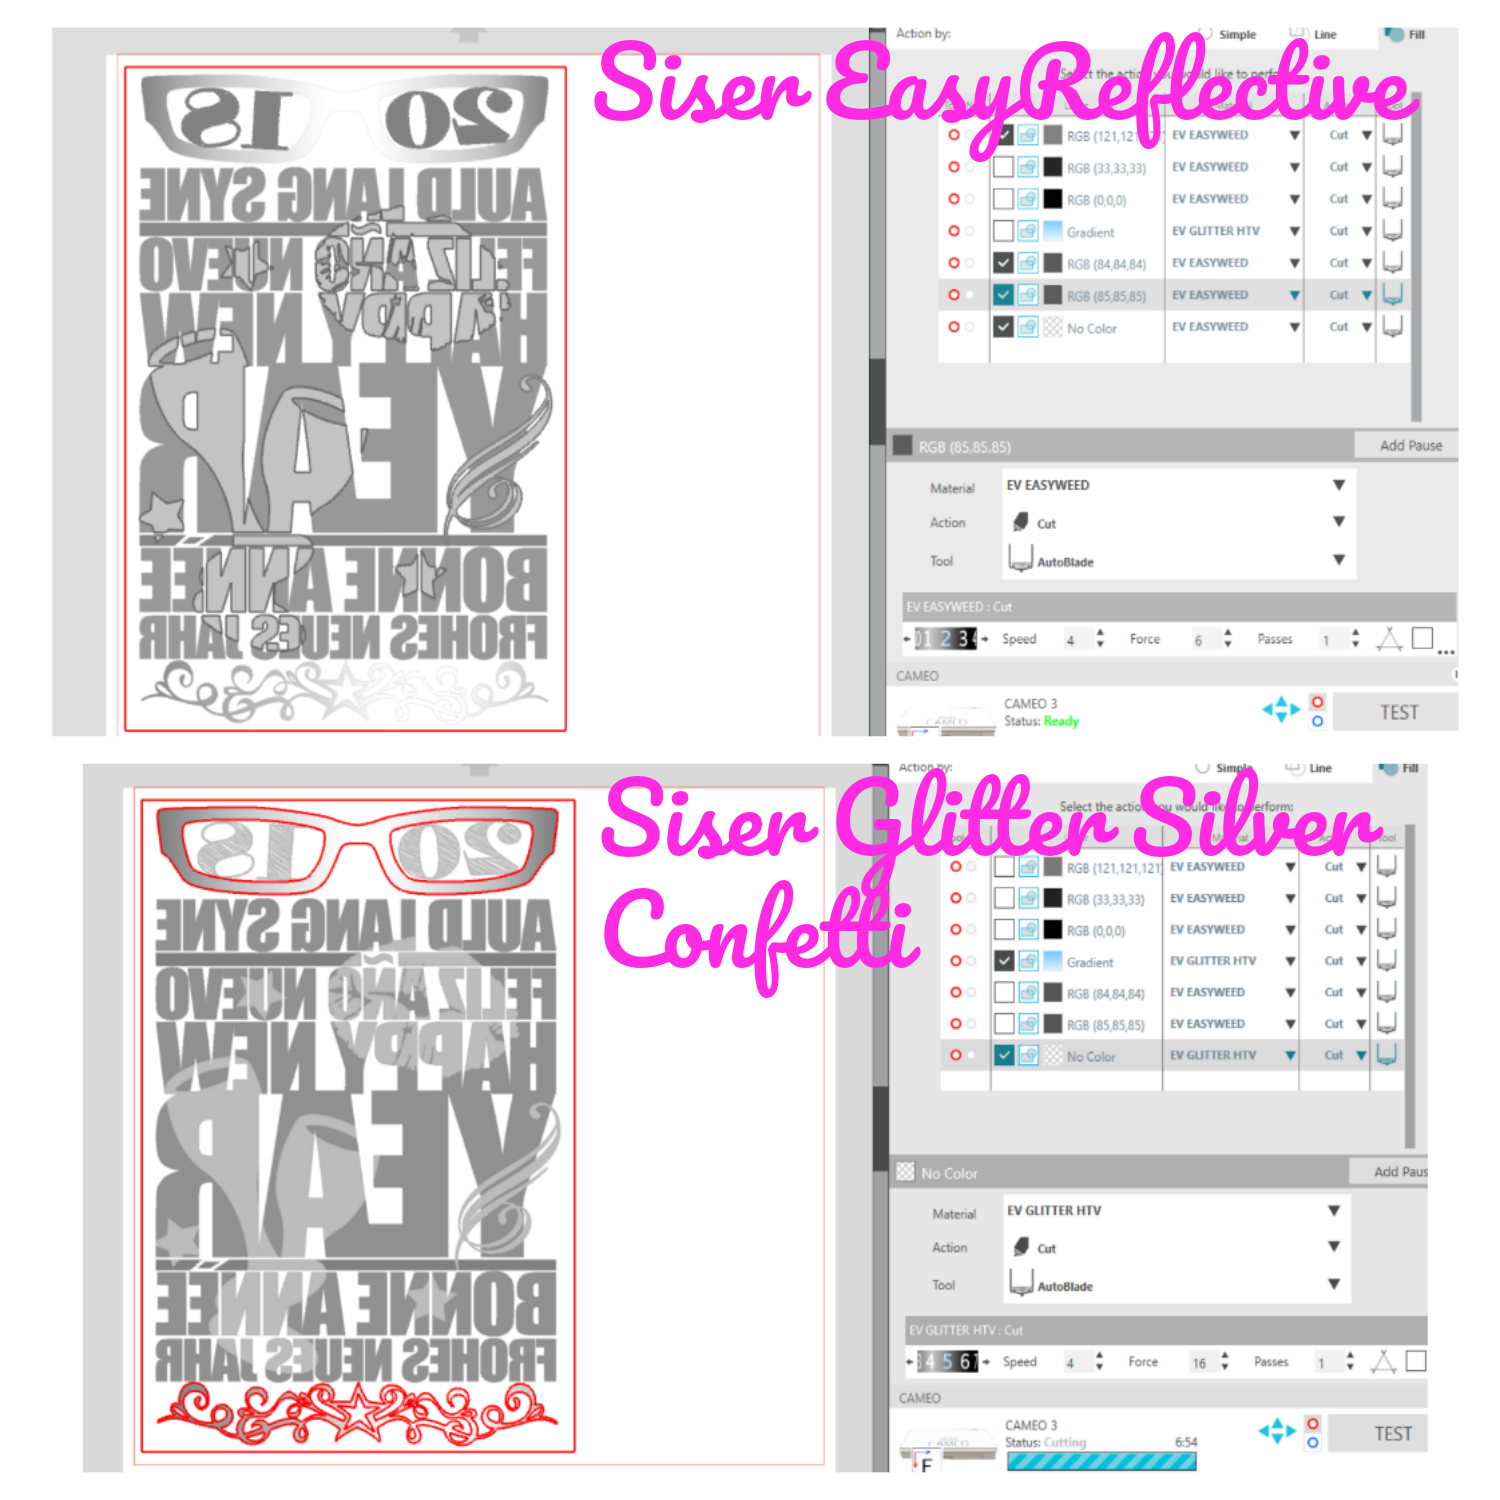
I have color coded the different vinyls that will be used, simply to help me cut the correct images on the correct vinyl. You could either cut by fill color now or by grouping and then cutting individually but I like to cut by color. I will show you how.
In you Send Window of the Silhouette program, you will see all these cut lines. You will not want to just go ahead and start cutting, you will need to assign the colors you wish to cut.
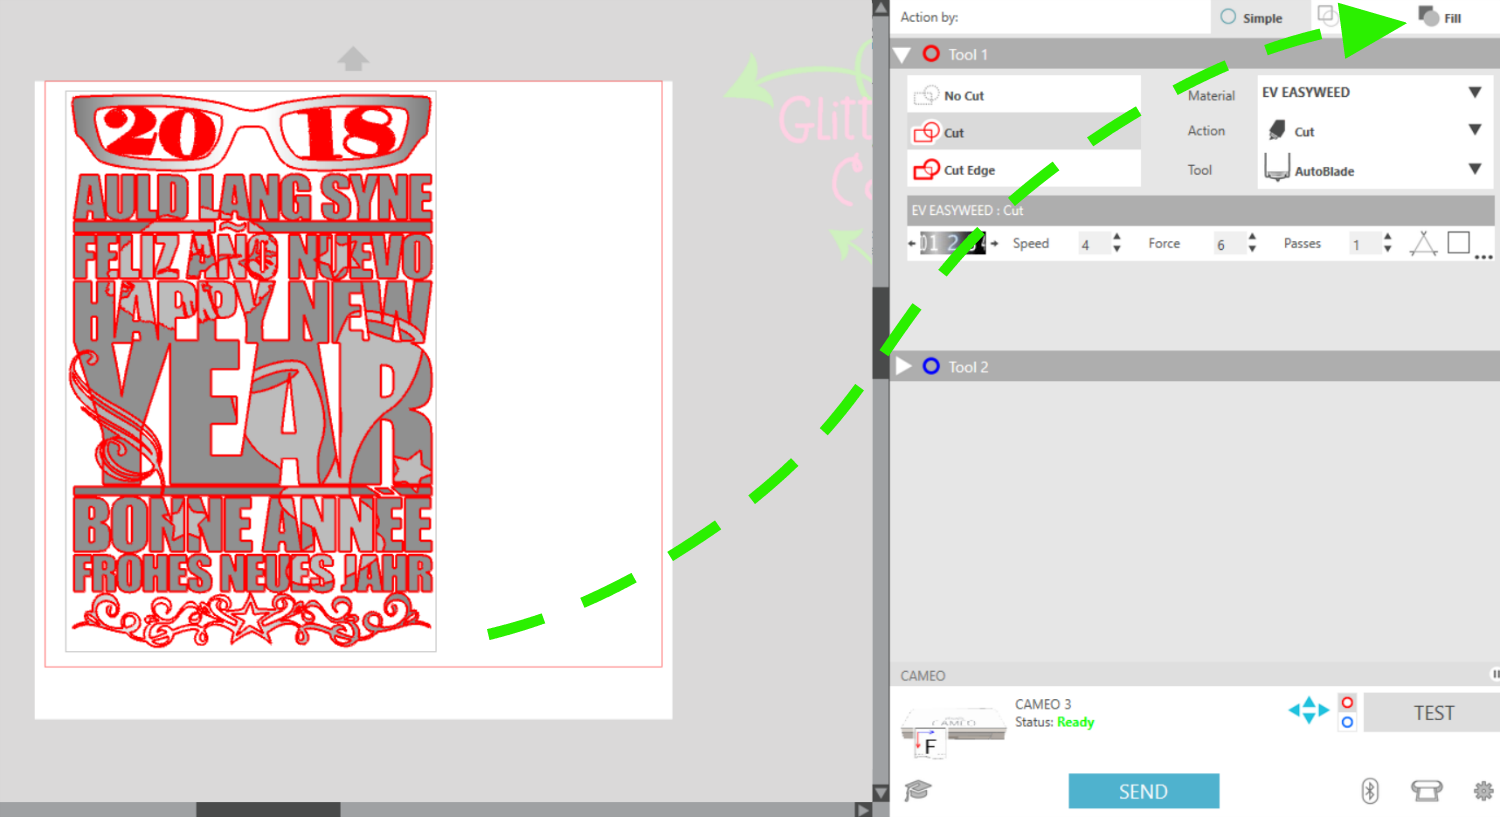
Once you have your Fill Action opened you will see quite a few colors that are not apart of your cut, if you have any extras off the cut area it will show in there as well so just uncheck any that do not apply.
The Change the Three that we are working with to the correct cut settings
NOTE:DO NOT forget to Mirror the cut for Heat Transfer Vinyl
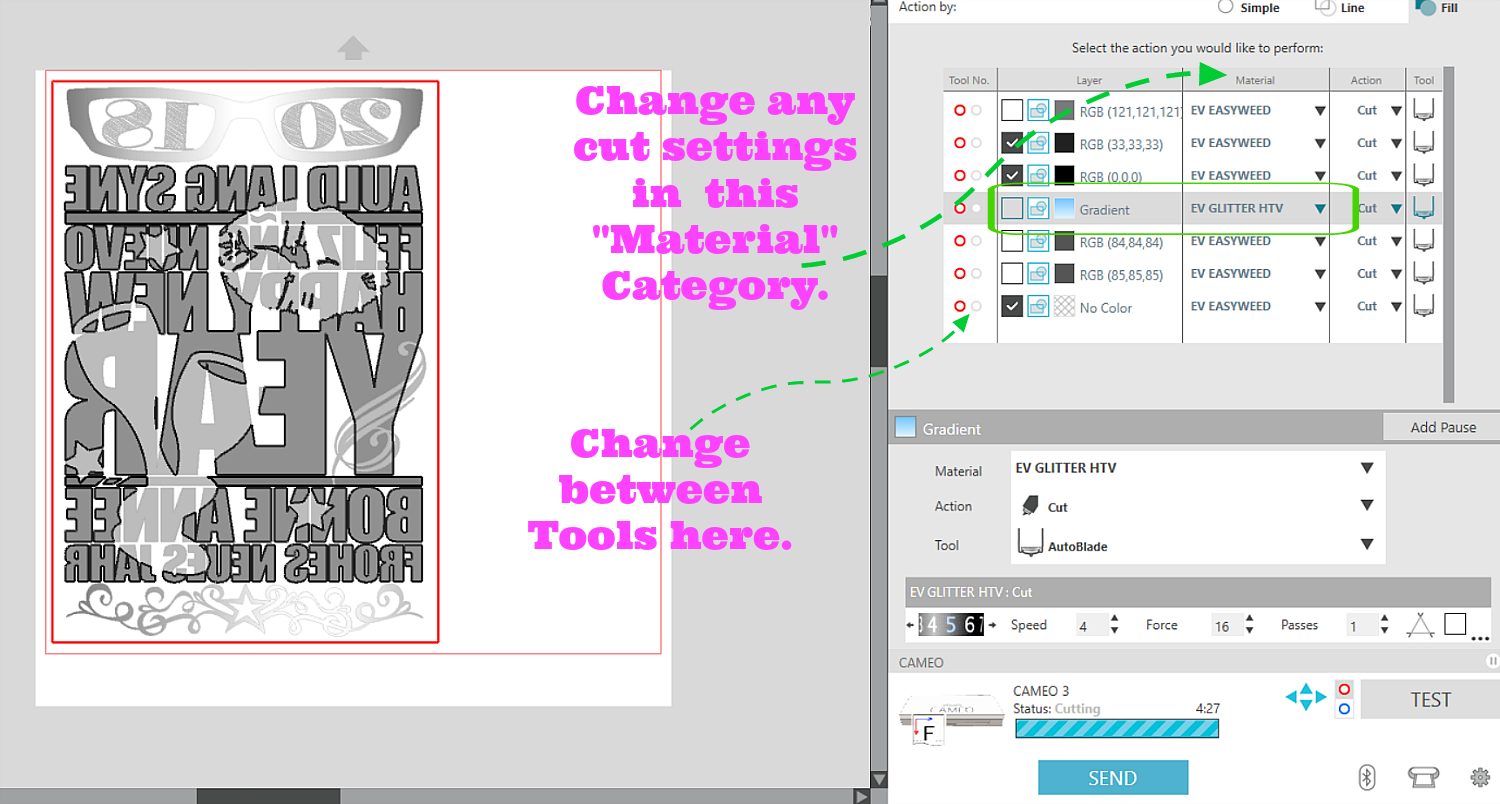
We will make our First cut our Siser Easyweed Grey. If you notice I have 2 colors selected, this could be from me matching colors with the Eye Dropper tool and being slightly off from the colors, but if all the cuts are selected for that particular vinyl color you are cutting it really does not matter.
I also have my "No Color" Selected, this is usually your weeding box. this cut setting will change along the way but the rest you can pre-set. Also make sure your Tool is the correct selection.
You are ready to cut your colors now. Just Repeat this step for each color marking only the colors being cut.
We have our Siser EasyReflective and our Siser Silver Confetti Glitter cut set as well.
NOTE: To save on Vinyl I would probably cut the glasses and Star Border out seperate.
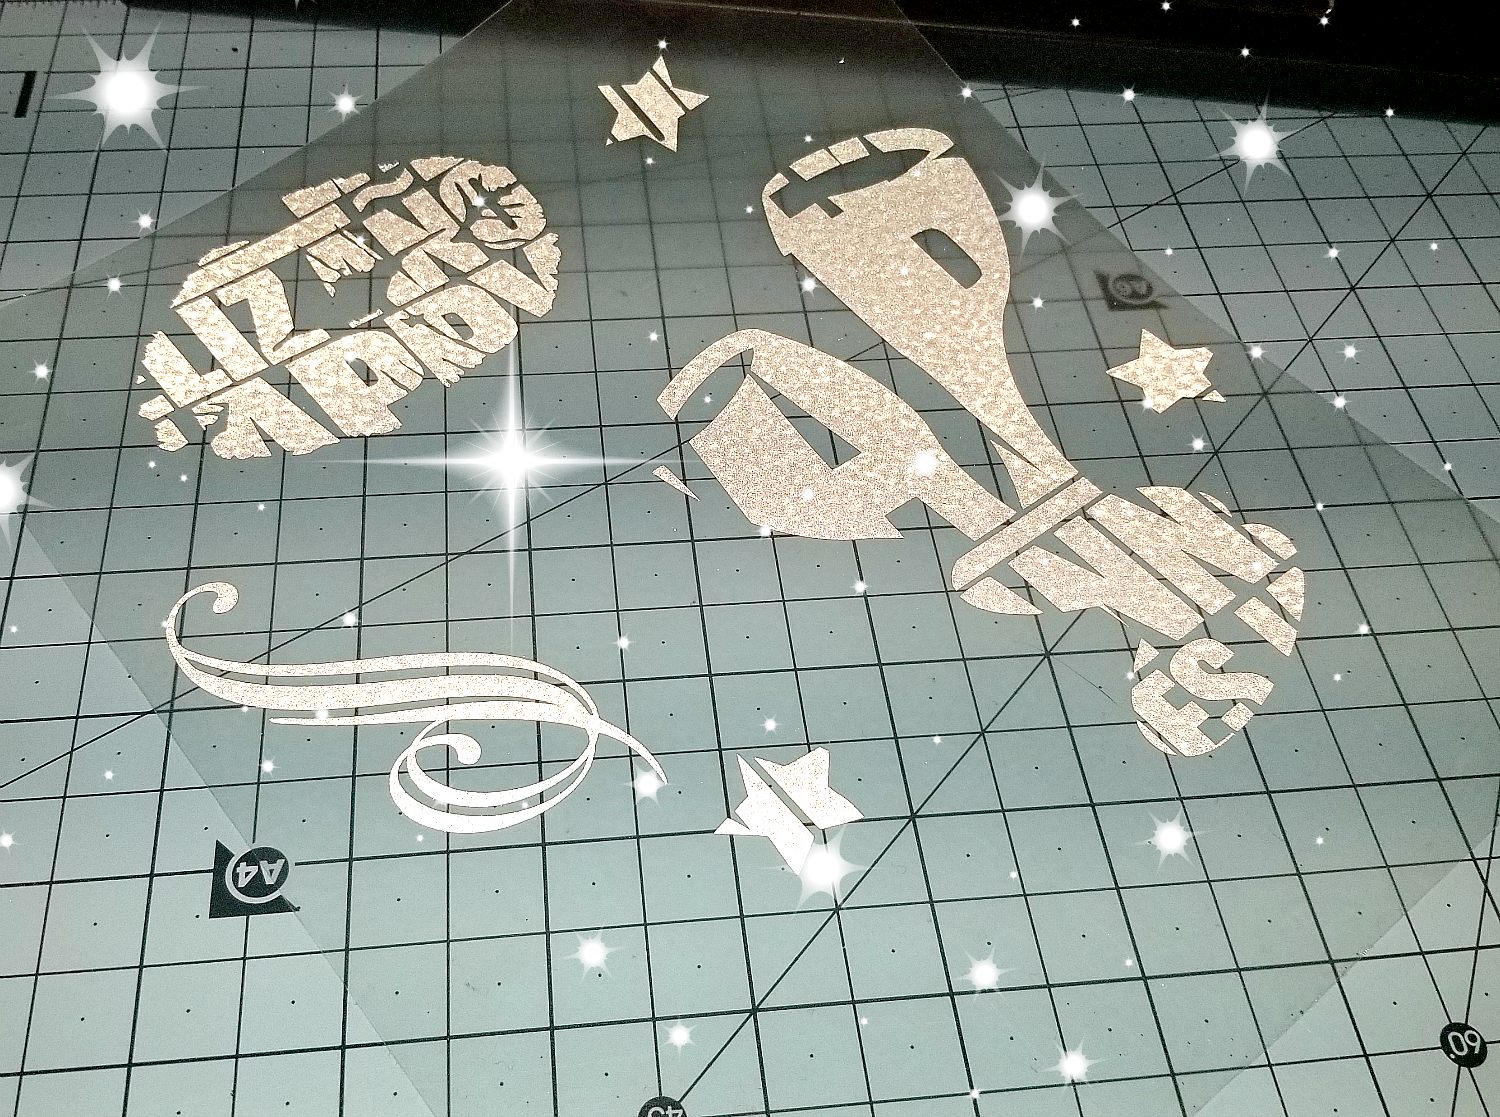
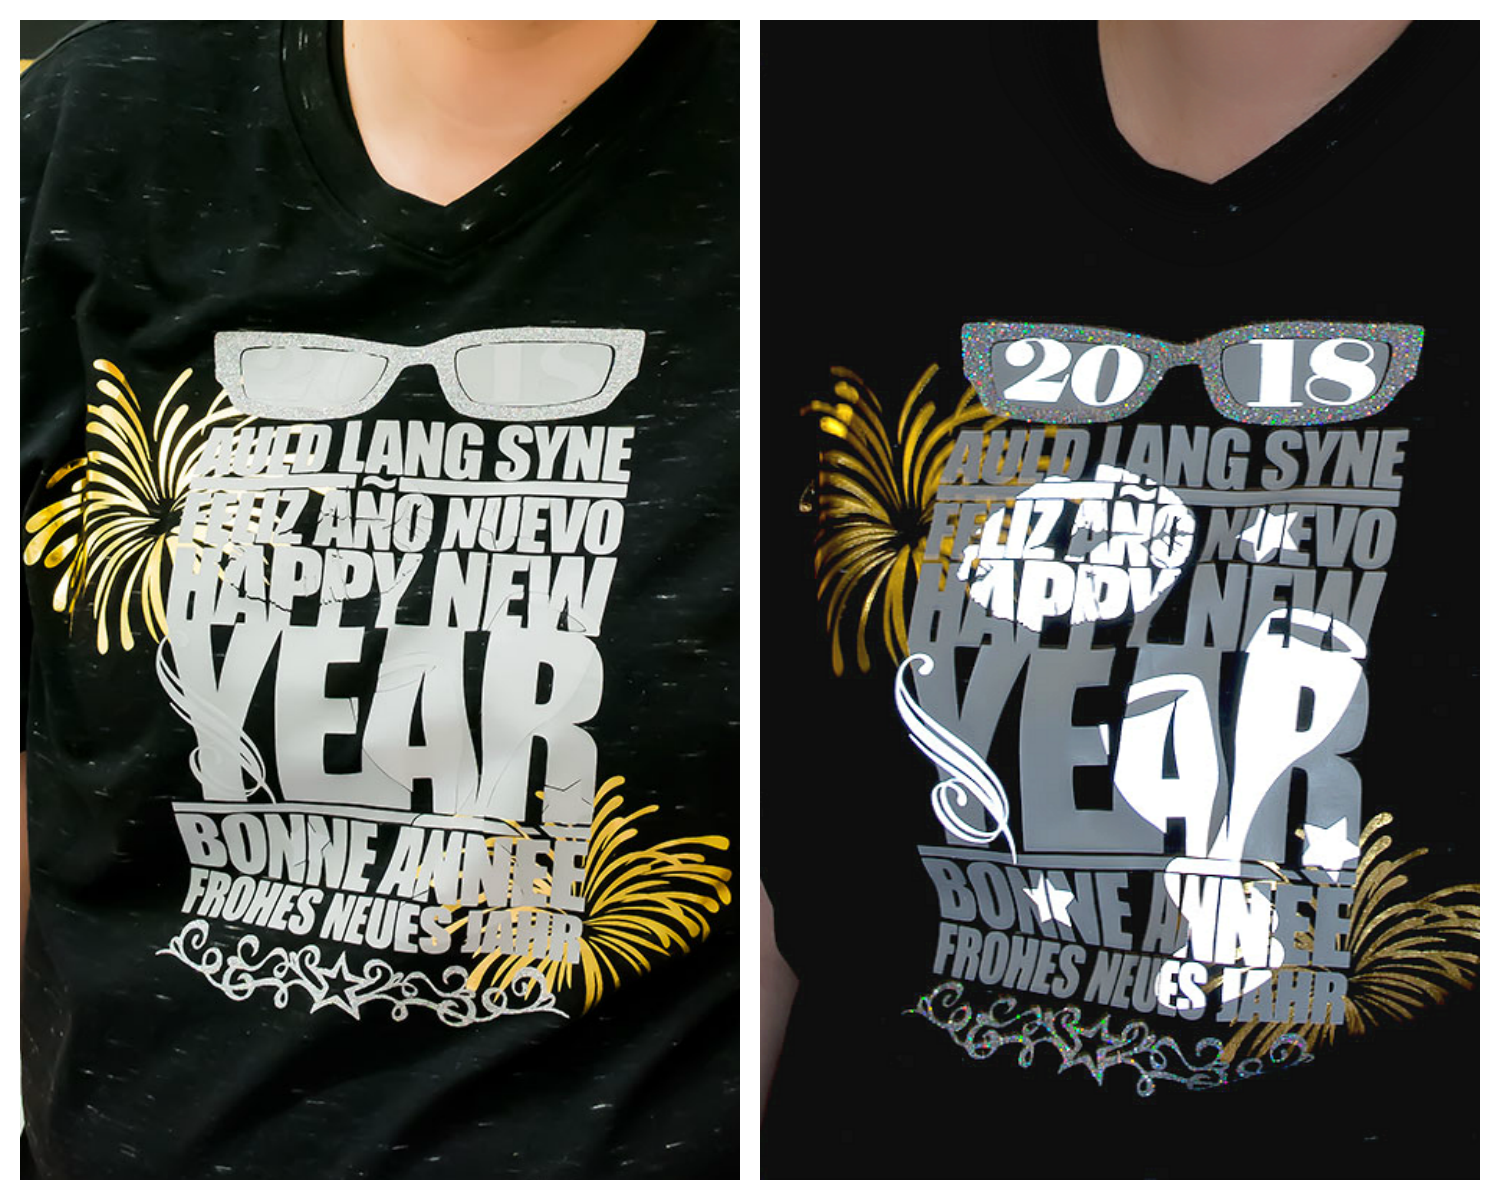
Check out that Flash!!! {Stars added for effect}
If you noticed, my 2018 is not there, I decided weeding all thsoe little lines was not going to work that small so I just ungrouped the numbers and took out the lines for a solid font.
Must better an easier to weed.

Now for the fun part, applying it to our shirt.
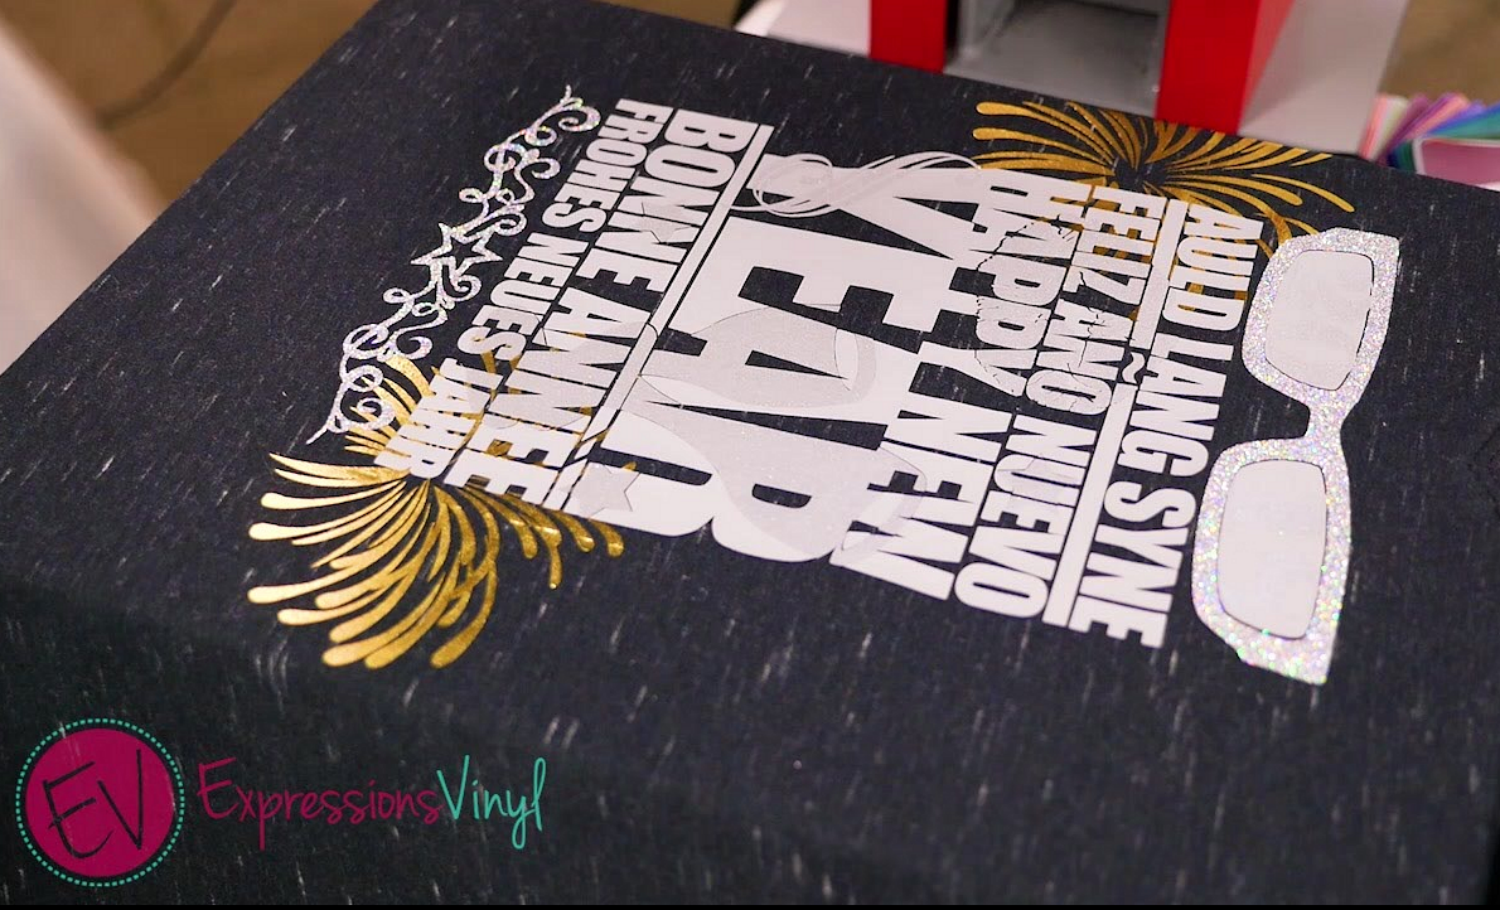
I like to lay the whole image out first to make sure that I have everything weeded and cut properly. And it gives me a good visual before I press everything.
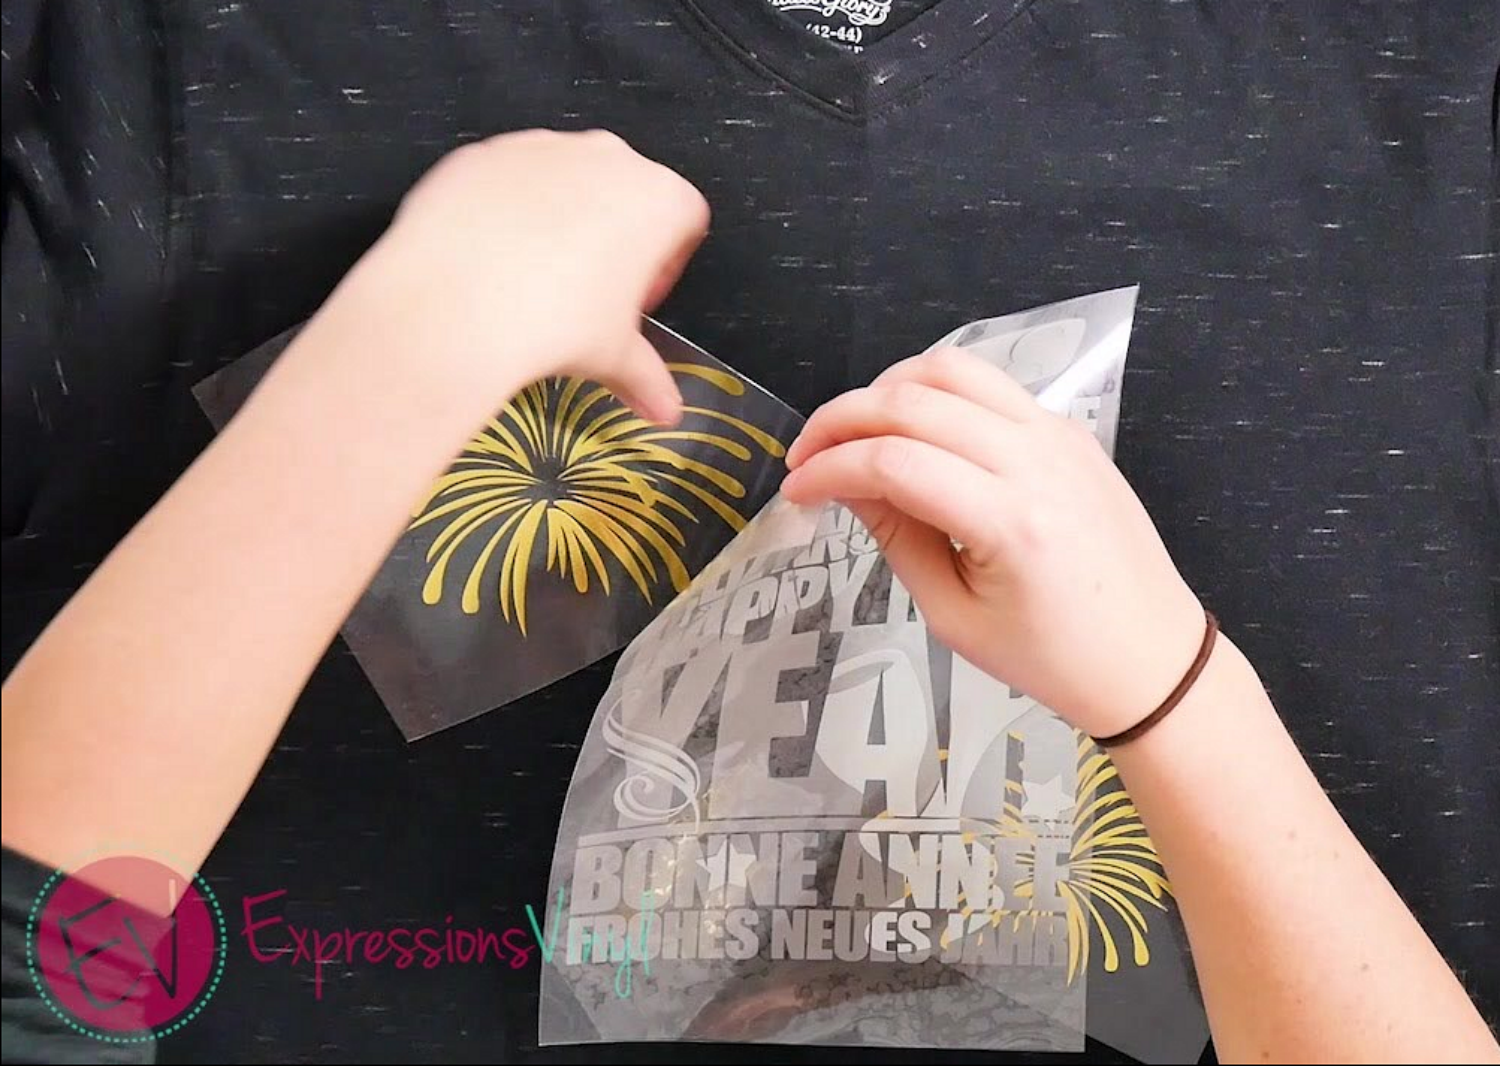
Once you have it where you like, start with your base layer. In this case our New Years fireworks. Then keep layering.
NOTE: You will want to avoid any shrinking so press it for a few seconds, you can make up the time once all layers have been added.
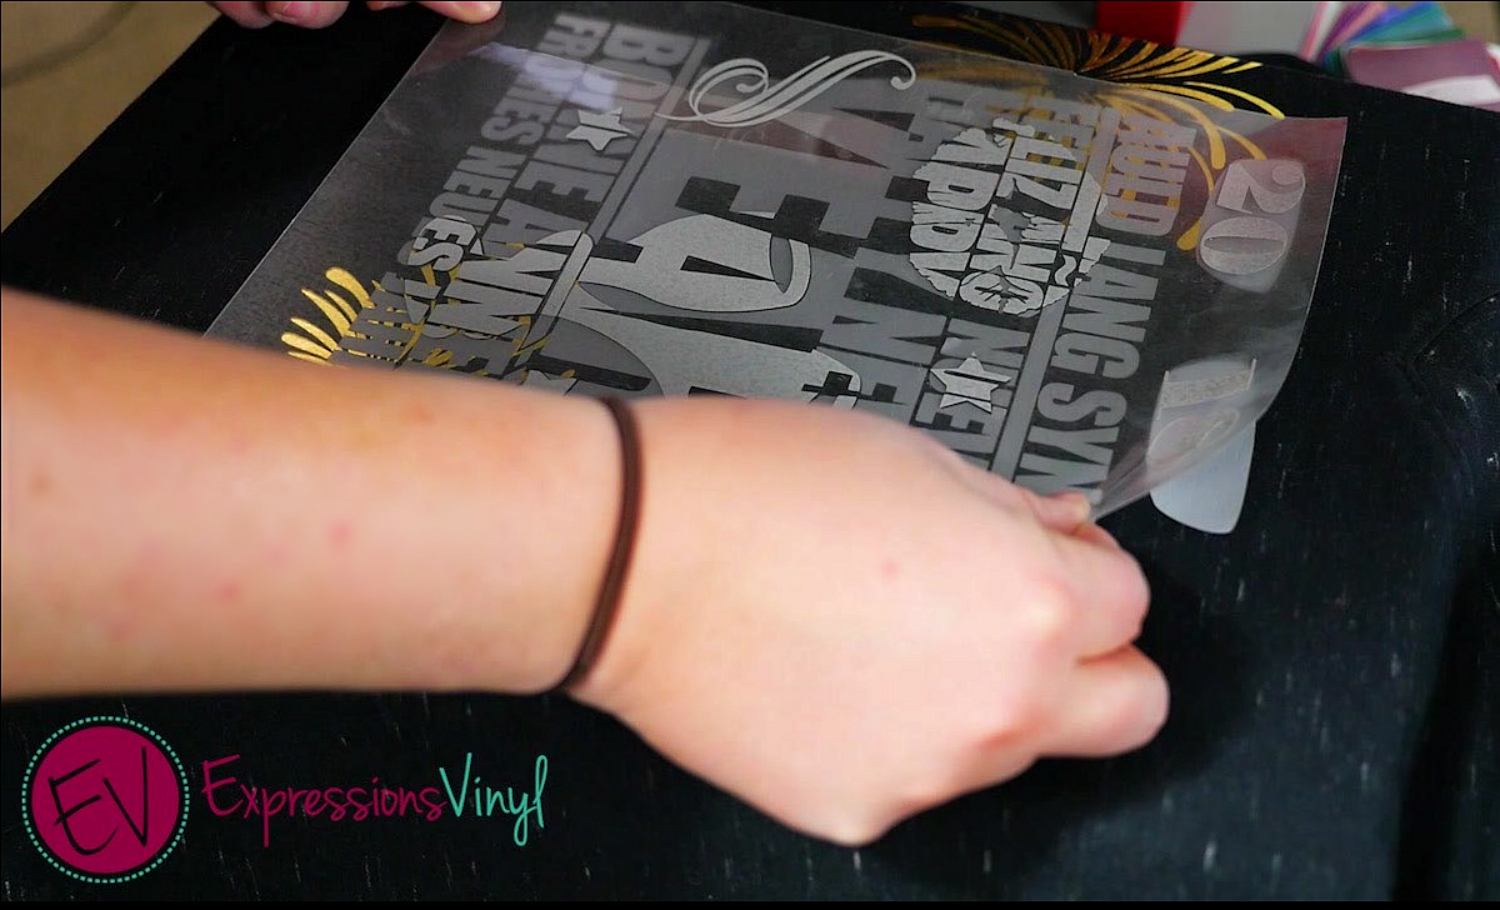
Then press your EasyReflective making sure to cover any exposed vinyl with a Heat Transfer Cover sheet.
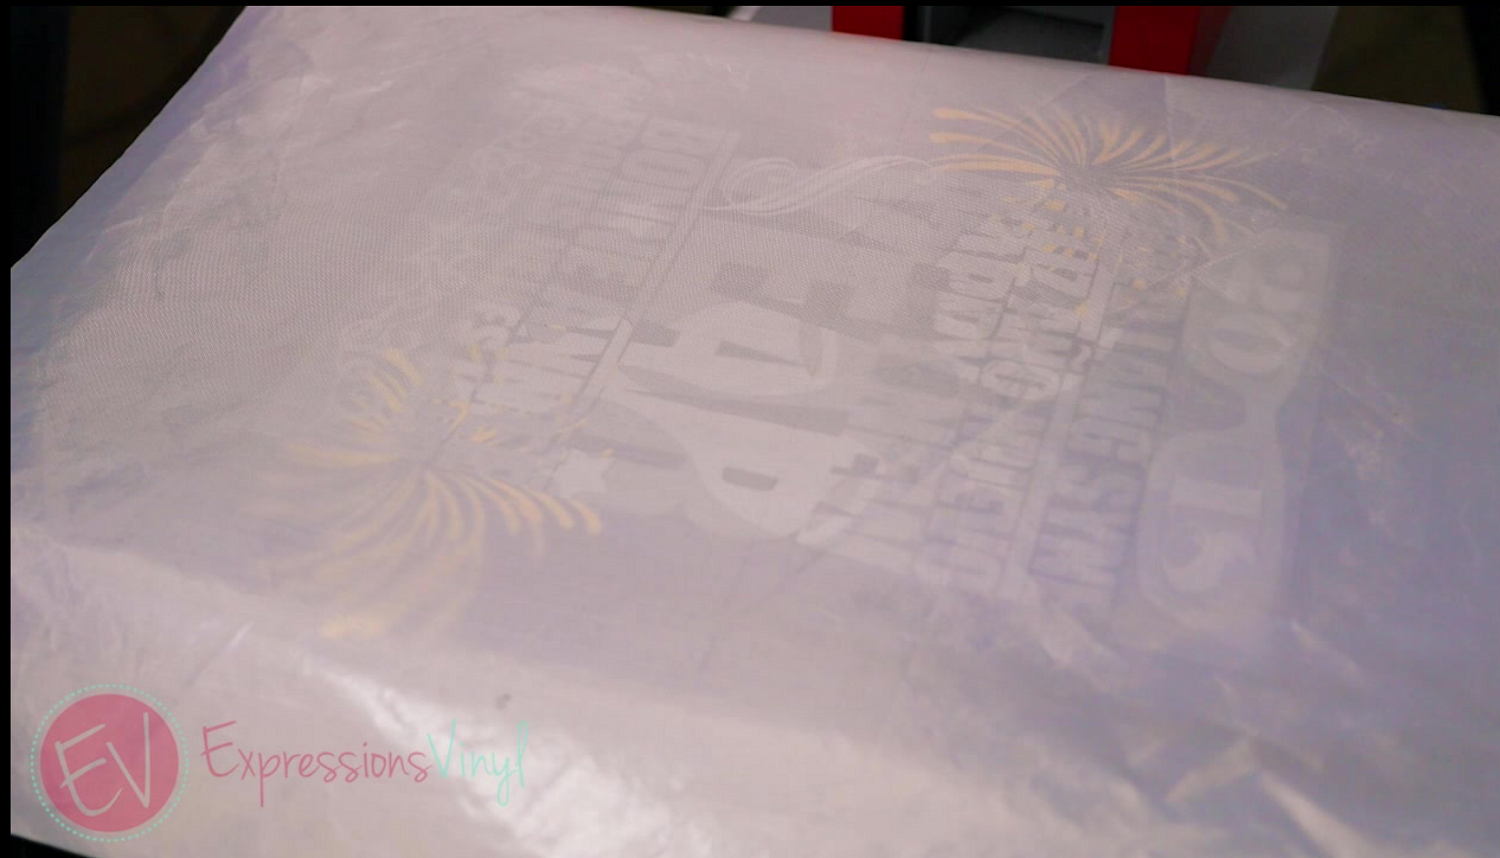
Press one last time with the Glitter HTV and you are ready to go.
Now you have an awesome shirt just in time for your New Years Party!
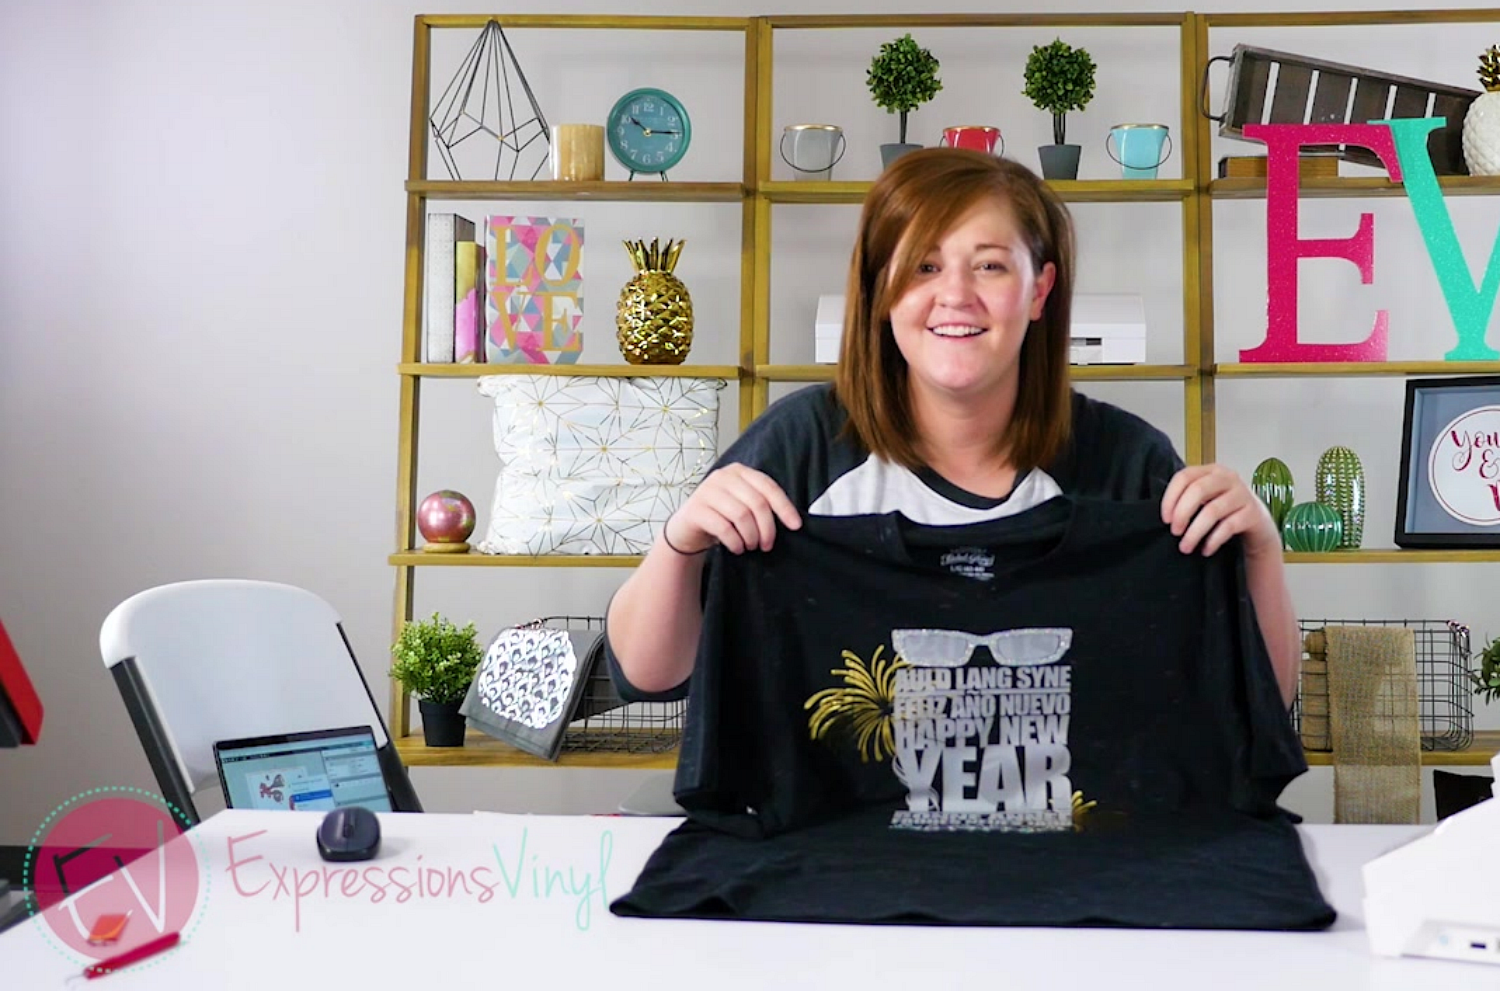
What will you create in 2018?

Recent Posts
-
NEW Holographic Eclipse Heat Transfer Vinyl
April 15th, 2024 3 Ways to Use the New Holographic Eclipse Heat Transfer Vinyl from Siser …Apr 29th 2024 -
Hop into Spring with Cute Easter Vinyl Crafts
Do you love our Vinyl? Sign up for Vinyl Club today to get FREE vinyl and save big! …Mar 28th 2024 -

Fixing Wrinkles and Bubbles in Vinyl
How do you get air bubbles out of vinyl? There are a few different ways to ensure a flawless …Mar 26th 2024