
Using a Weeding Box to Layer Adhesive Vinyl with Silhouette Studio
Hi everyone, it's Bonnie at Expressionsvinyl.com. I want to show you one method utilizing a weeding box to make sure all your vinyl lines up perfectly in Silhouette Studio. It's pretty easy, so let's begin!
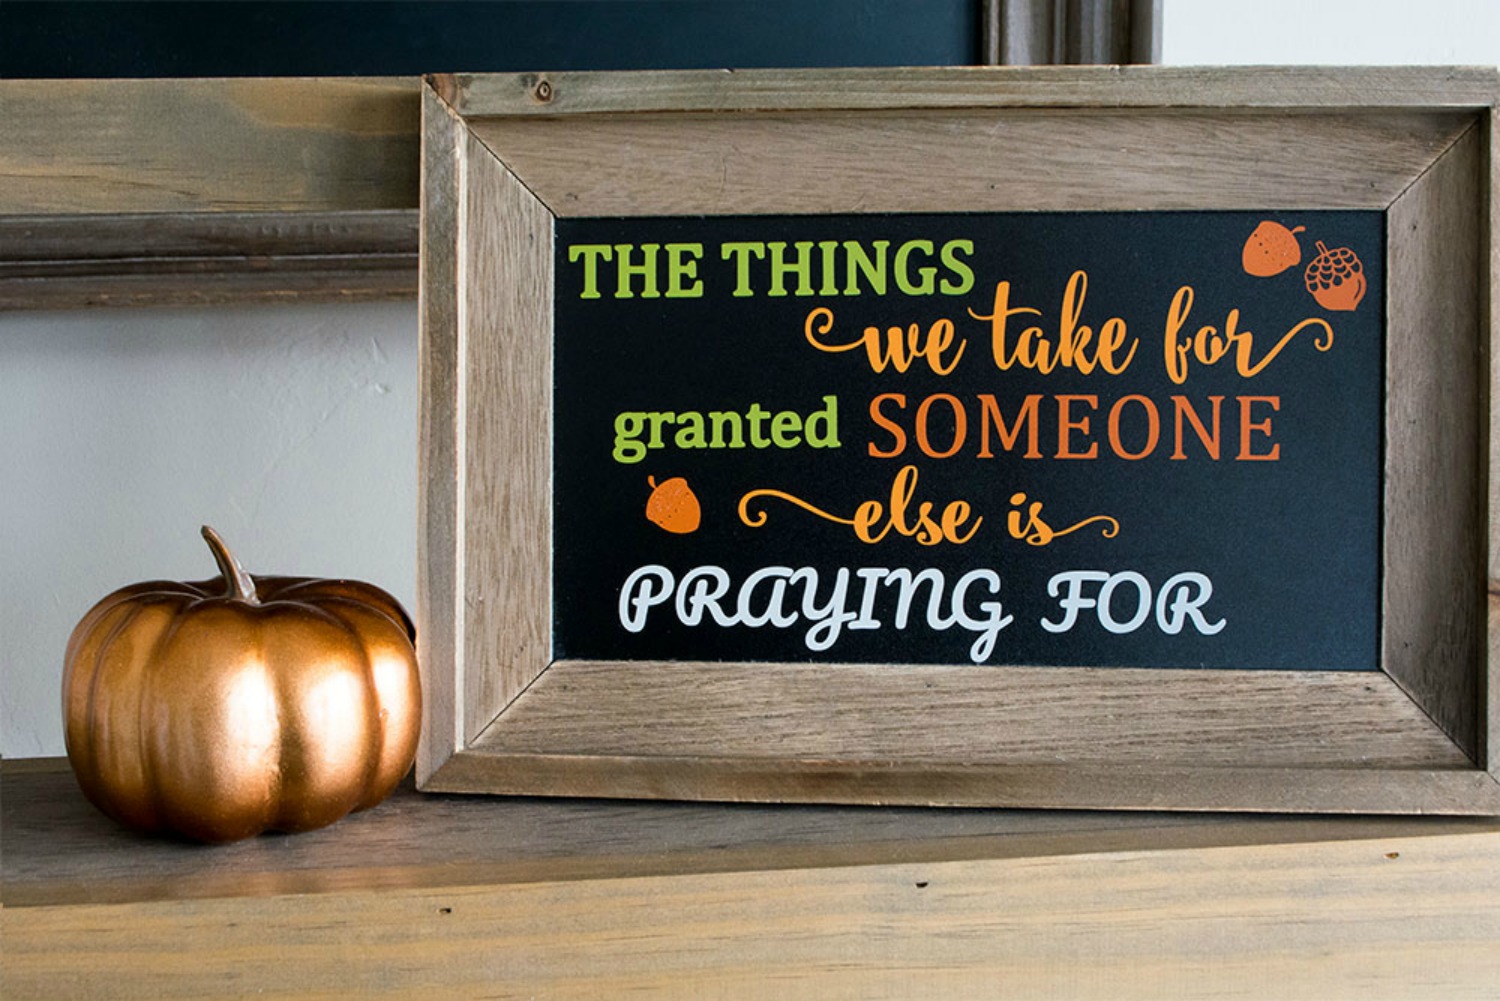
For this project I used:
- Oracal 631 Olive
- Oracal 631 Persimmon
- Oracal 631 Light Grey
- Oracal 631 Nut Brown
- Acorn image from silhouette design store - Thanksgiving Icons design ID# #51104
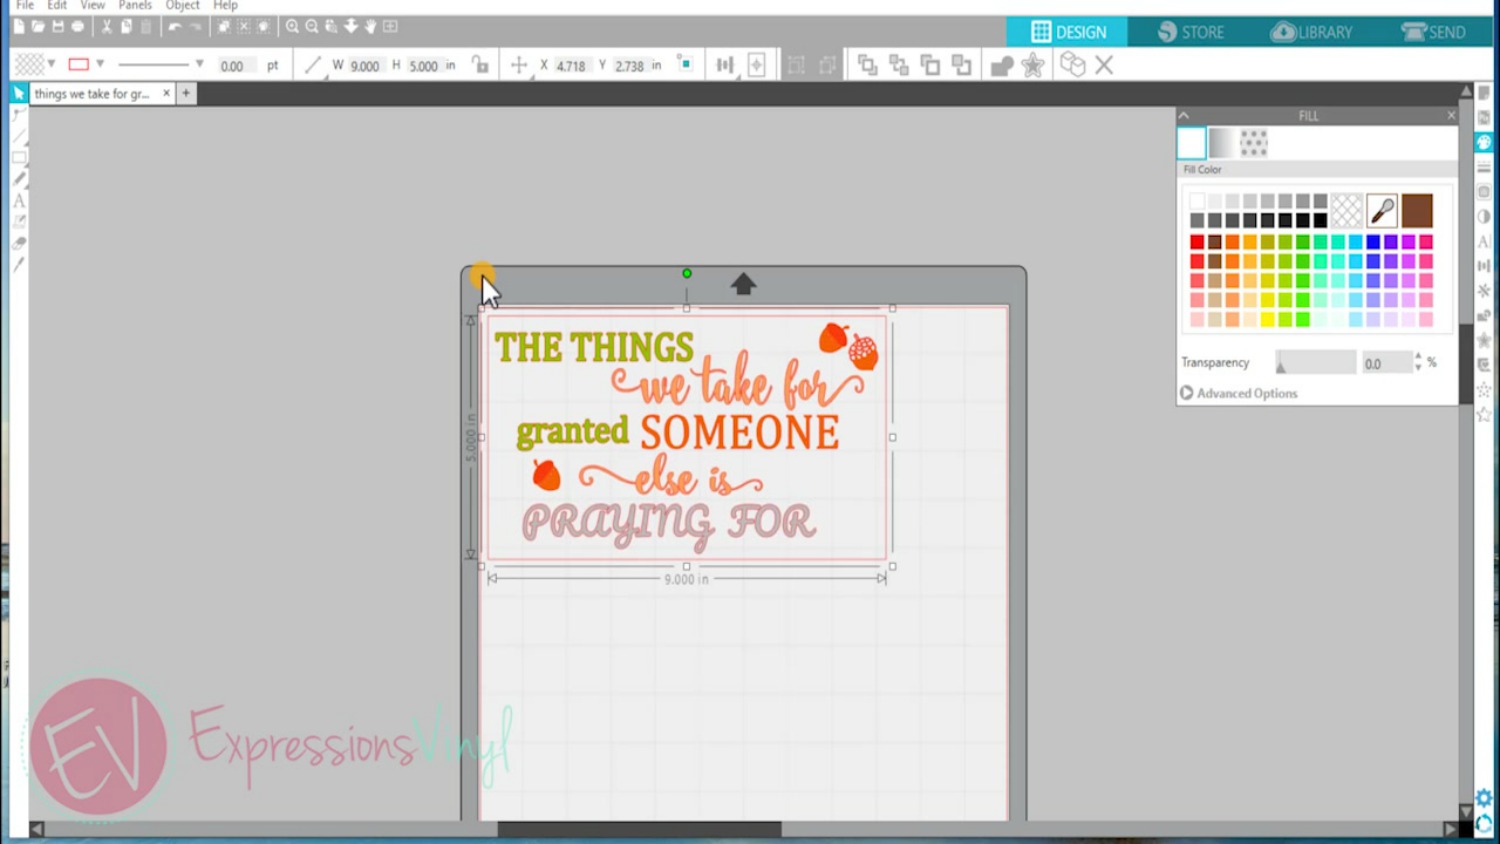
After you have designed your image in Silhouette Studio, place a box around your entire design. This is called a weeding box. A weeding box will be most beneficial if it is the same dimensions as whatever you are adhering the vinyl to. In my project, the chalkboard I was placing the vinyl onto is 9" x 5", thus my weeding box is that same size.
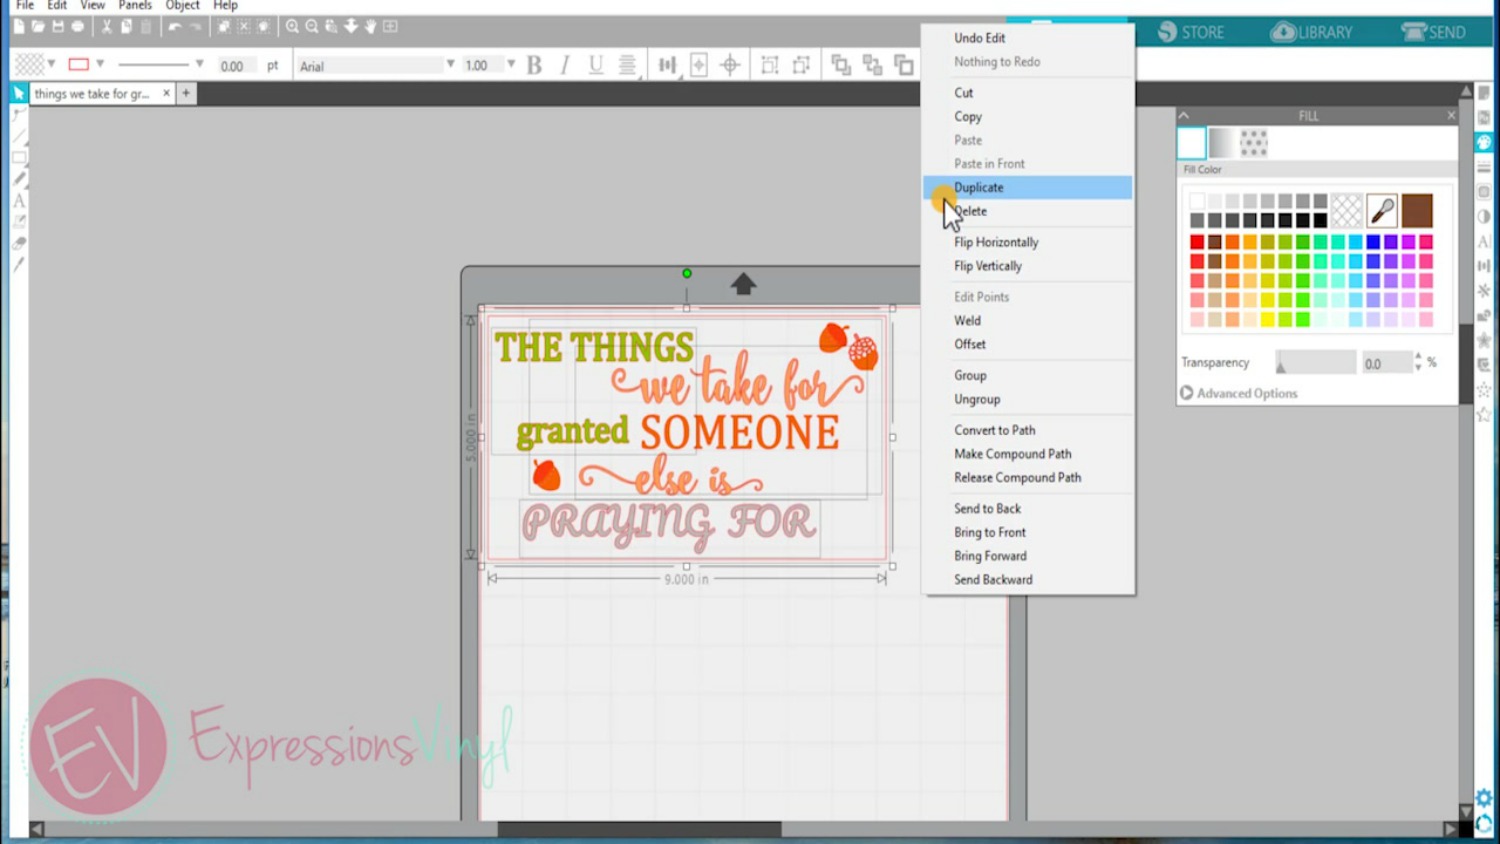
Select your entire design and duplicate the original. This will assure that you don't accidentally make unwanted changes to your finished project.
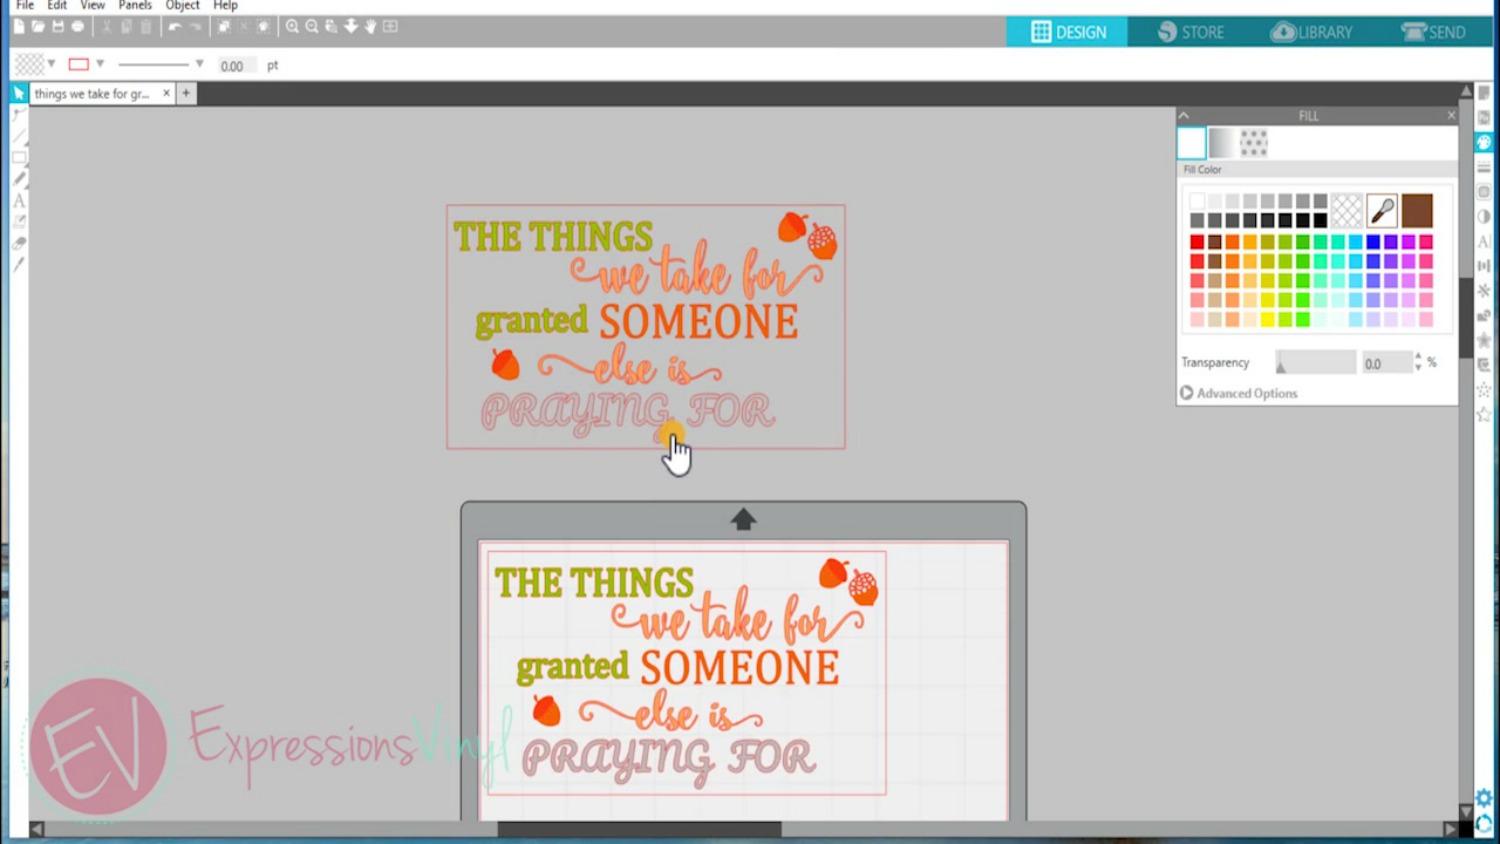
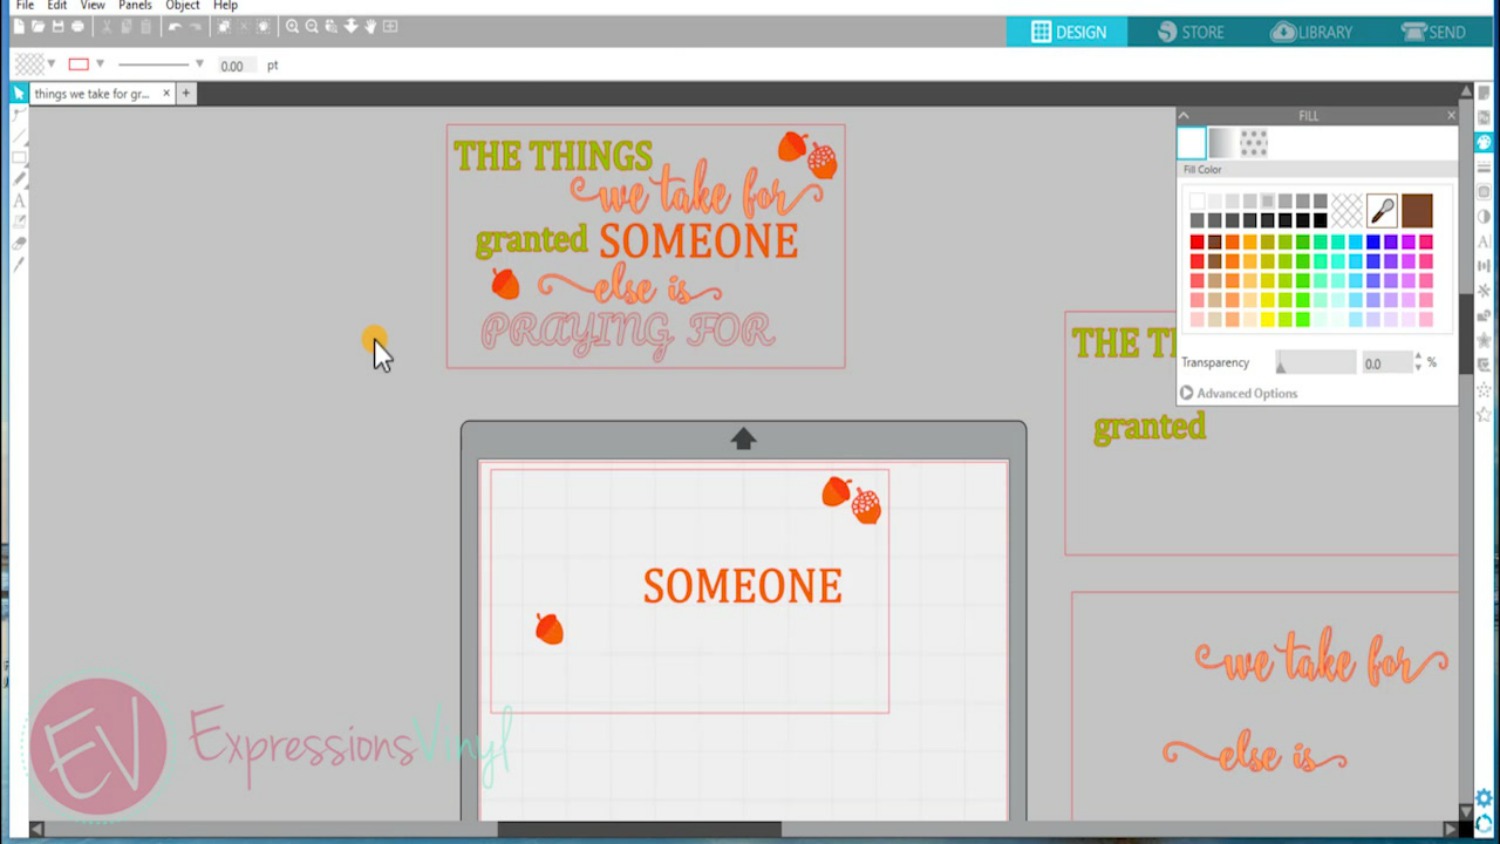
With the duplicate version of the design in your work space, I'll show one method to separate the colors prior to cutting out your design with your Silhouette. Keep in mind that this is not the only method, but it's a great way to get started and keep all colors straight.
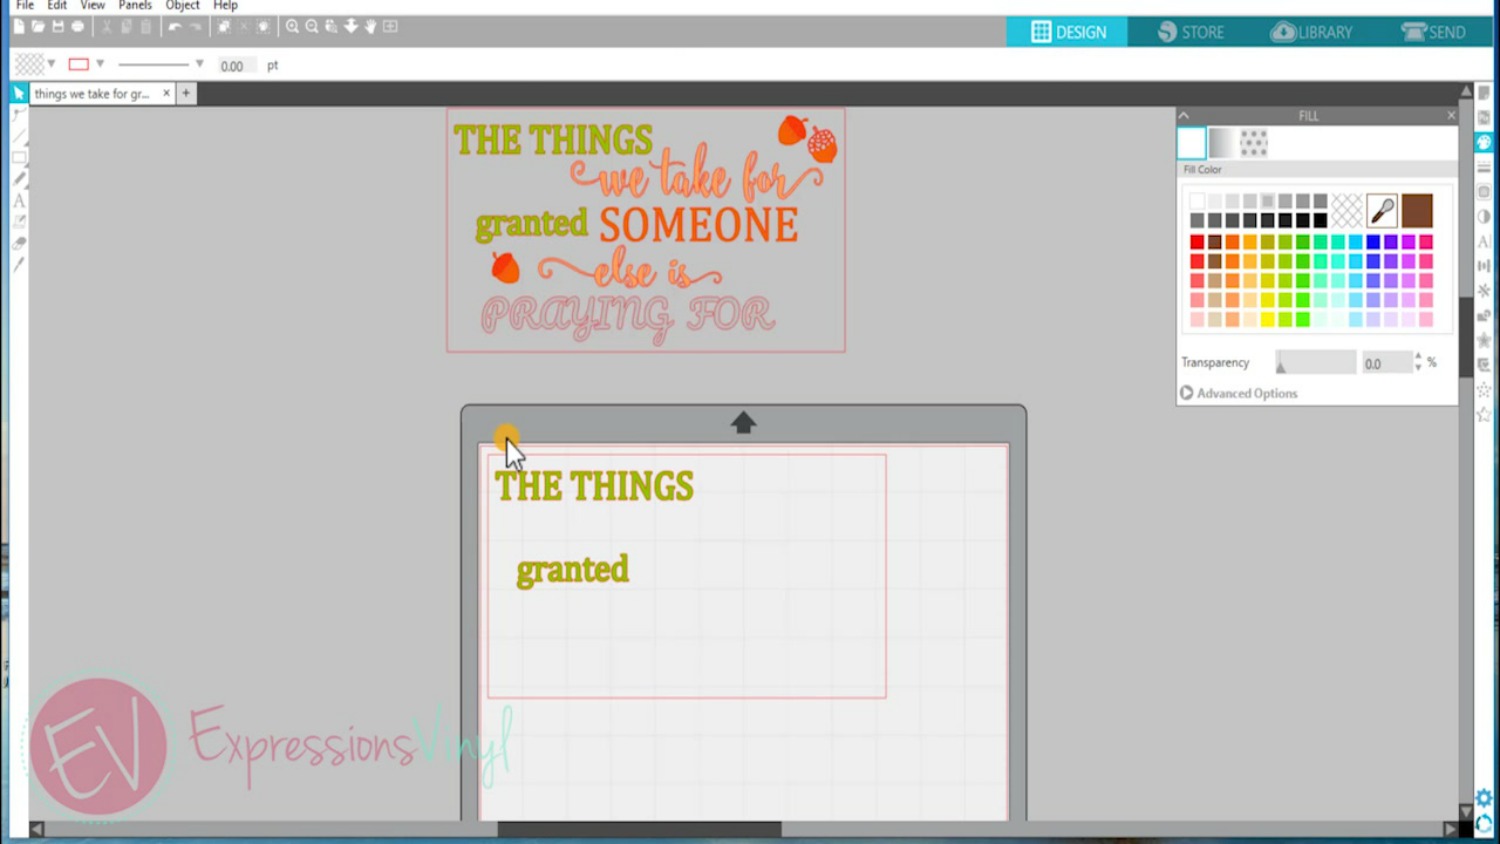
With the duplicate version of the design in my workspace, I delete all colors from my design except for one color. Make sure to keep the weeding box in tact to insure that each color will maintain it's proper placement on the project. After the design is left with only one color and the weeding box, group them together and move it to the side of your workspace. Repeat this step for the remaining colors, duplicating the original each time. Since this project has four colors, I will repeat this step four times as shown below.
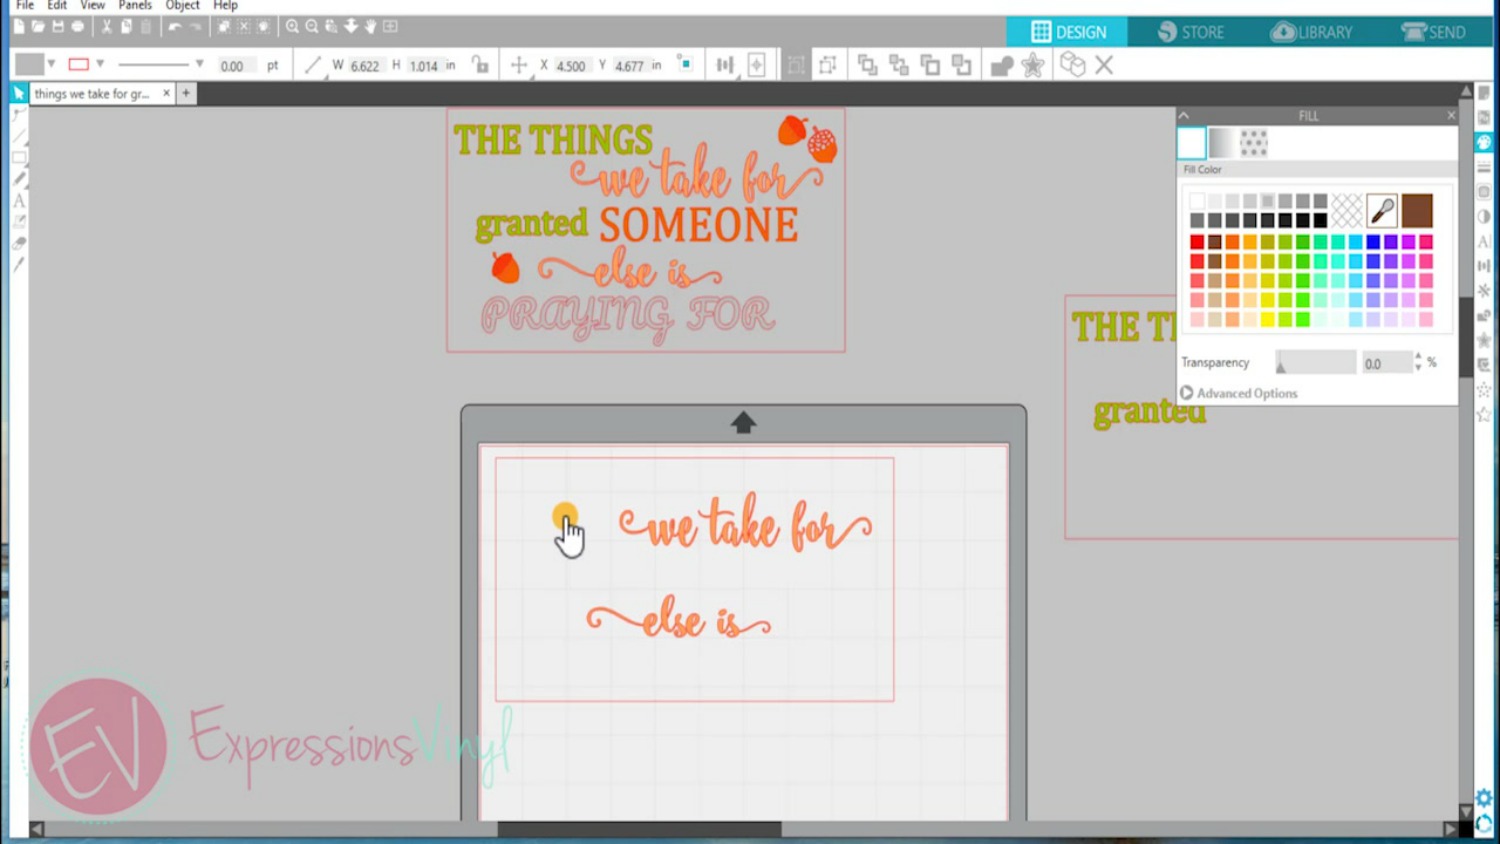
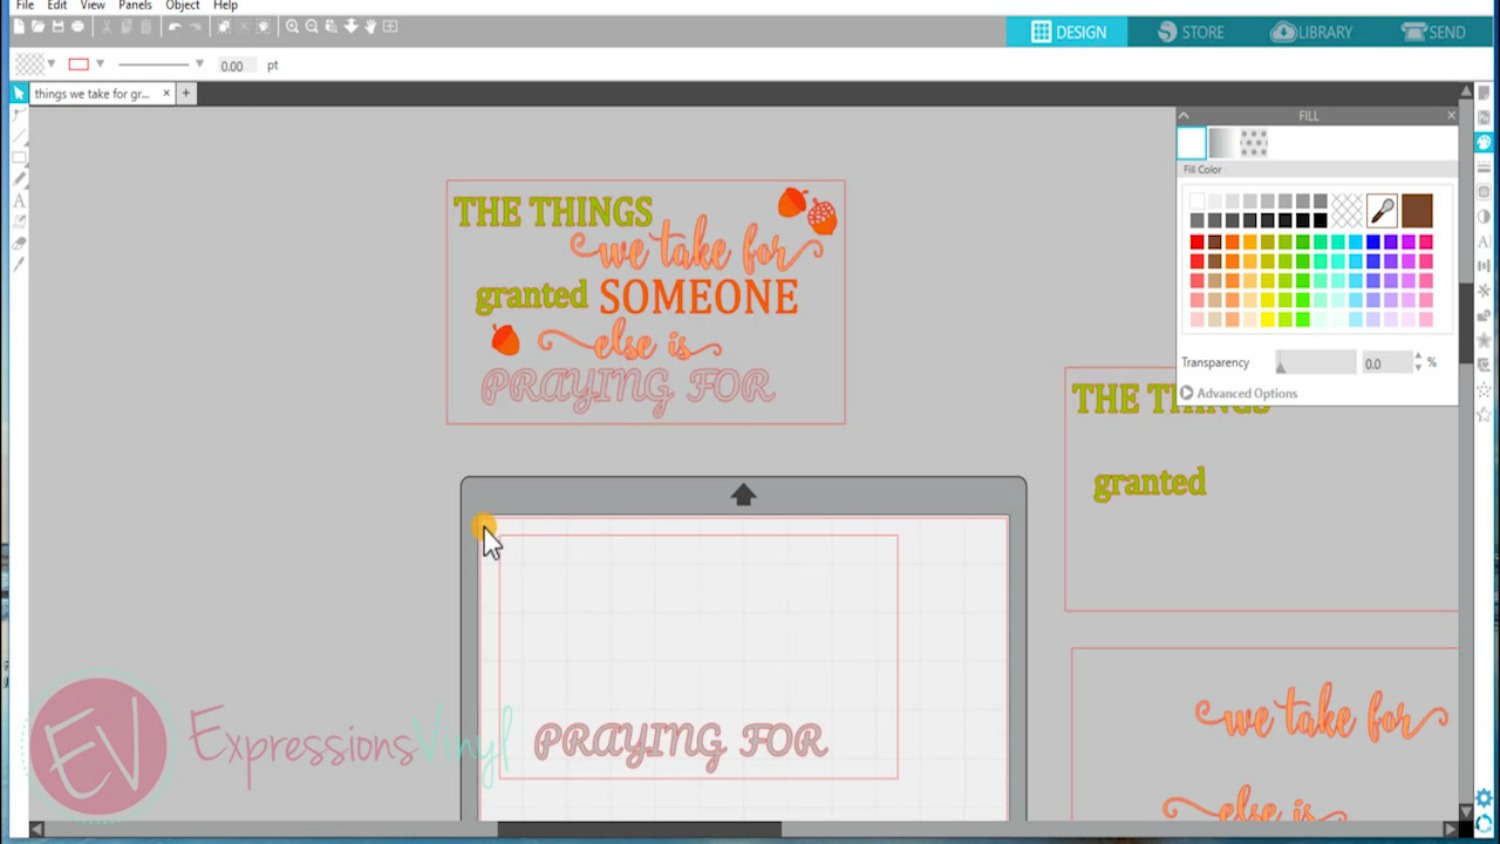
Now that the four colors of vinyl have been separated, they are ready to cut with the Silhouette. It is helpful to see which color of vinyl I should be loading into my machine according to which of the four colors I have selected on my screen.
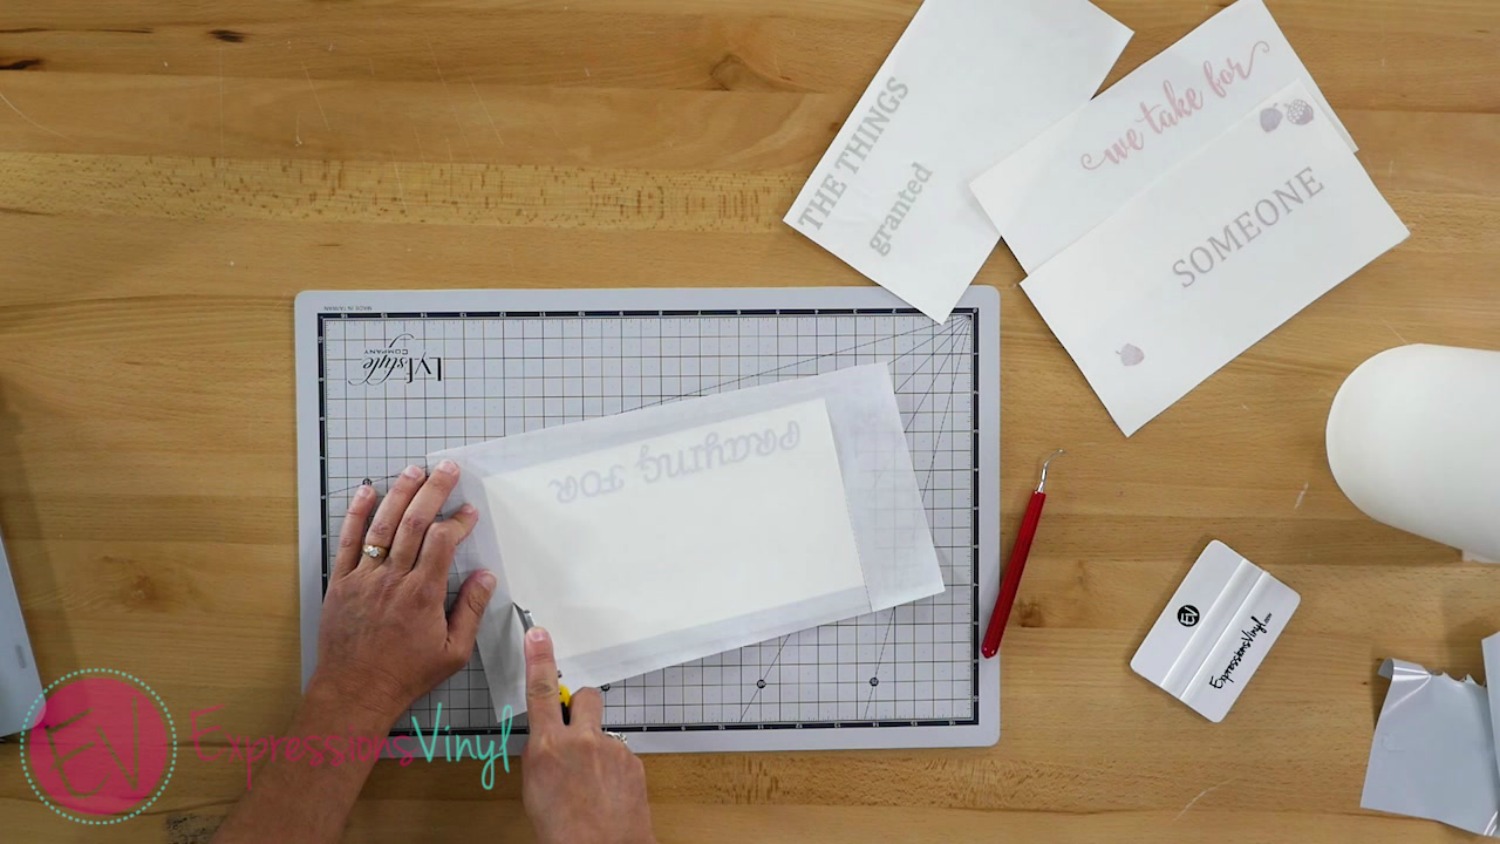
After the vinyl is cut, use the Siser weeding tool to weed the excess vinyl keeping the weeding box in tact, as this is how you will line up your project. The next step is to apply transfer tape to the vinyl. You can use the same piece of transfer tape for all vinyl pieces, or use separate transfer tape for each piece. The key is to trim your transfer tape to the EXACT same size as your weeding box. For my project, I applied paper transfer tape to each vinyl piece and cut around the sides of the weeding box as shown below.
Because each weeding box is now the exact same size as my project, I can simply place them down one at a time and apply the vinyl to my project.
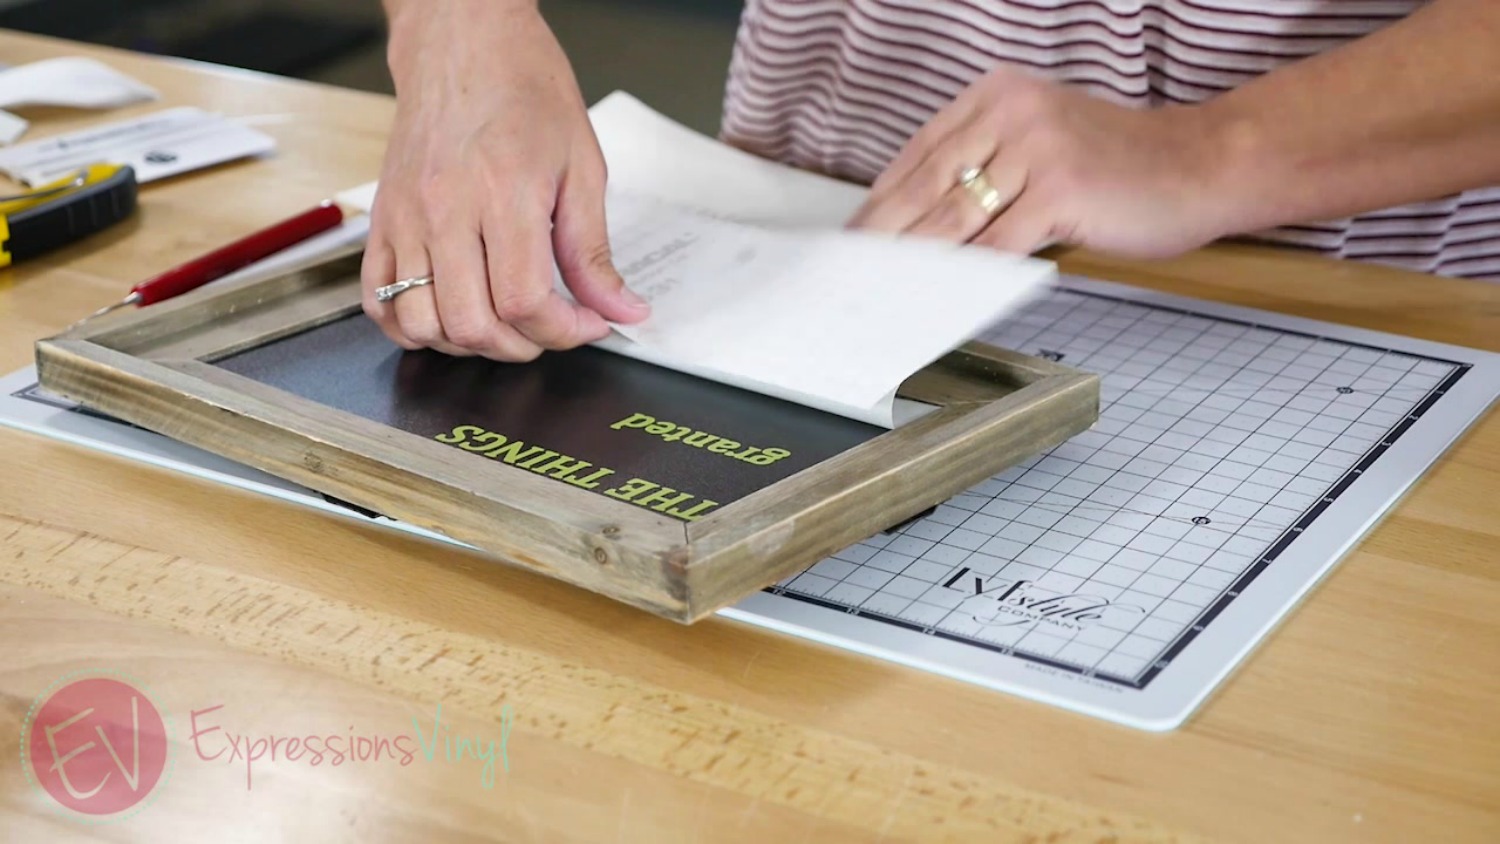
To apply the vinyl, I cut a small piece of backing paper off my first color and adhered this to my surface. If it isn't lined up perfectly, simply peel off and realign. After verifying that it is lined up within your design, pull the rest of the backing paper off and apply the vinyl using your application tool. Proceed with this process for the remainder of the layers of vinyl.

Now you have one great method for using a weeding box to layer several colors of adhesive vinyl onto one project! What are some of your tricks for layering adhesive vinyl? I'd love to hear them in the comments below!

Recent Posts
-
NEW Holographic Eclipse Heat Transfer Vinyl
April 15th, 2024 3 Ways to Use the New Holographic Eclipse Heat Transfer Vinyl from Siser …Apr 29th 2024 -
Hop into Spring with Cute Easter Vinyl Crafts
Do you love our Vinyl? Sign up for Vinyl Club today to get FREE vinyl and save big! …Mar 28th 2024 -

Fixing Wrinkles and Bubbles in Vinyl
How do you get air bubbles out of vinyl? There are a few different ways to ensure a flawless …Mar 26th 2024