
Glitter HTV on Shoes
Hey everyone, its Starla with ExpressionsVinyl.com. Wedding Day is ALWAYS around the corner, so get some great ideas now whether it be fore you, a friend, or family member, we have a great idea to get your dancing shoes ready.

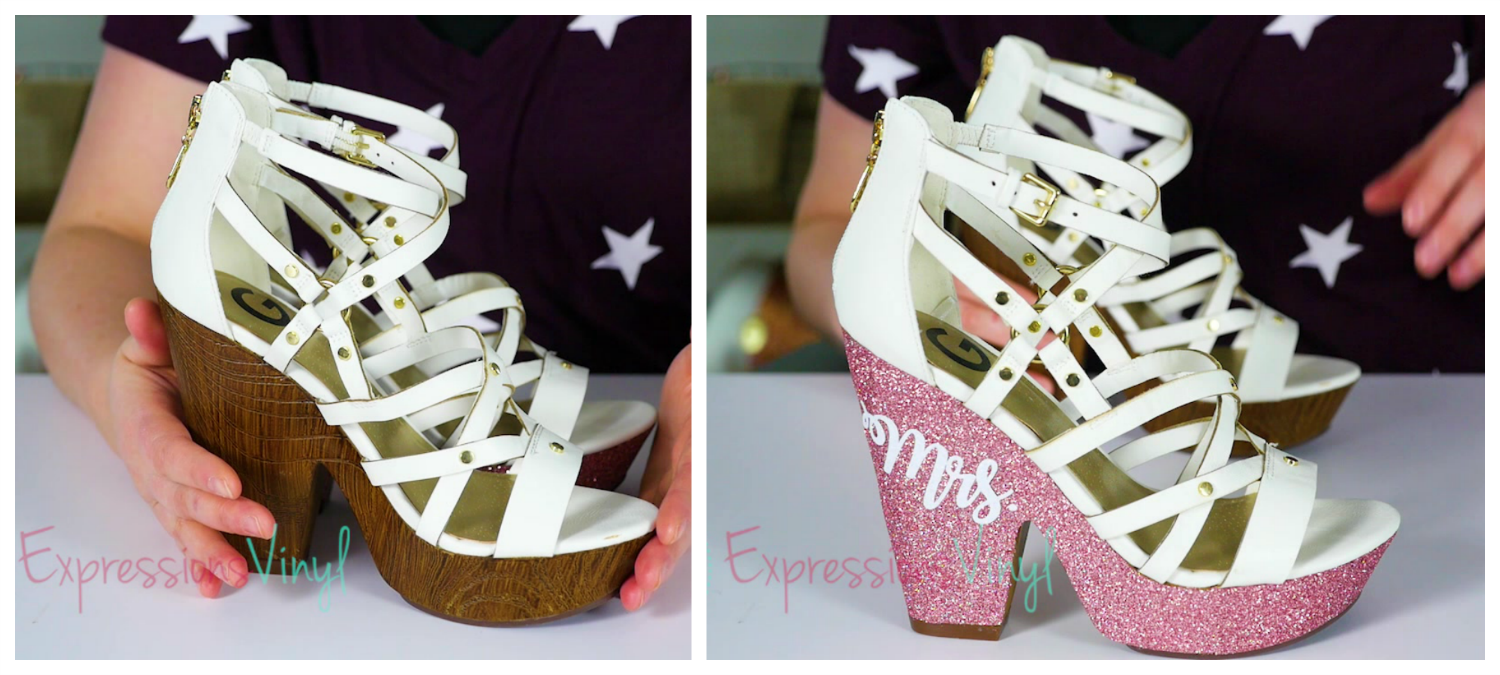
Today we are going to show you how to add some Sparkly Glitter HTV to some plain shoes. Sometimes you just want to bling them up a bit and we are going to show you how to do that today.
You will need a few things to get started:
Siser Glitter HTV (Mrs. ~ Rose Gold and White on this pair)
Siser Easyweed (Mr. White)
Silhouette Studio (If you have not tried it out, download the free software)
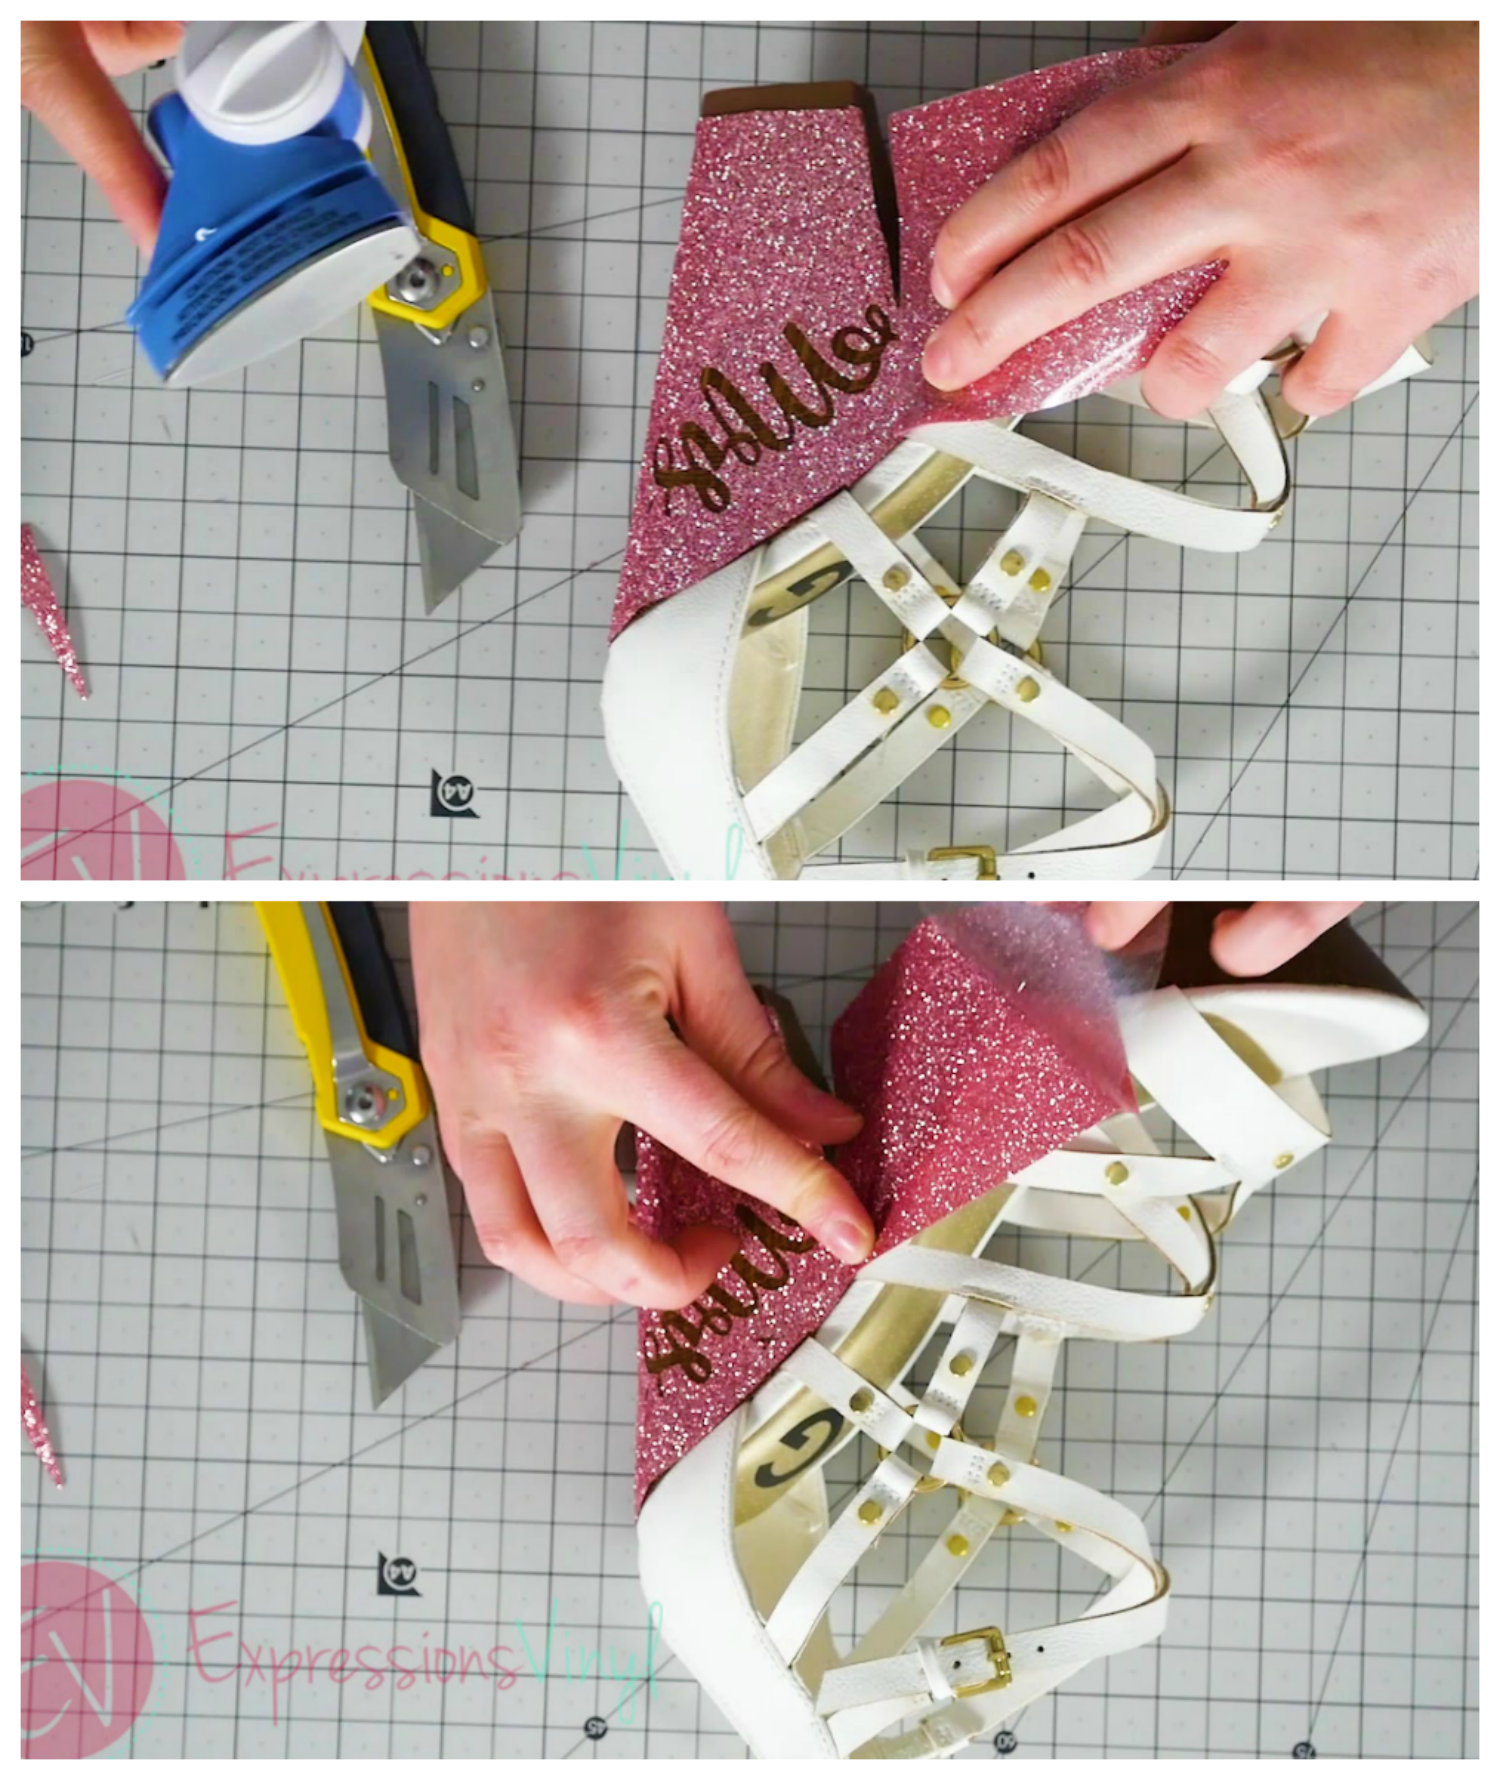
To Start of, we will begin with our Brides Shoes, you till want to measure from the back to your next breaking point which on these is 3". Cut your Vinyl strip just with a paper cutter and lay it out on your mat.
Since HTV is cut backwards, you have to work backwards when doing this technique. Meaning if you want your Mrs to go down towards the bottom of the shoe you need to mirror it and rotate it so it looks the exact opposite to you.
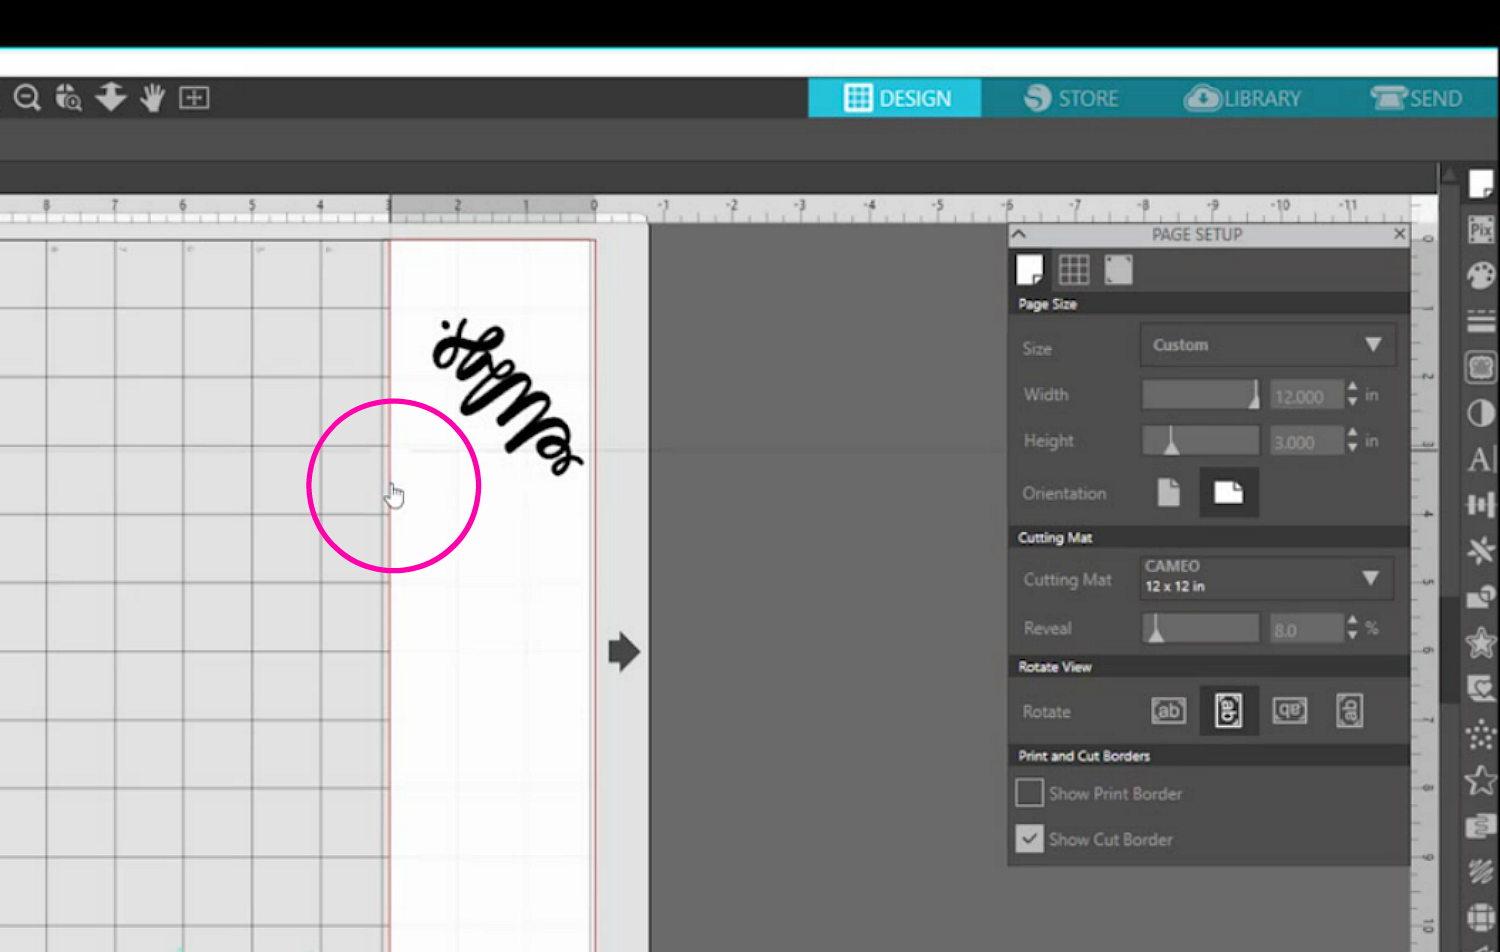
Here is what we have laid out, this will be for our left shoe, and it will look the exact opposite of this. The best way to determine how large, where to line it up and the angle. It to cut this with some cardstock first so you know exact placement.
See that circle with the pointy finger? That is showing the edge of your 3" Vinyl piece which is actually the back portion of your shoe along the heel. So keep in mind again or placement.
Once you have the word cut out and weeded line up the back line with the middle of your heel, and using your iron, slowly work your way around the shoe, watching placement of the Glitter so you do not have any blank spots.
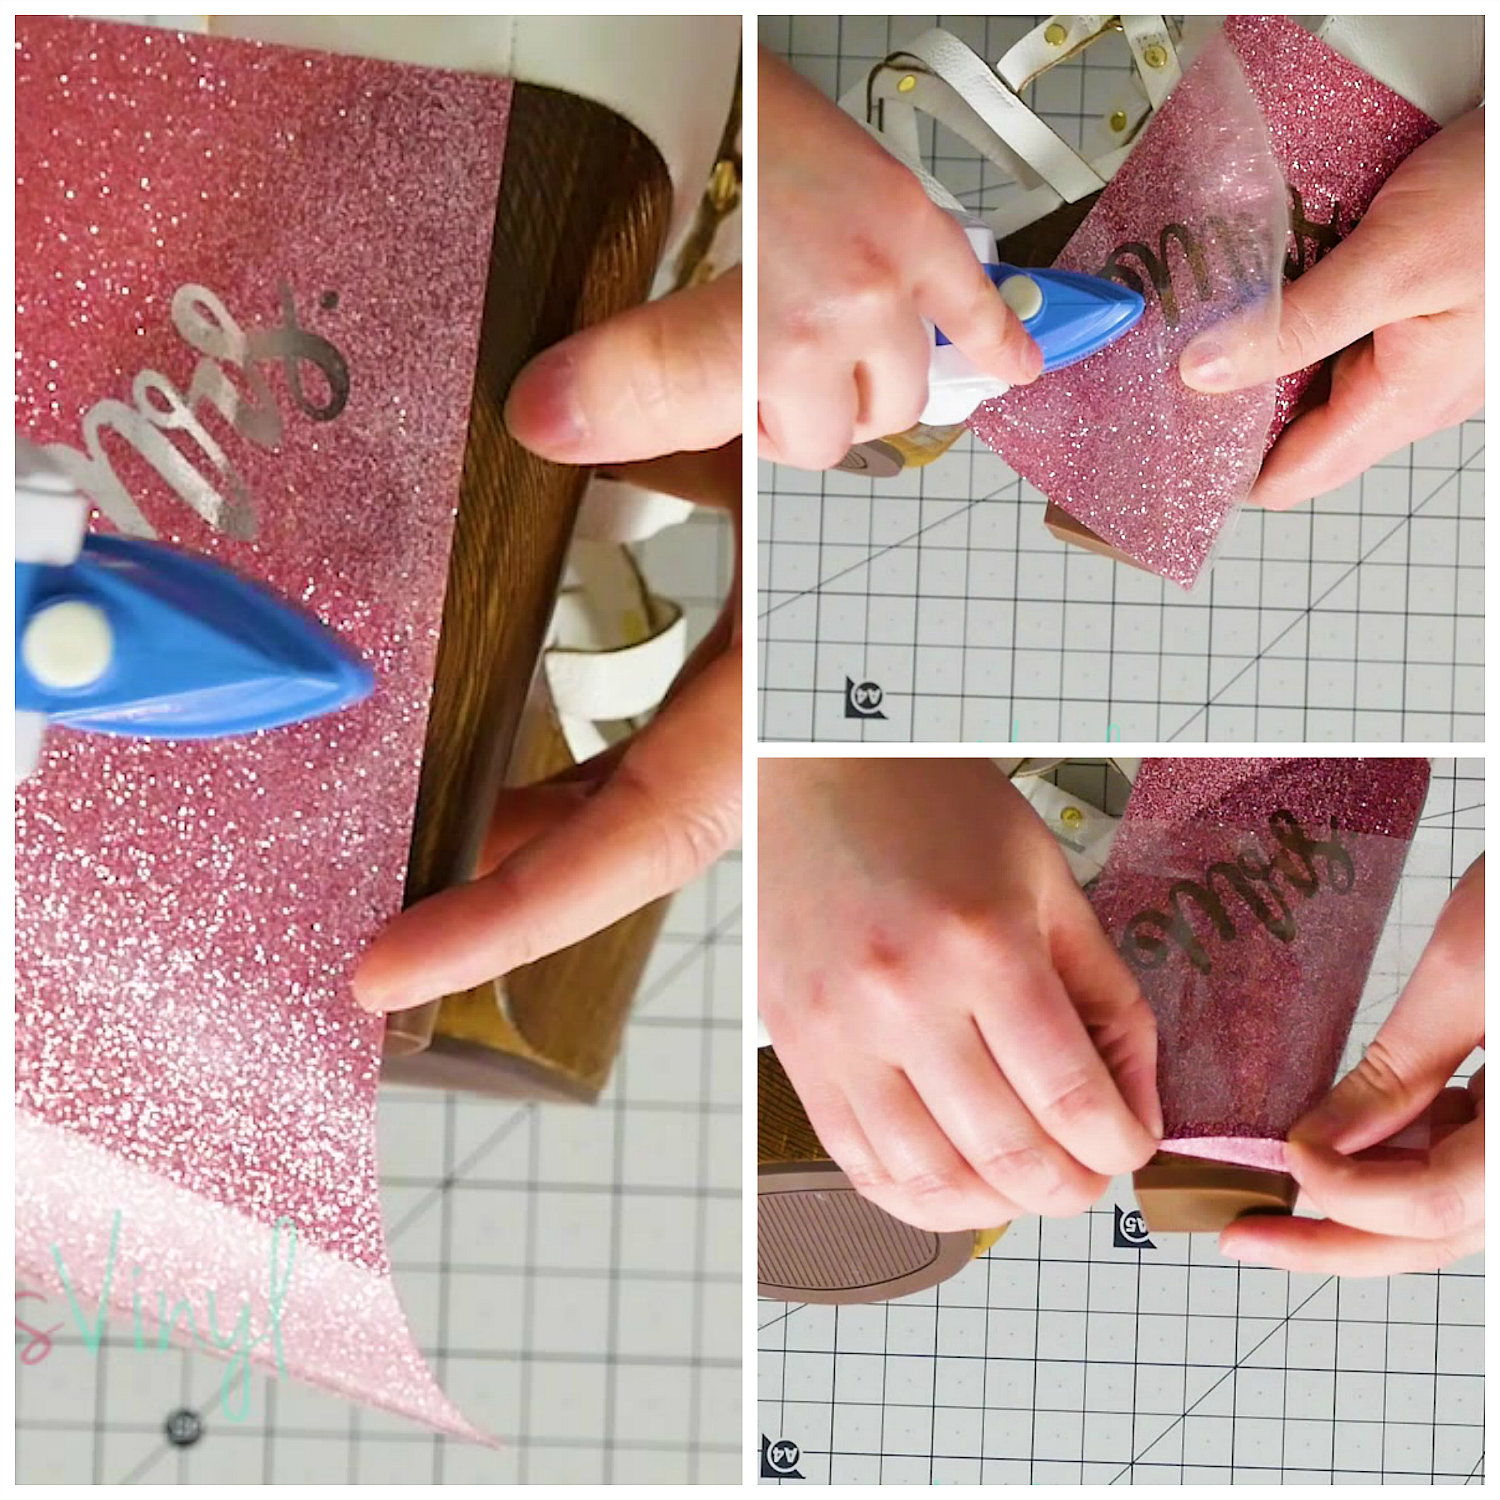
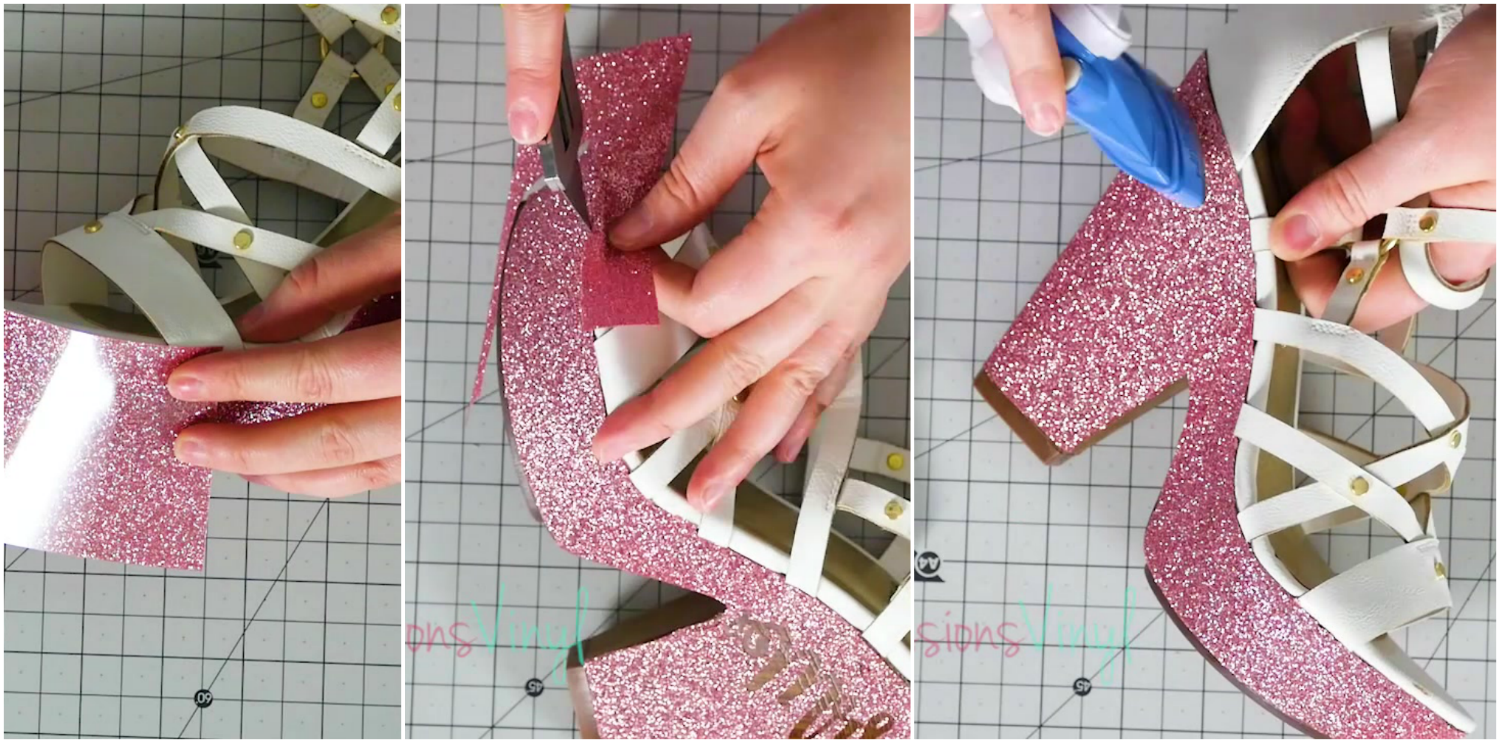
If you have a scrap on the end, no worries we are going to cut it off and use it for the nex small portion.
Since the shoes are not a typical appliction of the HTV, you do need to worry as much about touching the glitter directly with the iron. Taking the carrier sheet off and moving it around will help the Glitter conform to the shape of the shoes.
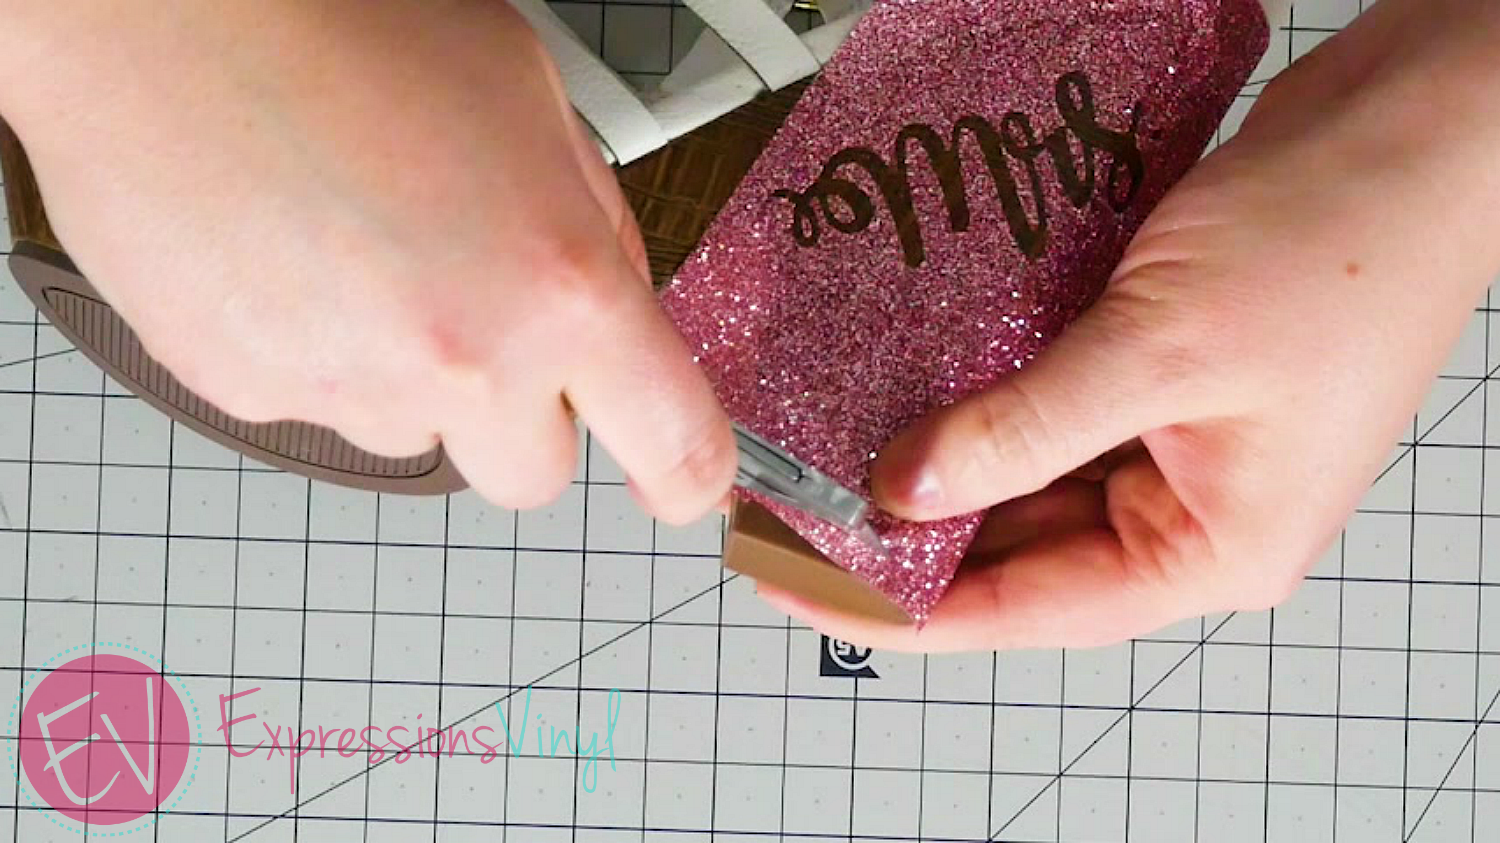
Once its good and stuck down, you can then go in and trim all the extra off near the leather and the rubber sole, I jut used a Fat Max box knife.
Once you get the Vinyl good and down, start your next layer by butting it up against the end of the first. You can overlap some, but not much, then simply repeat the same process all the way around.
But since we want to really make that MRS stand out on the shoe in a nice white Glitter HTV. Simply cut it out, no need to worry about direction, just make sure you are cutting it mirrored so it will not be backwards.
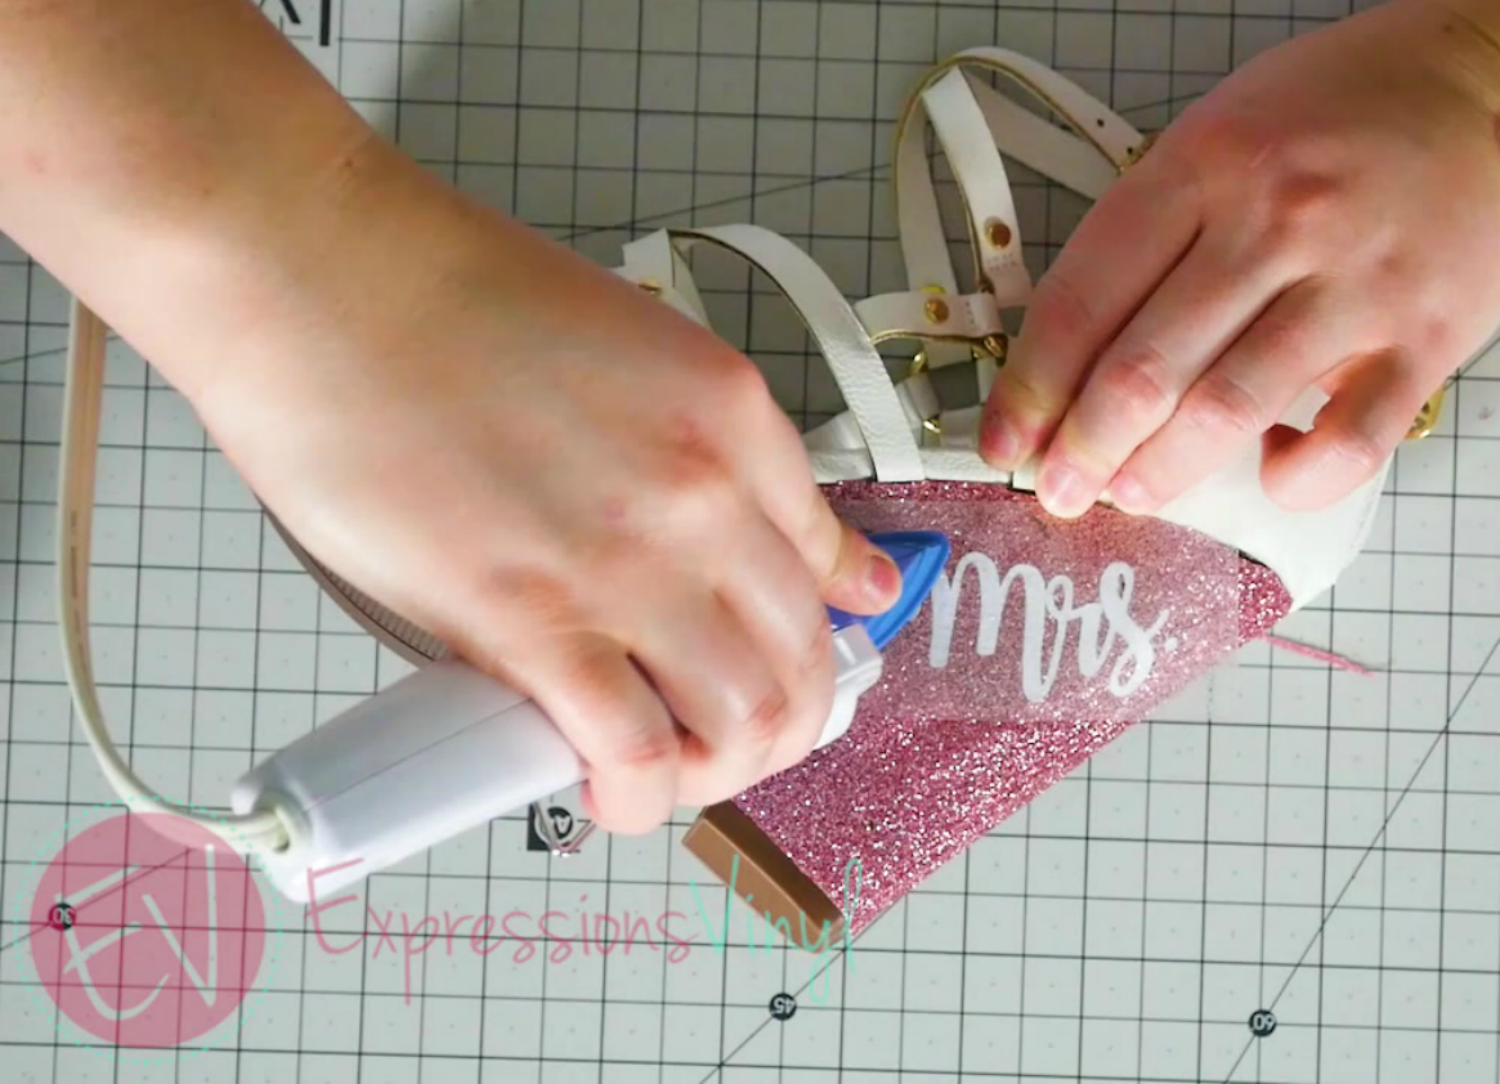
Then just keep going all the way around continuting with the Rose Gold Glitter HTV.
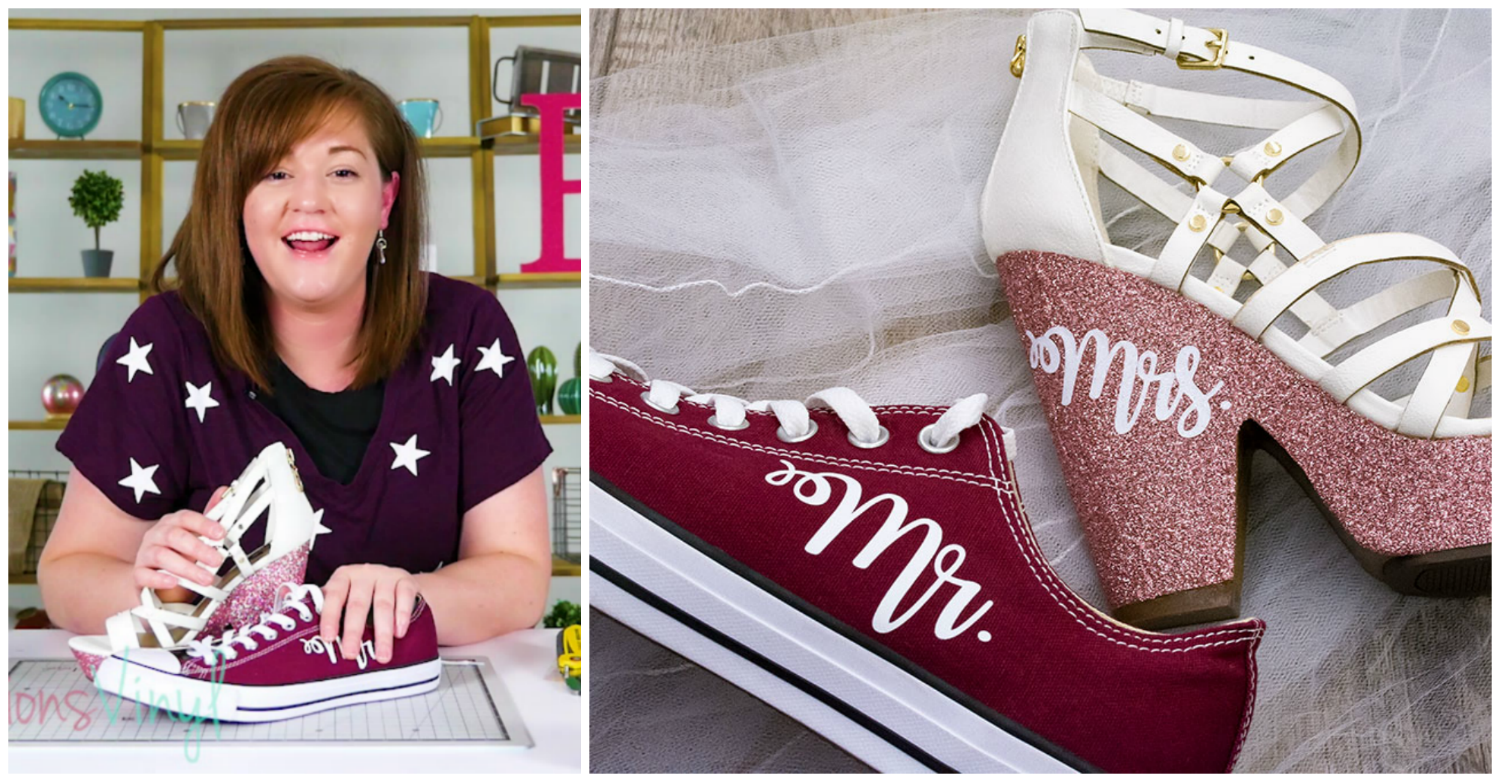
Now your brides shoes are all ready to go and have a great night on the dance floor and they are sure to sparkle.
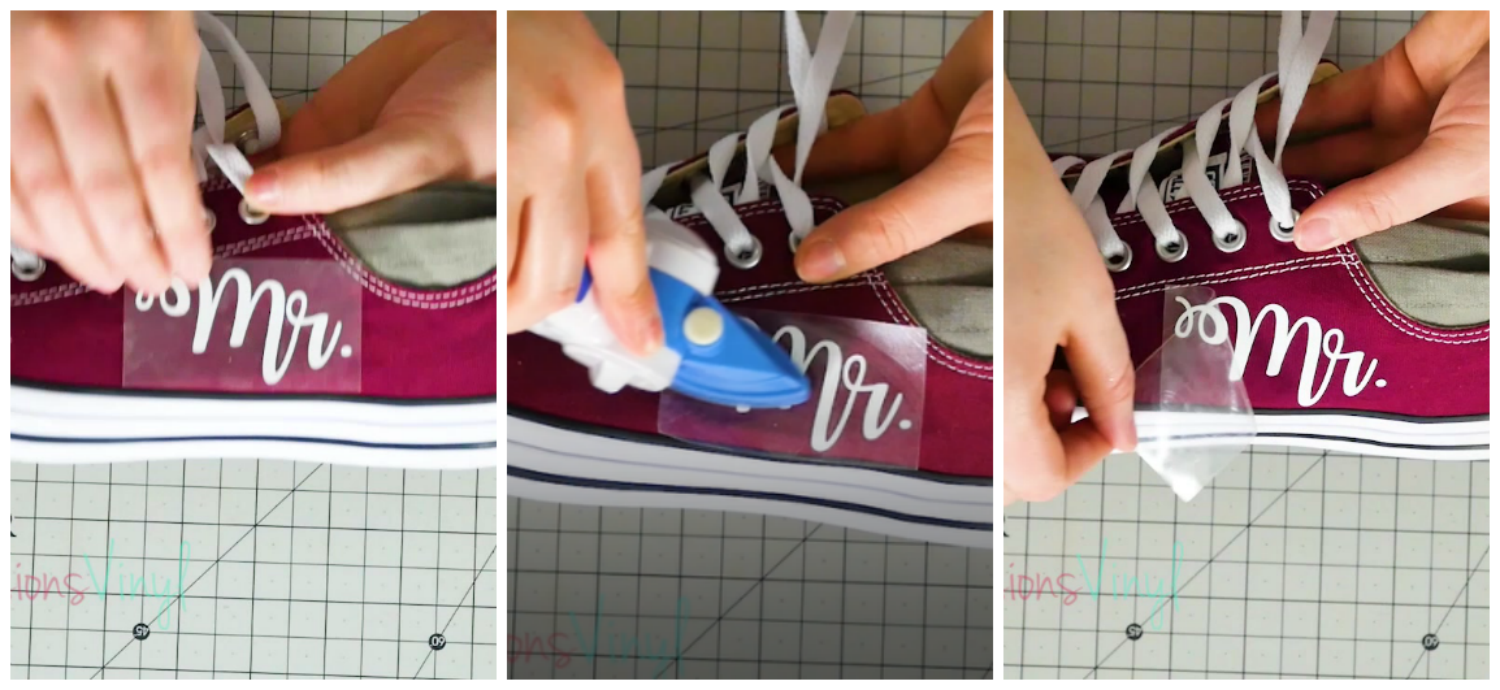
The grooms shoes will be simple. Just like on the Brides, measure the area where you want to font to go. Since these shoes are more flimsy, it will make it much easier to apply the HTV if you have a support behind the shoe, in this case I just rolled up a towel which will work just fine with me holding it in and applying pressure from the iron.
Then apply the vinyl to the side of the shoe where you would like and apply firm pressure for 10-15 seconds. I am using the Dritz Mini Iron again on this since it will give me better control.
And there ya have it, some fun customized shoes, it would be fun to add names, dates and other personalized images, Just make them your own.
Be sure to watch the video for the full tutorial and have an amazing Wedding!

Recent Posts
-
NEW Holographic Eclipse Heat Transfer Vinyl
April 15th, 2024 3 Ways to Use the New Holographic Eclipse Heat Transfer Vinyl from Siser …Apr 29th 2024 -
Hop into Spring with Cute Easter Vinyl Crafts
Do you love our Vinyl? Sign up for Vinyl Club today to get FREE vinyl and save big! …Mar 28th 2024 -

Fixing Wrinkles and Bubbles in Vinyl
How do you get air bubbles out of vinyl? There are a few different ways to ensure a flawless …Mar 26th 2024